
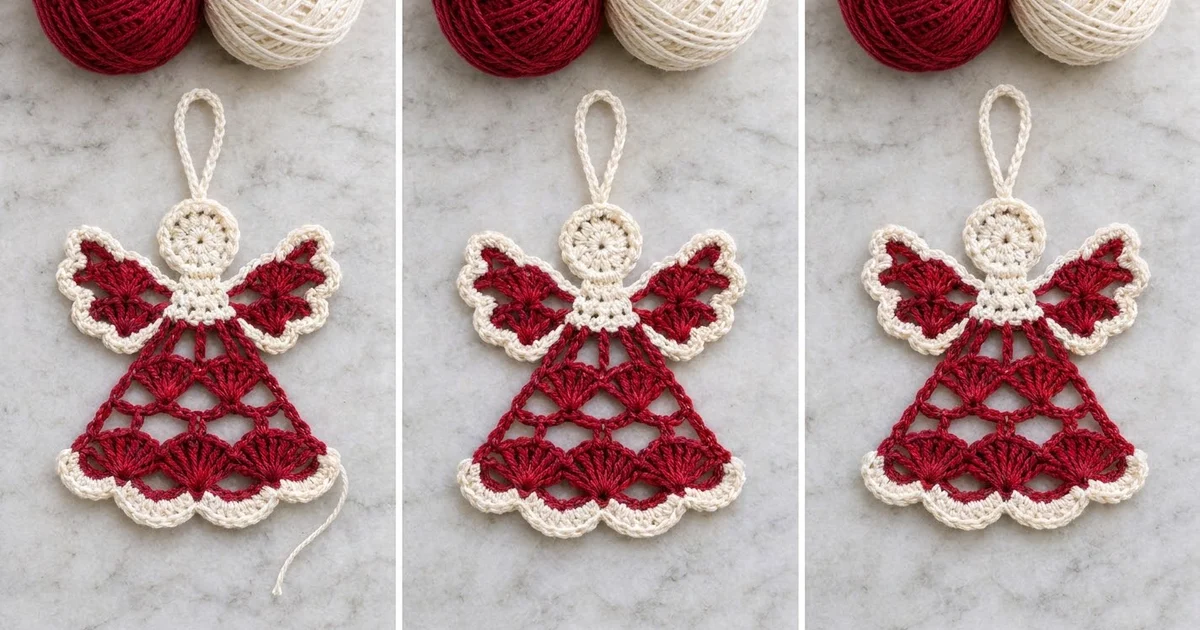
This little angel ornament is lace you can finish in one evening. It has a fan-stitch skirt in deep cranberry red, two lace wings, and a soft cream head and collar. Cream scalloped edging frames the hem and both wings, so the shape stands out against a dark tree.
The style is classic, like vintage thread angels, but it’s worked at a slightly larger scale so it’s quicker and easier to handle. Because the fans and open lattice rows let light through, the angel looks delicate even though it’s sturdy.
This pattern uses US crochet terms. The finished angel measures about 4.2 in (10.7 cm) wide from wing tip to wing tip and 4.3 in (10.9 cm) tall from the top of the head to the hem. The hanging loop adds about 1.5 in (3.8 cm).
The angel is made in one piece with no sewing. You crochet the head in rounds, work the collar in rows off the bottom of the head, and then crochet the skirt downward from the collar in fan and lattice rows. The wings go directly onto the sides of the collar. The cream edgings and the hanging loop are added last.
Finished Size and Construction
- Finished size: 4.2 in (10.7 cm) wide x 4.3 in (10.9 cm) tall, plus a 1.5 in (3.8 cm) loop
- Skill level: Intermediate (fans, chain lattice, working into row-ends)
- Terminology: US terms
- Yarn weight: Fingering weight (Super Fine / 1) mercerized cotton
- Hook: 2.5 mm
- Number of pieces: 1 (worked continuously, nothing sewn)
- Layout: One single angel motif
- Head size: 1.25 in (3.2 cm) across
- Skirt hem before border: 3.75 in (9.5 cm) wide
- Hem border depth: 0.25 in (0.6 cm), adding 1/8 in (0.3 cm) to each side
Materials
Use a smooth mercerized cotton. It gives the fans clear stitch definition, and the angel holds its shape after blocking. Avoid fuzzy or very soft yarns, because they blur the lattice.
- Red (cranberry): 7 g / 24 m, for the skirt and wing bases
- Cream: 5 g / 17 m, for the head, collar, edgings and loop
- 2.5 mm crochet hook
- Tapestry needle
- Scissors
- 1 locking stitch marker
- Blocking mat, rust-proof pins, and spray starch or a fabric stiffener (optional)
These amounts include roughly a 20% margin for your gauge swatch and weaving in ends.
Abbreviations (US Terms)
- ch – chain
- sl st – slip stitch
- sc – single crochet
- dc – double crochet
- st(s) – stitch(es)
- sp – space
- tch – turning chain
- RS – right side
Special stitch – Fan: Work 7 dc into the same ch-3 space. The center of the fan is its 4th dc.
Gauge and Checkpoints
Gauge isn’t critical for an ornament, but it controls the final size. Make the head first and measure it before you go on.
- Head after Round 1: 0.6 in (1.5 cm) across
- Head after Round 2: 1 in (2.5 cm) across
- Head after Round 3: 1.25 in (3.2 cm) across
- Collar Row 4: 1.6 in (4.1 cm) wide, 0.4 in (1.0 cm) deep
- One fan: about 0.9 in (2.3 cm) wide
- Skirt Row 2: 2 in (5.1 cm) wide
- Skirt Row 4: 2.9 in (7.4 cm) wide
- Skirt Row 6: 3.75 in (9.5 cm) wide, and Rows 1–6 together about 2.4 in (6.1 cm) deep
If your head measures more than 1.25 in (3.2 cm), go down to a 2.25 mm hook. If it measures less than 1.1 in (2.8 cm), go up to a 2.75 mm hook. Recheck at Skirt Row 2, because dc rows are where gauge differences show up most.
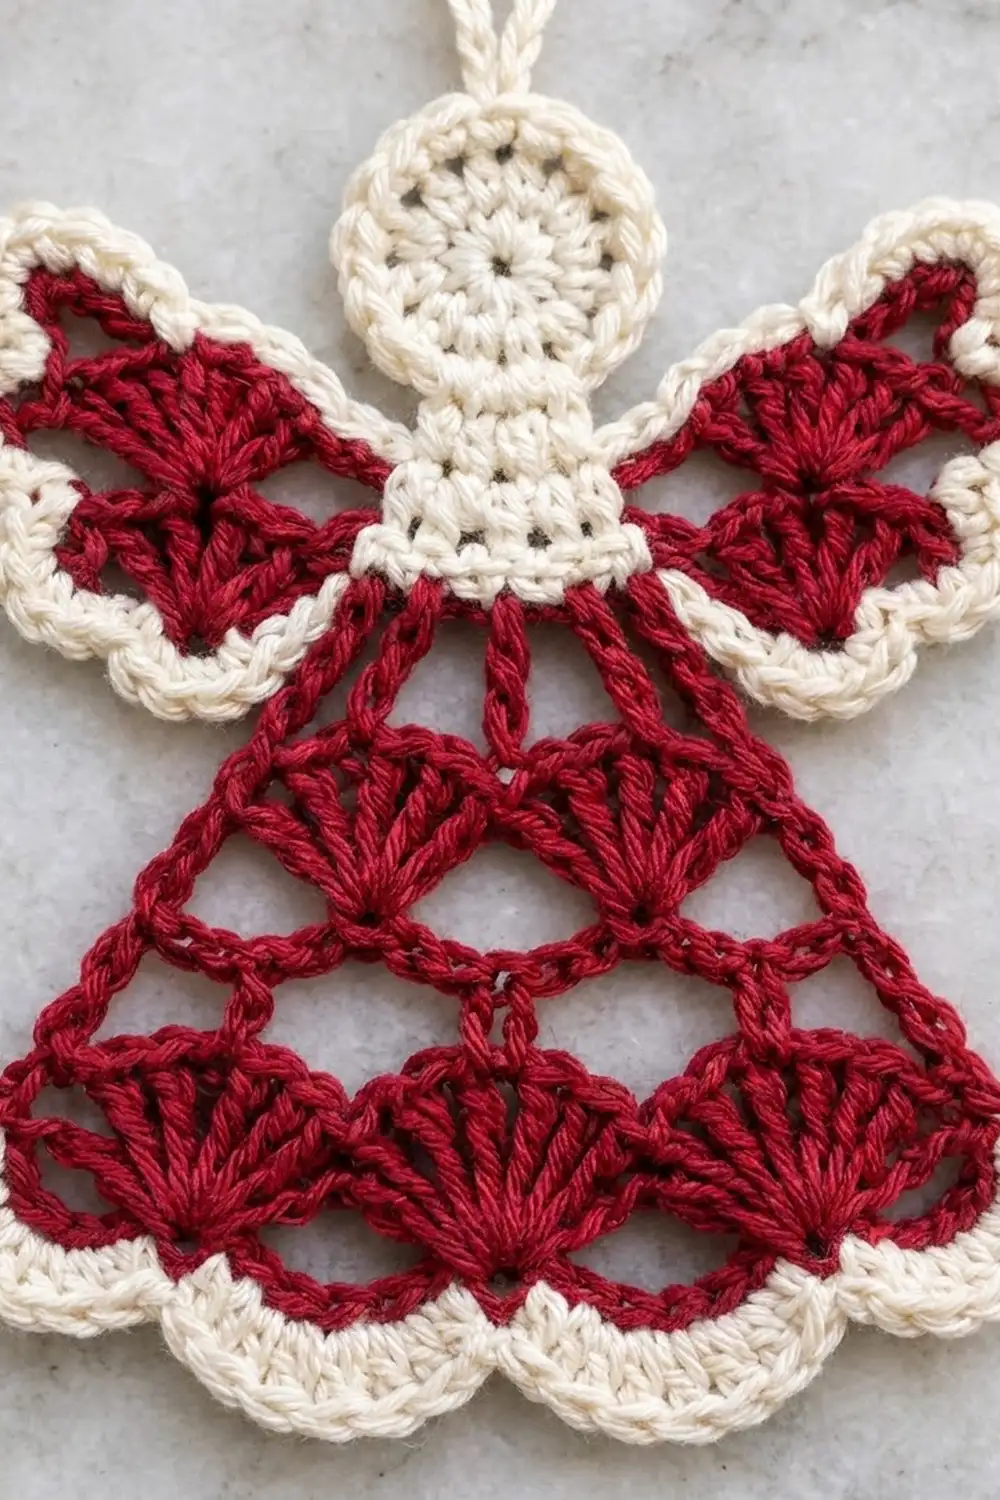
Head
Use cream.
Round 1: Make a magic ring. Ch 3 (counts as dc), then work 11 dc into the ring. Sl st to the top of the ch-3. (12 dc)
Round 2: Ch 3 (counts as dc), work 1 dc in the same st, then 2 dc in each remaining st around. Sl st to the top of the ch-3. (24 dc)
Round 3: Ch 1, sc in the same st, sc in the next st, 2 sc in the next st. [Sc in the next 2 sts, 2 sc in the next st] 7 times. Sl st to the first sc. (32 sc)
Fasten off. Pull the ring tail tight and weave it in. The joining st of Round 3 is st 1, and it will be the top center of the head. Mark it with the stitch marker for the loop later.
Collar
Use cream. Counting from the marked st 1, the bottom center of the head is st 17. The collar is worked across sts 14–20.
Row 1: Join cream in st 14. Ch 1, sc in the same st and in each of the next 6 sts. (7 sc)
Row 2: Ch 1, turn. Work 2 sc in the first st, sc in the next 5 sts, 2 sc in the last st. (9 sc)
Row 3: Ch 1, turn. Work 2 sc in the first st, sc in the next 7 sts, 2 sc in the last st. (11 sc)
Row 4: Ch 1, turn, sc in each st across. (11 sc)
Fasten off. The collar should be 1.6 in (4.1 cm) wide along Row 4.
Skirt
Use red. The skirt alternates lattice rows and fan rows. Each lattice row has one more ch-3 space than the fan row below it has fans, so each new fan row gains one fan.
Row 1 (lattice): With RS facing, join red in the first sc of collar Row 4. Ch 3 (counts as dc), ch 3, skip the next 4 sc, dc in the next sc (the center st). Ch 3, skip the next 4 sc, dc in the last sc. (3 dc, 2 ch-3 sps; 1 + 4 + 1 + 4 + 1 = 11 collar sts used)
Row 2 (fans): Ch 1, turn. Sc in the first dc. [Fan in the next ch-3 sp, sc in the next dc] twice, working the last sc into the top of the tch. (2 fans: 14 dc + 3 sc = 17 sts)
Row 3 (lattice): Ch 6 (counts as dc + ch 3), turn. Dc in the center dc of the first fan, ch 3, dc in the center dc of the next fan, ch 3, dc in the last sc. (4 dc, 3 ch-3 sps)
Row 4 (fans): Ch 1, turn. Sc in the first dc. [Fan in the next ch-3 sp, sc in the next dc] 3 times, working the last sc into the 3rd ch of the tch. (3 fans: 21 dc + 4 sc = 25 sts)
Checkpoint: the row is 2.9 in (7.4 cm) wide.
Row 5 (lattice): Ch 6 (counts as dc + ch 3), turn. [Dc in the center dc of the next fan, ch 3] 3 times, then dc in the last sc. (5 dc, 4 ch-3 sps)
Row 6 (fans): Ch 1, turn. Sc in the first dc. [Fan in the next ch-3 sp, sc in the next dc] 4 times, working the last sc into the 3rd ch of the tch. (4 fans: 28 dc + 5 sc = 33 sts)
Fasten off red. The hem should be 3.75 in (9.5 cm) wide. The dc posts rising from the fan centers form the vertical bars of the lattice.
Wings (Make 2, Worked onto the Collar)
Use red. The right wing goes on the right edge of the collar. The left wing is worked the same way on the left edge.
Row 1: With RS facing, join red with a sl st in the row-end of collar Row 3. Ch 3 (counts as dc), then work [ch 3, dc] twice into the same row-end. (3 dc, 2 ch-3 sps, fanning outward)
Row 2: Ch 1, turn. Sc in the first dc. [Fan in the next ch-3 sp, sc in the next dc] twice, working the last sc into the top of the tch. (2 fans: 14 dc + 3 sc = 17 sts)
Row 3: Ch 1, turn. Sc in the first sc. Ch 5, sc in the center dc of the fan. Ch 5, sc in the middle sc. Ch 5, sc in the center dc of the next fan. Ch 5, sc in the last sc. (5 sc, 4 ch-5 arches)
Fasten off red. Each wing should reach 1.2 in (3.0 cm) out from the collar edge. Repeat on the other side.
Border
Border gauge: Each cream sc should add no more than 1/8 in (0.3 cm) to the width. The edging should lie flat, with no ruffling or cupping.
Hem Edging
Row 7: With RS facing, join cream in the first sc of Row 6. Ch 1, sc in the same sc. [Sc in the next 3 dc, 3 sc in the center dc, sc in the next 3 dc, sc in the next sc] 4 times. (41 sc = 1 + 4 x 10)
Row 8: Ch 1, turn. Sc in the first sc. [Sc in the next 4 sc, 3 sc in the next sc (the middle of the 3-sc group), sc in the next 4 sc, sc in the next sc] 4 times. (49 sc = 1 + 4 x 12)
Fasten off.
Why the math works: Each fan unit in Row 6 has 8 sts (7 dc plus the sc after it). In Row 7, the 3-sc tip turns that into 10 sts, and in Row 8 another 3-sc tip makes it 12. Because each Row 8 unit uses exactly 10 sts (4 + 1 + 4 + 1), it lines up stitch for stitch with the unit below. Each scallop gets taller at its tip and stays flat at the joins between fans, so you get one rounded scallop under each fan without stretching the hem. The edging only adds 1/8 in (0.3 cm) per side, so the hem grows from 3.75 in (9.5 cm) to 4 in (10.2 cm).
Wing Edging (Each Wing)
Row 4: With RS facing, join cream in the first sc of wing Row 3. Ch 1, sc in the same st. [6 sc in the next ch-5 arch, sc in the next sc] 4 times. (29 sc = 1 + 4 x 7)
Fasten off. The 6 sc in each arch follow its curve, which gives the wing its scallops. After edging, each wing reaches 1.3 in (3.3 cm) out from the collar, so the wingspan is 1.3 + 1.6 + 1.3 = 4.2 in (10.7 cm).
Hanging Loop
Join cream with a sl st in the marked st at the top of the head. Ch 30, then sl st in the same st. For a firmer loop, sl st into each of the 30 ch and sl st again at the head. Fasten off. The loop hangs about 1.5 in (3.8 cm) above the head.
Final Blocking
- Weave in all ends along stitches of the same color, so no red shows through the cream.
- Soak the angel in cool water for 5 minutes, then press it gently in a towel. Don’t wring it.
- Lay it face up on a blocking mat.
- Pin the head into a circle 1.25 in (3.2 cm) across.
- Pin the hem to 4 in (10.2 cm), with one pin at the tip of each scallop.
- Pin each wing out to 1.3 in (3.3 cm) from the collar, with a pin at every scallop.
- Use your fingertip to open up each lattice space and spread each fan evenly.
- Mist with starch or stiffener if you want a crisp ornament, then let it dry completely, about 6 hours.
Final Quality-Control Checklist
- The head is flat, round and 1.25 in (3.2 cm) across.
- The collar is centered under the head and 1.6 in (4.1 cm) wide.
- The skirt has 2, then 3, then 4 fans, and each fan has exactly 7 dc.
- The vertical bars line up with the fan centers.
- The hem has 4 even scallops and measures 4 in (10.2 cm).
- Each wing has 2 fans, 4 arches and 4 cream scallops.
- The total size is 4.2 in (10.7 cm) x 4.3 in (10.9 cm).
- The loop is centered and secure, and all ends are hidden.
Troubleshooting
- The head cups: Your Round 2 tension is too tight. Loosen up or go up a hook size for the head only.
- The head ruffles: You’ve worked extra increases. Recount Round 3 to 32 sts.
- The skirt leans to one side: You skipped the wrong number of collar sts in Row 1. Check 4 skips on each side of the center dc.
- The fans overlap: Your ch-3 spaces are too tight. Make the chains a little looser.
- The hem ripples: The edging is too loose, or you added extra sc between fans. Check 41 and 49 sts.
- The wings droop: Starch them, and pin each wing slightly upward while it dries.
- The loop twists: Add the optional sl st round to stiffen it.
Care
Hand wash in cool water with mild soap, press flat in a towel, and reshape while damp. Store flat in tissue paper between seasons.
Final Notes
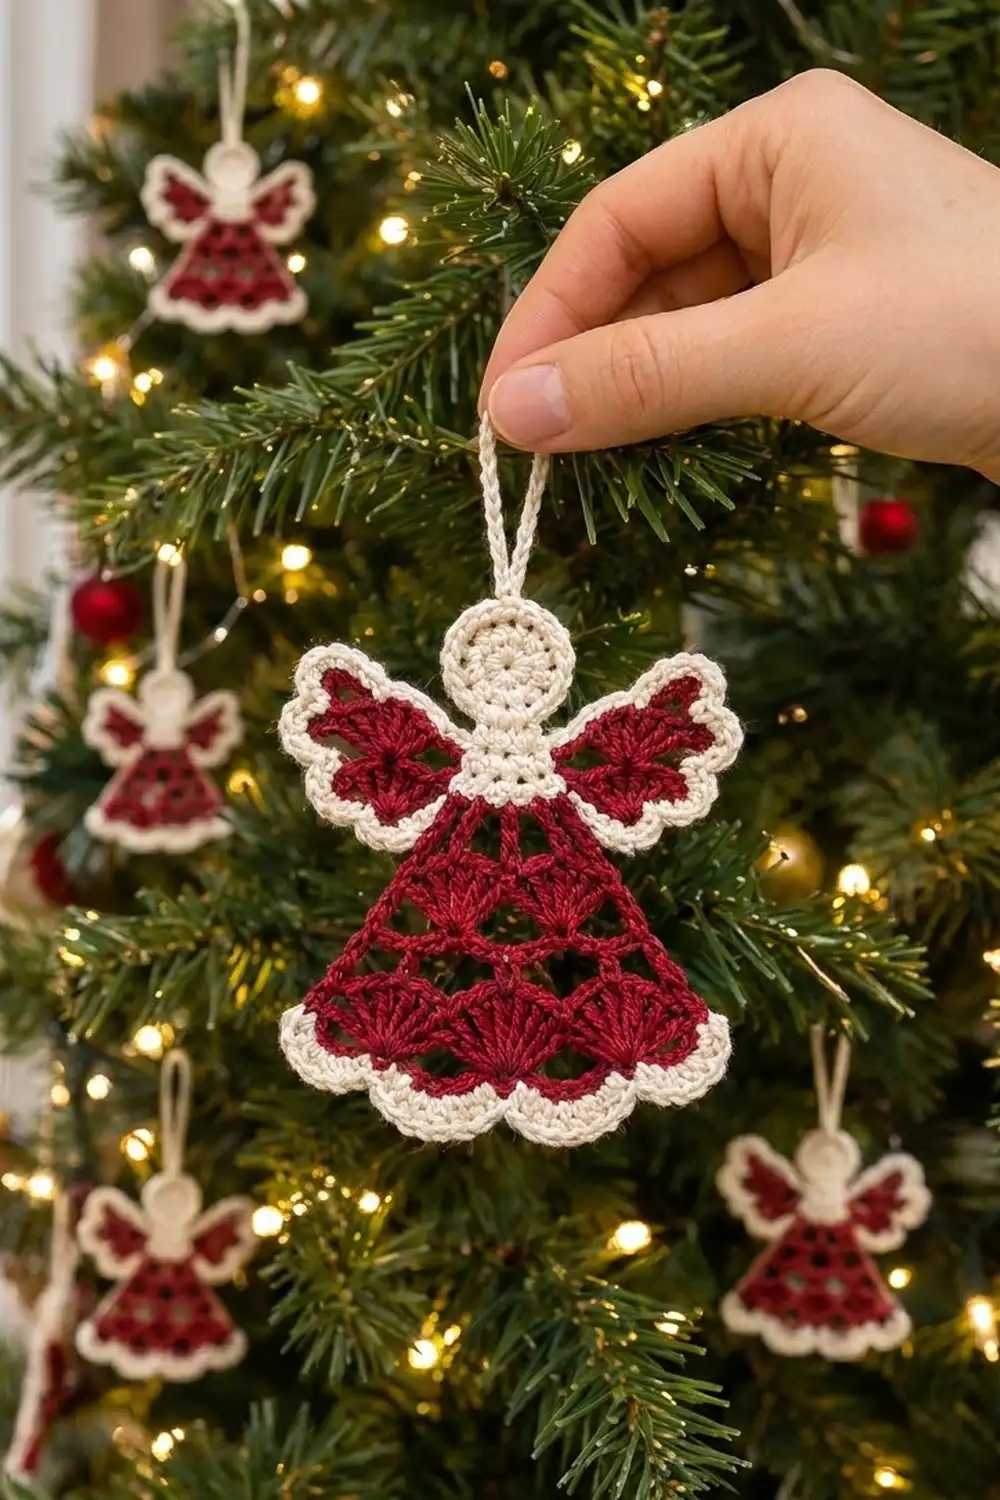
Here’s the measurement chain: the head grows to 1.25 in (3.2 cm), and the collar widens to 1.6 in (4.1 cm). The skirt flares from 2 in (5.1 cm) to 2.9 in (7.4 cm) to 3.75 in (9.5 cm), and the edging brings the hem to 4 in (10.2 cm). The wings bring the width to 4.2 in (10.7 cm), and the total height is 4.3 in (10.9 cm). If each checkpoint matches, the finished angel will match too. Make one for your own tree, then a handful more to tuck into holiday cards.
Happy crocheting!