

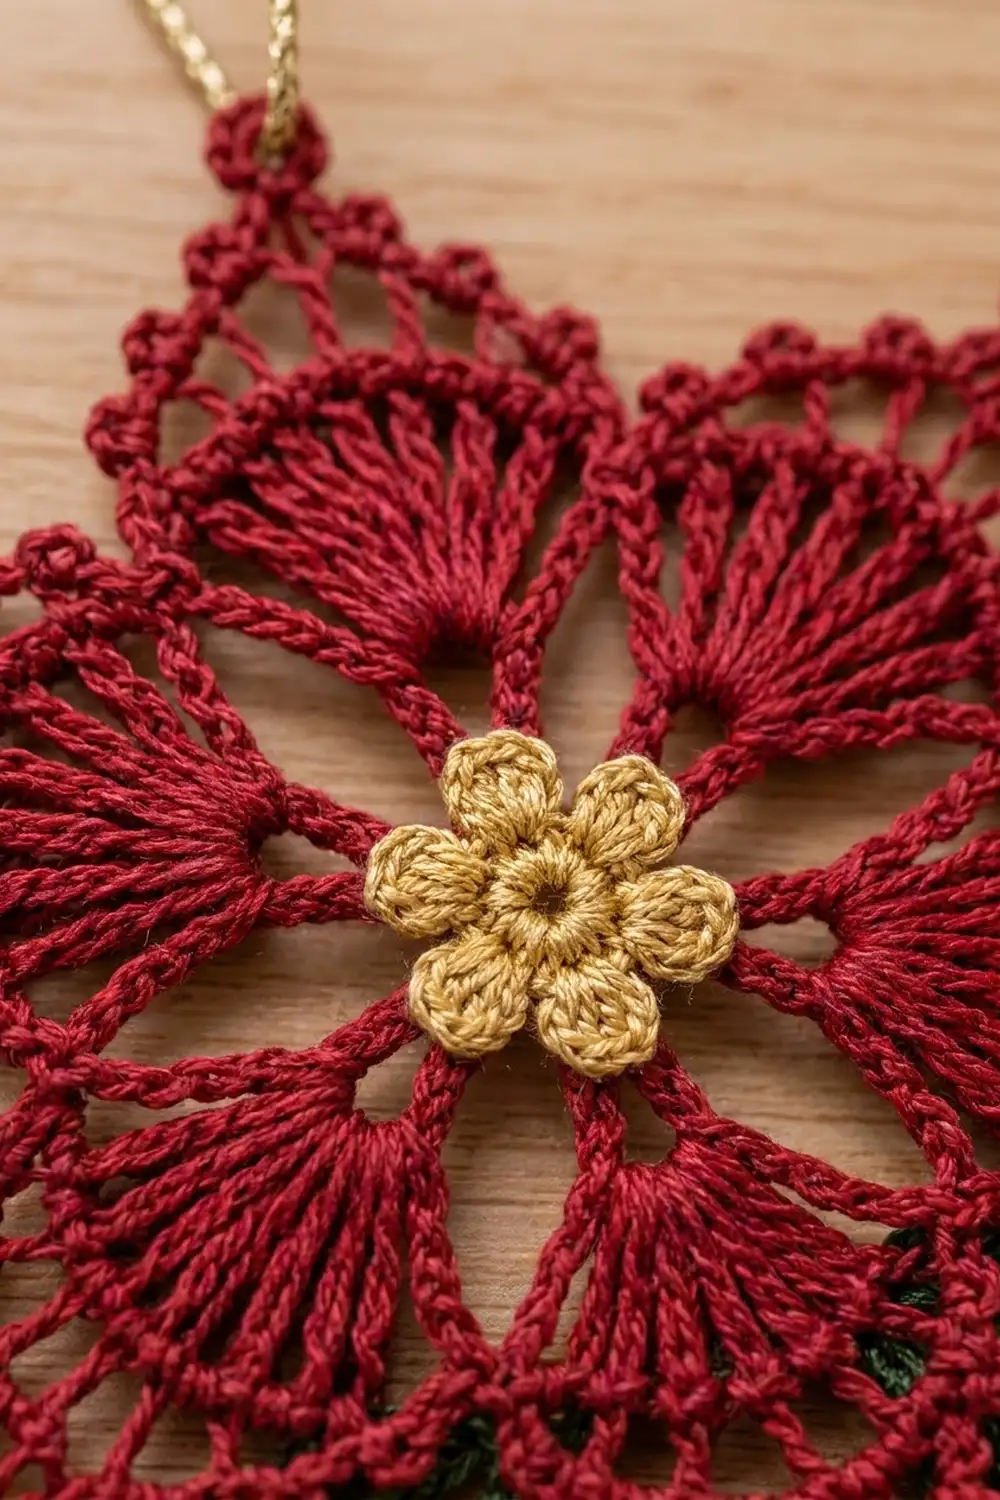
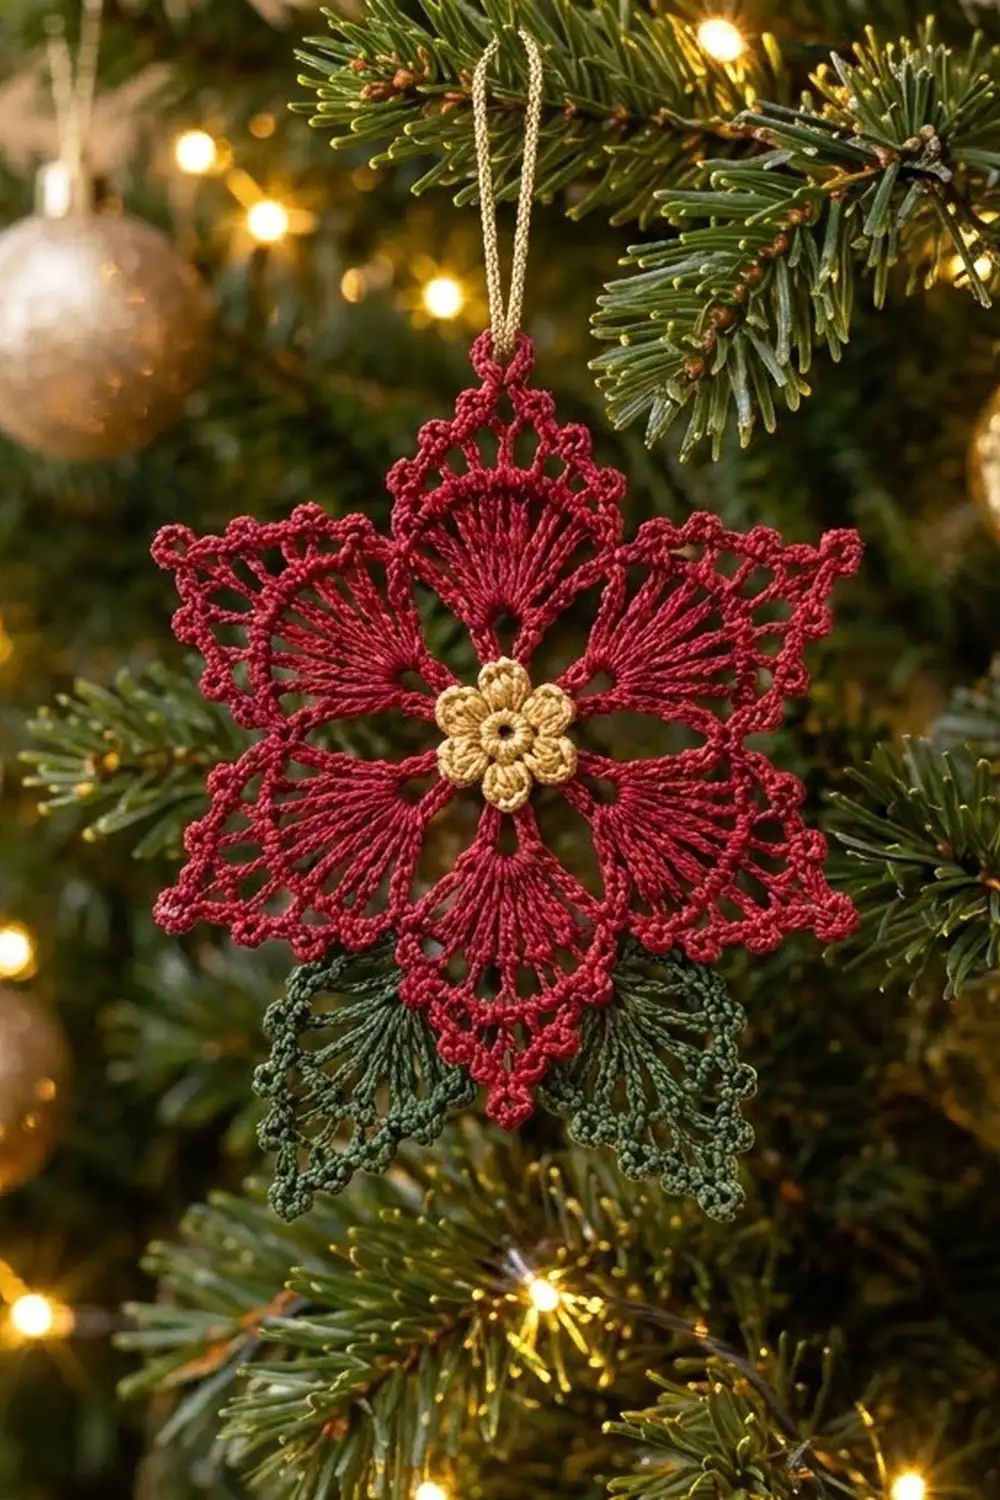
This lacy ornament looks like a poinsettia pressed into the shape of a six-pointed star. Six fan-shaped petals of tall stitches surround a small open ring. A frame of chain arches then rises into six picot-tipped points.
The colors are classic Christmas: deep crimson for the star, forest green for the two leaves, warm gold for the tiny flower center, and gold metallic cord for hanging. Size 10 cotton thread gives it a crisp, vintage-lace look.
The pattern uses US crochet terms. The finished star measures 4 in (10.2 cm) from point to point. With the leaves added, the ornament is about 4 in (10.2 cm) wide by 4.25 in (10.8 cm) tall, not counting the hanging loop.
You work the star in 6 rounds, and Round 6 is the picot border. Then you make one gold flower and two green leaves, sew them on, block the ornament, and add the loop.
Finished Size and Construction
- Finished star size: 4 in (10.2 cm) from point to point; 3 in (7.6 cm) from valley to valley
- Overall size with leaves: about 4 in x 4.25 in (10.2 cm x 10.8 cm)
- Skill level: Intermediate
- Terminology: US crochet terms
- Yarn weight: Lace (0), size 10 crochet cotton thread
- Hook: 1.5 mm (US steel 8)
- Number of pieces: 1 ornament: 1 star motif plus 3 sewn-on appliqués (1 flower, 2 leaves)
- Layout: Layered. The flower sits on the front center and the leaves go behind the lower edge.
- Size before border: 3.5 in (8.9 cm) from point to point after Round 5
- Border depth: about 0.25 in (0.6 cm)
- Flower: 0.6 in (1.5 cm) across
- Each leaf: 1.75 in (4.4 cm) long x 1 in (2.5 cm) wide
Materials
Use mercerized size 10 cotton thread. It holds a sharp point when you block it. Choose a true deep red, not an orange-red.
- Crimson red (star): 6 g, about 30 m
- Forest green (leaves): 3 g, about 15 m
- Gold or mustard (flower): 1 g, about 5 m
- Gold metallic cord (loop): 8 in (20.3 cm)
These quantities include a margin for swatching, tails, and one restart.
Tools:
- 1.5 mm (US steel 8) crochet hook
- Fine tapestry needle
- Small scissors
- Blocking board or foam mat
- About 12 rustproof pins
- Spray bottle; spray starch (optional)
- Ruler
Abbreviations (US Terms)
- ch – chain
- sl st – slip stitch
- sc – single crochet
- hdc – half double crochet
- dc – double crochet
- tr – treble crochet
- sc2tog – single crochet 2 together
- sp(s) – space(s)
- st(s) – stitch(es)
- rep – repeat
Special stitches:
- Picot: ch 3, sl st in 3rd ch from hook.
- Large picot: ch 5, sl st in 5th ch from hook.
Gauge and Checkpoints
If you plan to make a set of these, make one complete star first and measure it before you make the rest.
Base gauge: After Rounds 1–3, the piece measures 2.25 in (5.7 cm) from fan tip to fan tip.
Measure each round flat, without stretching it:
- Round 1: 0.5 in (1.3 cm) across
- Round 2: 1.25 in (3.2 cm) across
- Round 3: 2.25 in (5.7 cm) across the fan tips
- Round 4: 2.5 in (6.4 cm) across
- Round 5: 3.5 in (8.9 cm) from point to point
- Round 6: 4 in (10.2 cm) from point to point
Too big? Use a 1.25 mm hook or tighten your chains. Loose chains are the usual cause.
Too small or cupping? Use a 1.75 mm hook. If the size is right but the piece cups, loosen only the chains in Rounds 4 and 5.
Star Motif (Crimson)
Work in joined rounds with the right side facing you. Do not turn.
Ring: Ch 6, sl st in first ch to form a ring.
Round 1: Ch 1, 18 sc in ring, sl st in first sc to join. (18 sc)
This leaves the small open center ring.
Round 2: Ch 1, sc in same st as join, ch 6, skip next 2 sc, sc in next sc, ch 6, skip next 2 sc; rep from * 4 more times, sl st in first sc to join. (6 sc, 6 ch-6 sps)*
Round 3 (petals): Sl st in first ch-6 sp. Ch 4 (counts as first tr), 11 tr in same sp, ch 2, 12 tr in next ch-6 sp, ch 2; rep from * 4 more times, sl st in top of beginning ch-4 to join. (72 tr in 6 fans of 12 tr; 6 ch-2 sps)*
Each fan is one petal. Number the trebles in each fan 1 to 12 in your working direction. The ch-2 sps will become the star’s valleys.
Checkpoint: 2.25 in (5.7 cm). The fans should lie flat. If they cup, your Round 2 chains are too tight.
Round 4 (petal frame): Sl st in next 2 tr (you are now in tr 3 of the first fan). Ch 1, sc in same tr, ch 4, sc in tr 6, ch 5, sc in tr 7, ch 4, sc in tr 10, ch 4, sc in next ch-2 sp, ch 4; sc in tr 3 of next fan, ch 4, sc in tr 6, ch 5, sc in tr 7, ch 4, sc in tr 10, ch 4, sc in next ch-2 sp, ch 4; rep from * 4 more times, sl st in first sc to join. (30 sc, 24 ch-4 arches, 6 ch-5 tip arches)*
Each petal now has 5 arches:
- A1: the ch-4 from the valley sc to tr 3
- A2: the ch-4 from tr 3 to tr 6
- A3 (tip): the ch-5 from tr 6 to tr 7
- A4: the ch-4 from tr 7 to tr 10
- A5: the ch-4 from tr 10 to the valley sc
Checkpoint: 2.5 in (6.4 cm).
Round 5 (star points): Sl st in first 2 ch of next arch (A2 of the first petal). Ch 1, sc in same arch, ch 5, (sc, ch 7, sc) in A3, ch 5, sc in A4, ch 5, sc in A5, sc in A1 of next petal, ch 5; sc in A2, ch 5, (sc, ch 7, sc) in A3, ch 5, sc in A4, ch 5, sc in A5, sc in A1 of next petal, ch 5; rep from * 4 more times, sl st in first sc to join. (36 sc, 24 ch-5 sps, 6 ch-7 point sps)*
Each point has 6 sc, 4 ch-5 sps, and 1 ch-7 sp. There’s no chain between the A5 sc and the A1 sc, so the valley pulls in. The ch-7 lifts each petal tip into a point.
Checkpoint: 3.5 in (8.9 cm) from point to point. This is your size before the border.
Border
Round 6 adds about 0.25 in (0.6 cm) all around and forms the picot edge.
Border gauge: One ch-5 sp worked with 4 sc and 1 picot spans about 0.4 in (1.0 cm).
Round 6: Sl st in first 2 ch of next ch-5 sp (the one between A2 and the point). Ch 1, *(2 sc, picot, 2 sc) in current ch-5 sp, (4 sc, large picot, 4 sc) in next ch-7 sp, (2 sc, picot, 2 sc) in each of next 2 ch-5 sps, sc2tog over the next 2 sc (the valley pair), (2 sc, picot, 2 sc) in next ch-5 sp, skip next sc and move into the next ch-5 sp; rep from * 5 more times, sl st in first sc to join. Fasten off and weave in the ends.
You skip all the single sc stitches from Round 5. The only Round 5 stitches you work into are the valley pairs, and each pair becomes one sc2tog.
Counts for each point (valley to valley):
- 4 ch-5 sps x 4 sc = 16 sc
- 1 ch-7 sp x 8 sc = 8 sc
- 24 sc + 1 sc2tog = 25 sts, plus 4 picots and 1 large picot
Round 6 totals: 144 sc + 6 sc2tog = 150 sts, 24 picots, 6 large picots
Why the math works:
- Flat edges: A ch-5 in size 10 thread is about as long as 4 to 5 sc, so 4 sc keep the edge taut without ruffling.
- Clean points: The ch-7 gets 8 sc, which matches its length and wraps the point without bunching. The large picot then sharpens the tip.
- Sharp valleys: Each sc2tog turns 2 sts into 1, which pulls the valley in. Without it, the star rounds off into a hexagon.
- Symmetry: All six points use the same 25-st repeat: 6 x 25 = 150 sts.
Checkpoint: 4 in (10.2 cm) from point to point; 3 in (7.6 cm) from valley to valley.
Gold Flower Center (Make 1)
Ring: With gold, ch 4, sl st in first ch to form a ring.
Round 1: Ch 1, 10 sc in ring, sl st in first sc to join. (10 sc)
Round 2: (Hdc, dc, hdc) in next sc, sl st in next sc; rep from * 4 more times. (5 petals of 3 sts = 15 sts, plus 5 sl sts)*
Fasten off and leave an 8 in (20.3 cm) tail. The flower measures 0.6 in (1.5 cm) across.
Green Leaves (Make 2)
Foundation: With green, ch 12.
Round 1: Sc in 2nd ch from hook, hdc in next ch, dc in next 2 ch, tr in next 3 ch, dc in next 2 ch, hdc in next ch (10 sts), (sc, ch 3, sc) in last ch for the tip. Then work along the opposite side of the foundation chain: hdc in next ch, dc in next 2 ch, tr in next 3 ch, dc in next 2 ch, hdc in next ch, sc in last ch (10 sts). Sl st in first sc to join. (22 sts, 1 ch-3 tip sp)
For Round 2, number the 10 sts on each side 1 to 10 in working order. Side 1 starts at the base and side 2 starts at the tip. The two tip sc are not numbered.
Round 2: Ch 1, sc in st 1, (ch 3, skip 1 st, sc in next st) 4 times, ch 3, (sc, ch 3, sc) in tip sp, ch 3, skip st 1 of side 2, sc in st 2, (ch 3, skip 1 st, sc in next st) 4 times, ch 3, sl st in first sc to join. (12 sc, 12 ch-3 sps)
That gives you 5 sps along each side, 1 at the tip, and 1 at the base.
Round 3: Sl st in first ch-3 sp. Ch 1, (2 sc, picot, 2 sc) in same sp and in each of the next 10 ch-3 sps, 3 sc in the base sp, sl st in first sc to join. (47 sc, 11 picots)
Fasten off and leave an 8 in (20.3 cm) tail. The tall center stitches and open arches give the leaf its veined look.
Assembly
- Flower: Center the flower over the open ring. With the gold tail, whipstitch the flower’s Round 1 to the star’s Round 1. Leave the petals free.
- Placing the leaves: Hold the star with one point straight up. Lay the leaves on the back so their bases sit 0.5 in (1.3 cm) behind the valleys on each side of the bottom point. Those valleys are at 5 and 7 o’clock. Angle the leaves outward and down so about 0.75 in (1.9 cm) of each one shows past the red edge.
- Sewing the leaves: With the green tails, tack each leaf base to the back of Rounds 4 and 5. Add one more tack halfway along the leaf. Check the front to make sure no green stitches show.
Final Blocking
- Soak the ornament in cool water, then press out the excess water in a towel.
- Lay it face up on the board.
- Pin each large picot out to a 4 in (10.2 cm) circle, spacing the points evenly.
- Ease each valley in so it sits 1.5 in (3.8 cm) from the center.
- Smooth the fans so the trebles radiate straight out, and open each arch.
- Pin the leaf tips so both leaves sit at matching angles.
- Mist with starch if you like. Let it dry for at least 12 hours before unpinning.
- Hanging loop: Thread the 8 in (20.3 cm) metallic cord through the top large picot. Knot it into a loop about 2.5 in (6.4 cm) long and trim the tails to 0.25 in (0.6 cm).
Final Quality-Control Checklist
- 6 points, each with a large picot
- 25 sts, 4 picots, and 1 large picot on each point
- 4 in (10.2 cm) from point to point; 3 in (7.6 cm) from valley to valley
- Fans lie flat with evenly spaced trebles
- Valleys are sharp with no gaps
- Flower is centered with all 5 petals free
- Leaves match and show about 0.75 in (1.9 cm) past the edge
- No sewing stitches show on the front
- Loop is centered on the top point
Troubleshooting
- Petals cup: The Round 2 ch-6 sps are too tight. Redo the round with looser chains, or use ch 7.
- Star looks like a hexagon: Check that you didn’t skip a valley sc2tog, and that the Round 5 valley pairs have no chain between them.
- Blunt points: Pin the large picots firmly, and make sure each ch-7 has exactly 8 sc.
- Border ruffles: Your chains are short. Work 3 sc instead of 4 in each ch-5, and do it the same way on all six points.
- Leaves twist: Check that both sides of Round 1 match, then pin the leaves flat to block.
- Center puckers: Loosen the whipstitches on the flower.
Care
Hand wash in cool water with mild soap, reshape, and dry flat. Store it flat in tissue paper so the points stay crisp.
Final Notes
The measurements build round by round:
- Round 3: 2.25 in (5.7 cm)
- Round 4: 2.5 in (6.4 cm)
- Round 5: 3.5 in (8.9 cm) from point to point
- Round 6 (150-st border): 4 in (10.2 cm) from point to point
If each checkpoint matches, the finished star will match too. Add the 0.6 in (1.5 cm) gold flower and two 1.75 in (4.4 cm) leaves to finish the poinsettia, then hang it on the tree.
Happy crocheting!