

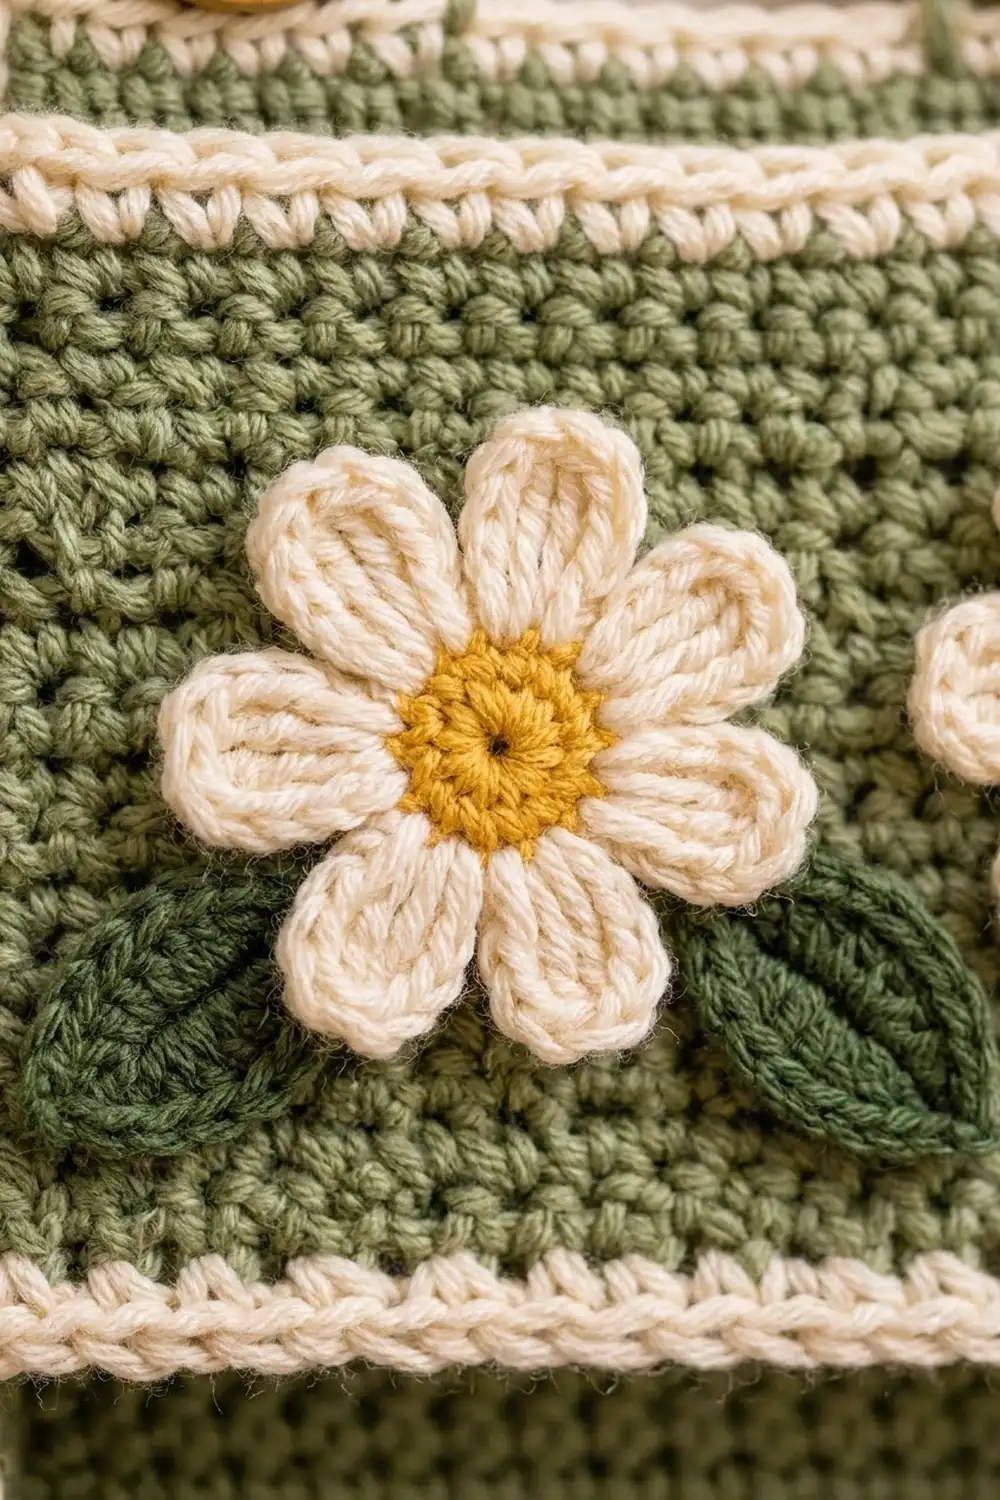
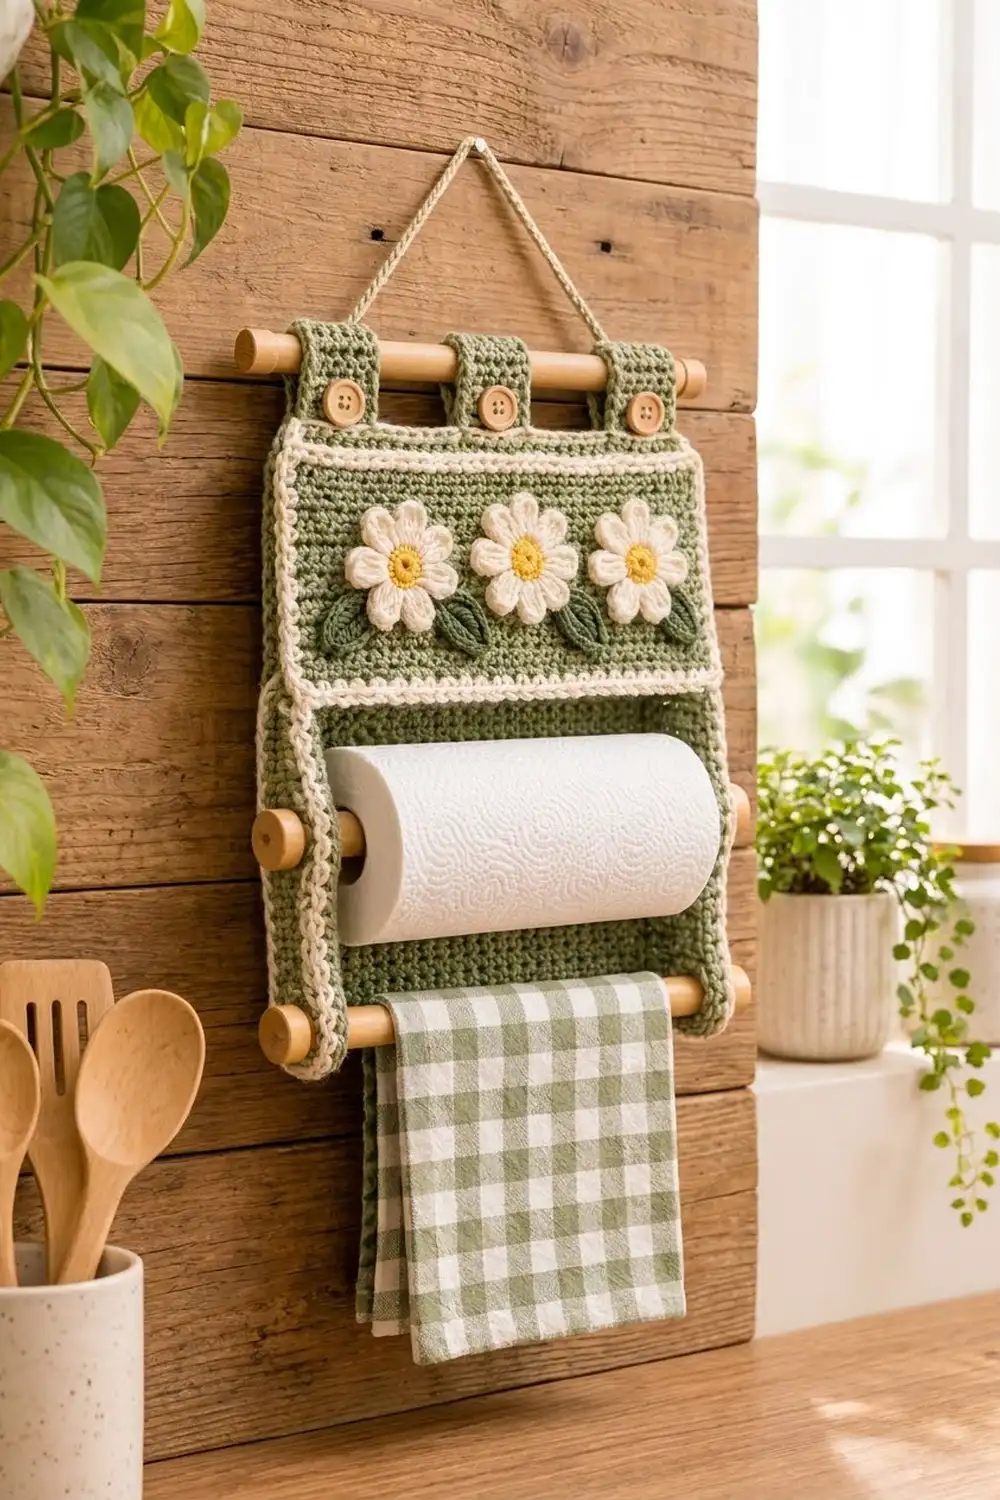
This hanging paper towel holder has a sturdy sage green single crochet body, a cream rope-like trim, and a row of three daisies with golden centers and dark green leaves. It hangs from a wooden dowel by three buttoned tabs. A paper towel roll sits in the middle and a tea towel hangs from a lower dowel.
The colors are calm and suit a kitchen: sage green for the structure, cream for the edging and petals, golden yellow for the flower centers and forest green for the leaves. The style is cottage-tidy, with crisp edges.
All instructions use US crochet terms. The crocheted body measures 13 x 13 in (33.0 x 33.0 cm) after the border. With the dowels in place, the holder is 15 in (38.1 cm) wide and about 14 in (35.6 cm) tall, and it sticks out 5 in (12.7 cm) from the wall.
You crochet a back panel, a front band, four side layers and three tabs in flat rows, then add a two-round cream border to each part. The side layers are paired into two stiff side panels. Then everything is sewn together stitch to stitch, and the daisies and leaves are appliquéd on last.
Finished Size and Construction
- Finished size: 13 x 13 in (33.0 x 33.0 cm) crocheted body; 15 in (38.1 cm) wide with dowels
- Skill level: Intermediate (easy stitches, careful assembly)
- Terminology: US
- Yarn weight: Worsted (CYC 4), 100% cotton
- Hook: 4.5 mm (US 7)
- Number of pieces: 1 back panel, 1 front band, 4 side layers (joined into 2 side panels), 3 tabs, 3 daisies, 6 leaves
- Layout: Front band over the top 5 in (12.7 cm) of the back panel; side panels below it on the left and right edges
- Back panel before border: 12 x 12 in (30.5 x 30.5 cm)
- Front band before border: 12 x 4 in (30.5 x 10.2 cm)
- Side layer before border: 4 x 7.1 in (10.2 x 18.0 cm)
- Border depth: 0.5 in (1.3 cm) per edge (two rounds)
Materials
Use a firm worsted cotton, either mercerized or combed. Cotton holds its shape, copes with kitchen steam and washes well. Acrylic side panels will sag under the weight of the roll.
- Sage green (MC): 150 g / 255 m
- Cream (CC1): 50 g / 85 m
- Golden yellow (CC2): 10 g / 17 m
- Forest green (CC3): 10 g / 17 m
These quantities include a margin of about 30% for gauge differences and swatching.
Tools:
- 4.5 mm (US 7) crochet hook
- Three wooden dowels, 1/2 in (1.3 cm) diameter, each cut to 15 in (38.1 cm)
- Three 3/4 in (1.9 cm) wooden buttons
- Tapestry needle and stitch markers
- Measuring tape
- Blocking mat, rust-proof pins and a spray bottle
Abbreviations (US Terms)
- ch – chain
- sl st – slip stitch
- sc – single crochet
- hdc – half double crochet
- dc – double crochet
- sk – skip
- st(s) – stitch(es)
- RS / WS – right side / wrong side
- MR – magic ring
Special stitch – reverse sc (crab stitch): Work from left to right (if you are right-handed). Insert the hook into the next stitch to the right, yarn over and pull up a loop, then yarn over and pull through both loops. This makes the twisted, rope-like cream edge.
Gauge and Checkpoints
Gauge: 16 sc and 18 rows = 4 in (10.2 cm).
Make one piece first and measure it. The front band works well as a swatch because it is small and uses the full 48-stitch width.
- Front band, after Row 1: 12 in (30.5 cm) wide.
- Front band, after Row 18: 4 in (10.2 cm) tall.
- Back panel, after Row 18: 4 in (10.2 cm) tall; after Row 54: 12 in (30.5 cm) tall.
- Side layer, after Row 32: 4 x 7.1 in (10.2 x 18.0 cm).
- Any piece, after border: 1 in (2.5 cm) larger in each direction.
If your piece is too big, change to a 4 mm hook. If it is too small, change to a 5 mm hook. Width matters most, because the paper towel roll is about 11 in (27.9 cm) long and needs the full space between the side panels.
Back Panel (Make 1, MC)
Ch 49.
Row 1 (RS): Sc in 2nd ch from hook and in each ch across. Turn. (48 sc)
Rows 2–54: Ch 1 (does not count as a st), sc in each st across. Turn. (48 sc)
Fasten off. The panel measures 12 x 12 in (30.5 x 30.5 cm).
Front Band (Make 1, MC)
Ch 49.
Row 1 (RS): Sc in 2nd ch from hook and in each ch across. Turn. (48 sc)
Rows 2–18: Ch 1, sc in each st across. Turn. (48 sc)
Fasten off. The band measures 12 x 4 in (30.5 x 10.2 cm).
Side Layers (Make 2 of Layer A and 2 of Layer B, MC)
Each side panel is two layers sewn together, which makes it stiff enough to hold the roll. The eyelets (small holes for the dowels) line up when the layers are stacked.
Row 1 is the top of each layer. On Layer A, the wall edge is the end where Row 1 begins, opposite the starting tail. On Layer B, the wall edge is the starting-tail end. Mark the wall edge on each layer.
Ch 17.
Row 1: Sc in 2nd ch from hook and in each ch across. Turn. (16 sc)
Rows 2–10: Ch 1, sc in each st across. Turn. (16 sc)
Row 11 (roll eyelet):
– Layer A: Ch 1, sc 9, ch 3, sk 3, sc 4. Turn. (13 sc, 1 ch-3 space)
– Layer B: Ch 1, sc 4, ch 3, sk 3, sc 9. Turn. (13 sc, 1 ch-3 space)
Row 12: Ch 1, sc in each sc and 3 sc in the ch-3 space. Turn. (13 sc + 3 sc = 16 sc)
Rows 13–26: Ch 1, sc in each st across. Turn. (16 sc)
Row 27 (towel eyelet):
– Layer A: Ch 1, sc 11, ch 3, sk 3, sc 2. Turn. (13 sc, 1 ch-3 space)
– Layer B: Ch 1, sc 2, ch 3, sk 3, sc 11. Turn. (13 sc, 1 ch-3 space)
Row 28: Ch 1, sc in each sc and 3 sc in the ch-3 space. Turn. (13 sc + 3 sc = 16 sc)
Rows 29–32: Ch 1, sc in each st across. Turn. (16 sc)
Fasten off. Each layer measures 4 x 7.1 in (10.2 x 18.0 cm). Counting from the wall edge, the roll eyelet sits over sts 10–12 and the towel eyelet over sts 12–14 on every layer.
Tabs (Make 3, MC)
Ch 7.
Row 1: Sc in 2nd ch from hook and in each ch across. Turn. (6 sc)
Rows 2–18: Ch 1, sc in each st across. Turn. (6 sc)
Fasten off. Each tab measures 1.5 x 4 in (3.8 x 10.2 cm).
Daisies (Make 3)
Rnd 1 (CC2): MR, ch 1, 8 sc in ring. Sl st to first sc. (8 sc)
Rnd 2 (CC2): Ch 1, 2 sc in each st around. Sl st to first sc. Fasten off. (16 sc)
Rnd 3 (CC1, petals): Join CC1 in any st. *Ch 7, sc in 2nd ch from hook, hdc in next ch, dc in next 2 ch, hdc in next ch, sc in last ch, sk next st of the center, sl st in next st; repeat from * 7 more times. The last sl st goes into the joining st. (8 petals)
Each petal uses 2 center stitches, so 16 sts make 8 petals. Fasten off. Each daisy measures about 3 in (7.6 cm) across.
Leaves (Make 6, CC3)
Ch 9.
Rnd 1: Sl st in 2nd ch from hook, sc in next ch, hdc in next ch, dc in next 2 ch, hdc in next ch, sc in next ch, 3 sc in last ch. Working along the other side of the chain: sc in next ch, hdc in next ch, dc in next 2 ch, hdc in next ch, sc in next ch, sl st in last ch. (17 sts)
Fasten off. Each leaf is about 2 in (5.1 cm) long.
Make All Pieces
Before the borders, you should have:
- MC: 1 back panel, 1 front band, 4 side layers (2 A, 2 B), 3 tabs
- CC1 + CC2: 3 daisies
- CC3: 6 leaves
Layout, seen from the front:
   [tab]        [tab]        [tab]       <- top dowel
+-------------------------------------+
|   FRONT BAND: daisy  daisy  daisy   |  5 in
+-------------------------------------+
|side |                         |side |
|panel|   BACK PANEL (roll)     |panel|  8 in
|     |   (tea towel dowel)     |     |
+-------------------------------------+
Border
Every border uses CC1 and the same two rounds. Border gauge: the sc round adds about 1/4 in (0.6 cm) per edge, and the reverse sc round brings the total to 0.5 in (1.3 cm).
Side counts below do not include the corner groups, which are counted separately. Work 1 sc in each stitch along the top and bottom edges, and 1 sc in each row end along the sides.
Back Panel Border
Rnd 1: Join CC1 in the last st of Row 54. Ch 1, 3 sc in same st (corner). Sc in each row end down the side (54 sc). 3 sc in the first foundation ch (corner). Sc in next 46 ch (46 sc). 3 sc in last ch (corner). Sc in each row end up the side (54 sc). 3 sc in first st of Row 54 (corner). Sc in next 46 sts (46 sc). Sl st to first sc. (54 + 46 + 54 + 46 + 12 corner sts = 212 sts)
Rnd 2: Ch 1, reverse sc in each st around. Sl st to first st. Fasten off. (212 sts)
The back panel now measures 13 x 13 in (33.0 x 33.0 cm).
Front Band Border
Rnd 1: Work as for the back panel: 18 sc along each side, 46 sc along the top and bottom, and 3 sc in each corner. (18 + 46 + 18 + 46 + 12 = 140 sts)
Rnd 2: Reverse sc around. Fasten off. (140 sts)
The band now measures 13 x 5 in (33.0 x 12.7 cm).
Side Panel Border (Joins the Layers)
Stack one Layer A and one Layer B with WS together. Line up the wall edges and the eyelets, with Row 1 at the top of both layers. Work each stitch through both layers.
Rnd 1: 32 sc along each long edge, 14 sc along each short edge, and 3 sc in each corner st. (32 + 14 + 32 + 14 + 12 = 104 sts)
Rnd 2: Reverse sc around. Fasten off. (104 sts)
Make the second side panel the same way. Each one measures about 5 x 8.1 in (12.7 x 20.6 cm).
Why the math works: Each edge gets exactly 1 sc per existing stitch or row end, and each corner gets 3 sc. The middle sc of each corner group becomes the new corner, so the edges stay flat without ruffling or cupping. The back panel and band have the same 46-stitch top edge, so both measure exactly 13 in (33.0 cm) wide after the border.
Joining
Use MC and a tapestry needle. Whipstitch through the outer loops of the Rnd 1 sc, just inside the reverse sc ridge, so the seam hides behind the cream edge. Keep the tension firm but relaxed so the seam lies flat. Every 10 stitches, check that the two edges still match.
1. Front band to back panel. Lay the band RS up over the top of the back panel, with the top edges aligned.
– Top: join the band’s 48 top sts (46 sc plus the middle sc of each corner group) one to one with the back panel’s 48 top sts.
– Sides: on each side, join the band’s 20 side sts (18 sc plus 2 corner centers) to the back panel’s top 20 side sts (top corner center plus the row ends of Rows 54–36).
– Bottom: whipstitch the band’s 48 bottom sts to the surface of the back panel along Row 35.
2. Side panels to back panel. Hold each side panel at a right angle to the back panel, with its wall edge against the back panel’s side and the eyelet rows at the bottom.
– Join the side panel’s 34 wall-edge sts (32 sc plus 2 corner centers) to the back panel’s bottom 34 side sts (bottom corner center plus the row ends of Rows 1–33).
– The band’s lower border covers Rows 34–35.
3. Tabs. Place one tab at the center and one centered 1.5 in (3.8 cm) in from each side edge. Sew the bottom 1 in (2.5 cm) of each tab to the back of the back panel at its top edge. Fold the tab over the top dowel and sew its other 1 in (2.5 cm) to the front band, just below the cream border. Sew a button through both layers at each tab end. The middle 2 in (5.1 cm) of the tab forms the loop for the dowel.
4. Appliqués. Pin the daisies on the front band, vertically centered, with their centers 2.5 in (6.4 cm), 6.5 in (16.5 cm) and 10.5 in (26.7 cm) from the left edge. Tuck two leaves under the bottom of each daisy, angled outward. Sew around each petal and leaf with matching yarn.
5. Cord and dowels. Holding two strands of CC1 together, ch 80, about 18 in (45.7 cm) long. Tie each end to the top dowel just outside the outer tabs. Slide one dowel through the roll eyelets and the paper towel roll, and another through the towel eyelets.
Size checkpoint: The body measures 13 x 13 in (33.0 x 33.0 cm). There is at least 12 in (30.5 cm) of space between the side panels.
Final Blocking
- Remove the dowels.
- Lay the holder on the mat with the back panel flat.
- Pin the back panel to 13 x 13 in (33.0 x 33.0 cm).
- Mist the whole holder until damp, not soaked.
- Prop the side panels upright with rolled towels so they dry at a right angle.
- Pin each daisy petal open.
- Let it dry for at least 24 hours, then put the dowels back.
Final Quality-Control Checklist
- The back panel and band are both 13 in (33.0 cm) wide.
- The side panels stand at right angles and are the same height.
- The eyelets line up so the dowels slide straight through.
- The border rounds count 212, 140 and 104 stitches.
- The seams have no gaps or puckers.
- The daisies are evenly spaced and the leaves are secure.
- All yarn ends are woven in and the holder hangs level.
Troubleshooting
- Panel wider than 12 in (30.5 cm): Go down a hook size.
- Side panels sag: Make sure both layers are joined, and use firm cotton.
- Dowels won’t fit through the eyelets: Make larger eyelets: ch 4, sk 4, then work 4 sc into the space on the next row.
- Border ruffles: There are too many stitches; recount each side.
- Border cups: A corner group is missing; check that every corner has 3 sc.
- Petals curl: Pin them flat and block.
- Holder tilts: Adjust the cord knots until it hangs level.
Care
Remove the dowels and hand wash in cool water with mild soap. Dry flat, shaping the side panels while they are still damp.
Final Notes
The measurements build on each other. At 16 sc = 4 in (10.2 cm), 48 stitches make 12 in (30.5 cm), and the 0.5 in (1.3 cm) border brings the back panel and band to 13 in (33.0 cm). The 32-row side panels finish at about 8.1 in (20.6 cm) and fill the space below the 5 in (12.7 cm) band. If you check each stage as you go, the parts will join cleanly.
Happy crocheting!