

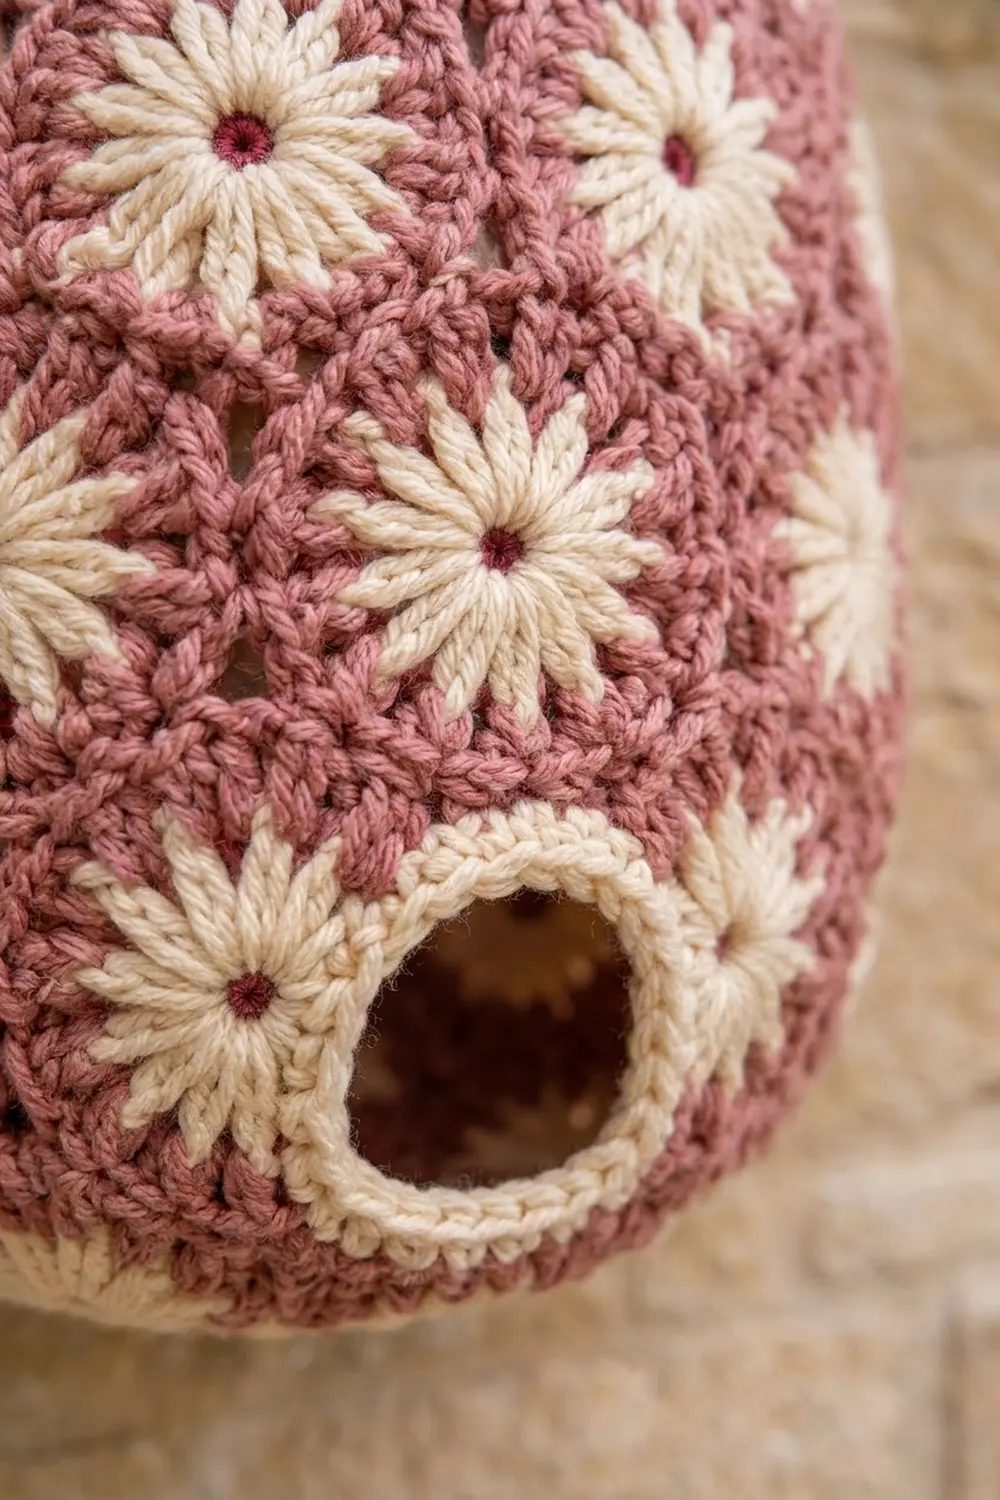
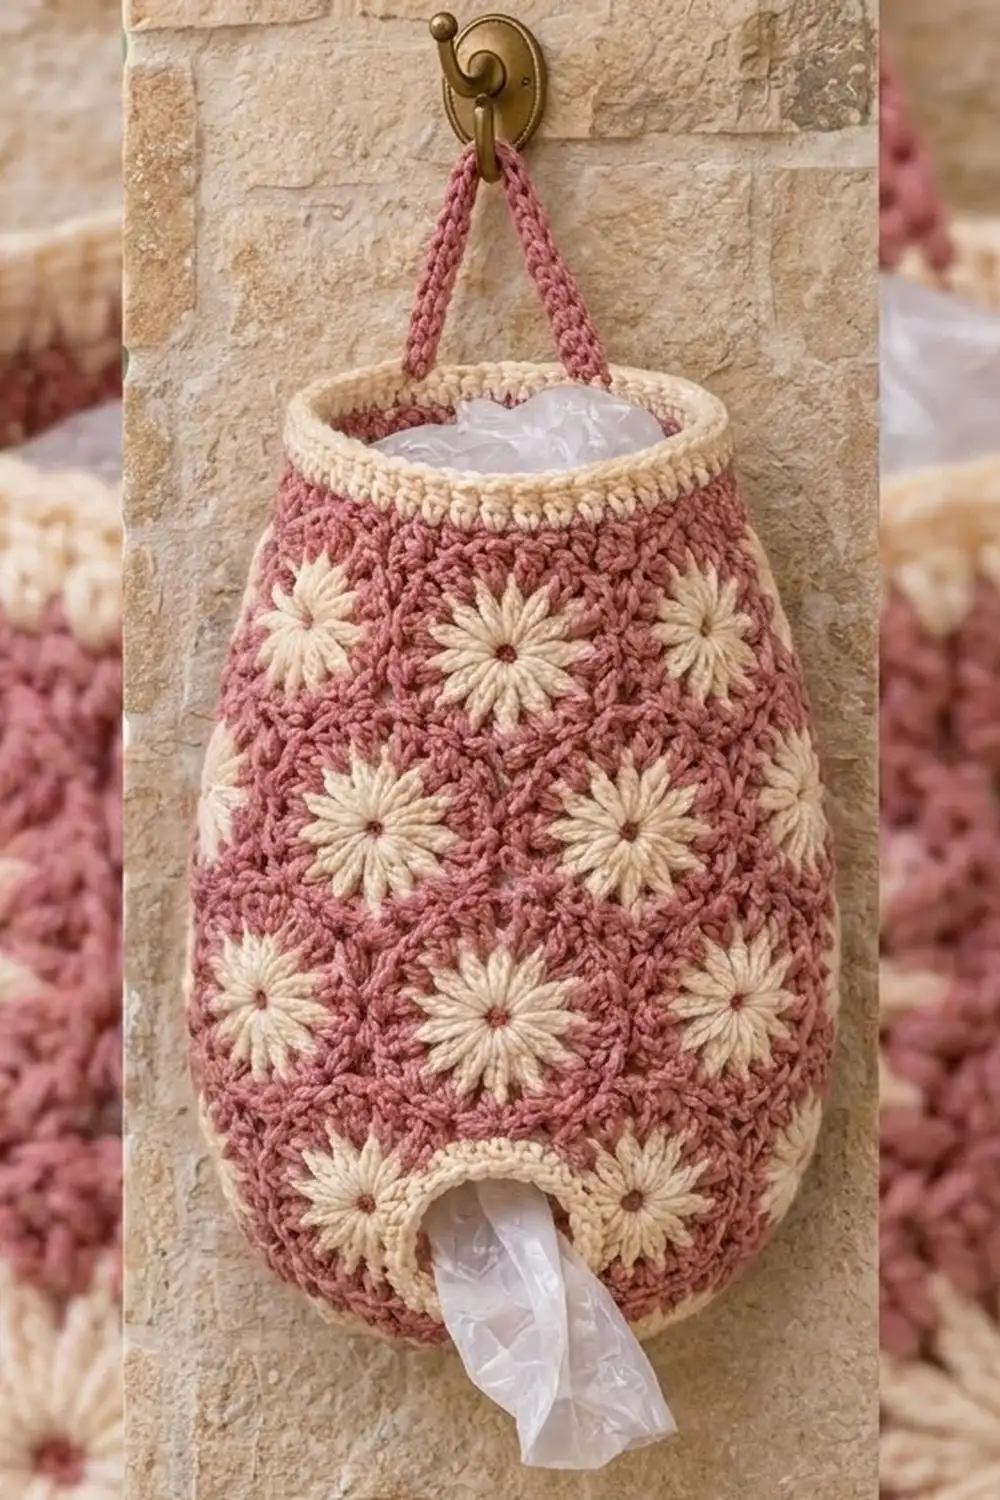
This plastic bag holder is a practical kitchen piece that also works as decor. Its rounded, egg-shaped body in dusty rose pink is covered in cream daisies, each with a small deep raspberry center. A cream rim softens the top, a cream-edged opening near the bottom lets you pull bags out one at a time, and a slim pink strap hangs it from a hook.
The style is cottage-farmhouse, with warm, soft colors and a simple shape. The fabric is solid half double crochet, so it holds its shape and keeps bags from poking through. You embroider the daisies afterward with lazy daisy stitches and French knots, which keeps the crochet itself simple.
This pattern uses US crochet terms. The finished holder measures about 9 in (22.9 cm) wide when flattened and 13 in (33.0 cm) tall up the side, not counting the strap.
Construction overview: you work one seamless piece from the bottom up. A flat circle forms the base, and the sides grow to full width. A short section of turned rows creates the dispensing opening, and a chain bridge closes it. The body then tapers toward the top. You add a cream rim and opening edging, work the strap directly off the rim, and embroider the daisies last.
Finished Size and Construction
- Finished size: 9 in (22.9 cm) wide flattened, 13 in (33.0 cm) tall, plus a strap loop about 4 in (10.2 cm) tall
- Skill level: Easy to intermediate
- Terminology: US crochet terms
- Yarn weight: Worsted weight (#4)
- Hook: 5 mm (H-8)
- Number of pieces: 1 (seamless body with integrated strap)
- Layout: Joined rounds worked from the bottom up, with 8 turned rows for the opening
- Widest circumference: 64 sts, about 18.3 in (46.5 cm)
- Size before rim: 12 in (30.5 cm) of side height above the base
- Rim depth: 1 in (2.5 cm)
Materials
Choose a smooth worsted-weight cotton, cotton blend, or acrylic. Cotton gives the firmest shape. Acrylic is lighter and slightly stretchier. Avoid fuzzy yarns, which hide the embroidery.
- Color A, dusty rose pink: 120 g, about 220 yd (201.2 m)
- Color B, cream: 45 g, about 90 yd (82.3 m)
- Color C, deep raspberry: 5 g, about 10 yd (9.1 m)
All quantities include a margin of roughly 15 to 20 percent.
Tools:
- 5 mm (H-8) crochet hook
- Tapestry needle with a large eye
- 6 to 8 locking stitch markers
- Scissors
- Measuring tape
- Water spray bottle and a rolled towel for blocking
Abbreviations (US Terms)
- ch – chain
- sl st – slip stitch
- sc – single crochet
- hdc – half double crochet
- inc – 2 hdc in the same stitch
- st(s) – stitch(es)
- rnd – round
- RS / WS – right side / wrong side
Special stitches:
- hdc2tog: [Yarn over, insert hook in next st, yarn over, pull up a loop] twice, yarn over, pull through all 5 loops.
- sc2tog: [Insert hook in next st, yarn over, pull up a loop] twice, yarn over, pull through all 3 loops.
- Reverse sc (rev sc): Working from left to right (if you are right-handed), insert hook in the next st to the right, pull up a loop, yarn over, pull through both loops.
- Lazy daisy stitch: An embroidery stitch. Bring the needle up at the flower center, insert it back at the same point, and bring it out at the petal tip with the loop under the needle. Pull gently and anchor the tip with a tiny stitch.
- French knot: An embroidery stitch. Bring the needle up, wrap the yarn twice around the needle, and insert it right beside the exit point.
Gauge and Checkpoints
Gauge: 14 hdc and 10 rnds = 4 in (10.2 cm) in hdc worked in the round. In sc, 14 sts and 16 rnds = 4 in (10.2 cm).
Work Rnds 1–6 first and use the base as your gauge test.
- After Rnd 6: The flat circle measures 4.4 in (11.2 cm) across.
- After Rnd 9: The circumference is 18.3 in (46.5 cm), or about 9 in (22.9 cm) flattened.
- After Row 19: The opening measures 3.4 in (8.6 cm) wide and 3.2 in (8.1 cm) tall.
- After Rnd 30: The side height above Rnd 6 is 9.6 in (24.4 cm).
- After Rnd 36: The side height above Rnd 6 is 12 in (30.5 cm), and the top circumference is 12.6 in (32.0 cm).
If your base is larger than 4.4 in (11.2 cm), go down one hook size. If it is smaller, go up one size. If the base ripples, your stitches are too loose; if it cups, they are too tight. Fix your gauge here, before you start the sides.
Body Pattern
Work with Color A. At the start of every round, ch 2 (does not count as a st) and hdc in the first st. Join each round with a sl st to the first hdc.
Base
Rnd 1: Make a magic ring, ch 2, 8 hdc in the ring. Join. (8 sts)
Rnd 2: Inc in each st around. (16 sts)
Rnd 3: [Hdc in next st, inc] 8 times. (24 sts)
Rnd 4: [Hdc in next 2 sts, inc] 8 times. (32 sts)
Rnd 5: [Hdc in next 3 sts, inc] 8 times. (40 sts)
Rnd 6: [Hdc in next 4 sts, inc] 8 times. (48 sts)
Check: the base lies flat and measures 4.4 in (11.2 cm) across.
Rounded Lower Body
Rnd 7: [Hdc in next 5 sts, inc] 8 times. (56 sts)
Rnd 8: Hdc in each st around. (56 sts)
Rnd 9: [Hdc in next 6 sts, inc] 8 times. (64 sts)
Rnds 10–11: Hdc in each st around. (64 sts)
The gradual increases in Rnds 7–9 turn the flat base up into a rounded bottom instead of a sharp corner.
Dispensing Opening
The opening is made from the first 12 sts of Rnd 11. You now work back and forth over the remaining 52 sts.
Row 12 (WS): Ch 2, turn. Working backward around the body, hdc in the next 52 sts. Sts 1–12 of Rnd 11 stay unworked. (52 sts)
Rows 13–19: Ch 2, turn, hdc in each st across. (52 sts each row)
Row 19 is a RS row. Do not turn.
Bridge: Ch 12, then sl st to the top of the first hdc of Row 19 to close the gap.
Rnd 20: Ch 2, hdc in the same st and in the next 51 hdc, then hdc in the top loop of each of the 12 ch. Join. (52 hdc + 12 hdc over chains = 64 sts)
Check: the opening is a rectangle 12 sts wide and 8 rows tall, about 3.4 in (8.6 cm) by 3.2 in (8.1 cm). The turned rows look slightly different from the rounds. The daisies and the edging cover this texture change.
Upper Body
Rnds 21–30: Hdc in each st around. (64 sts)
Rnd 31: [Hdc in next 6 sts, hdc2tog] 8 times. (56 sts)
Rnd 32: Hdc in each st around. (56 sts)
Rnd 33: [Hdc in next 5 sts, hdc2tog] 8 times. (48 sts)
Rnd 34: Hdc in each st around. (48 sts)
Rnd 35: [Hdc in next 10 sts, hdc2tog] 4 times. (44 sts)
Rnd 36: Hdc in each st around. (44 sts)
Fasten off Color A. The tapered top creates the egg shape and keeps bags from spilling out.
Border: Rim, Opening Edging, and Strap
Border gauge: 14 sc = 4 in (10.2 cm) and 4 sc rnds = 1 in (2.5 cm). At this gauge, sc and hdc are the same width, so the border uses 1 sc per existing st with no extra stitches.
Top Rim (Color B)
Flattened, the top has 22 sts on the front and 22 on the back. It is a tube, so there are no corner stitches.
Rnd 37: Join Color B in any st, ch 1, sc in each st around. Join. (44 sts: 22 front, 22 back)
Rnds 38–39: Ch 1, sc in each st around. Join. (44 sts each)
Rnd 40: Ch 1, rev sc in each st around. Join. (44 sts)
Fasten off. The rim is 1 in (2.5 cm) deep. Its 44 sc measure 12.6 in (32.0 cm), the same as Rnd 36, so the rim neither flares nor pulls in.
Opening Edging (Color B)
The opening has 4 edges: the 12 unworked sts of Rnd 11 (bottom), the 12 free chain loops of the bridge (top), and 8 row ends on each side.
Rnd 1: With RS facing, join Color B at the bottom right corner and ch 1. Sc in each of the 12 bottom sts, 2 sc in each of the 8 row ends up the side (16 sts), sc in each of the 12 free chain loops, and 2 sc in each of the 8 row ends down the other side (16 sts). Join. (12 + 16 + 12 + 16 = 56 sts)
Rnd 2: Ch 1. At each of the 4 corners, sc2tog over the last st of one edge and the first st of the next edge. Sc in every other st. Join. (10 bottom + 14 side + 10 top + 14 side + 4 corner sc2tog = 52 sts)
Fasten off. The sc2tog corners round the rectangle into a soft oval. Each sc rnd is 0.25 in (0.6 cm) deep, so the two rounds take 0.5 in (1.3 cm) from each edge. The finished opening is about 2.4 in (6.1 cm) wide and 2.2 in (5.6 cm) tall. That is big enough for fingers but small enough to keep the bags inside.
Strap (Color A)
Flatten the holder with the opening centered on the front, and mark the center back of the rim. Leave 4 rim sts free at the center back, 2 on each side of the mark.
Row 1: Working into the top of Rnd 40, join Color A in the 4 sts just to the left of the free sts. Ch 1, sc in each of these 4 sts. (4 sts)
Rows 2–36: Ch 1, turn, sc in each st across. (4 sts each row)
The strap is 9 in (22.9 cm) long and 1.1 in (2.8 cm) wide. Without twisting it, bring the end to the 4 sts just to the right of the free sts. Sl st the last row to those 4 sts through both layers, then fasten off. The strap forms an arch about 4 in (10.2 cm) tall.
Embroidered Daisies
Each daisy is 2 in (5.1 cm) across. It has 12 lazy daisy petals in Color B, each 0.8 in (2.0 cm) long, around a French knot center in Color C. Space the petals evenly, like the hours on a clock face.
Place the daisies in 5 staggered rings. Daisy centers sit 8 sts apart (2.3 in, 5.8 cm), and the rings sit 6 rnds apart (2.4 in, 6.1 cm).
| Ring | Center on | Sts in rnd | Daisies | Position |
|---|---|---|---|---|
| 1 | Rnd 9 | 64 | 8 | Every 8 sts |
| 2 | Rnd 16 | 64 | 6 | Offset 4 sts; skip the 2 positions over the opening |
| 3 | Rnd 22 | 64 | 8 | Lined up with Ring 1 |
| 4 | Rnd 28 | 64 | 8 | Offset 4 sts |
| 5 | Rnd 33 | 48 | 6 | Every 8 sts |
That makes 8 + 6 + 8 + 8 + 6 = 36 daisies in total. Use stitch markers to mark each ring before you start stitching. In Ring 2, the daisies on either side of the opening sit about 0.7 in (1.8 cm) clear of the cream edging.
Keep your embroidery tension relaxed, because tight petals pucker the fabric. Weave all tails into the inside of the body.
Final Blocking
- Weave in all remaining ends on the WS.
- Roll a towel and fit it inside the holder so it fills out the egg shape.
- Mist the whole piece lightly until it is damp but not wet.
- Shape the base into a smooth curve and center the opening on the front.
- Ease the rim into a round shape, about 12.6 in (32.0 cm) around.
- Pat each daisy flat so the petals lie evenly.
- Lay the strap flat and straight.
- Let it dry completely, then remove the towel.
Final Quality-Control Checklist
- The flattened width is about 9 in (22.9 cm).
- The side height is 13 in (33.0 cm), including the rim.
- The base is round and curves smoothly into the sides.
- The opening is centered on the front, and its edging lies flat.
- The rim is 1 in (2.5 cm) deep and neither flares nor pulls in.
- The strap is untwisted and firmly attached at both ends.
- All 36 daisies are evenly spaced, with no puckering.
- All ends are secured on the inside.
Troubleshooting
Base cups upward early: Your stitches are tight. Go up one hook size and redo Rnds 1–6.
Base ruffles: Your stitches are loose. Go down one hook size.
Opening looks stretched or has gaps at the corners: Work an extra sc in each corner of Rnd 1 of the edging, then sc2tog over those 3 sts in Rnd 2.
Rim flares: Go down one hook size for the rim only.
Strap stretches over time: Work a row of sl sts down each long edge of the strap to make it firmer.
Daisies pucker: Remove the tight petals and stitch them again with looser tension.
Care
Hand wash in cool water with mild soap. Press the water out in a towel, then dry the holder flat over a rolled towel to keep its shape, and keep it out of the dryer.
Final Notes
Every measurement builds on the last one. A gauge of 14 hdc per 4 in (10.2 cm) gives a 4.4 in (11.2 cm) base. At 64 sts, the body is 18.3 in (46.5 cm) around. The 12-st opening finishes at 2.4 in (6.1 cm) wide, and the 44 sts at the top give a 12.6 in (32.0 cm) rim. If you check each stage as you go, the finished holder will measure 9 in (22.9 cm) by 13 in (33.0 cm).
Happy crocheting!