

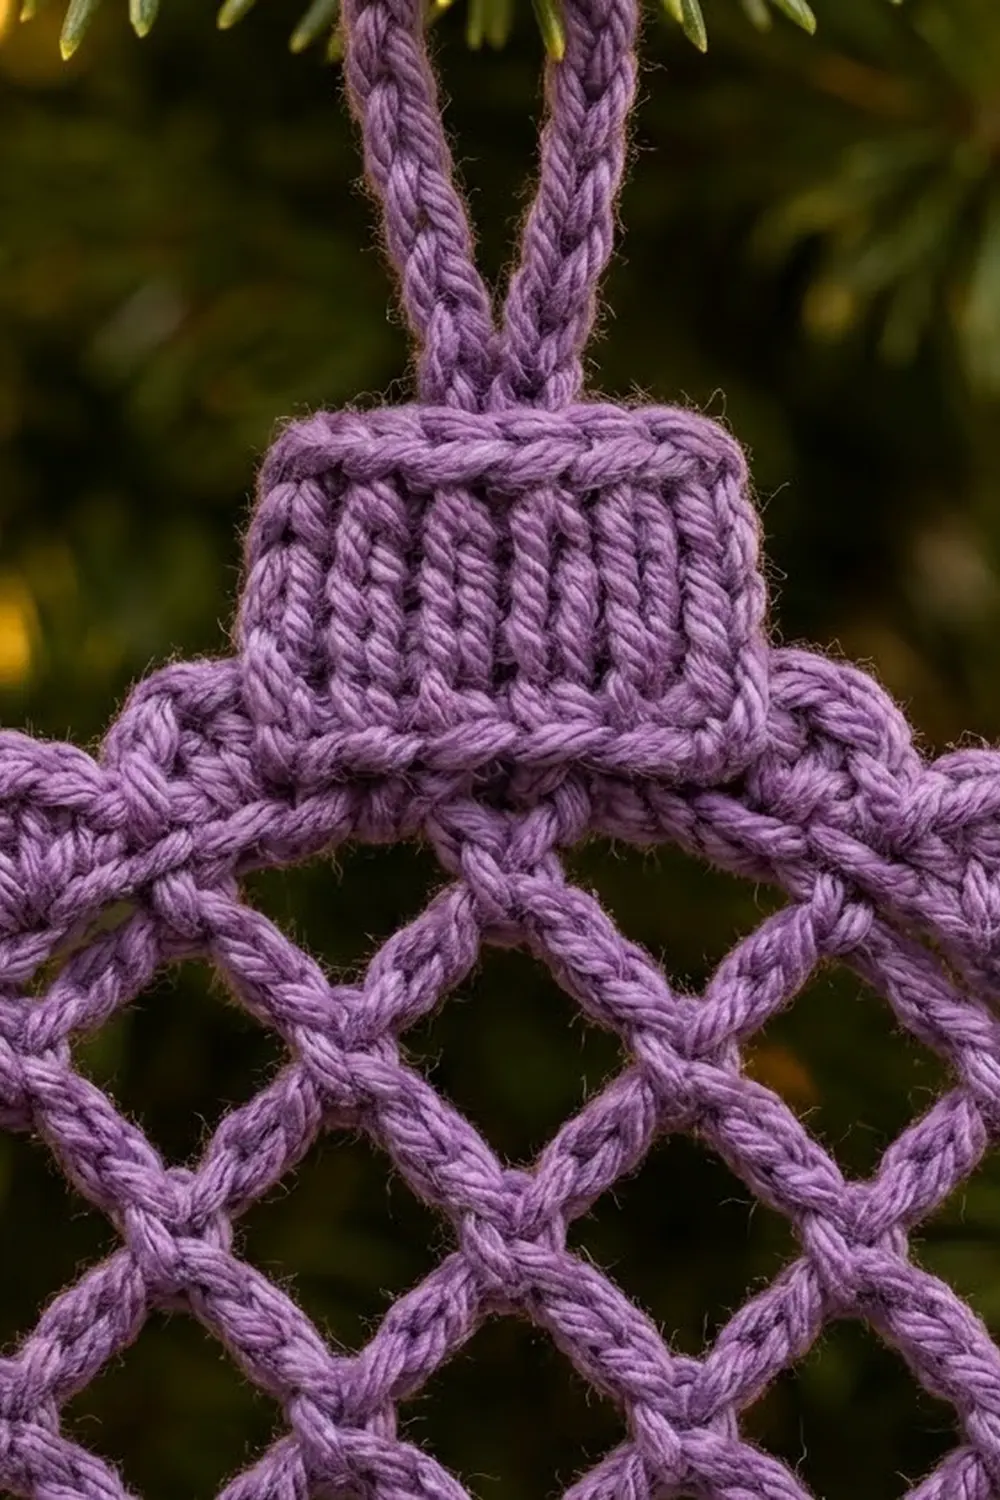
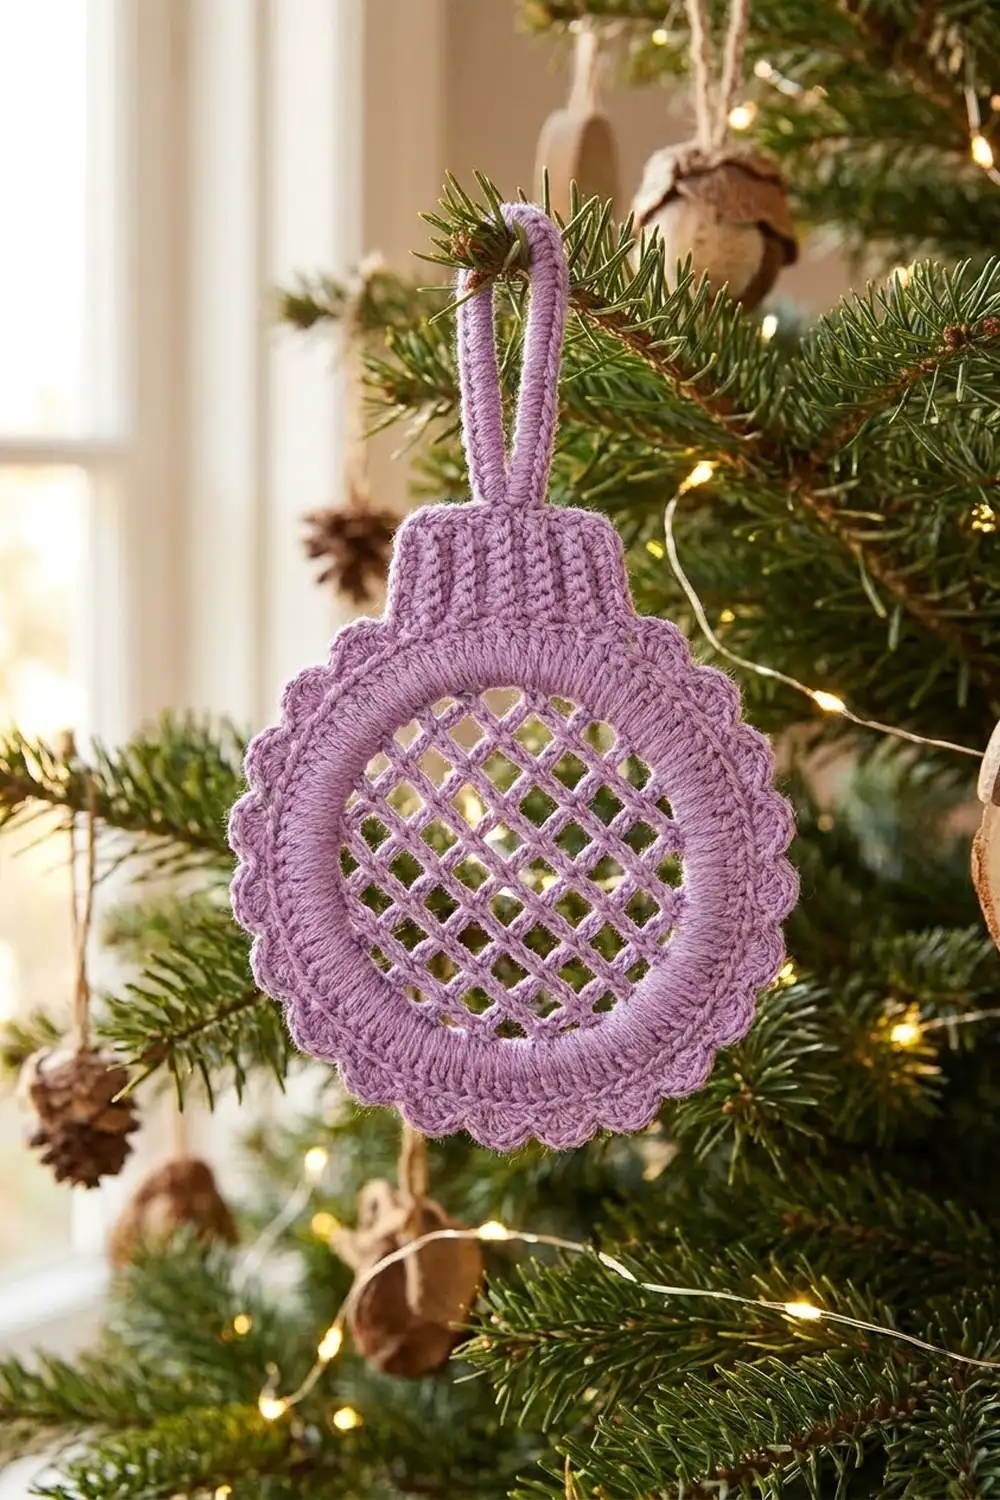
This little bauble is a flat, open Christmas ornament in a soft lilac purple. A solid round frame holds a neat diamond lattice, and rounded scallops run all the way around the edge. On top sits a small ribbed cap with a hanging loop, just like on a glass ornament.
The design uses only one color, so the texture does all the work. The lattice shows up well against tree lights, and the piece hangs flat without stuffing or wire. All instructions use US crochet terms.
The finished ornament measures 5.25 in (13.3 cm) across and about 6.7 in (17.0 cm) tall, including the cap and loop.
The construction is simple and logical. You make a foundation-single-crochet ring and stretch two sets of chain strands across it to form the diagonal lattice. Next you add a single crochet round and a scallop round. Finally, you sew on a tiny ribbed cap and work the hanging loop.
Finished Size and Construction
- Finished size: 5.25 in (13.3 cm) wide, about 6.7 in (17.0 cm) tall with cap and loop
- Skill level: Intermediate (careful counting, slip stitch joins)
- Terminology: US
- Yarn weight: Sport (2), cotton or cotton blend
- Hook: 3.25 mm (US D-3)
- Number of pieces: 1 ornament, plus a small cap sewn on top
- Layout: Round frame with a 6-by-6 diagonal chain lattice
- Frame size (after Round 1): 4.4 in (11.2 cm) outer diameter
- Size before border: 4.75 in (12.1 cm) after Round 2
- Border depth: Scallops add about 0.25 in (0.6 cm) on each side
- Cap: 1.1 in (2.8 cm) wide by 0.7 in (1.8 cm) tall
Materials
Choose a smooth mercerized or combed cotton in sport weight. Cotton keeps the lattice lines straight and blocks crisply. Avoid fuzzy yarns, because they blur the diamonds.
- Lilac purple: 10 g, about 30 m (33 yd)
Tools:
- 3.25 mm (US D-3) crochet hook
- Tapestry needle
- 4 locking stitch markers
- Scissors
- Rust-proof pins and a blocking mat or folded towel
- Spray bottle with water
- Optional: spray starch for a stiffer finish
The yarn amount includes a margin of about 25% for your gauge test and for weaving in ends.
Abbreviations (US Terms)
- ch: chain
- sl st: slip stitch
- sc: single crochet
- dc: double crochet
- BLO: back loop only
- fsc: foundation single crochet
- st(s): stitch(es)
- sk: skip
- RS: right side
Special stitch: foundation single crochet (fsc). Ch 2 and insert hook in 2nd ch from hook. Yo and pull up a loop, yo and pull through 1 loop (the “chain” part), then yo and pull through 2 loops (the “sc” part). For each next fsc, insert hook under the 2 loops of the “chain” part of the previous stitch and repeat. Each fsc has a chain edge on the bottom and an sc edge on top.
Special stitch: sl st around a strand. Insert hook from front to back under the chain strand you are crossing. Yo, pull the loop under the strand, and pull it through the loop on your hook.
Gauge and Checkpoints
- Stitch gauge: 6 sc = 1 in (2.5 cm)
- Chain gauge: 8 ch = 1 in (2.5 cm), measured relaxed
Test before you start: 12 fsc should measure 2 in (5.1 cm), and a chain of 16 should also measure 2 in (5.1 cm). The chain gauge matters as much as the stitch gauge, because the lattice strands are counted in chains.
Checkpoints:
- After Round 1, the ring lies flat and measures 4.4 in (11.2 cm) across the outside.
- After the lattice, the ring is still round (not oval or puckered) and the strands lie straight.
- After Round 2, it measures 4.75 in (12.1 cm) across.
- After Round 3, it measures 5.25 in (13.3 cm) across.
If your ring is too big, go down a hook size to 3.0 mm. If it is too small, go up to 3.5 mm (US E-4). If only your chains are off, keep the same hook for the frame and adjust your tension on the strands. Loose chains make the lattice sag, and tight chains pull the frame out of round.
Frame: Round 1
Rnd 1 (RS): Work 80 fsc. Check that the strip is not twisted, then sl st to the first fsc to form a ring. 80 sts. Fasten off, leaving a 6 in (15.2 cm) tail.
The chain edge faces the center of the ring, and the sc edge faces outward. The lattice is anchored into the inner chain edge, and Round 2 is worked into the outer sc edge.
Number the stitches 1 to 80 in the order you made them. Place markers in sts 1, 21, 41, and 61. Stitch 1 is the top center of the ornament, and each marker sits a quarter of the way around. Each stitch covers 4.5 degrees of the circle, so you can count from the nearest marker.
Lattice
The lattice is made of 6 parallel strands in one diagonal direction (Set A) and 6 in the other (Set B). Each set has 2 short, 2 middle, and 2 long strands. Between strands you travel along the inner edge with sl sts, so each set uses one continuous length of yarn.
Strand lengths:
- Short strand: 22 sts, about 2.75 in (7.0 cm)
- Middle strand: 30 sts, about 3.75 in (9.5 cm)
- Long strand: 34 sts, about 4.25 in (10.8 cm)
Every “sl st in st X” below means a sl st into the inner chain edge of that stitch of Round 1.
Set A (plain chain strands)
Work with the RS facing you.
- Join yarn with a sl st in st 2. Ch 22, sl st in st 20. (Short strand.)
- Sl st in sts 21 through 25 (5 sl sts).
- Ch 30, sl st in st 77. (Middle strand.)
- Sl st backward along the edge in sts 76, 75, 74, and 73 (4 sl sts).
- Ch 34, sl st in st 29. (Long strand.)
- Sl st in sts 30 through 33 (4 sl sts).
- Ch 34, sl st in st 69. (Long strand.)
- Sl st backward in sts 68, 67, 66, and 65 (4 sl sts).
- Ch 30, sl st in st 37. (Middle strand.)
- Sl st in sts 38 through 42 (5 sl sts).
- Ch 22, sl st in st 60. (Short strand.) Fasten off.
Check that all 6 strands run parallel, with even gaps of about 0.6 in (1.5 cm) between them. Nudge the chains so they lie straight.
Set B (strands joined at every crossing)
Set B runs at a right angle to Set A. Each time a Set B strand meets a Set A strand, lock the two together with a sl st around the strand. Each crossing sl st counts as 1 st of the strand.
- Long B strand: Ch 4, sl st around next A strand, ch 4; repeat from * 5 more times. 34 sts: 6 crossings + 7 chain segments of 4.
- Middle B strand: Ch 2, sl st around next A strand, ch 4, sl st around next A strand; repeat from * 4 more times, ch 2. 30 sts: 6 crossings + 5 segments of 4 + 2 end segments of 2.
- Short B strand: Ch 3, sl st around next A strand, ch 4, sl st around next A strand; repeat from * 2 more times, ch 3. 22 sts: 4 crossings + 3 segments of 4 + 2 end segments of 3.
Now work Set B:
- Join yarn with a sl st in st 22. Work a short B strand, then sl st in st 40.
- Sl st in sts 41 through 45 (5 sl sts).
- Work a middle B strand, then sl st in st 17.
- Sl st backward in sts 16, 15, 14, and 13 (4 sl sts).
- Work a long B strand, then sl st in st 49.
- Sl st in sts 50 through 53 (4 sl sts).
- Work a long B strand, then sl st in st 9.
- Sl st backward in sts 8, 7, 6, and 5 (4 sl sts).
- Work a middle B strand, then sl st in st 57.
- Sl st in sts 58 through 62 (5 sl sts).
- Work a short B strand, then sl st in st 80. Fasten off.
The short B strands cross only the 4 middle and long A strands, because the short A strands are out of their reach. The middle and long B strands cross all 6 A strands.
The grid is set on the diagonal relative to stitch 1, so the openings look like diamonds when the ornament hangs from the top. Weave in all lattice ends along the inner edge of Round 1.
Border
The border is 2 rounds worked into the outer sc edge of Round 1.
Border gauge: Same as the frame, 6 sc = 1 in (2.5 cm). Each scallop is about 0.8 in (2.0 cm) wide along the edge and adds about 0.25 in (0.6 cm) of depth.
Rnd 2: With RS facing, join yarn with a sl st in the outer edge of st 79. Ch 1, then sc in the same st and in each st around. Join with a sl st to the first sc. 80 sc. Do not fasten off. The new stitches keep the Round 1 numbers, so the first sc is st 79.
Quarter check: each quarter between markers holds exactly 20 sc.
Rnd 3: Ch 1. Sc in next st, sk 1 st, 5 dc in next st, sk 1 st, sc in next st; repeat from * 15 more times. Join with a sl st to the first sc. 16 scallops: 32 sc + 80 dc = 112 sts. Fasten off.
The first repeat works sc in st 79, skips st 80, places 5 dc in st 1, skips st 2, and works sc in st 3, so one scallop is centered at the top. The last repeat ends with sc in st 78.
Why the math works: Each repeat uses exactly 5 sts of Round 2. 80 divided by 5 is 16, so the scallops close evenly with no partial repeat. Each 20-st quarter holds exactly 4 scallops, which keeps the edge symmetrical around the lattice. Between scallops, 2 sc sit side by side and form the small valleys.
Cap and Hanging Loop
The cap is worked sideways in BLO rows, so the ribs run vertically.
Ch 4.
Row 1: Sc in 2nd ch from hook and in each ch across. Turn. 3 sc.
Rows 2-9: Ch 1, sc BLO in each st across. Turn. 3 sc per row.
The cap now measures about 1.1 in (2.8 cm) wide across the 9 rows and 0.5 in (1.3 cm) tall.
Rim: Rotate the cap to work along one long edge (the row ends). Ch 1, then work 1 sc in each row end. 9 sc. The rim brings the cap’s height to 0.7 in (1.8 cm).
Loop: Ch 20, then sl st in the 5th (center) rim sc. Ch 1, work 26 sc into the ch-20 loop, and sl st in the same center rim sc. Fasten off, leaving a 12 in (30.5 cm) tail.
Attaching: Center the cap over the top scallop (the one on st 1), with its bottom edge resting on Round 2. Use the long tail to whipstitch the bottom edge and both short sides to the ornament, catching Round 2 and the scallop behind. Keep the stitches small so they disappear into the ribs.
Final Blocking
- Weave in any remaining ends, hiding them inside the frame stitches.
- Mist the ornament with water until it is damp, not soaked.
- Lay it RS up on the blocking mat.
- Pin the frame into a true circle 4.75 in (12.1 cm) across at Round 2. Place 4 pins at the markers first, then 4 more between them.
- Pin each scallop tip outward so the ornament measures 5.25 in (13.3 cm) across.
- Straighten each lattice strand with a fingertip so the strands sit evenly, about 0.6 in (1.5 cm) apart.
- Square up the cap and pin the loop upright.
- Mist with spray starch if you want a stiffer ornament.
- Let it dry fully, then unpin it and remove the markers.
Final Quality-Control Checklist
- Round 1 has 80 sts and forms an untwisted ring.
- Set A has 6 parallel strands of 22, 30, 34, 34, 30, and 22 sts.
- Set B has 6 strands of the same lengths, joined at every crossing.
- The lattice has 32 crossings in total (4 + 6 + 6 + 6 + 6 + 4).
- Round 2 has 80 sc, and Round 3 has 16 scallops and 112 sts.
- One scallop sits centered under the cap.
- The finished width is 5.25 in (13.3 cm).
- The cap is centered, and the loop stands straight up.
Troubleshooting
The ring turns oval after the lattice. One strand is too short. Undo it and add 1 ch to each end segment.
The strands sag. Your chains are looser than gauge. Remove 1 ch from each end segment, or chain more firmly.
The diamonds are uneven. A crossing sl st landed off-center. Gently slide it along the A strand before blocking. Small shifts even out during blocking.
Round 3 does not close evenly. Round 2 does not have 80 sts. Recount, because any missing or extra stitch breaks the 5-stitch repeat.
The scallops ruffle. Use a 3.0 mm hook for Round 3 only, or work 4 dc per scallop instead of 5.
The cap tilts. Re-sew it with its center row lined up over st 1.
Care
Hand wash in cool water, press out the moisture in a towel, and dry flat, re-pinning if needed. Store flat between sheets of tissue paper so the lattice stays straight.
Final Notes
The whole ornament follows one measurement chain. Gauge sets Round 1 at 80 sts and 4.4 in (11.2 cm). Fixed anchor stitches and strand lengths of 22, 30, and 34 sts keep the lattice straight inside that ring. Round 2 keeps the same 80 sts at 4.75 in (12.1 cm). Because 80 divides evenly into 16 scallops of 5 sts, the edge closes cleanly and finishes at 5.25 in (13.3 cm). Make one, hang it on the tree, and you will probably want a whole set.
Happy crocheting!