

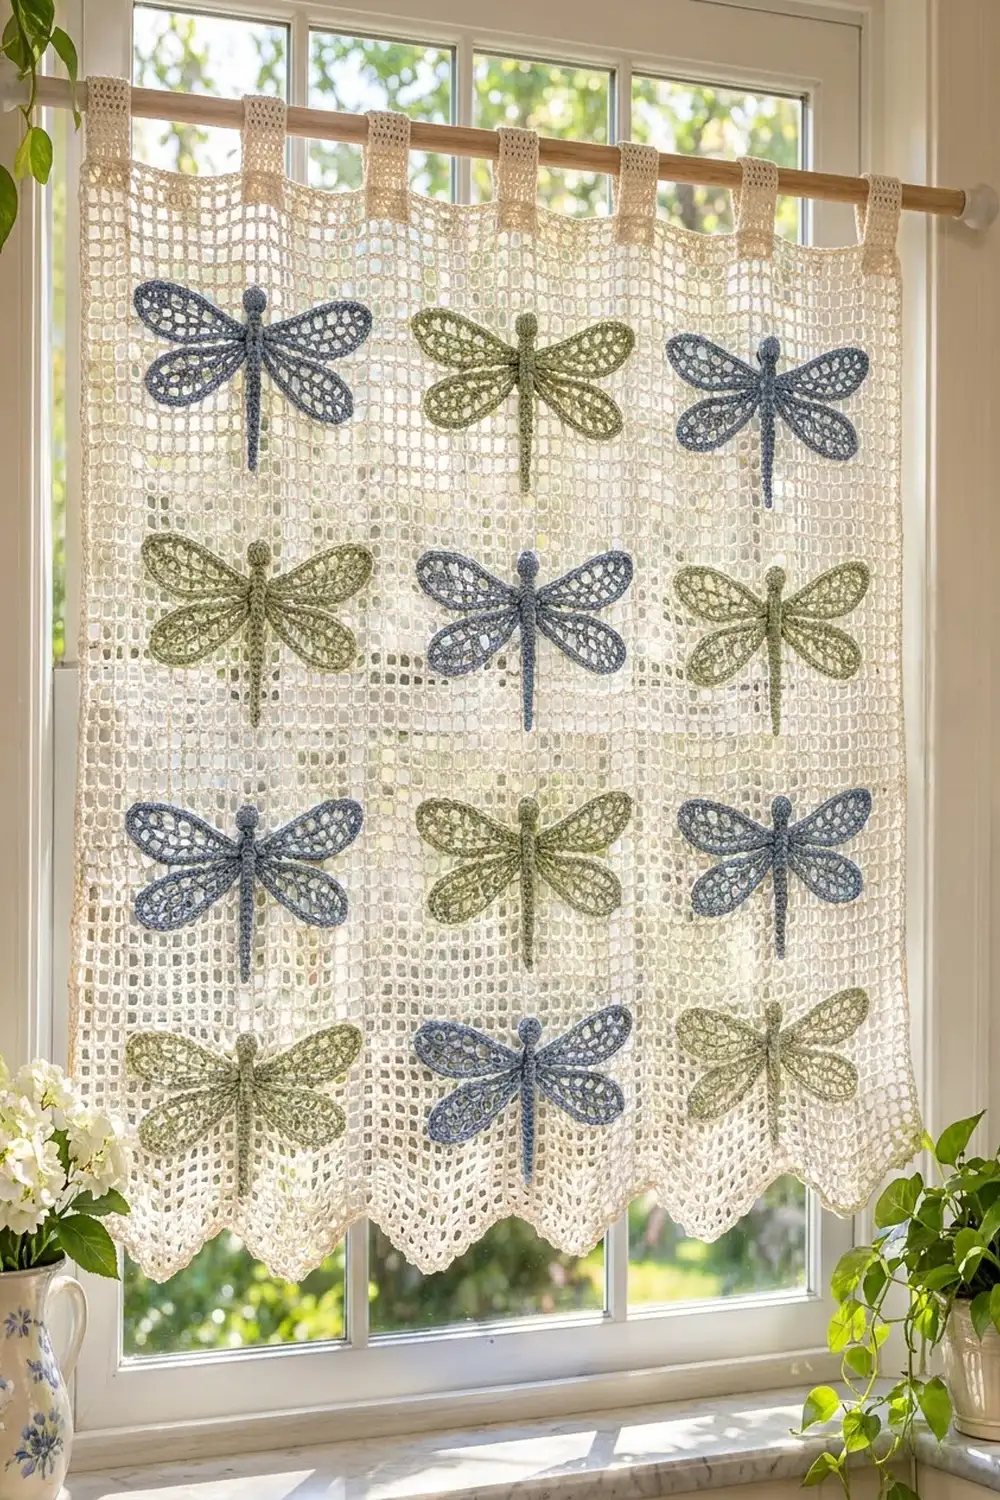
This café curtain sets a light, airy cream filet mesh behind twelve lacy dragonflies. The dragonflies alternate between dusty blue and sage green in a calm checkerboard. Each wing is filled with open cells and outlined with a firm rim, so the wings show clearly against the mesh when the window light comes through.
The style is cottage-garden, soft and a little vintage. Nine slim tabs at the top slide onto a café rod, and a row of gentle scallops finishes the hem.
The pattern uses US crochet terms. The finished curtain measures 30.5 in (77.5 cm) wide by 27 in (68.6 cm) long. The tabs add a 3 in (7.6 cm) hanging loop above the top edge.
The construction is simple. You work the mesh panel from the top down, then add the scalloped hem, the side edging and the tabs. You make twelve dragonflies separately (one body and four wings each), block them, and sew them onto the mesh in a 3 × 4 grid.
Finished Size and Construction
- Finished size: 30.5 in × 27 in (77.5 cm × 68.6 cm), not counting the tab loops
- Skill level: Intermediate
- Terminology: US
- Yarn weight: DK (#3) cotton
- Hooks: 4.0 mm (G-6) for the panel and 3.5 mm (E-4) for the appliqués
- Number of pieces: 1 mesh panel + 12 dragonfly appliqués (each made of 1 body + 4 wings)
- Layout: 3 columns × 4 rows of dragonflies
- Dragonfly size: 8 in (20.3 cm) wingspan × 5.5 in (14.0 cm) long
- Size before border: 30 in × 25 in (76.2 cm × 63.5 cm), which is 48 meshes × 40 rows
- Border depth: 1.75 in (4.4 cm) of scallops at the bottom, 0.25 in (0.6 cm) along the top and sides
Materials
Choose a smooth, mercerized or combed DK cotton. Cotton gives crisp mesh and holds the wing openings open. Avoid fuzzy yarns, because they blur the cells.
- Cream (main color): 150 g, about 360 m
- Dusty blue: 50 g, about 120 m (6 dragonflies)
- Sage green: 50 g, about 120 m (6 dragonflies)
All quantities include a safety margin of about 20%.
Tools:
– 4.0 mm (G-6) and 3.5 mm (E-4) hooks
– Tapestry needle
– Small amount of fiberfill for the bodies
– Rustproof pins and a blocking board or foam mats
– Spray bottle
– Measuring tape
– Locking stitch markers
Abbreviations (US Terms)
- ch – chain
- sl st – slip stitch
- sc – single crochet
- hdc – half double crochet
- dc – double crochet
- tr – treble crochet
- sp(s) – space(s)
- st(s) – stitch(es)
- inc – 2 sc in the same st
- dec – single crochet 2 together
- BLO – back loop only
- MR – magic ring
- RS – right side
Special stitch – mesh: dc, ch 2, skip 2 sts (or one ch-2 sp), dc in the next st. One mesh is one open square, 3 sts wide.
Gauge and Checkpoints
Panel gauge (4.0 mm hook): 8 meshes × 8 rows = 5 in × 5 in (12.7 cm × 12.7 cm). One mesh is 0.625 in (1.6 cm) square.
Single crochet gauge (4.0 mm hook): 24 sc × 24 rows = 5 in (12.7 cm). That is the same width as 8 meshes.
Test pieces first. Make a swatch: ch 35 and work 10 meshes for 10 rows. It should measure 6.25 in (15.9 cm) square. Then make one complete dragonfly with the 3.5 mm hook and check it against these measurements:
– Upper wing: 3.75 in × 1.5 in (9.5 cm × 3.8 cm)
– Lower wing: 3.25 in × 1.25 in (8.3 cm × 3.2 cm)
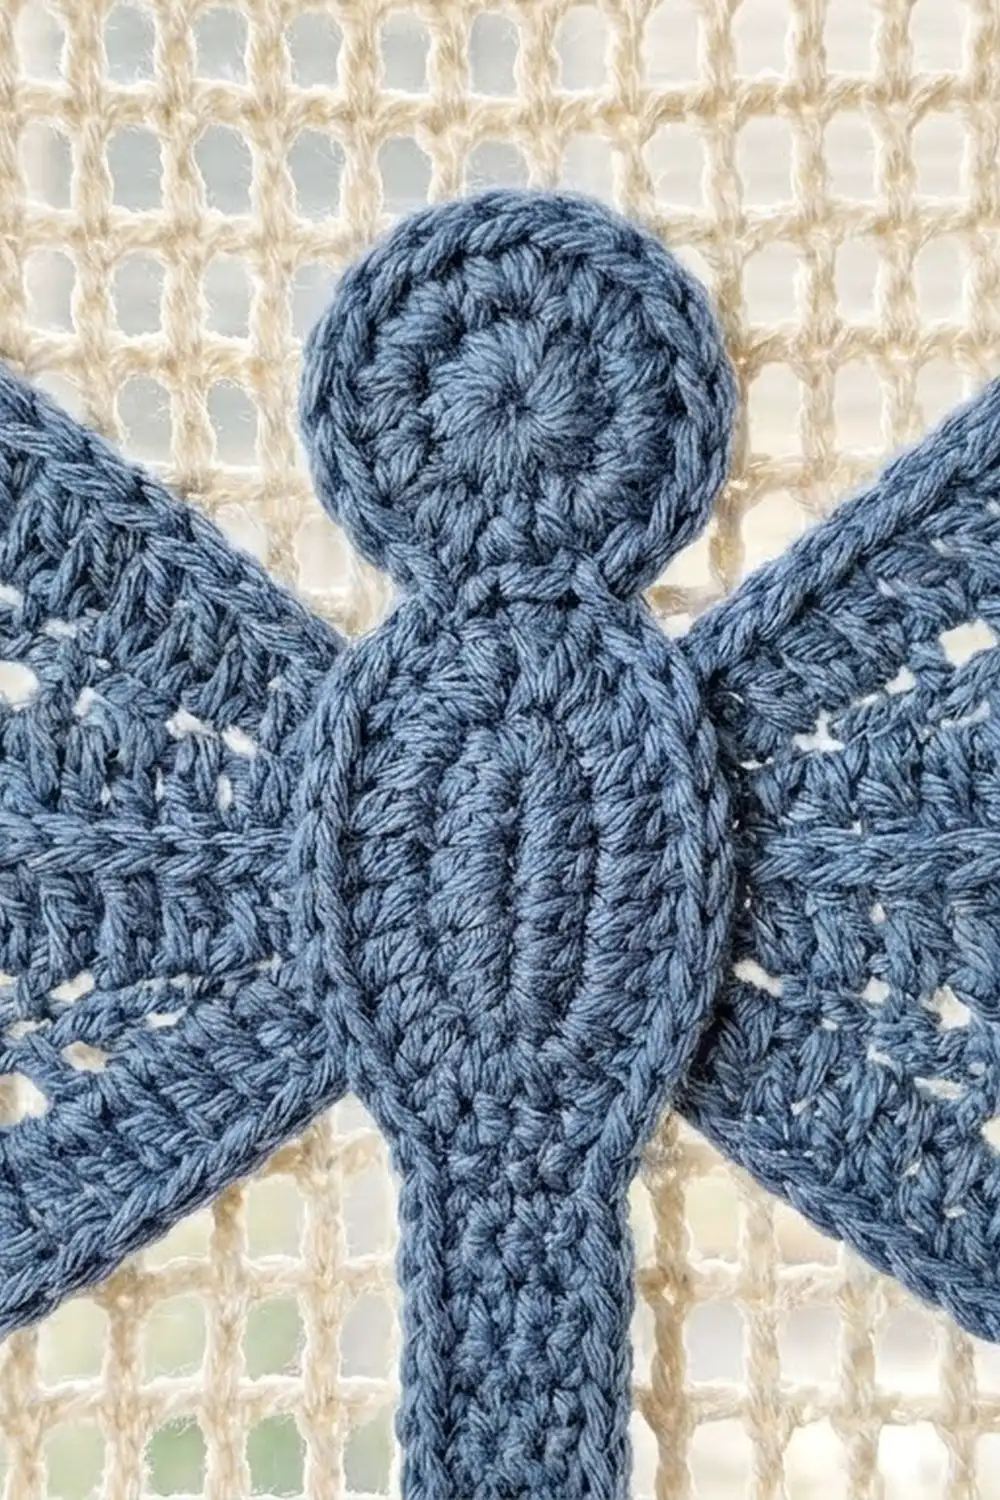
– Body: 5.5 in (14.0 cm) long
– Wingspan when assembled: 8 in (20.3 cm)
Panel checkpoints:
– Row 1 width: 30 in (76.2 cm)
– After Row 8: 5 in (12.7 cm) deep
– After Row 16: 10 in (25.4 cm) deep
– After Row 40: 25 in (63.5 cm) deep
If your piece is too big, go down half a hook size. If it is too small, go up half a size. If only the height is off, look at your dc height. Pulling up a taller or shorter loop fixes the row depth without changing the width.
Mesh Panel
The panel is worked flat from the top edge down. Use cream and the 4.0 mm hook.
Foundation: Ch 149 (3 × 48 meshes + 5).
Row 1: Dc in 8th ch from hook. Ch 2, sk 2 ch, dc in next ch. Rep from * across. You now have 48 meshes, made of 49 dc posts (counting the beginning chain as the first post) and 48 ch-2 sps. That is 145 sts.
Row 2: Ch 5 (counts as dc + ch 2), turn. Dc in next dc. Ch 2, dc in next dc. Rep from * across, working the last dc into the 3rd ch of the beginning chain. You still have 48 meshes and 145 sts.
Rows 3–40: Rep Row 2, working the last dc of each row into the 3rd ch of the turning ch-5. Every row has 48 meshes and 145 sts.
Do not fasten off. The panel now measures 30 in × 25 in (76.2 cm × 63.5 cm). This is the size before the border.
Dragonfly Appliqués
Use the 3.5 mm hook. The smaller hook keeps the wing rims firm and raised.
Upper Wing (make 2)
Foundation: Ch 19.
Rnd 1:
1. Sc in 2nd ch from hook, hdc in next ch, dc in next ch (ch 4).
2. Ch 1, sk 1 ch, dc in next ch. Rep from * 7 times; the last dc goes in ch 18.
3. Ch 1, then work (dc, ch 1, dc, ch 1, dc) in the last ch (ch 19) to make the tip.
4. Ch 1. Now work along the free loops on the other side of the foundation. Dc in the loop at ch 18, then ch 1, sk 1 loop, dc in next loop 7 times, ending at ch 4.
5. Hdc in ch 3, sc in ch 2, and sl st to the first sc.
Count: 23 posts (2 sc, 2 hdc, 19 dc) and 18 ch-1 sps. These ch-1 sps become the inner row of oval openings.
Rnd 2:
1. Ch 1, sc in the same st as the join. Ch 2, sk hdc, sc in the first dc.
2. Ch 3, sk ch-1 sp, sc in next dc. Rep from * 7 times.
3. Ch 3, sc in tip dc 1. Ch 3, sc in tip dc 2. Ch 3, sc in tip dc 3. Ch 3, sc in the first dc on side B.
4. Ch 3, sk sp, sc in next dc. Rep from * 7 times.
5. Ch 2, sl st to the first sc.
Count: 20 sc, 18 ch-3 loops and 2 ch-2 loops. The loops form the outer row of cells.
Rnd 3 (rim):
1. Ch 1. Work 1 sc in each sc, 2 sc in each ch-2 loop and 3 sc in each ch-3 loop. In the center tip sc, work 3 sc instead of 1.
2. Sl st to the first sc and fasten off.
Count: 20 sc worked into the sc + 58 sc worked into the loops + 2 extra at the tip = 80 sc.
Lower Wing (make 2)
Foundation: Ch 17.
Rnd 1: Work as for the upper wing, with these changes:
– Work ch 1, sk 1, dc in next ch 6 times on each side.
– Work the tip in ch 17.
Count: 21 posts and 16 ch-1 sps.
Rnd 2: Work as for the upper wing, repeating the ch-3 loops 6 times on each side.
Count: 18 sc, 16 ch-3 loops and 2 ch-2 loops.
Rnd 3: Work as for the upper wing.
Count: 18 + 52 + 2 = 72 sc.
Body (make 1)
Work in continuous rounds.
Head:
– Rnd 1: 6 sc in MR. (6)
– Rnd 2: Inc in each st. (12)
– Rnds 3–4: Sc around. (12)
– Rnd 5: Dec 6 times. (6) Stuff the head firmly.
Thorax:
– Rnd 6: Sc, inc 3 times. (9)
– Rnd 7: Sc 2, inc 3 times. (12)
– Rnds 8–9: Sc around. (12)
– Rnd 10: Sc 2, dec 3 times. (9)
– Rnd 11: Sc, dec 3 times. (6) Stuff the thorax lightly.
Tail:
– Rnds 12–29: Sc around (6 sts per round). Work Rnds 14, 17, 20, 23, 26 and 29 in BLO. This leaves 6 front-loop ridges that mark the tail segments.
– Rnd 30: Dec 3 times. (3) Fasten off and close the tip.
Checkpoint: The body should be 5.5 in (14.0 cm) long.
Assembling One Dragonfly
- Lay the body face up.
- Tuck the pointed base of each upper wing under Rnds 7–8 of the thorax. Tuck each lower wing under Rnds 9–10, angled slightly back.
- Sew the wing bases to the thorax with matching yarn.
The wingspan should be 8 in (20.3 cm).
Make All Pieces
- Dusty blue: 6 dragonflies (6 bodies, 12 upper wings, 12 lower wings)
- Sage green: 6 dragonflies (6 bodies, 12 upper wings, 12 lower wings)
- Cream: 1 mesh panel
Layout (as seen from the RS):
Row 1:  Blue   Green  Blue
Row 2:  Green  Blue   Green
Row 3:  Blue   Green  Blue
Row 4:  Green  Blue   Green
Block all twelve dragonflies before you sew them on (see Final Blocking).
Joining: Attaching the Appliqués
Placement logic:
– Columns: The 48 meshes divide into 3 columns of 16 meshes, each 10 in (25.4 cm) wide. The center of each column is the 9th dc post of that column.
– Rows: The 40 rows divide into 4 bands of 10 rows, each 6.25 in (15.9 cm) deep.
Placing each dragonfly:
– Line up the body with the center dc post of its column.
– Put the head in row 2 of its band and the tail tip in row 9 or 10.
– With an 8 in (20.3 cm) wingspan in a 10 in (25.4 cm) column, you get 1 in (2.5 cm) of clear mesh at each wing tip. That leaves 2 in (5.1 cm) between neighboring dragonflies.
Method:
1. Pin all twelve dragonflies in place first, then step back and check the grid.
2. Using matching yarn and a tapestry needle, whipstitch the outer edge of each wing rim to the mesh bars it crosses. Catch only the back loop of the rim so the stitches stay hidden.
3. Tack the body to the center dc post every 3 rounds.
Tension: Sew loosely, so the mesh stays flat and square under each dragonfly. If the mesh puckers, unpick and resew with more slack.
Size checkpoint: After sewing, the panel should still measure 30 in × 25 in (76.2 cm × 63.5 cm).
Border
Border gauge: 24 sc = 5 in (12.7 cm), which equals 8 meshes. Each mesh therefore takes exactly 3 sc: 1 into the dc and 2 into the ch-2 sp. That keeps every edge flat.
Bottom Edge (scallops)
Continue from Row 40 with cream.
Row 1: Ch 1, turn. Sc in each dc and 2 sc in each ch-2 sp.
Count: 49 + 96 = 145 sc.
Row 2:
1. Ch 1, turn. Sc in the first sc.
2. Ch 2, sk 2 sc, dc in next sc. Then (ch 2, sk 2 sc, dc in next sc) 6 times. Ch 2, sk 2 sc, sc in next sc.
3. Rep from * 6 times in total.
Count: 42 dc, 7 sc and 48 ch-2 sps (145 sts).
Row 3:
1. Ch 1, turn. Sc in the first sc.
2. *Ch 1, sk the end sp. Work these groups, with ch 1 between them and after the last one:
– (hdc, ch 1, hdc) in the 1st inner sp
– (dc, ch 1, dc) in the 2nd
– (tr, ch 2, tr) in the 3rd
– (tr, ch 2, tr) in the 4th
– (dc, ch 1, dc) in the 5th
– (hdc, ch 1, hdc) in the 6th
Then sk the end sp and sc in the next sc.*
3. Rep from * 6 times in total and fasten off.
Count: 6 scallops, each with 12 posts and 7 ch-1 connectors, plus 7 valley sc in total.
Why the math works: 145 = 6 × 24 + 1. Each scallop uses 24 sts, which is exactly 8 meshes or 5 in (12.7 cm), so two scallops sit under each dragonfly column.
Top Edge and Tabs
Top edge: With the RS facing, join cream at the top right corner. Work along the foundation chain: 1 sc at the base of each dc and 2 sc in each ch-2 sp.
Count: 145 sc.
Tabs:
1. Work the first tab over sts 1–9. Ch 1, turn, sc in each of 9 sts. Repeat for 30 rows in total. The strip measures 6.25 in (15.9 cm) long and 1.875 in (4.8 cm) wide.
2. Fasten off, leaving a long tail.
3. Skip 8 sts, join in the next st, and repeat Step 1.
4. Continue until you have made 9 tabs.
Why the math works: 9 tabs × 9 sts + 8 gaps × 8 sts = 81 + 64 = 145. The first tab starts at stitch 1 and the last ends at stitch 145, so the tabs are spaced evenly from edge to edge.
To finish the tabs, fold each one to the back and sew its last row just below the top edge with a 0.25 in (0.6 cm) overlap. This makes a 3 in (7.6 cm) loop.
Side Edges
With the RS facing, work sc down each side in this order:
– 1 sc in the top edge row end
– 3 sc in each mesh row end (120 sc)
– 1 sc in the end of bottom Row 1, 2 sc in the end of Row 2 and 1 sc in the end of Row 3
Count: 125 sc per side.
The sides use the same 3-sc-per-mesh rule as the top and bottom, so they lie flat. This edging adds 0.25 in (0.6 cm) on each side, so the finished width is 30.5 in (77.5 cm).
Final Blocking
- Block the appliqués first. Pin each wing open to its listed size, pinning the center of every oval cell open. Spray until damp and let dry fully.
- After sewing them on, lay the curtain face down on the mats.
- Pin the corners to 30.5 in × 27 in (77.5 cm × 68.6 cm).
- Pin along each edge every 2 in (5.1 cm), keeping the mesh rows straight.
- Pin each scallop peak and valley so all six match.
- Spray evenly until damp. Do not soak.
- Let it dry completely, at least 24 hours, before unpinning.
- Flatten the tab loops by hand and let them air dry.
Final Quality-Control Checklist
- [ ] The panel has 48 meshes × 40 rows, and every row has 145 sts
- [ ] The body measures 30 in × 25 in (76.2 cm × 63.5 cm) before the border
- [ ] There are 6 matching scallops, each 5 in (12.7 cm) wide
- [ ] There are 9 evenly spaced tabs, each forming a 3 in (7.6 cm) loop
- [ ] Each side edge has 125 sc
- [ ] There are 12 dragonflies, 6 blue and 6 green, in checkerboard order
- [ ] Every wing rim is complete (80 sc on upper wings, 72 sc on lower wings)
- [ ] The tail has 6 visible segment ridges
- [ ] There is no puckering under the appliqués
- [ ] All ends are woven in along mesh posts
Troubleshooting
- Meshes are tall rectangles: Your dc are too tall. Pull up a shorter loop, or use ch 1 for the turning chain plus a tighter hdc-height dc.
- Panel is narrower than 30 in (76.2 cm): Your chains are too tight. Chain with a hook one size larger, then switch back.
- Wing rim ruffles: Work 2 sc instead of 3 in two of the ch-3 loops on each side.
- Wing rim cups: Add 1 sc to the tip loops on each side.
- Scallops flip upward: Block the scallops harder, or use 2 dc instead of 2 tr in the center groups.
- Tail curls: Steam lightly and pin it straight, then tack it to the mesh more often.
- Dragonflies sit off-center: Count the dc posts again from the side edge before you pin.
Care
Hand wash in cool water with mild soap, press out the water in a towel, and reshape it flat to dry. Avoid tumble drying, which can distort the mesh and the wing cells.
Final Notes
Everything follows from the gauge:
– 8 meshes = 5 in (12.7 cm)
– 48 meshes × 40 rows = 30 in × 25 in (76.2 cm × 63.5 cm)
– 145 border sts = 6 scallops of 24 sts and 9 tabs of 9 sts
– Side edging adds 0.25 in (0.6 cm) on each side, for a width of 30.5 in (77.5 cm)
– Scallops and the top edge bring the length to 27 in (68.6 cm)
– Each 16-mesh column holds one 8 in (20.3 cm) dragonfly with breathing room around it
Check your swatch first, and the rest falls into place.
Happy crocheting!