

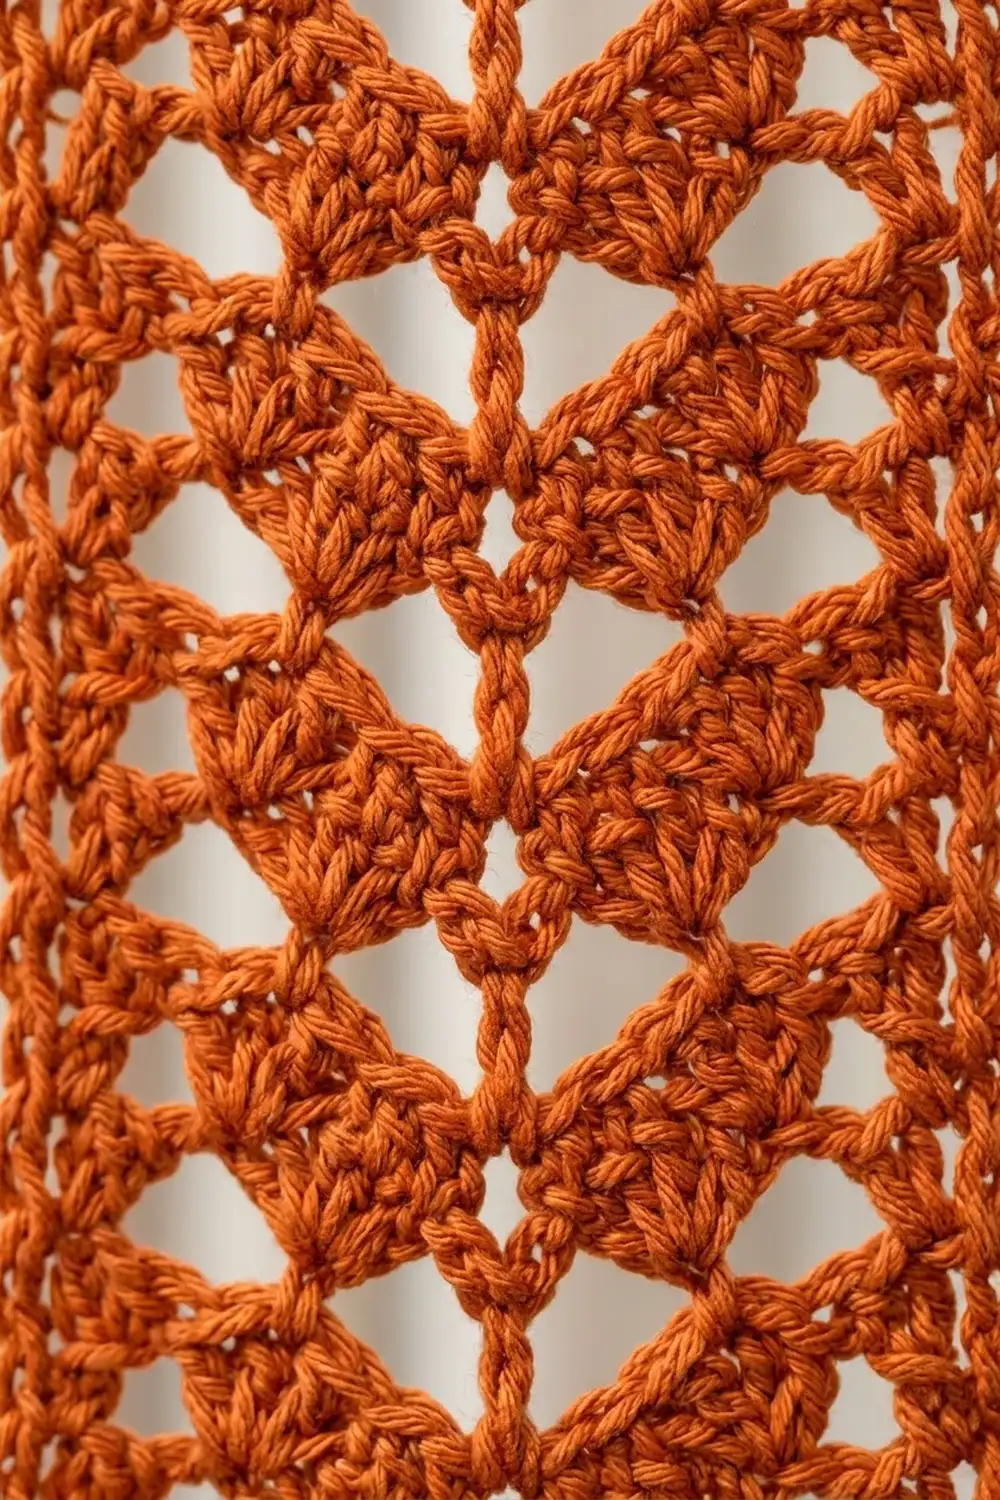
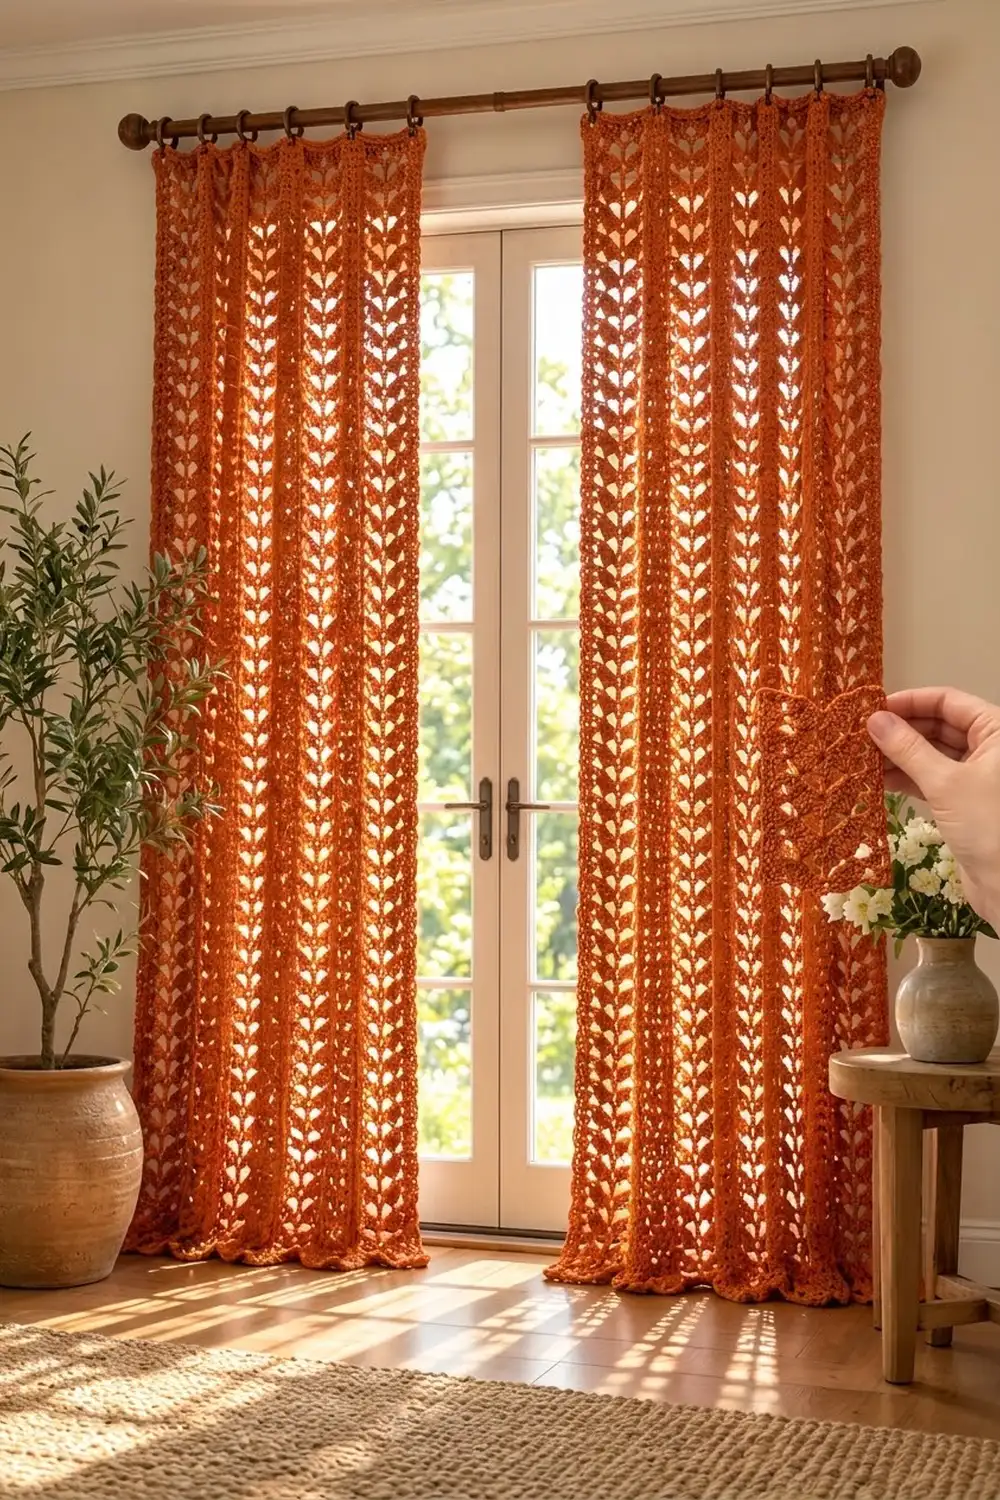
These are tall, warm curtain panels in one rich rust shade. Each panel is a single piece with vertical lace columns: fans stacked along a slim center spine, and solid ribs between the columns. When daylight comes through, the openings show up as rows of small V-shaped windows.
The look is boho and a little retro, but the structure is simple. Every pattern row is the same, so after the first few rows you can work from memory. The pattern uses US crochet terms throughout.
Each finished panel measures 40¼ in (102.2 cm) wide by 84 in (213.4 cm) long. You make two identical panels to dress one window or door.
Each panel starts with a foundation chain and one solid row of double crochet. Next comes a setup row that lays out the columns, then the repeating fan row, and a solid closing row at the top. A two-round single-crochet border squares everything up, and the panels hang from clip rings.
Finished Size and Construction
- Finished size (per panel): 40¼ in × 84 in (102.2 cm × 213.4 cm)
- Skill level: Easy–Intermediate
- Terminology: US crochet terms
- Yarn weight: Worsted (#4), cotton or cotton blend
- Hook: 5.0 mm (H-8)
- Number of pieces: 2 identical panels, not joined to each other
- Layout: 2 panels hung side by side on one rod
- Piece size before border: 39¼ in × 83 in (99.7 cm × 210.8 cm)
- Border depth: ½ in (1.3 cm) on every edge
- Size after border: 40¼ in × 84 in (102.2 cm × 213.4 cm)
Materials
Yarn: Choose a smooth worsted-weight cotton or cotton-blend yarn. Cotton drapes well, shows the stitches clearly and holds its shape when it hangs. Avoid fuzzy or highly elastic acrylic, which hides the lace and stretches over time.
- Rust / burnt orange (only color): about 950 g / 1,650 m per panel, so 1,900 g / 3,300 m for the pair
These quantities include a margin of about 10% for the gauge swatch, small tension differences and weaving in ends. Buy all of the yarn from one dye lot. On a large curtain, even a slight change in shade will show in the light.
Tools:
- 5.0 mm (H-8) crochet hook
- Tapestry needle
- Stitch markers (at least 8)
- Measuring tape
- Rust-proof pins and a large blocking surface (a clean floor with towels works)
- Spray bottle
- 16 curtain clip rings (8 per panel)
Abbreviations (US Terms)
- ch – chain
- sk – skip
- sl st – slip stitch
- sc – single crochet
- dc – double crochet
- sp – space
- st(s) – stitch(es)
- RS / WS – right side / wrong side
- rep – repeat
Special stitch – Fan: Work 5 dc into the same stitch.
Pattern terms:
- Rib: 3 dc worked one per stitch. This makes the solid vertical stripes.
- Spine: the single dc in the middle of each lace column.
- Column: 19 sts made of ch 2, 5-dc group, ch 2, spine dc, ch 2, 5-dc group, ch 2.
Stitch counting: Each chain counts as a stitch. Every row has 157 sts: 101 dc and 56 ch.
Gauge and Checkpoints
Pattern gauge: 16 sts = 4 in (10.2 cm) wide, and 2 rows = 1 in (2.5 cm) tall, after blocking.
One rib plus one column is 22 sts and measures 5½ in (14.0 cm).
Test one piece first. Before you start a full panel, make the swatch below. It is one lace column with a rib on each side, the same as the test strip in the photo.
- Ch 27.
- Row 1: Dc in 4th ch from hook and in each ch across. Turn. (25 dc)
- Row 2: Work the setup row (below) with 1 column repeat.
- Rows 3–20: Work the pattern row (below).
- Block the swatch.
Swatch checkpoints:
- The swatch should measure 6¼ in (15.9 cm) wide.
- 20 rows should measure 10 in (25.4 cm) tall.
- Each 3-dc rib should be ¾ in (1.9 cm) wide.
- Each 19-st column should be 4¾ in (12.1 cm) wide.
If your swatch is off:
- Too big: go down one hook size, to 4.5 mm (US 7).
- Too small: go up one hook size, to 5.5 mm (I-9).
- Width right but rows too short: pull up a slightly taller loop on each dc. You can also try a hook with a longer throat.
The checkpoints during the panel are listed in each section below.
Panel Pattern (Make 2)
Foundation: Ch 159.
Row 1 (RS)
Dc in 4th ch from hook and in each ch across. The 3 skipped chains count as the first dc. Turn.
(157 dc)
Checkpoint: Row 1 should measure 39¼ in (99.7 cm) wide.
Row 2 (Setup Row)
Ch 3 (counts as dc throughout). Dc in next 2 dc. This is the first rib.
*Ch 2, sk 2 dc, dc in next 5 dc, ch 2, sk 2 dc, dc in next dc (spine), ch 2, sk 2 dc, dc in next 5 dc, ch 2, sk 2 dc, dc in next 3 dc (rib).*
Rep from * to * 6 more times, for 7 columns in total. Work the last dc of the row into the top of the turning ch. Turn.
(157 sts: 101 dc + 56 ch)
Each repeat uses exactly 22 sts of Row 1 (2 + 5 + 2 + 1 + 2 + 5 + 2 + 3) and makes 22 sts. So the count is: 3 (first rib) + 7 × 22 = 157 sts.
Place a marker in each spine dc. This helps you keep track of the columns while the work is still small.
Row 3 (Pattern Row)
Ch 3, dc in next 2 dc (rib).
*Ch 2, sk ch-2 sp and next 2 dc. Fan in next dc (the 3rd, or center, dc of the 5-dc group). Ch 2, sk next 2 dc and ch-2 sp. Dc in spine dc. Ch 2, sk ch-2 sp and next 2 dc. Fan in next dc. Ch 2, sk next 2 dc and ch-2 sp. Dc in next 3 dc (rib).*
Rep from * to * 6 more times. Work the last dc into the top of the turning ch. Turn.
(157 sts: 101 dc + 56 ch)
Each fan sits on the center dc of the group below it, and its 5 dc fan out over the space of the 5-dc group. That is why the stitch count stays the same.
The ch-2 spaces on each side of the spine line up row after row. This is what creates the V-shaped openings. The fans stack into triangular blocks with the point facing down.
Rows 4–165
Rep Row 3, ending with a WS row.
(157 sts in every row)
Checkpoints:
- After Row 20: 10 in (25.4 cm) tall
- After Row 100: 50 in (127.0 cm) tall
- After Row 165: 82½ in (209.6 cm) tall
At each checkpoint, check that the width is still 39¼ in (99.7 cm). If the width has drifted more than ½ in (1.3 cm), count the stitches in your last row before going on.
Row 166 (Closing Row)
Ch 3, dc in next 2 dc.
*2 dc in ch-2 sp, dc in each of next 5 dc, 2 dc in ch-2 sp, dc in spine dc, 2 dc in ch-2 sp, dc in each of next 5 dc, 2 dc in ch-2 sp, dc in next 3 dc.*
Rep from * to * 6 more times. Do not fasten off.
(157 dc)
Per repeat: 2 + 5 + 2 + 1 + 2 + 5 + 2 + 3 = 22 dc, so 3 + 7 × 22 = 157 dc. This solid row gives the clip rings a firm edge to grip.
Checkpoint: The panel is now 166 rows and measures 39¼ in × 83 in (99.7 cm × 210.8 cm).
Make All Pieces
Make 2 panels in rust / burnt orange, using about 950 g / 1,650 m of yarn for each.
Both panels are identical and reversible, so either one can go on the left. Layout on the rod (seen from inside the room):
[ Panel A ]   (window / door opening)   [ Panel B ]
 7 columns                                7 columns
 157 sts                                  157 sts
Joining
The panels are not joined to each other or to anything else. Each one hangs on its own from clip rings, so there is no seam to work.
The only “joining” is attaching the 8 clip rings to the top of each panel. Attach the rings to the rib stitches only, so the weight of the curtain hangs on solid fabric and never pulls on the lace. You will place them after the border is done (see Final Blocking, step 7).
Size checkpoint: before you start the border, lay the two panels on top of each other. Their lengths should match within ½ in (1.3 cm). If they don’t, add or remove pattern rows before Row 166 so they match.
Border
Border gauge: 4 sc = 1 in (2.5 cm) on every edge. This matches the panel exactly:
- Top and bottom edges: 157 sts over 39¼ in = 4 sts per inch.
- Side edges: dc rows are 2 per inch, so 2 sc per row-end = 4 sc per inch.
When the border gauge matches the panel, the edges stay flat. They don’t ruffle and they don’t pull in.
Round 1
Ch 1, then turn so the RS faces you.
- Top edge: 3 sc in the first st (corner). Sc in each of the next 155 sts. 3 sc in the last st (corner).
- First side: Work 2 sc into the end of each of the 166 rows. (332 sc)
- Bottom edge: Work into the free loops of the foundation chain. 3 sc in the first ch (corner). Sc in each of the next 155 ch. 3 sc in the last ch (corner).
- Second side: Work 2 sc into the end of each row. (332 sc)
- Sl st to the first sc to join.
Counts per side:
- Top: 3 + 155 + 3 = 161
- Bottom: 161
- Each side: 332 (between the corner groups)
Total: 161 + 161 + 332 + 332 = 986 sc
Round 2
Ch 1. Sc in each sc around, working 3 sc in the center sc of each 3-sc corner group. Sl st to the first sc to join. Fasten off.
This is a conversion round: 986 sts worked one per stitch, plus 8 extra sts (2 at each of the 4 corners), for 994 sc.
Counts per side:
- Top: 5 + 155 + 5 = 165
- Bottom: 165
- Each side: 332
Check: 165 + 165 + 332 + 332 = 994 ✓
Why the math works: each round of sc adds ¼ in (0.6 cm) to every edge. Two rounds add ½ in (1.3 cm) per edge, which is 1 in (2.5 cm) in total for each direction:
- Width: 39¼ in + 1 in = 40¼ in (102.2 cm)
- Length: 83 in + 1 in = 84 in (213.4 cm)
The corner increases are needed only to turn the corner. They do not change the count along the straight part of any edge.
Final Blocking
- Weave in all ends along the ribs, where they won’t show against the light.
- Soak one panel in cool water with a little wool wash for 15 minutes. Gently press out the water. Do not wring.
- Roll the panel in towels to remove excess water.
- Lay it flat on a clean floor covered with towels. Shape it to 40¼ in × 84 in (102.2 cm × 213.4 cm).
- Pin both long edges straight first, then the top and bottom. Check that each rib runs in a straight vertical line.
- Open each fan and V-opening with your fingers. Let the panel dry completely.
- Clip one ring to the center stitch of each of the 8 ribs on the top edge. The ribs are 5½ in (14.0 cm) apart, so the rings will be evenly spaced.
- Repeat steps 2–7 for the second panel.
Cotton lace often grows 1–2 in (2.5–5.1 cm) longer once it hangs. Let the panels hang for 2 days before you trim them to fit or adjust the rod height.
Final Quality-Control Checklist
- [ ] Each panel has 157 sts in every row, including Row 166.
- [ ] Each panel has 7 lace columns and 8 ribs.
- [ ] Every fan is centered on the middle dc of the group below it.
- [ ] Each spine runs in a straight, unbroken line.
- [ ] Border Round 2 has 994 sc, with 165 on the top and bottom and 332 on each side.
- [ ] Each panel measures 40¼ in × 84 in (102.2 cm × 213.4 cm) after blocking.
- [ ] Both panels are the same length within ½ in (1.3 cm).
- [ ] The rings are clipped to rib stitches only, 5½ in (14.0 cm) apart.
- [ ] All ends are woven in and none show on either side.
Troubleshooting
Columns lean to one side.
You are probably working the fan into the 2nd or 4th dc of the group instead of the 3rd. Count “skip 2, fan in next” every time.
Stitch count grows over several rows.
Usually this means a dc was worked into the turning chain at the start of a row as well as at the end. Remember that the ch 3 counts as the first dc.
The edges wave after the border.
Your sc are looser than the panel. Redo the border with a hook one size smaller, keeping the same counts.
The edges cup inward.
Your sc are tighter than the panel. Redo the border with a hook one size larger.
The panel is narrower than 39¼ in (99.7 cm).
Your ch-2 spaces are too tight. Make each chain the same height as a loose dc loop.
The two panels are different lengths.
Your tension changed between the panels. Fix this by blocking the shorter panel to the longer length. If the difference is more than 1 in (2.5 cm), add rows to the shorter one before its closing row.
Care
Hand wash or machine wash cool on a gentle cycle in a mesh laundry bag. Dry flat, then rehang while the panels are still slightly damp so they settle straight.
Final Notes
The whole curtain depends on one measurement chain:
- 16 sts = 4 in (10.2 cm), and 2 rows = 1 in (2.5 cm)
- So each 22-st rib-and-column repeat is 5½ in (14.0 cm)
- 7 repeats plus a final rib = 157 sts = 39¼ in (99.7 cm) wide
- 166 rows = 83 in (210.8 cm) long
- 2 sc border rounds add ½ in (1.3 cm) on each edge
- Finished panel: 40¼ in × 84 in (102.2 cm × 213.4 cm)
If your swatch matches the gauge, every number after it will work out too. Make two panels, block them to match, clip them to the rings, and enjoy the light coming through.
Happy crocheting!