
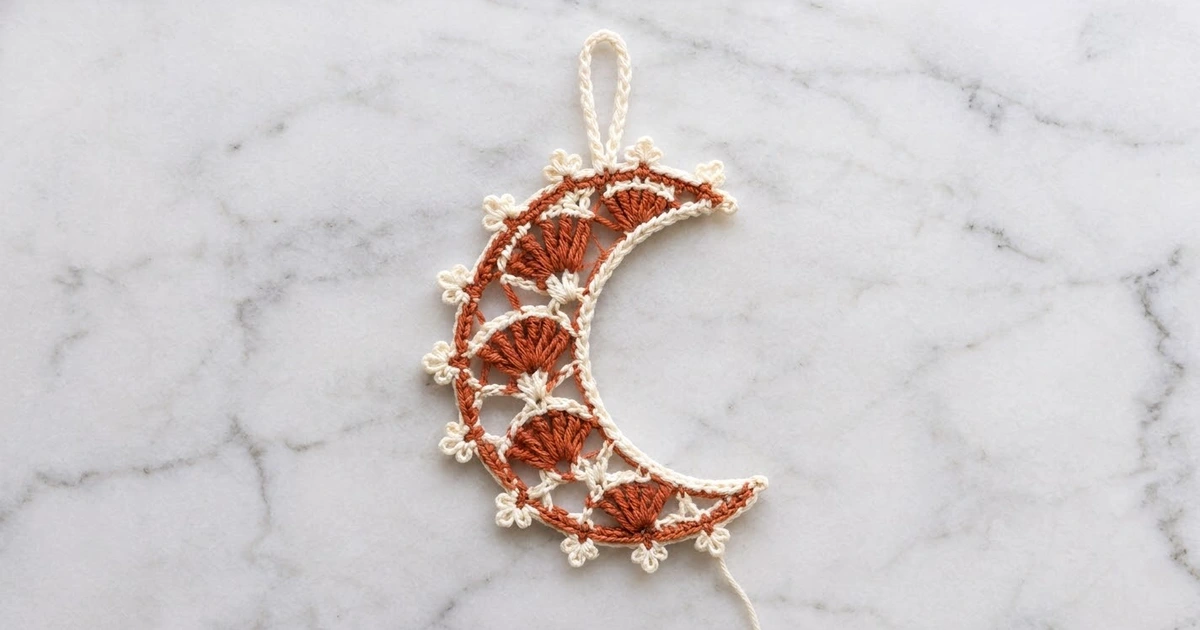
The Ember Moon is a small lace crescent with a warm, vintage look. Five rust shell fans sit inside the curve, each capped with cream. A rust mesh band runs around the outside, and cream trefoil picots finish the edge. It looks good hanging from a tree branch, a window latch, or a gift package.
It uses two colors, rust and cream, and both are part of the design. Rust gives the fans and outer band some weight. Cream outlines the inner curve, frames each fan, and forms the picot edge, so the ornament reads clearly against dark greenery.
The finished crescent measures 5 in (12.7 cm) tall and 3 in (7.6 cm) wide, plus a 2 in (5.1 cm) hanging loop. The pattern uses US crochet terms throughout.
You make the ornament in short rows from tip to tip. It starts with a single-crochet spine for the inner curve. The fans grow outward from that spine, a mesh row and a solid row build the outer curve, and one border round adds the picots and outlines the inner edge. The crescent shape comes from the outer edge having many more stitches than the inner edge, and blocking sets the curve.
Finished Size and Construction
- Finished size: 5 in (12.7 cm) tall x 3 in (7.6 cm) wide, without the loop
- Skill level: Easy intermediate
- Terminology: US crochet terms
- Yarn weight: Sport weight (#2) cotton or cotton blend
- Hook: 3.25 mm (US D/3)
- Number of pieces: 1 (a single crescent)
- Layout: One stand-alone ornament, no joining
- Piece size before border: 4.5 in (11.4 cm) tall x 2.5 in (6.4 cm) wide
- Band thickness at center: 1.3 in (3.3 cm) before the border, 1.7 in (4.3 cm) after
- Border depth: 0.25 in (0.6 cm) on the outer curve and tips, 0.15 in (0.4 cm) on the inner curve
Materials
Use a smooth, mercerized or matte sport-weight cotton. Cotton holds the fans crisply and blocks into a firm crescent. Avoid fuzzy or very stretchy acrylic, which blurs the picots and lets the curve sag.
- Color A, rust/terracotta: 6 g, about 18 m (19.7 yd)
- Color B, cream: 6 g, about 18 m (19.7 yd)
These amounts include a margin for gauge swatching and weaving in ends. One ornament uses a little less than this.
Tools:
- 3.25 mm (US D/3) crochet hook
- Tapestry needle
- Scissors
- Stitch marker
- Blocking mat or foam board
- Rustproof pins
- Spray bottle with water
- Optional: diluted fabric stiffener
Abbreviations (US Terms)
- ch – chain
- sl st – slip stitch
- sc – single crochet
- dc – double crochet
- sk – skip
- sp – space
- st(s) – stitch(es)
- RS – right side
Special stitches
- V-st (V-stitch): (dc, ch 2, dc) in the same stitch.
- Fan: 7 dc in the same stitch.
- tp (trefoil picot): sc in the stitch, then [ch 3, sl st in the same stitch] 3 times. You get three small loops coming from one base stitch. The tp counts as 1 stitch.
- Color change: work the last stitch of the row until 2 loops remain on the hook, then yarn over with the new color and pull through.
Gauge and Checkpoints
Gauge: 12 sc and 14 rows = 2 in (5.1 cm), worked in Color A on a 3.25 mm hook.
Make one test ornament before you make a set. It uses very little yarn and tells you more than a flat swatch.
Checkpoints:
- After Row 1: the 31-sc spine measures 5.2 in (13.2 cm) laid straight.
- After Row 2: each fan stands about 0.8 in (2.0 cm) tall.
- After Row 5: the crescent measures about 4.5 in (11.4 cm) tall x 2.5 in (6.4 cm) wide when gently curved, with the band 1.3 in (3.3 cm) thick at the center.
- After the border: 5 in (12.7 cm) tall x 3 in (7.6 cm) wide.
If your piece is too big: go down to a 3.0 mm hook, or check that your fans aren’t loose at the top.
If your piece is too small: go up to a 3.5 mm (US E/4) hook.
Change the hook, not the stitch counts. The fan and mesh repeats depend on exact counts.
Pattern
Row 1: Inner Spine (Color A)
With A, ch 32.
Row 1 (RS): Sc in the 2nd ch from the hook and in each ch across. Turn. (31 sc)
This row becomes the inner curve of the moon. Keep the foundation chain fairly loose, because the border round works into its free loops later.
Row 2: Shell Fans (Color A)
Row 2: Ch 1. Sc in the first sc. [Ch 2, sk 2 sts, Fan in the next st, ch 2, sk 2 sts, sc in the next st] 5 times. On the last sc, change to B. Turn.
Count: 6 sc, 5 Fans (35 dc), and 10 ch-2 spaces.
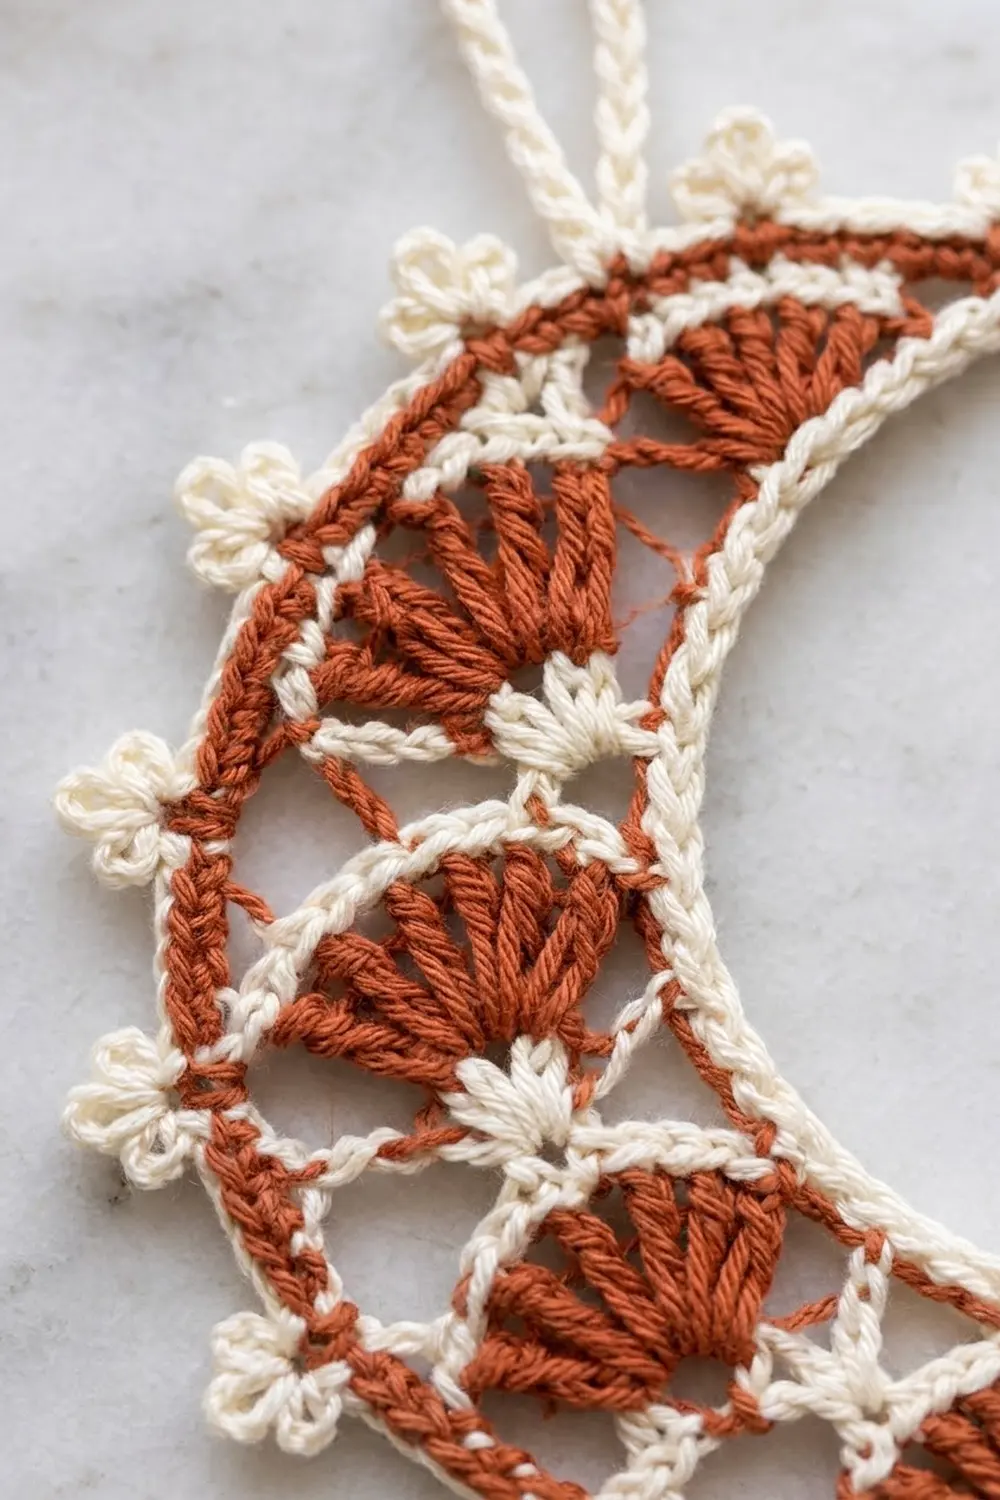
The fans sit on stitches 4, 10, 16, 22, and 28, and the sc on stitches 1, 7, 13, 19, 25, and 31. The repeat is 6 stitches, and 1 + (5 x 6) = 31, so the row ends exactly on the last stitch. The fans already make the work start to curl. That’s correct.
Row 3: Fan Caps and V-Stitches (Color B)
Row 3: Ch 1. Sc in the first sc. [Ch 2, sk the ch-2 sp, sc in each of the next 7 dc, ch 2, sk the ch-2 sp, V-st in the next sc] 4 times. Ch 2, sk the ch-2 sp, sc in each of the next 7 dc, ch 2, sk the ch-2 sp, sc in the last sc. On the last sc, change to A. Turn.
Count: 37 sc (1 + 35 + 1), 4 V-sts, and 10 bridging ch-2 spaces.
The cream sc across each fan top forms the cap. The V-sts form the small cream bursts between the fans.
Row 4: Rust Mesh Lattice (Color A)
Row 4: Ch 1. Sc in the first sc.
Then work this 4 times: ch 3, sk the ch-2 sp and the next 3 sc, sc in the next sc (the center of the fan cap), ch 3, sk the next 3 sc and the ch-2 sp, sc in the ch-2 sp of the next V-st.
Then finish the row: ch 3, sk the ch-2 sp and the next 3 sc, sc in the next sc, ch 3, sk the next 3 sc and the ch-2 sp, sc in the last sc. Turn.
Count: 11 sc and 10 ch-3 spaces.
The 11 sc are: 1 at the start, 2 in each of the 4 repeats (8), 1 at the center of the 5th fan, and 1 at the end. Every fan cap gets one center anchor, and every V-st gets one anchor.
Row 5: Solid Outer Band (Color A)
Row 5: Ch 1. Sc in the first sc. [4 sc in the next ch-3 sp, sc in the next sc] 10 times. On the last sc, change to B. Turn.
Count: 51 sc, worked as (1) + (10 x 5).
This row works 1 sc into each of the 11 existing sc and adds 40 sc in the spaces: 11 + 40 = 51. Working 4 sc into each 3-ch space adds fullness, which pushes the outer edge into a wide curve.
Checkpoint: 4.5 in (11.4 cm) tall x 2.5 in (6.4 cm) wide when eased into a crescent.
Border
Border gauge: the trefoil edge adds 0.25 in (0.6 cm) on the outer curve and at each tip. The inner sc outline adds 0.15 in (0.4 cm).
Round 6 (B): This round runs all the way around, starting on the outer curve.
Outer curve: tp in the first sc. [Sc in each of the next 4 sc, tp in the next sc] 10 times. That’s 51 stitches: 11 tp and 40 sc. One tp lands at each tip.
First tip: Rotate the work. Work 6 sc evenly across the row ends of Rows 5 to 1:
- 1 sc in Row 5
- 1 sc in Row 4
- 1 sc in Row 3
- 2 sc in the tall Row 2
- 1 sc in Row 1
Inner curve: Sc in each of the 31 free loops of the foundation chain. That’s 31 sc.
Second tip: Work 6 sc evenly across the row ends of Rows 1 to 5, using the same spacing as the first tip in reverse.
Sl st to the base sc of the first tp. Fasten off.
Round 6 total: 94 base stitches: 51 on the outer curve, plus 6 + 31 + 6 = 43 on the tips and inner curve.
Why the math works:
- The tp repeat is 5 stitches (1 tp + 4 sc). Starting with a tp and adding 10 repeats gives 1 + 50 = 51, which is exactly the number of stitches in Row 5. So the picots line up evenly and both tips get a matching tp.
- The inner edge takes exactly one sc per foundation loop, so it stays smooth and doesn’t ruffle or pull.
- The tip edges get one sc per short row and two for the dc row, matching each row’s height.
Hanging Loop (Color B)
- Count the tp clusters from the upper tip. Join B with a sl st into the base sc of the 3rd tp, working behind the picots.
- Ch 30. Sl st in the same base stitch to close the loop.
- Turn. Sl st in the back bump of each of the 30 ch.
- Sl st into the base stitch again. Fasten off.
The loop stands about 2 in (5.1 cm) tall and has a firm, rope-like finish.
Final Blocking
- Weave in all ends through same-color stitches. Rust tails go into the rust band, and cream tails go into the cream edge.
- Soak the ornament in cool water for 5 minutes. Press the water out in a towel without wringing.
- Lay it RS up on the blocking mat. Ease it into a crescent so the tips are 5 in (12.7 cm) apart and the widest point is 3 in (7.6 cm).
- Pin each tp so its three loops spread into a trefoil.
- Pin the inner curve into a smooth arc. Check that the band measures 1.7 in (4.3 cm) at the center.
- Spread each fan so its 7 dc fan out evenly.
- Optional: brush on diluted fabric stiffener for a crisp ornament.
- Let it dry completely before unpinning. Hang the loop straight while it finishes drying.
Final Quality-Control Checklist
- [ ] There are 5 rust fans, each with 7 dc, all opening toward the outer curve
- [ ] There are 4 cream V-sts, one between each pair of fans
- [ ] Row 4 has 10 rust mesh spaces, each anchored at a fan center or V-st
- [ ] There are 51 outer stitches with 11 trefoil picots, one at each tip
- [ ] The inner curve is a smooth cream sc line with no gaps
- [ ] Size is 5 in (12.7 cm) x 3 in (7.6 cm)
- [ ] The loop is secure, about 2 in (5.1 cm) tall, and the ornament hangs straight
- [ ] All ends are woven in invisibly
Troubleshooting
- The piece stays flat and won’t curve: your fans are too short or Row 5 is too tight. Check that Row 5 has 4 sc in each ch-3 space, then block firmly.
- The outer edge ruffles: the Row 5 sc are too loose. Go down half a hook size for Rows 4 and 5.
- The inner edge puckers: the foundation chain is too tight. Redo it one hook size larger.
- The picots look floppy: make each ch-3 snug, and pin all three loops during blocking.
- The color change shows a bump: always change colors on the final yarn-over of the last stitch, not on the turning chain.
- The ornament hangs tilted: move the loop one stitch toward the tip that hangs too low.
Care
Hand wash in cool water, press dry in a towel, and reshape flat to dry. Store the ornaments flat between tissue paper so the picots and curve stay crisp.
Final Notes
The measurements build like this:
- The 31-sc spine measures 5.2 in (13.2 cm).
- Five fans and the mesh rows grow that into a 4.5 in x 2.5 in (11.4 cm x 6.4 cm) crescent.
- The 51-stitch trefoil border brings it to 5 in x 3 in (12.7 cm x 7.6 cm).
- Blocking sets the curve.
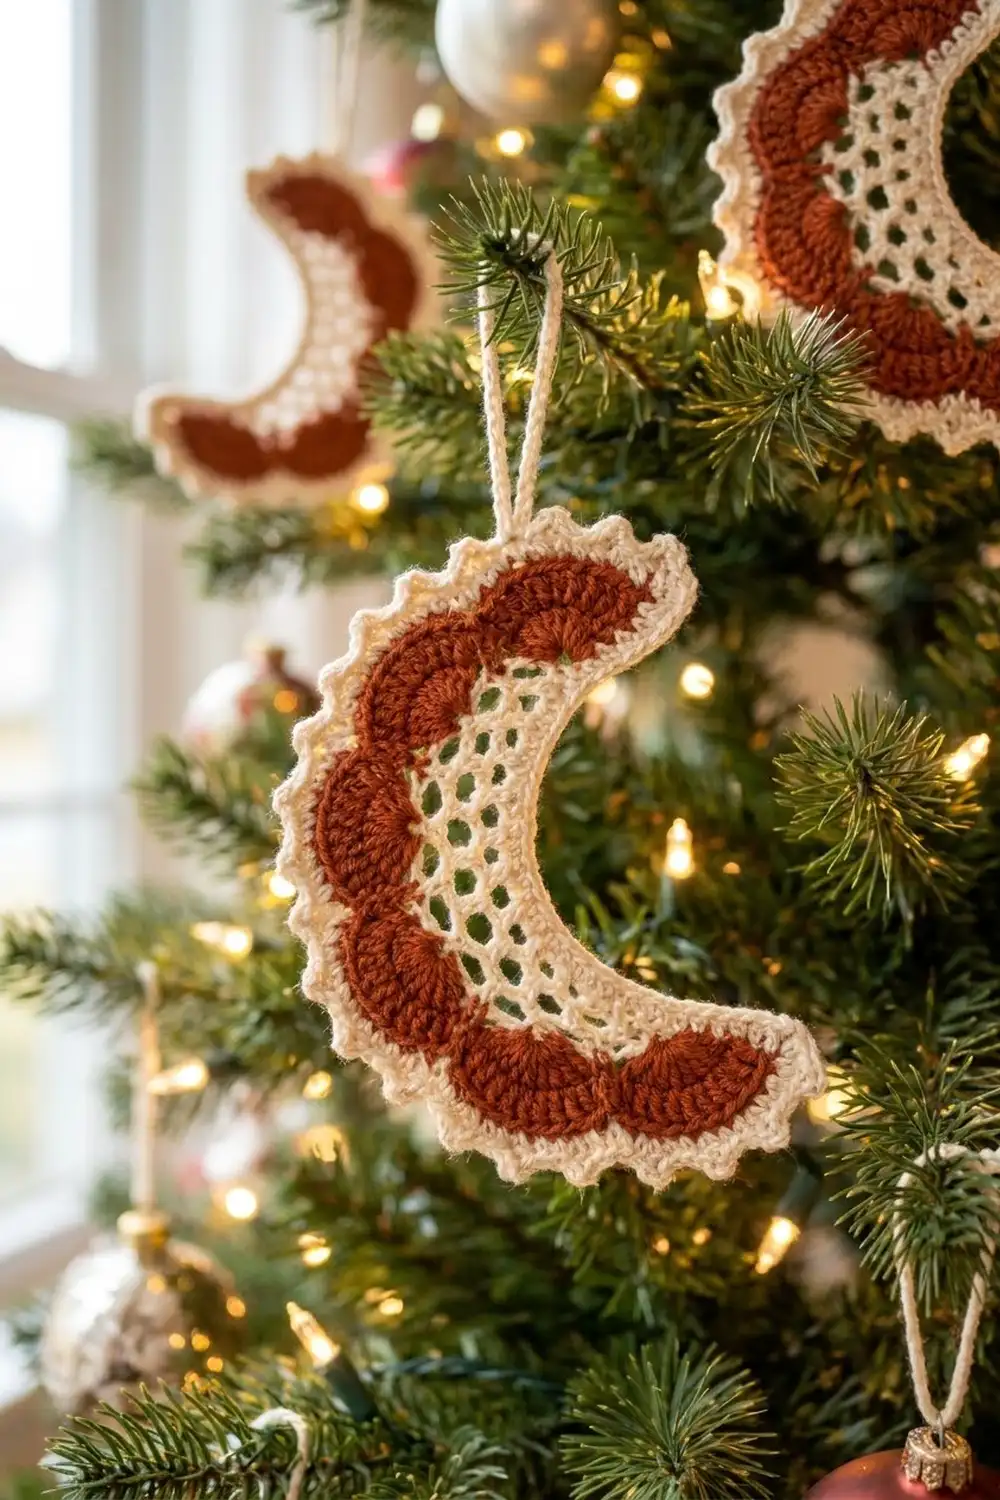
If your checkpoints match, every ornament in your set will be the same size. Make a few in the same colors for a tree, or swap the rust for deep green or navy.
Happy crocheting!