

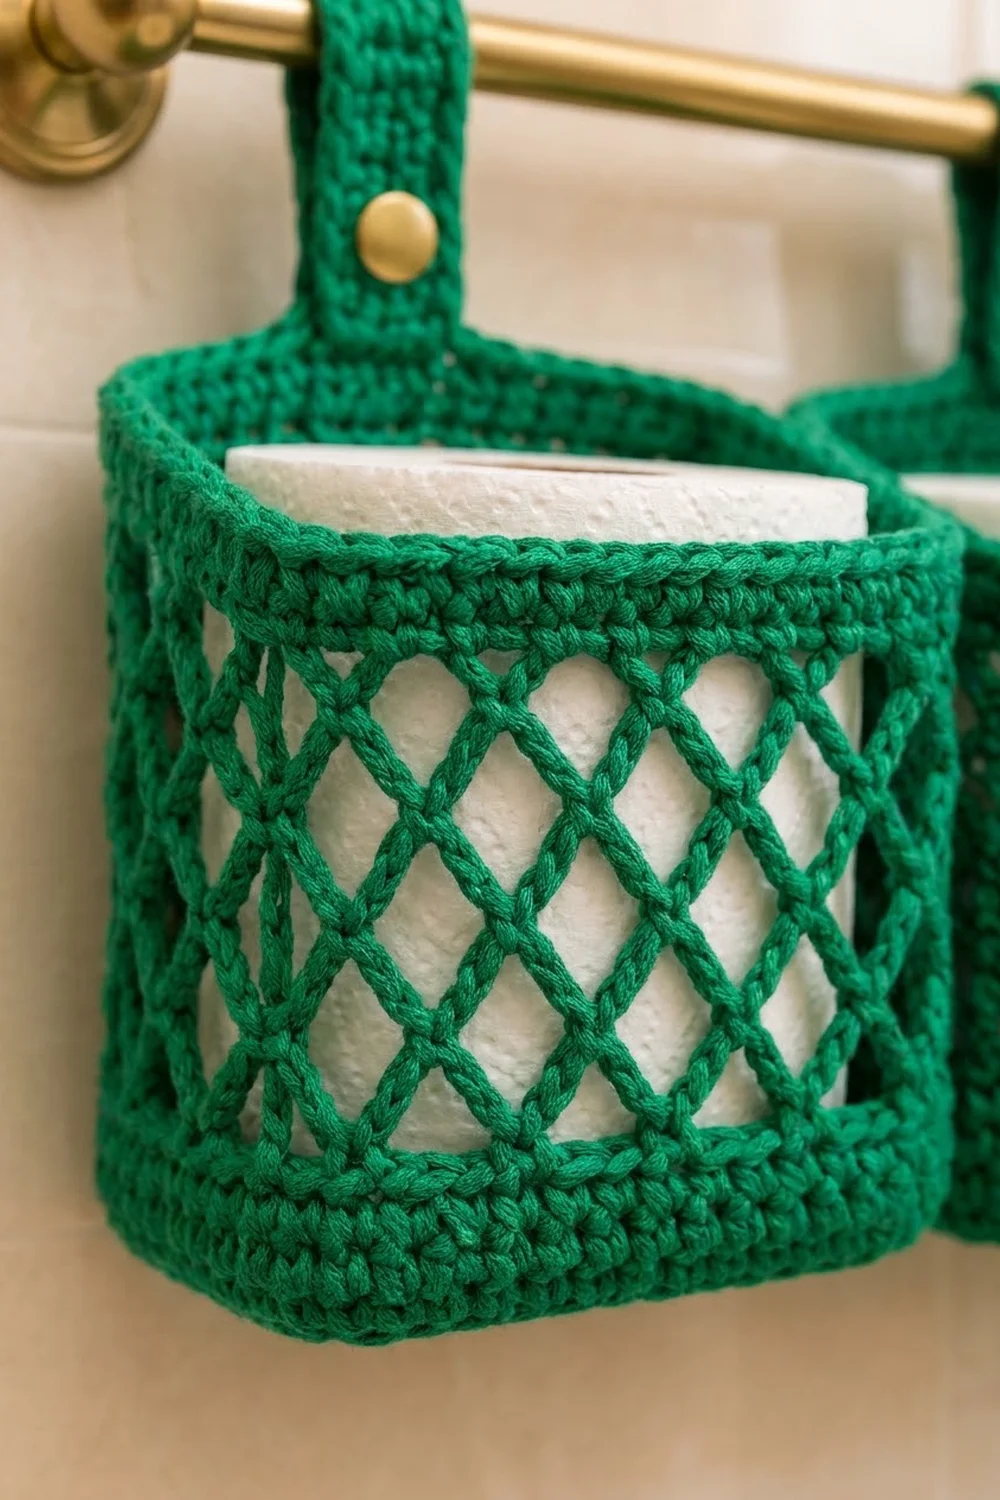
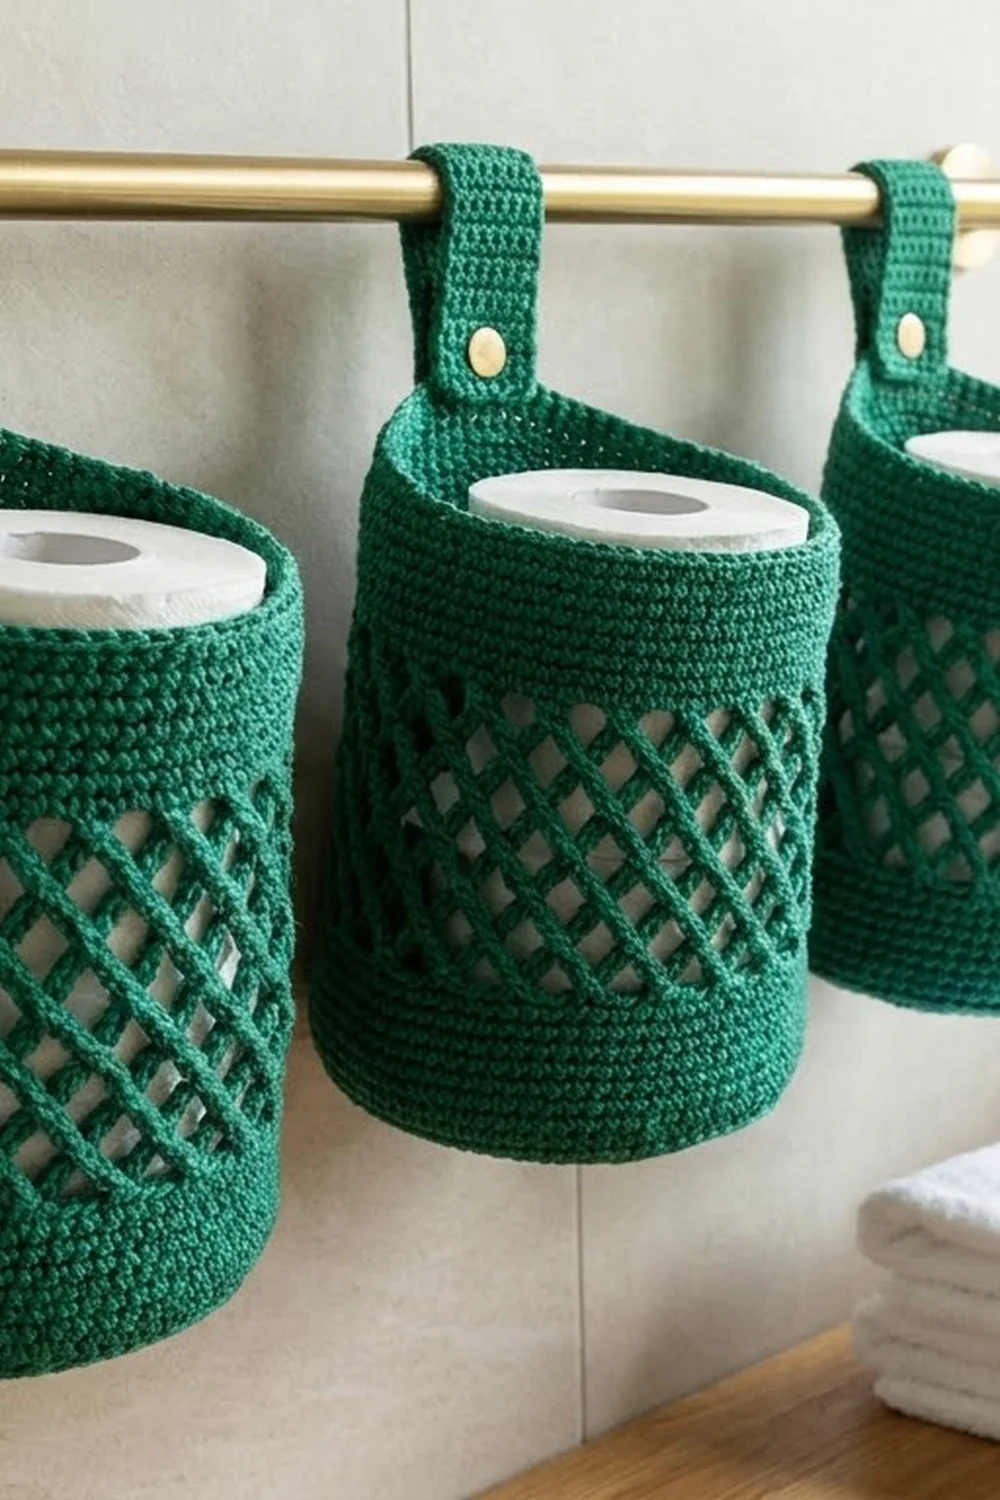
The Emerald Lattice Hanging Bathroom Basket is a small, sturdy rectangular basket that hangs from a towel rod and holds one toilet roll. Solid bands at the top and bottom give it structure. Between them, an open diamond lattice lets the white roll show through, so the basket looks light without going floppy.
The pattern uses one color, a deep emerald green, and a small brass button on each strap. Make three identical baskets and hang them side by side for a tidy, built-in look. Worked in cotton, the color reads as fresh and slightly vintage, especially against brass fixtures.
This pattern uses US crochet terms. Each finished basket measures about 5.7 in (14.5 cm) wide, 4.5 in (11.4 cm) deep and 5 in (12.7 cm) tall, not counting the strap.
Here is how each basket is built. You crochet a flat rectangular base in rows, then work one round of single crochet around its edge. Next you crochet the wall upward in joined rounds: a solid band, a chain-loop lattice, and then another solid band with a slip-stitch rim. Finally, you work a buttonhole strap upward from the back rim.
Finished Size and Construction
- Finished size (one basket): 5.7 in (14.5 cm) wide × 4.5 in (11.4 cm) deep × 5 in (12.7 cm) tall
- Skill level: Easy–Intermediate
- Terminology: US
- Yarn weight: Worsted (#4) cotton
- Hook: 5.0 mm (H-8)
- Number of pieces: 3 identical baskets, not joined
- Layout: 3 baskets in a row, hanging side by side
- Piece size: one basket, as given above
- Size before top border: 5.7 in (14.5 cm) × 4.5 in (11.4 cm) × 4 in (10.2 cm) tall
- Top border depth: 1 in (2.5 cm)
- Strap: 1.4 in (3.6 cm) wide × 6.5 in (16.5 cm) long before folding
Materials
Choose a smooth worsted-weight cotton or cotton blend. Cotton holds the basket’s shape, puts up with bathroom humidity and shows the lattice clearly. Avoid acrylic, which is too soft for this basket: the walls will slump.
- Emerald green: about 40 g / 80 m (87 yd) per basket. For all three, plan on 120 g / 240 m (262 yd).
- Brass shank buttons: 3, each 5/8 in (1.6 cm)
- 5.0 mm (H-8) hook
- Stitch markers
- Tapestry needle
- Sewing needle and green thread for the buttons
- Measuring tape
The yarn quantities include about a 15% margin for your swatch and for small differences in tension.
Abbreviations (US Terms)
- ch – chain
- sl st – slip stitch
- sc – single crochet
- BLO – back loop only
- sk – skip
- st(s) – stitch(es)
- sp – space
- rnd – round
Special stitch – ch-5 loop: chain 5. In the lattice, each ch-5 loop runs from one sc anchor to the next. The loops of each new round anchor into the centers of the loops below, and that offset forms the diamonds.
Gauge and Checkpoints
Gauge: 14 sc and 16 rows = 4 in (10.2 cm) in sc. That works out to 3.5 sts and 4 rows per inch.
Before making all three, crochet one complete basket and check it at each stage:
- After base Row 18: 5.7 in (14.5 cm) × 4.5 in (11.4 cm)
- After Rnd 5: solid bottom band is 1 in (2.5 cm) tall
- After Rnd 11: wall is 4 in (10.2 cm) tall, with the lattice about 3 in (7.6 cm) tall when lightly stretched
- After Rnd 16: wall is 5 in (12.7 cm) tall, and the rim measures 20.6 in (52.3 cm) around
If your piece is too big, go down 0.5 mm in hook size. If it is too small, go up 0.5 mm. Don’t add or remove stitches, because the lattice needs a stitch count that is a multiple of 4.
Base
Ch 21.
Row 1: Sc in 2nd ch from hook and in each ch across, turn. (20 sc)
Rows 2–18: Ch 1, sc in each st across, turn. (20 sc)
Checkpoint: the base is 5.7 in (14.5 cm) × 4.5 in (11.4 cm).
Rnd 1 (edge round): Do not turn. Ch 1, then work around the whole rectangle:
- 20 sc across the long side along the row-ends side of the last row worked. Correction: work these 20 sc into the 20 sts of Row 18.
- 16 sc down the short side, one in each row-end. Skip the row-ends of Rows 6 and 13.
- 20 sc across the long side along the opposite side of the foundation chain.
- 16 sc up the remaining short side, again skipping the row-ends of Rows 6 and 13.
Sl st to the first sc. (72 sc: 20 + 16 + 20 + 16)
Each side’s count already includes its corner stitches. Place a marker in the first st of each long side.
Wall
Rnd 2 (turning ridge): Ch 1, sc in BLO of each st around, sl st to first sc. (72 sc)
The unused front loops make a crisp ridge where the base turns up into the wall.
Rnds 3–5: Ch 1, sc in each st around, sl st to first sc. (72 sc)
Checkpoint: the solid bottom band, Rnds 2–5, is 1 in (2.5 cm) tall.
Rnd 6 (lattice set-up): Ch 1, sc in first st. Ch 5, sk 3 sts, sc in next st. Repeat from * 16 more times. Ch 5, sk 3 sts, sl st to first sc. (18 sc + 18 ch-5 loops)
The math: 18 repeats × 4 sts = 72. Each long side holds 5 loops (20 ÷ 4) and each short side holds 4 loops (16 ÷ 4).
Rnd 7: Sl st in the first 3 ch of the next loop to reach its center. Ch 1, sc in the same loop. Ch 5, sc in next ch-5 loop. Repeat from * 16 more times. Ch 5, sl st to first sc. (18 sc + 18 ch-5 loops)
Rnds 8–11: Repeat Rnd 7. (18 sc + 18 ch-5 loops each round)
You now have 6 lattice rounds, Rnds 6–11. Each new sc sits at the center of a loop below, so the loops cross into diamonds.
Checkpoint: the wall is 4 in (10.2 cm) tall, and the lattice section is about 3 in (7.6 cm) tall when lightly stretched.
Top Border
The top border is a solid band that stiffens the opening. Its gauge is the same as the base: 3.5 sts per inch.
Rnd 12 (conversion round): Ch 1, sc in first sc. 3 sc in next ch-5 loop, sc in next sc. Repeat from * around, ending with 3 sc in the last loop. Sl st to first sc. (72 sts = 18 sc worked one per sc anchor + 54 sc worked 3 per loop)
Per-side counts: each long side has 5 anchors and 5 loops = 5 + 15 = 20 sts. Each short side has 4 anchors and 4 loops = 4 + 12 = 16 sts. The total is 20 + 16 + 20 + 16 = 72.
Rnds 13–15: Ch 1, sc in each st around, sl st to first sc. (72 sc. Per side: 20 / 16 / 20 / 16)
Rnd 16 (rope rim): Ch 1, sl st firmly in each st around. Join to the first sl st. (72 sl st)
Fasten off and weave in the ends.
Why the math works: The base edge round sets 72 sts. The lattice divides 72 into 18 loops of 4 sts each. The conversion round gives each loop back exactly 4 sts (1 anchor + 3 in the loop). So the top opening matches the base perimeter: 72 ÷ 3.5 ≈ 20.6 in (52.3 cm). That’s why the walls rise straight instead of flaring or pulling in.
Checkpoint: the wall is 5 in (12.7 cm) tall, and the border, Rnds 12–16, is 1 in (2.5 cm) deep.
Strap
Hold the basket with one long side facing you. That side becomes the back.
Count the 20 sts of the back side along the rim. Skip the first 7, and join the yarn in st 8. The strap is worked over sts 8–12. It sits half a stitch off true center, which you won’t see once the basket is hanging.
Row 1: Ch 1, sc in the same st and in each of the next 4 sts, turn. (5 sc)
Rows 2–22: Ch 1, sc in each st across, turn. (5 sc)
Row 23 (buttonhole): Ch 1, sc 1, ch 2, sk 2, sc 2, turn. (3 sc + 1 ch-2 sp)
Row 24: Ch 1, sc 2, 2 sc in ch-2 sp, sc 1, turn. (5 sc)
Rows 25–26: Ch 1, sc in each st across, turn. (5 sc)
Outline: Ch 1. Sl st across the 5 sts of the tip, then sl st down one long side, one in each row-end of Rows 25–1. Sl st up the other side in the same way. (5 + 25 + 25 = 55 sl st)
Sl st into the rim and fasten off.
Checkpoint: the strap is 1.4 in (3.6 cm) wide and 6.5 in (16.5 cm) long.
Button: Sew a button to the outside face of the strap, centered on Row 8, which is 2 in (5.1 cm) above the rim. When you fold the strap over the rod, the buttonhole in Row 23 meets the button. That leaves a loop of 15 rows, or 3.75 in (9.5 cm) around, which fits rods up to 1 in (2.5 cm) in diameter.
Make All Pieces
Make 3 baskets, each using about 40 g / 80 m (87 yd) of emerald green and 1 button. That’s 120 g / 240 m (262 yd) of emerald green and 3 buttons in total.
Layout on the rod (seen from the front):
[ Basket 1 ] [ Basket 2 ] [ Basket 3 ]
   5.7 in       5.7 in       5.7 in
The row is 17.1 in (43.4 cm) wide overall. Use a rod at least 18 in (45.7 cm) long.
Joining (Hanging the Set)
The baskets are not sewn together. Each one hangs independently, so you can lift any basket off the rod to refill it.
- Method: Fold each strap up and over the rod toward the front, then push the button through the buttonhole.
- Stitch-to-stitch logic: Each strap is worked over the same 5 back stitches (sts 8–12), so all three straps sit at the same point on their baskets. The rims line up evenly.
- Tension: Keep the strap rows firm. A loose strap stretches under the weight of a roll and drops that basket lower than its neighbors.
- Size checkpoint: All three rims should hang at the same height, about 2 in (5.1 cm) below the rod. Side by side, the three baskets measure 17.1 in (43.4 cm) across.
Final Blocking
- Lightly spray the basket with water, or steam it from about 1 in (2.5 cm) away.
- Stuff it firmly with a towel or a toilet roll wrapped in a plastic bag.
- Square the corners. Measure 5.7 in (14.5 cm) across and 4.5 in (11.4 cm) deep.
- Gently pull the lattice upward until the wall is 5 in (12.7 cm) tall and the diamonds look even.
- Lay the strap flat and pin it to 1.4 in (3.6 cm) × 6.5 in (16.5 cm).
- Let everything dry completely before removing the stuffing.
Final Quality-Control Checklist
- The base measures 5.7 in × 4.5 in (14.5 cm × 11.4 cm), and the turning ridge is crisp.
- The count is 72 sts in Rnds 1–5 and Rnds 12–16.
- Every lattice round has 18 loops, with no loops missed.
- The wall is 5 in (12.7 cm) tall and the walls are straight, not flared.
- Each strap is worked over sts 8–12 of the back side.
- The button is on Row 8, and the buttonhole on Row 23 fastens easily.
- All three baskets hang at the same height.
- All ends are woven in securely.
Troubleshooting
The walls flare out: your lattice chains are too loose. Make the loops ch 4 instead of ch 5, or go down one hook size for Rnds 6–11.
The walls pull inward: your lattice is too tight. Chain more loosely, or use a hook 0.5 mm larger for the chains only.
The diamonds drift around the basket: make sure each new round starts at the center of a loop, after exactly 3 sl sts.
The conversion round isn’t 72 sts: check that you worked exactly 3 sc in every loop and 1 sc in every anchor.
The strap stretches: go down a hook size for the strap, or line it with a strip of grosgrain ribbon.
The button pulls through the buttonhole: use a slightly larger button or work a ch-1 buttonhole instead.
Care
Hand wash in cool water, reshape while damp and lay flat to dry. Avoid hot dryers, which can shrink cotton and distort the lattice.
Final Notes
The measurement chain is simple:
- 20 × 18 sc base = 5.7 in × 4.5 in (14.5 cm × 11.4 cm)
- 72-st edge round = 18 lattice loops
- 72-st top border = 20.6 in (52.3 cm) around
- 5 in (12.7 cm) wall height
- 5-st, 26-row strap that buttons into a 3.75 in (9.5 cm) loop
Check your gauge once, check each checkpoint on the first basket, and the other two will match.
Happy crocheting!