

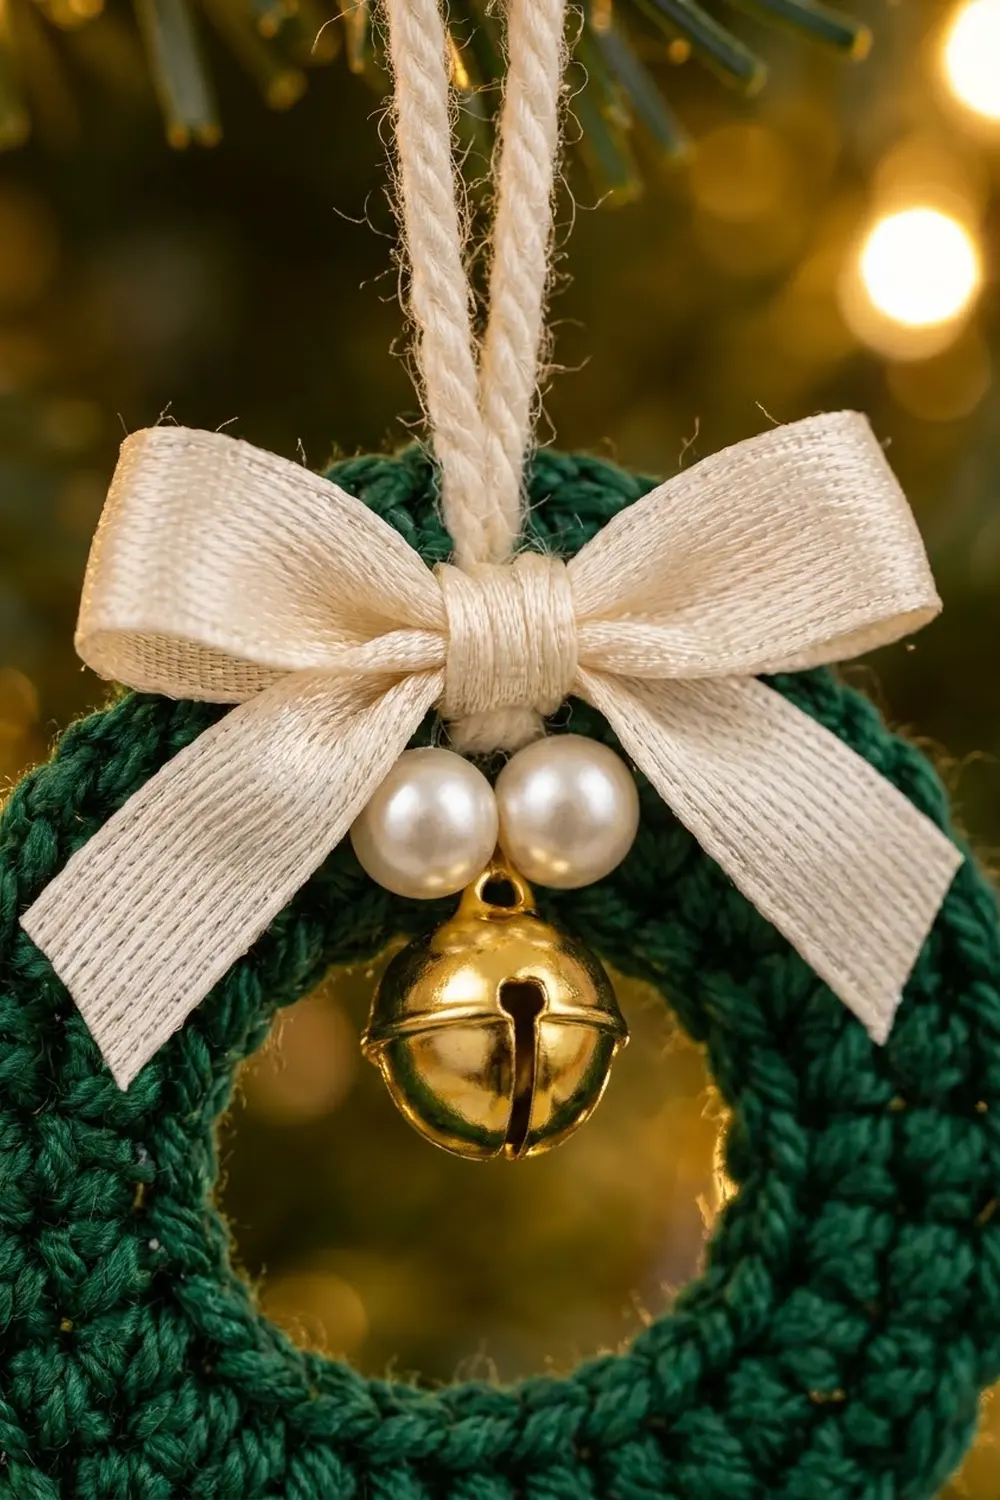
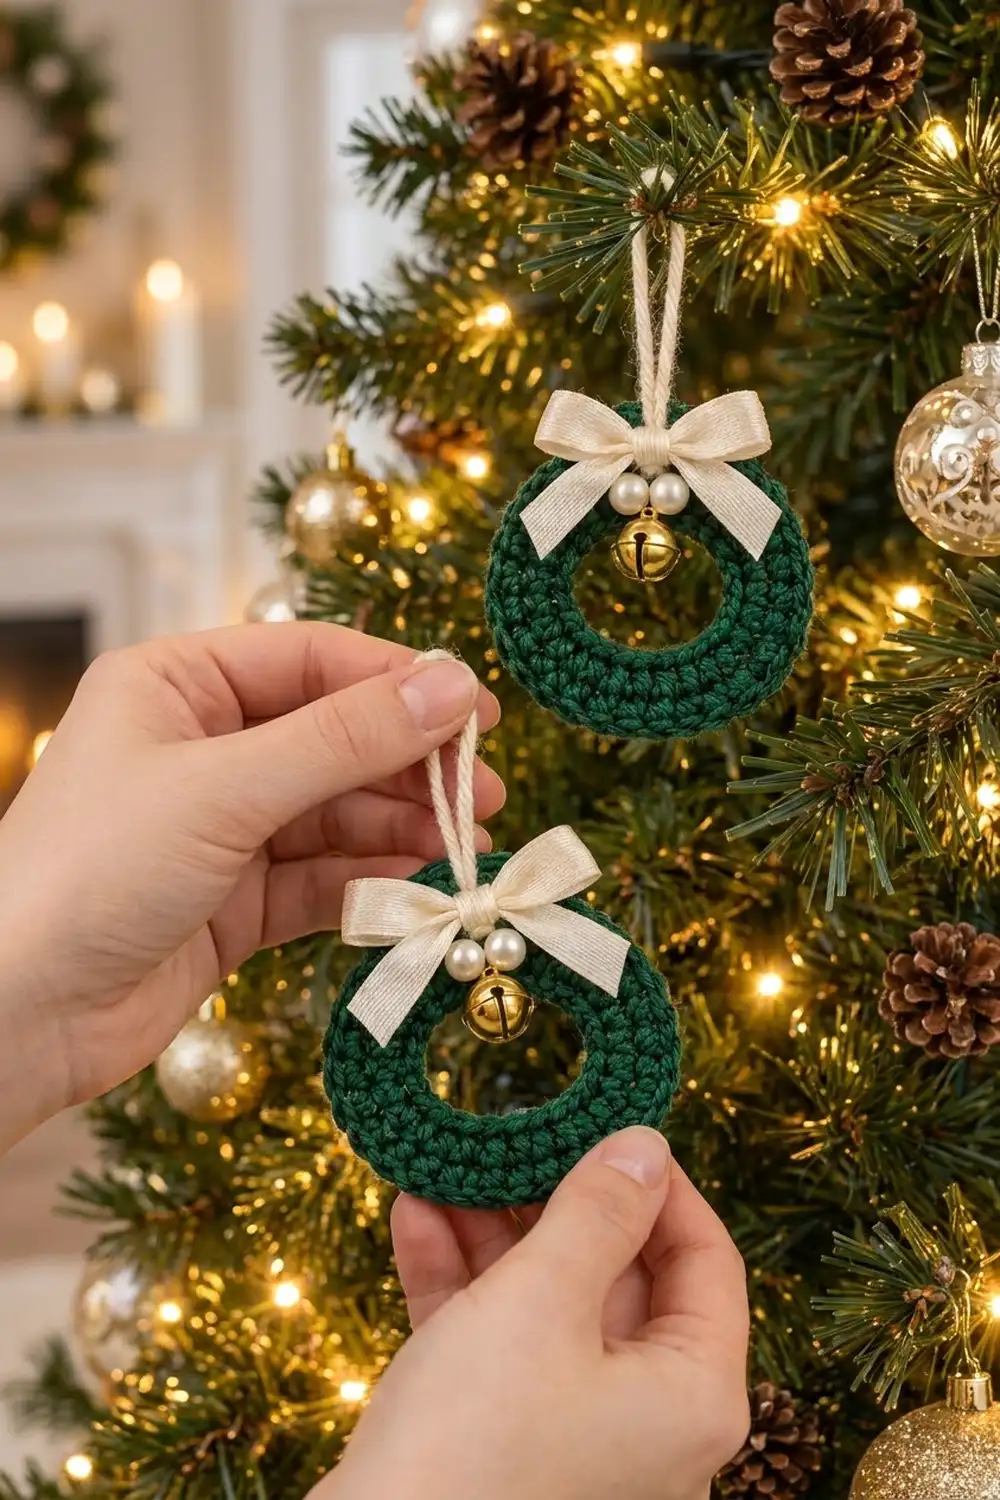
This little wreath is a small, solid ring of deep forest green single crochet. It’s finished with a cream satin bow, two pearl beads, and a tiny gold jingle bell. A cream yarn loop at the top lets it hang from a tree branch, a doorknob, or a gift.
The look is classic and quiet: one rich green, soft cream, and a touch of gold. The dense single crochet gives the ring a firm, slightly padded texture that looks like a real evergreen wreath from a distance. It needs no stuffing and no wire.
This pattern uses US crochet terms. The finished ornament measures about 3 in (7.6 cm) across. The center opening is about 1 in (2.5 cm), and the solid band is about 1 in (2.5 cm) wide.
Construction is simple. You chain a short foundation ring, then work five joined rounds of single crochet outward, adding six increases per round so the ring stays flat. The last round is the edge finish. After blocking, you add the hanging loop, tie on the ribbon bow, and sew on the pearls and bell.
Finished Size and Construction
- Finished size: about 3 in (7.6 cm) outer diameter
- Center opening: about 1 in (2.5 cm)
- Skill level: Easy
- Terminology: US crochet terms
- Yarn weight: Worsted (#4), worked firmly
- Hook: 3.75 mm (US F-5)
- Number of pieces: 1 crocheted ring
- Layout: one flat ring, with embellishments at top center
- Piece size before edge round: about 2.6 in (6.6 cm) after Round 4
- Edge round depth: 1 round, about 0.2 in (0.5 cm)
Materials
Choose a smooth worsted-weight yarn with good stitch definition. Mercerized cotton or a cotton blend gives the crisp, slightly glossy stitches shown here. Acrylic also works and is a good choice if children will be handling the ornament. Avoid fuzzy or brushed yarns, because they blur the texture.
Yarn
- Forest green (main ring): 5 g, about 10 m
- Cream (hanging loop): 1 g, about 1 m
These amounts include a margin for a gauge swatch and weaving in ends. One ornament uses about 3 g of green, so a single 50 g ball will make many.
Embellishments
- Cream satin ribbon, 3/8 in (1.0 cm) wide: 10 in (25.4 cm) per ornament
- 2 round pearl beads, 8 mm (about 0.3 in)
- 1 gold jingle bell, 15 mm (about 0.6 in)
Tools
- 3.75 mm (US F-5) crochet hook
- Tapestry needle
- Sewing needle and cream or green thread
- Scissors
- Stitch marker
- Ruler or tape measure
- Blocking mat and rustproof pins
- Spray bottle with water
- Optional: fabric glue or a lighter (to seal the ribbon ends)
Abbreviations (US Terms)
- ch – chain
- sc – single crochet
- sl st – slip stitch
- inc – increase: 2 sc in the same stitch
- st(s) – stitch(es)
- ( ) x6 – repeat the instructions in parentheses 6 times in total
Special technique – invisible join: After the last stitch of the final round, cut the yarn and pull the tail up through the stitch. Thread the tail on a tapestry needle. Skip the first stitch of the round and insert the needle under both loops of the second stitch. Then go back down through the back loop of the last stitch. Pull gently until the new “stitch” is the same size as the others.
Gauge and Checkpoints
Gauge: 5 sc and 5 rows = 1 in (2.5 cm) in single crochet, worked firmly.
To swatch: ch 11, then sc in the second ch from the hook and in each ch across (10 sc). Work 9 more rows. Your swatch should measure 2 in (5.1 cm) square. A firm gauge matters here, because tight stitches keep the ring flat and stop the center hole from stretching.
Because this is a one-piece project, the best test is the ornament itself. Make one ring, check it at each checkpoint below, and make any changes before you start a batch.
Checkpoints (outer diameter, measured flat):
- After Round 2: about 1.8 in (4.6 cm)
- After Round 4: about 2.6 in (6.6 cm)
- After Round 5: about 3 in (7.6 cm)
Each round makes the band about 0.2 in (0.5 cm) wider, which adds 0.4 in (1.0 cm) to the overall diameter.
If your ring is too big: go down to a 3.5 mm (US E-4) hook, or tighten your tension.
If your ring is too small: go up to a 4 mm (US G-6) hook. Don’t add stitches, because the stitch counts are what keep the ring flat.
Wreath Ring
Work in joined rounds with the right side facing you the whole time. The ch 1 at the start of each round does not count as a stitch. Put a stitch marker in the first sc of each round so the join is easy to find.
Foundation: With green, ch 18. Join with a sl st to the first ch to make a ring. Be careful not to twist the chain. (18 ch)
Laid flat and gently straightened, the chain ring should measure about 3.6 in (9.1 cm) around.
Round 1 (conversion round): Ch 1. Working into each ch around, (sc in next 2 ch, 2 sc in next ch) x6. Join with a sl st to the first sc.
Count: 18 sts worked 1-per-chain + 6 extra = 24 sc.
Work under one loop and the back bump of each chain so the edge of the opening stays neat and rounded. Spread the stitches evenly around the chain as you go.
Round 2: Ch 1. (Sc in next st, inc in next st, sc in next 2 sts) x6. Join. (30 sc)
Round 3: Ch 1. (Sc in next 4 sts, inc in next st) x6. Join. (36 sc)
Round 4: Ch 1. (Sc in next 2 sts, inc in next st, sc in next 3 sts) x6. Join. (42 sc)
Checkpoint: the ring should lie flat and measure about 2.6 in (6.6 cm) across. If it ruffles, your stitches are too loose. If it cups upward like a bowl, they are too tight.
Rounds 2 and 4 have staggered increases. This stops the increases from stacking on top of each other, which would turn the ring into a hexagon. Your wreath should look evenly round.
Edge Round
The last round is the outer edge of the wreath. It uses the same single crochet texture, so the outside edge looks smooth and rounded with no contrast trim.
Edge gauge: the same as the body, 5 sc per 1 in (2.5 cm). One round is 0.2 in (0.5 cm) deep.
Round 5 (edge round): Ch 1. (Sc in next 6 sts, inc in next st) x6. Don’t join with a sl st. Use the invisible join instead. (48 sc)
A round piece has no corners, so think of it as six equal segments instead. Each segment has 7 stitches in Round 4. In Round 5, each segment has 8 stitches: 6 single sc plus 1 increase that makes 2. Six segments of 8 stitches give 48 sc.
Why the math works: each round of a flat circle or ring has to get longer around by about 2 x 3.14 x the round height. With a round height of 0.2 in (0.5 cm), each round grows by about 1.26 in (3.2 cm). At 5 sts per inch, that’s about 6.3 new stitches per round, so 6 increases per round keeps the ring flat.
The final count confirms the size. 48 sts divided by 5 sts per inch gives 9.6 in (24.4 cm) of outer edge. Divide that by 3.14 and you get an outer diameter of about 3.06 in, which blocks to 3 in (7.6 cm). You can also check it from the inside out: 5 rounds x 0.2 in = 1 in (2.5 cm) of band on each side of the 1 in (2.5 cm) opening, for the same total of 3 in (7.6 cm).
Weave in the green tails on the wrong side. Run them through the middle of the band so they don’t show through the center hole.
Hanging Loop and Embellishments
Add these after blocking (see below), once the ring is completely dry.
Hanging loop: Cut 8 in (20.3 cm) of cream yarn and fold it in half. Pass the folded end from front to back through the center hole and around the top of the band. Pull the two cut ends through the fold to make a lark’s head knot around the band at top center. Tie the two cut ends together in a firm overhand knot so the loop stands about 2 in (5.1 cm) above the top of the wreath. Trim the ends to 0.25 in (0.6 cm) and tuck them behind the band.
Bow: Tie the 10 in (25.4 cm) ribbon into a small bow with two loops and two tails. The finished bow should be about 2 in (5.1 cm) wide. The tails should be about 1 in (2.5 cm) long and angle down and outward over the green band. Cut the tails on a diagonal and seal them with a dab of glue or a quick pass near a flame.
Place the bow at the top center of the wreath, right over the lark’s head knot, so the center of the bow hides the base of the hanging loop. With sewing thread, stitch through the bow knot and into the green band 3 or 4 times to hold it firmly.
Pearls and bell: Sew the two pearl beads side by side just below the bow knot, on the inner edge of the band. Then sew the jingle bell just below and between the pearls, so it hangs into the top of the center opening. Secure each one with several passes of thread and knot on the back.
From top to bottom, the finished layers are: cream loop, cream bow, two pearls, gold bell.
Final Blocking
- Weave in all green ends before blocking, but leave the embellishments off.
- Lay the ring right side up on a blocking mat.
- Mist it lightly with water until it’s damp but not soaked.
- Gently pat the ring into an even circle with your fingers.
- Measure it: the outer diameter should be 3 in (7.6 cm) and the center opening 1 in (2.5 cm).
- Pin around the outer edge at 6 to 8 evenly spaced points. To keep the opening round, you can also slip a 1 in (2.5 cm) bottle neck or rolled paper tube into the center.
- Let it dry completely. This usually takes a few hours.
- Unpin it, then add the loop, bow, pearls, and bell.
For acrylic yarn, light steam works better than water. Hold the iron above the fabric and never let it touch.
Final Quality-Control Checklist
- The ring lies flat with no ruffling or cupping.
- The outer diameter is about 3 in (7.6 cm).
- The center opening is about 1 in (2.5 cm) and evenly round.
- Round 5 has 48 sc and the invisible join is hard to spot.
- The outer edge has no hexagon points.
- All green tails are woven in and hidden inside the band.
- The hanging loop is centered at the top and stands about 2 in (5.1 cm) high.
- The bow covers the loop’s knot and sits level.
- The pearls sit side by side under the bow, with the bell centered below them.
- The bell rings freely and every piece is firmly sewn on.
Troubleshooting
The ring ruffles. You probably added too many stitches, or your tension is loose. Recount each round and go down a hook size.
The ring cups like a bowl. Your tension is too tight or you missed some increases. Check the counts (24, 30, 36, 42, 48) and go up a hook size if needed.
The ring looks like a hexagon. The increases are stacking. Make sure you’re using the staggered repeats in Rounds 2 and 4, then block the ring into a circle.
The center hole is too big. The foundation chain was loose. Chain more tightly, or use a smaller hook for the foundation only.
The center hole puckers. The chain is too tight to hold 24 sc. Make the foundation chain with a hook one size larger.
The bow droops or spins. Add more stitches through the bow knot, catching both the ribbon and the band.
Care
Spot clean with a damp cloth and mild soap, then lay flat to dry. Don’t machine wash it, because that can damage the ribbon, pearls, and bell.
Final Notes
The size of this little wreath comes from a short chain of measurements. It starts with a gauge of 5 stitches and 5 rows to 1 in (2.5 cm). Eighteen chains make a 1 in (2.5 cm) opening. Five rounds at 0.2 in (0.5 cm) each build a 1 in (2.5 cm) band. Six increases per round keep it flat, and it finishes at 48 stitches and about 3 in (7.6 cm) across.
Check your ring after Rounds 2, 4, and 5. Once the first one is right, the rest go quickly, and a whole branch of them looks lovely with the bows and bells catching the light.
Happy crocheting!