

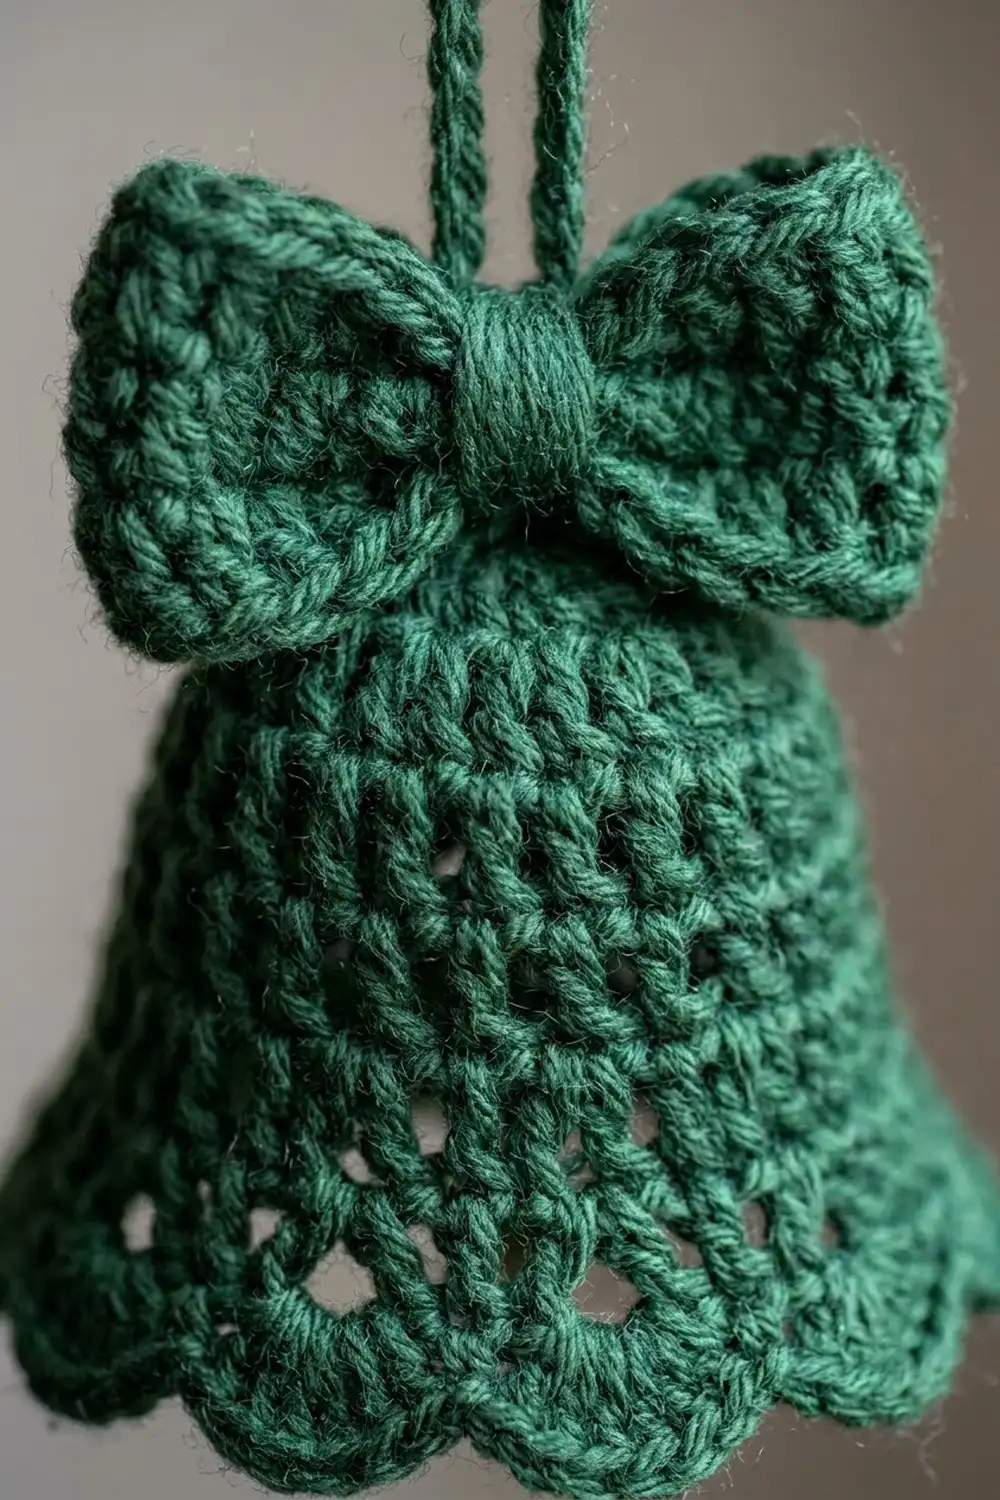
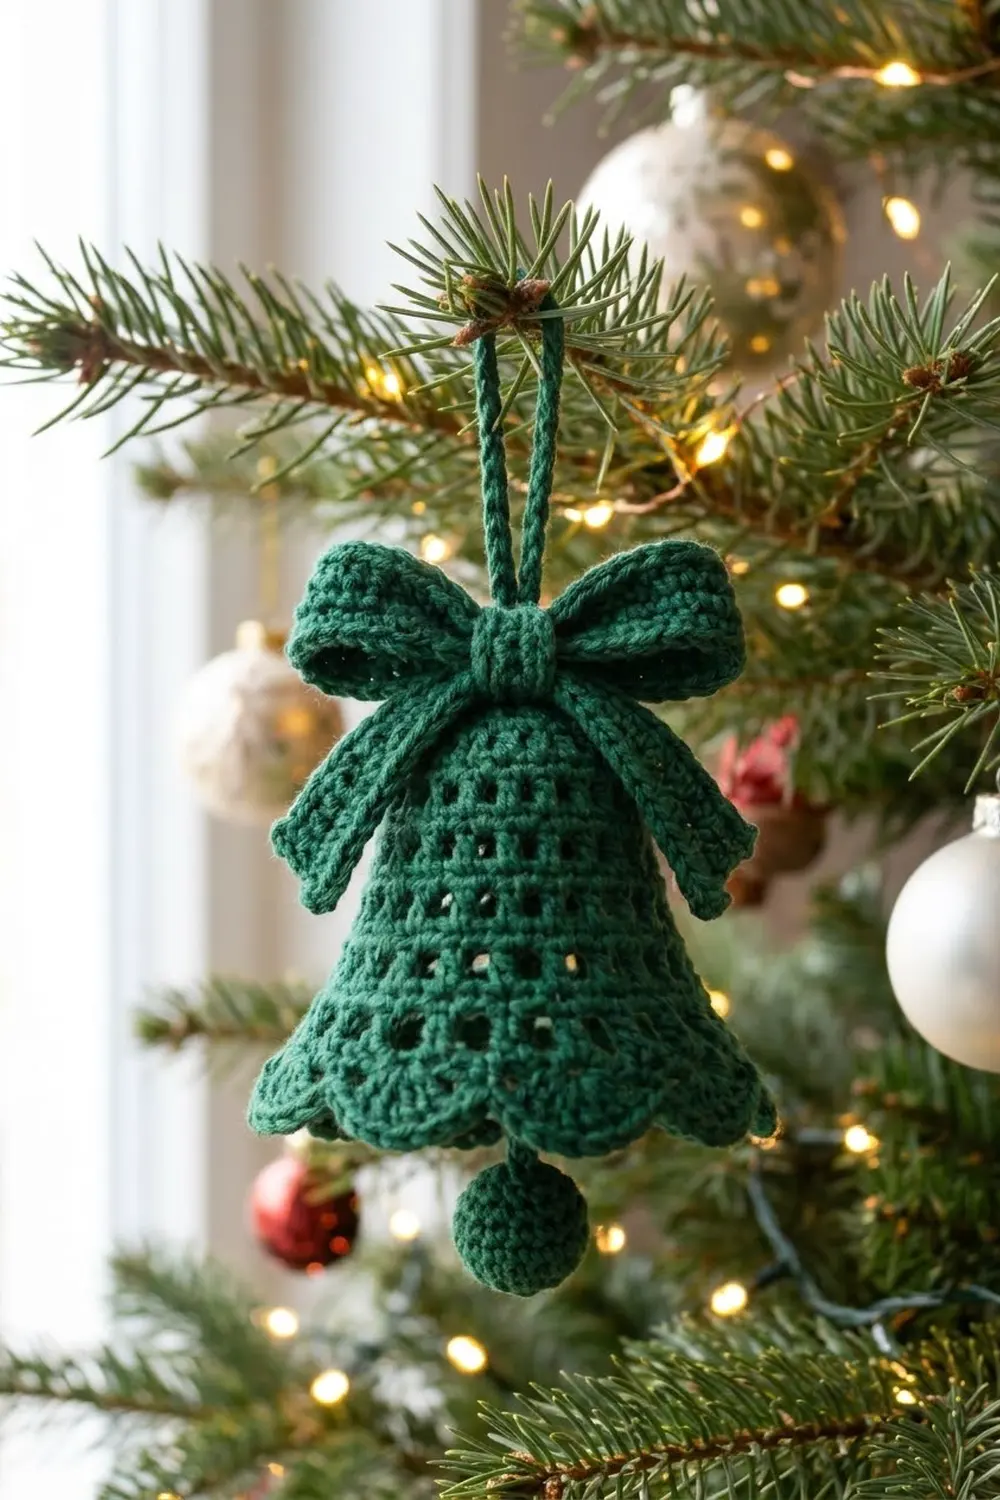
The Evergreen Lace Bell is a small, structured Christmas ornament with a classic bell silhouette. The body tapers from a narrow crown to a flared hem. Rounds of open mesh alternate with solid double crochet, which forms neat vertical columns and little windows of light. A row of rounded shell scallops finishes the lower edge.
The bell and its three-dimensional bow are worked in forest green. A small dark green clapper hangs on a short strand just below the opening. The hanging loop is built into the bow’s center knot, so the ornament is ready for the tree as soon as you assemble it.
This pattern uses US crochet terms. The bell measures about 2 in (5.1 cm) tall and about 2.75 in (7.0 cm) wide when flattened at the scallops. Total hanging length, from the top of the loop to the bottom of the clapper, is about 3.25 in (8.3 cm).
The bell is worked top-down in joined rounds. It starts as a flat crown, then grows through alternating mesh and solid rounds, and ends with a shell border. The bow is a ridged strip folded into two loops and wrapped with a small center band. The clapper is a tiny amigurumi sphere on a chain strand.
Finished Size and Construction
- Finished size (bell): 2 in (5.1 cm) tall × 2.75 in (7.0 cm) wide flattened at the scallops
- Total hanging length: about 3.25 in (8.3 cm)
- Skill level: Intermediate
- Terminology: US crochet terms
- Yarn weight: #1 super fine (fingering) cotton, or size 3 crochet thread
- Hook: 2.0 mm
- Number of pieces: 1 ornament made of 3 joined components: the bell, the bow (strip plus center band with hanging loop), and the clapper
- Layout: Bow and hanging loop at the top, bell in the middle, clapper hanging inside and just below the opening
- Piece sizes: bell as above; bow 2.25 in × 0.75 in (5.7 × 1.9 cm); clapper 0.5 in (1.3 cm) diameter
- Bell size before border: 1.5 in (3.8 cm) tall along the side, 2.6 in (6.6 cm) wide flattened
- Border depth: about 0.4 in (1.0 cm)
Materials
Choose a smooth, tightly plied mercerized cotton. It gives crisp stitch definition, holds the flared shape after blocking, and shows off the mesh windows. Fuzzy or very soft yarns will blur the lace and let the bell slump.
- Forest green: 12 g / about 41 m. This covers the bell (about 6 g) and the bow (about 3 g).
- Dark green: 2 g / about 7 m, for the clapper.
These quantities include a comfortable margin for gauge swatching and weaving in ends.
Tools:
– 2.0 mm crochet hook
– Tapestry needle
– 1 stitch marker
– Scissors
– A pinch of fiberfill or matching scrap yarn
– Rust-proof pins
– A small cone form for blocking (rolled cardstock works)
– Optional: fabric stiffener or spray starch
Abbreviations (US Terms)
- ch – chain
- sl st – slip stitch
- sc – single crochet
- dc – double crochet
- sc2tog – single crochet 2 together
- BLO – back loop only
- sk – skip
- sp – space
- MR – magic ring
- st(s) – stitch(es)
Special stitch – Shell: work 5 dc in the same stitch.
Counting notes:
– A beginning ch-3 counts as 1 dc.
– A beginning ch-4 on mesh rounds counts as 1 dc plus 1 ch-1 space.
– In mesh rounds, each ch-1 space counts as 1 stitch.
Gauge and Checkpoints
Gauge:
– 8 dc and 4 dc rounds = 1 in (2.5 cm)
– 8 sc and 8 sc rows = 1 in (2.5 cm)
Test the bell crown first. Work Rounds 1–2 and lay the piece flat. It should measure about 1 in (2.5 cm) across.
Checkpoints:
– After Round 2: flat disk, about 1 in (2.5 cm) diameter
– After Round 4: circumference 3.75 in (9.5 cm), flattened width 1.9 in (4.8 cm)
– After Round 8: circumference 5.25 in (13.3 cm), flattened width 2.6 in (6.6 cm), side height 1.5 in (3.8 cm) measured down from the edge of Round 2
– After the border: total height 2 in (5.1 cm), flattened width 2.75 in (7.0 cm)
If your work is too big, go down 0.25 mm in hook size. If it is too small, go up 0.25 mm. Correct the gauge at the crown rather than changing stitch counts, because the border math depends on the bell ending with exactly 42 stitches.
Bell
Use forest green. Join every round with a sl st to the top of the beginning chain. Do not turn.
Round 1: MR, ch 3 (counts as dc), 11 dc in ring. Pull the ring closed and sl st to the top of ch-3. (12 dc)
Round 2: Ch 3, dc in same st as join, 2 dc in each remaining st around. Sl st to join. (24 dc)
The piece should lie flat at this point. This is the crown.
Round 3 (mesh): Ch 4 (counts as dc + ch 1), sk next st, dc in next st, ch 1, sk next st. Repeat from * 10 more times. Sl st in 3rd ch of beg ch-4. (12 dc + 12 ch-1 sps = 24 sts)
Because no stitches are added, the sides begin to turn downward here.
Round 4: Ch 3, dc in next ch-sp, dc in next dc, 2 dc in next ch-sp. Dc in next dc, dc in next ch-sp, dc in next dc, 2 dc in next ch-sp. Repeat from * 4 more times. Sl st to join. (30 dc)
Each repeat makes 5 sts, and 6 repeats × 5 = 30.
Round 5 (mesh): Ch 4, sk next st, dc in next st, ch 1, sk next st. Repeat from * 13 more times. Sl st to join. (15 dc + 15 ch-1 sps = 30 sts)
Round 6: Ch 3, dc in next ch-sp, dc in next dc, dc in next ch-sp, 2 dc in next dc, [dc in next ch-sp, dc in next dc] twice, 2 dc in next ch-sp.
[Dc in next dc, dc in next ch-sp] twice, 2 dc in next dc, [dc in next ch-sp, dc in next dc] twice, 2 dc in next ch-sp. Repeat from * once more. Sl st to join. (36 dc)
Each repeat covers 10 stitches and makes 12, and 3 repeats × 12 = 36.
Round 7 (mesh): Ch 4, sk next st, dc in next st, ch 1, sk next st. Repeat from * 16 more times. Sl st to join. (18 dc + 18 ch-1 sps = 36 sts)
Round 8: Ch 3, dc in next ch-sp, dc in next dc, dc in next ch-sp, dc in next dc, 2 dc in next ch-sp. [Dc in next dc, dc in next ch-sp] twice, dc in next dc, 2 dc in next ch-sp. Repeat from * 4 more times. Sl st to join. (42 dc)
Each repeat covers 6 stitches and makes 7, and 6 repeats × 7 = 42.
Check your measurements against the Round 8 checkpoint before moving on to the border. Do not fasten off.
Border
Border gauge: The border is worked at the same gauge as the bell, 8 sts per in. The bell is a round piece, so it has no sides. The border is counted per scallop repeat instead: 6 sts = 0.75 in (1.9 cm) per scallop.
Round 9 (sc conversion): Ch 1, sc in each dc around. Sl st to first sc.
This round adds no new stitches. It is 42 sc worked one into each existing dc, plus 0 extra, for 42 sc. It firms up the hem and gives the shells a stable base.
Round 10 (shells): Ch 1, sc in first sc. Sk 2 sc, shell in next sc, sk 2 sc, sc in next sc. Repeat from * 5 more times. To finish, sk 2 sc, shell in next sc, sk 2 sc, and sl st to the first sc. (7 shells and 7 sc) Fasten off and weave in ends.
Why the math works: Each scallop uses exactly 6 base stitches: 1 sc, 2 skipped, 1 shell stitch, and 2 skipped. Since 42 ÷ 6 = 7, the round closes with 7 even scallops and no leftover stitches. That is why the bell must end Round 8 with exactly 42 dc.
Bow
Use forest green.
Bow strip: Ch 7.
Row 1: Sc in 2nd ch from hook and in each ch across. (6 sc)
Rows 2–36: Ch 1, turn, sc in BLO of each st across. (6 sc)
Fasten off, leaving a 12 in (30.5 cm) tail. The strip should measure 4.5 in (11.4 cm) long × 0.75 in (1.9 cm) wide. The BLO ridges give the loops their texture.
Shape the bow:
1. Lay the strip ridge-side out.
2. Fold both short ends in to meet at the center back, overlapping by 2 rows.
3. Sew the ends together through both layers.
4. Pinch the center tightly and wrap the tail around the pinch 3 times to gather it.
You now have two rounded loops, and the bow measures about 2.25 in (5.7 cm) wide.
Center band with hanging loop: Ch 5.
Row 1: Sc in 2nd ch from hook and in each ch across. (4 sc)
Rows 2–8: Ch 1, turn, sc in each st. (4 sc)
The band measures 1 in (2.5 cm) long × 0.5 in (1.3 cm) wide.
Hanging loop: Without fastening off, ch 12, then sl st into the same stitch where the chain began. Fasten off, leaving a 10 in (25.4 cm) tail. The loop stands about 0.75 in (1.9 cm) tall.
Wrap the band around the gathered center of the bow so the hanging loop sits at the top. Sew the band’s short ends together at the back. This forms the gathered knot.
Clapper
Use dark green and work in continuous rounds. Mark the first stitch of each round.
Round 1: 6 sc in MR. (6)
Round 2: 2 sc in each st. (12)
Round 3: Sc in each st. (12)
Round 4: Sc2tog 6 times. (6)
Stuff firmly with a pinch of fiberfill or scrap yarn.
Round 5: Sc2tog 3 times. (3)
Strand: Ch 16, which makes about 2 in (5.1 cm). Fasten off, leaving an 8 in (20.3 cm) tail. The sphere measures about 0.5 in (1.3 cm) across.
Assembly
- Attach the clapper. Thread the strand’s tail onto a needle. From inside the bell, pass it up through the center of the magic ring in Round 1, then back down one stitch over. Knot it securely inside.
- Check the drop. The clapper should hang about 0.5 in (1.3 cm) below the scallop tips.
- Attach the bow. Center the knot over the crown, with the hanging loop pointing straight up. Use the band’s tail to sew the back of the knot to Rounds 1–2 of the crown, going through all layers several times. The bow carries the ornament’s weight, so sew firmly.
- Finish. Weave in all ends, hiding them in the bow’s back layers.
Final Blocking
- Lightly dampen the bell, or mist it with diluted fabric stiffener for a firmer finish.
- Slide it over a cone form that is about 2.6 in (6.6 cm) wide at the base.
- Ease each mesh column straight, so the windows line up vertically.
- Pin each of the 7 scallops outward evenly, to a flattened width of 2.75 in (7.0 cm).
- Stuff the bow loops with tissue to round them out.
- Let everything dry completely, then remove the pins and tissue.
- Straighten the clapper strand by hand.
Final Quality-Control Checklist
- [ ] Bell is 2 in (5.1 cm) tall and 2.75 in (7.0 cm) wide flattened
- [ ] Round 8 ended with exactly 42 dc
- [ ] 7 even scallops with no gap at the join
- [ ] Mesh windows align in vertical columns
- [ ] Bow is 2.25 in (5.7 cm) wide, with symmetrical loops
- [ ] Knot band is snug and the hanging loop stands upright
- [ ] Clapper is round, firmly stuffed, and hangs about 0.5 in (1.3 cm) below the hem
- [ ] All ends are hidden and secure
Troubleshooting
The crown ruffles. Your tension is too loose. Go down a hook size and work Round 2 again.
The crown cups before Round 3. Your tension is too tight. Go up a hook size.
The windows slant. Make sure each ch-1 sits directly above a ch-1 from the round below, and keep your joins consistent.
The shells don’t fit evenly. Recount Round 9. It must have 42 sc.
The bell slumps. Re-block it with stiffener or starch.
The bow droops. Sew the knot to the crown with more passes, and re-block the loops with tissue inside.
The clapper shows stuffing. Use matching scrap yarn instead of fiberfill.
Care
Spot clean with cool water and mild soap, then reshape and dry flat over your cone form. Store the ornament in a small box so the bell keeps its flare.
Final Notes
The measurement chain is simple. A 1 in (2.5 cm) crown leads to a 3.75 in (9.5 cm) circumference after Round 4. That grows to 5.25 in (13.3 cm) and 42 stitches after Round 8. The 42-stitch base divides into 7 scallops, which bring the bell to its finished 2 in (5.1 cm) height.
Check your gauge at the crown and the rest will follow. Optional: make several in different greens and reds to hang as a set.
Happy crocheting!