

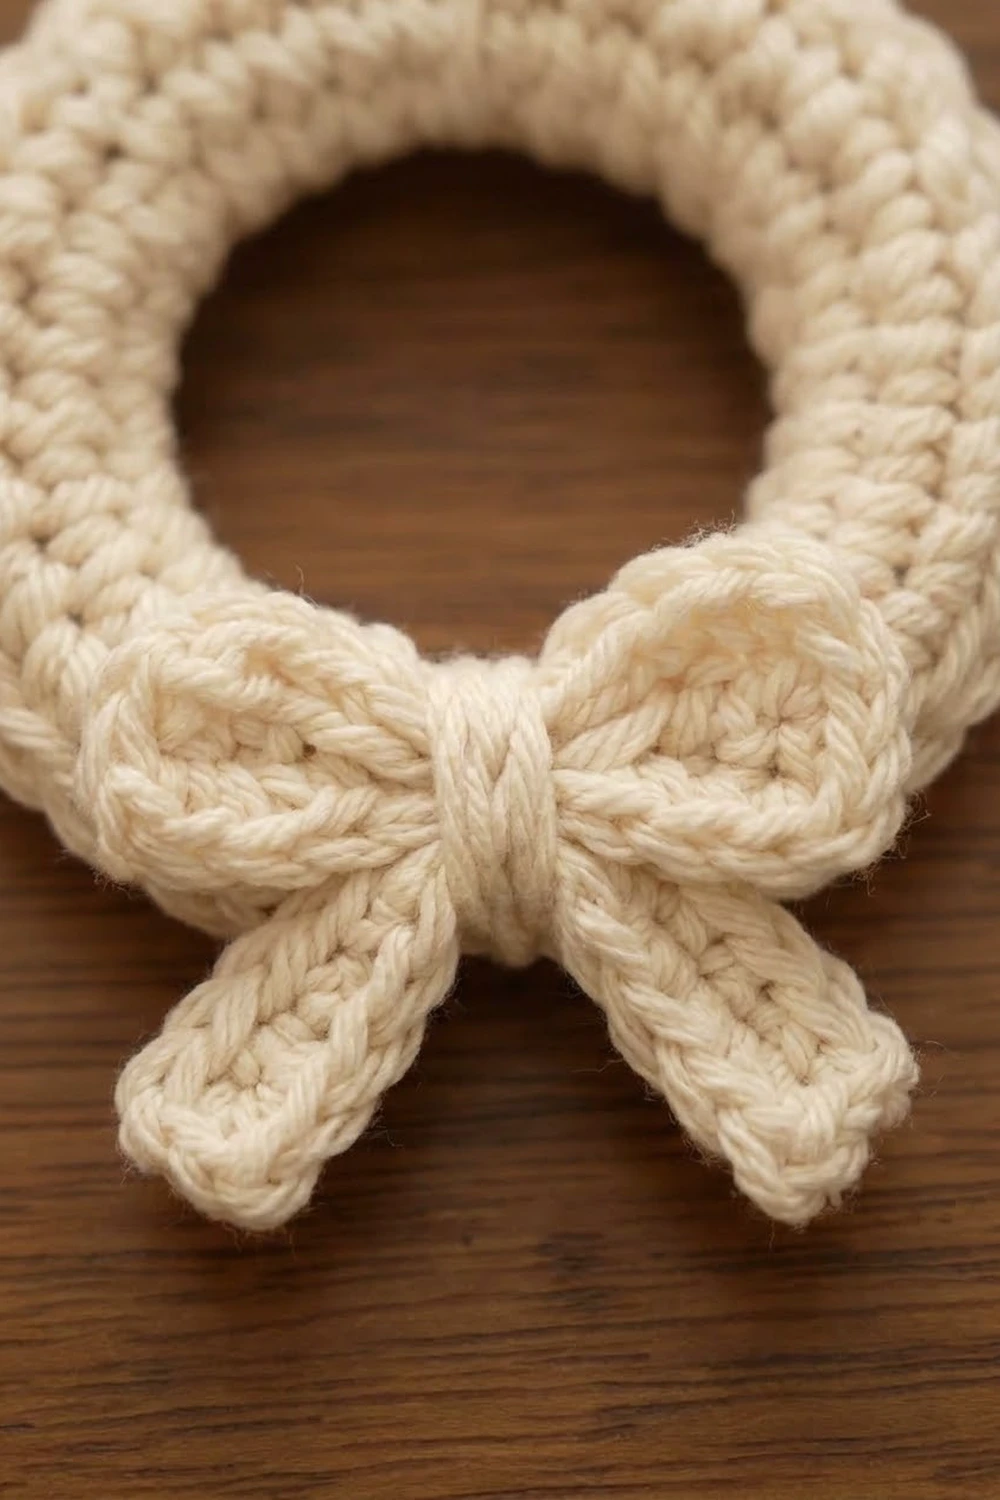
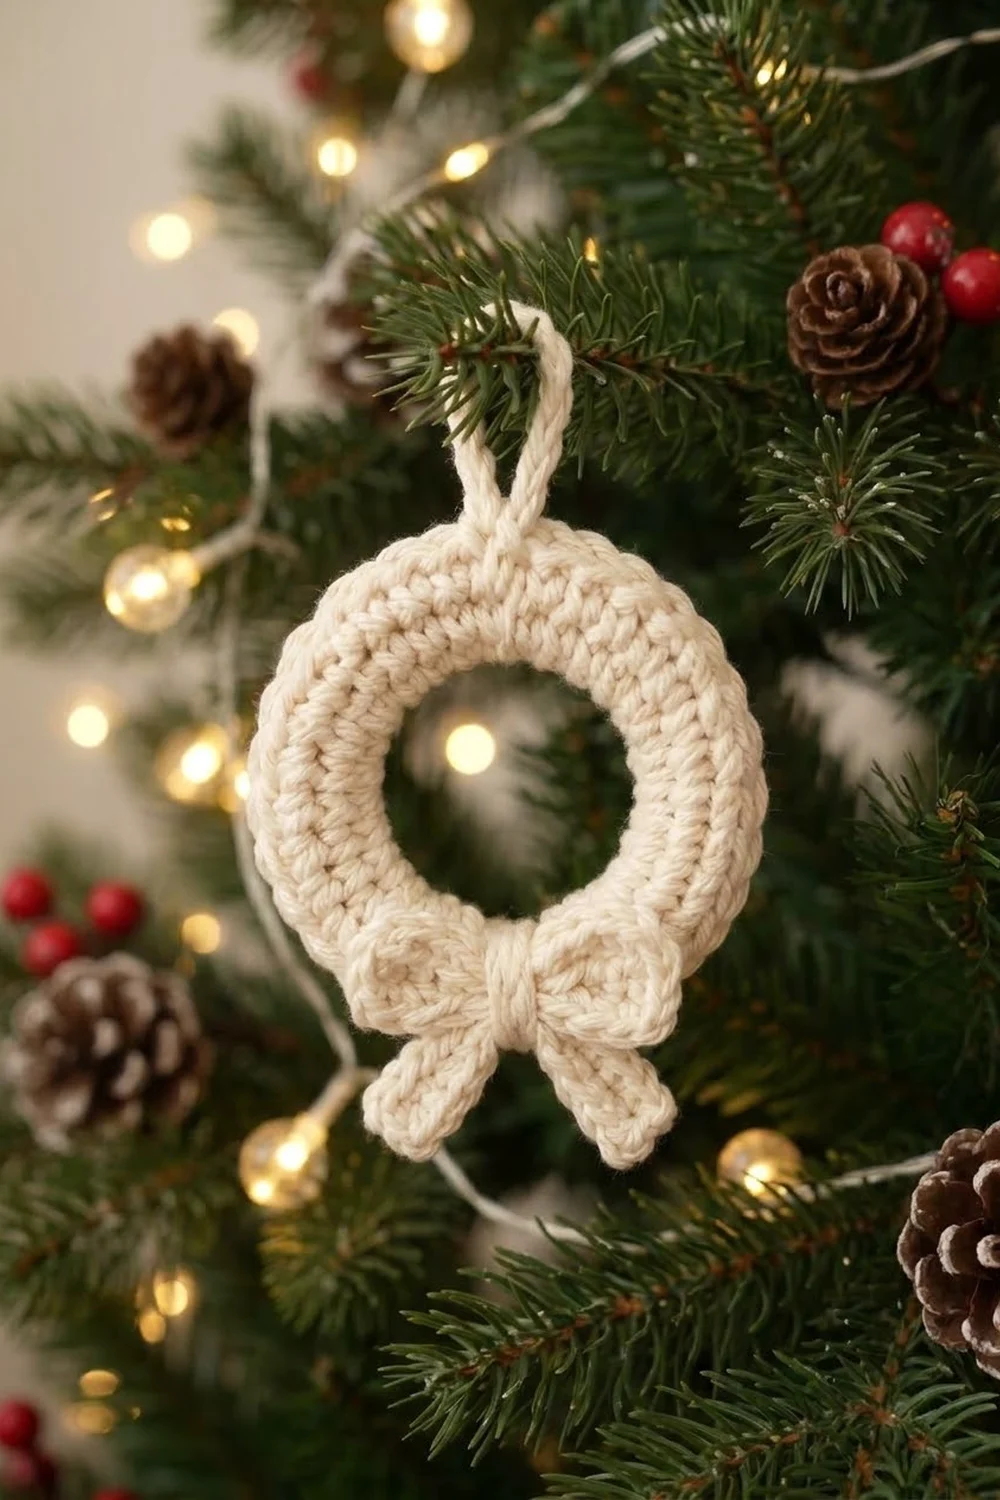
This little wreath ornament is a quiet, cozy piece for the tree. It is worked entirely in cream yarn. The dense ring has a thick, rope-like texture, a looped hanging cord sits at the top, and two separate bows are layered at the bottom.
The style is soft and minimal. With no color changes, the stitch texture carries the design. The bumpy surface of the stitches catches the light, and the two bows add shape and depth at the base.
This pattern uses US crochet terms throughout. The finished ring measures 4.5 in (11.4 cm) across. With the hanging loop and bows attached, the full ornament is about 6.5 in (16.5 cm) tall.
The ring is worked flat in the round from a chain circle, using three increase rounds of half double crochet (hdc). A tighter single crochet border finishes the outer edge, followed by a reverse single crochet round that rolls the rim into a rope-like edge. The hanging loop is worked directly onto the ring. Each bow is a short single crochet strip folded into two loops and wrapped at the center to form a knot. Both bows are then sewn to the bottom of the ring.
Finished Size and Construction
- Finished size (ring): 4.5 in (11.4 cm) diameter
- Finished size (full ornament): about 4.5 in (11.4 cm) wide x 6.5 in (16.5 cm) tall
- Skill level: Easy / advanced beginner
- Terminology: US crochet terms
- Yarn weight: Worsted (#4)
- Hook: 4.0 mm (G-6)
- Number of pieces: 3 (1 ring with an attached hanging loop, plus 2 bows)
- Layout: Hanging loop at the top, ring in the center, two layered bows at the bottom
- Piece size: Ring 4.5 in (11.4 cm). Each bow is 2.2 in (5.6 cm) wide x 1 in (2.5 cm) tall after folding.
- Size before border: 3.8 in (9.7 cm) diameter
- Border depth: 0.35 in (0.9 cm) per side
- Center hole: about 1.8 in (4.6 cm)
- Ring width (edge to hole): about 1.35 in (3.4 cm)
Materials
Yarn: Use a smooth worsted-weight cotton or cotton blend in cream or off-white. Cotton gives the clearest stitch definition and holds its shape well. Acrylic also works, but the ring will be slightly softer.
- Cream: 20 g (about 35 m)
These quantities include a margin of roughly 25% for swatching, sewing tails, and wrapping the bow knots.
Tools:
– 4.0 mm (G-6) crochet hook
– Tapestry needle
– Scissors
– 1 stitch marker
– Rust-proof pins
– Blocking mat or folded towel
– Spray bottle
– Optional: light fabric stiffener for the bows
Abbreviations (US Terms)
- ch: chain
- sl st: slip stitch
- sc: single crochet
- hdc: half double crochet
- rev sc: reverse single crochet (crab stitch)
- st(s): stitch(es)
- rnd(s): round(s)
- rep: repeat
Special stitch: Reverse single crochet (rev sc). Work from left to right if you are right-handed. Insert the hook into the next stitch to the right, yarn over, and pull up a loop. You now have 2 loops on the hook. Yarn over and pull through both loops. Each rev sc twists slightly, which creates the rope-like rolled edge.
Gauge and Checkpoints
Gauge:
– hdc: 16 sts and 12 rnds = 4 in (10.2 cm), or 4 hdc = 1 in (2.5 cm)
– sc: 18 sts and 16 rows = 4 in (10.2 cm), or 4.5 sc = 1 in (2.5 cm)
The sc border is deliberately worked at a tighter gauge than the hdc body: 4.5 sc/in versus 4 hdc/in. This keeps the outer edge firm.
Test one piece first. Work the ring through Rnd 3 and measure it before continuing. A flat ring is its own gauge swatch.
Checkpoints (measure flat, across the center):
– Foundation ring: inner circumference of about 6 in (15.2 cm), which gives a hole of about 1.9 in (4.8 cm)
– After Rnd 1: 2.6 in (6.6 cm)
– After Rnd 2: 3.2 in (8.1 cm)
– After Rnd 3: 3.8 in (9.7 cm)
– After Border Rnd 1: 4.3 in (10.9 cm)
– After Border Rnd 2: 4.5 in (11.4 cm)
If the ring is too big (over 4 in / 10.2 cm after Rnd 3), restart with a 3.75 mm hook.
If the ring is too small (under 3.6 in / 9.1 cm after Rnd 3), restart with a 4.5 mm hook.
If the ring ripples, your hdc is looser than gauge. Go down a hook size.
If the ring cups into a bowl shape, your hdc is tighter than gauge. Go up a hook size.
Wreath Ring
The ring is worked in joined rounds with the right side facing throughout. The beginning ch 2 does not count as a stitch. Join each round with a sl st to the first hdc.
Foundation: Ch 24 and sl st to the first ch to form a ring. Be careful not to twist the chain.
Rnd 1: Ch 2. 2 hdc in the next ch, hdc in each of the next 2 ch. Rep from * 7 more times. Join. (32 hdc)*
Each of the 8 repeats turns 3 chains into 4 stitches, so 8 x 4 = 32.
Rnd 2: Ch 2. 2 hdc in the next st, hdc in each of the next 3 sts. Rep from * 7 more times. Join. (40 hdc)*
Rnd 3: Ch 2. 2 hdc in the next st, hdc in each of the next 4 sts. Rep from * 7 more times. Join. (48 hdc)*
Each round adds exactly 8 stitches, one per repeat. At 4 hdc/in, 48 sts give an outer circumference of 12 in (30.5 cm). That works out to a diameter of 3.8 in (9.7 cm).
Inner edge: Turn the ring so the foundation chain faces you. Join the yarn with a sl st in any foundation ch loop. Sl st loosely in each of the 24 foundation loops and join. (24 sl st) This firms the hole to about 1.8 in (4.6 cm) without adding height. Fasten off and weave in the end.
Do not fasten off the main yarn yet. Continue straight to the Border section once the bows are made, or set the ring aside with a stitch marker in the live loop.
Bows (Make 2)
Both bows are identical. They are worked flat in rows.
Row 1: Ch 21. Sc in the 2nd ch from the hook and in each ch across. (20 sc)
Rows 2-4: Ch 1, turn. Sc in each st across. (20 sc)
Fasten off and leave a 12 in (30.5 cm) tail for wrapping.
Strip checkpoint: 4.4 in (11.2 cm) long x 1 in (2.5 cm) tall. At 4.5 sc/in, 20 sc = 4.4 in. Four rows at 4 rows/in = 1 in.
Shape the bow:
1. Lay the strip flat with the wrong side up.
2. Fold both short ends to the center so they overlap by about 0.25 in (0.6 cm). This creates two layered loops.
3. Turn the bow right side up. Each loop should measure about 1.1 in (2.8 cm), giving a bow 2.2 in (5.6 cm) wide.
4. Pinch the center to about 0.4 in (1.0 cm).
Center knot: Thread the tail onto the tapestry needle. Wrap the yarn snugly around the pinched center 10 times, stacking the wraps side by side. Pass the needle under all the wraps twice on the back to lock them, then make a small knot. The wrapped band forms the raised knot detail. Leave the remaining tail for sewing.
Make All Pieces
- Ring: 1 in Cream (with the border and hanging loop added later)
- Bows: 2 in Cream, labeled Bow A (front) and Bow B (back)
Layout:
TOP:     HANGING LOOP
CENTER:  RING
BOTTOM:  BOW B (back, angled) + BOW A (front, horizontal)
Joining
Finish the Border and hanging loop (next section) before sewing on the bows. This keeps the edge stitches easy to count.
Find the bottom. The hanging loop is worked into one border stitch, which marks the top. Count 28 sts around from it. Since 56 / 2 = 28, this is the bottom center stitch. Place a marker here.
Sew Bow B (back):
1. Turn Bow B so its loops angle downward at about 45 degrees, like an open V.
2. Center its knot over the marked stitch, with the knot resting on the border.
3. Using the tail, whipstitch through the back of the knot and into the marked stitch plus 1 stitch on each side, for 3 border sts total.
4. Bow B’s loops should extend about 0.5 in (1.3 cm) below the ring.
Sew Bow A (front):
1. Place Bow A horizontally on top of Bow B, aligning the knots.
2. Sew through Bow A’s knot, Bow B’s knot, and the same 3 border sts.
3. Tack each Bow A loop to the ring with 1 hidden stitch at its outer back edge so the loops stay lifted and layered.
Tension: Pull each stitch just snug. If you sew too tightly, the border will pucker. If you sew too loosely, the bows will flop forward.
Size checkpoint: The ornament should measure 4.5 in (11.4 cm) wide and about 6.5 in (16.5 cm) tall, from the top of the hanging loop to the lowest point of Bow B.
Border
The border is worked around the outer edge of Rnd 3.
Border gauge: 4.5 sc = 1 in (2.5 cm). This is tighter than the hdc body.
Border Rnd 1 (conversion round): Join the yarn in any hdc of Rnd 3, or continue from your live loop. Ch 1. 2 sc in the next st, sc in each of the next 5 sts. Rep from * 7 more times. Join. (56 sc)*
Count: 48 sts worked 1 sc each, plus 8 extra sc (one in each 2-sc stitch), gives 48 + 8 = 56.
Border Rnd 2: Ch 1. Rev sc in each st around. Join. (56 rev sc)
This round works 1 rev sc into each existing sc and adds no stitches.
Why the math works: After Border Rnd 1, the ring is 4.3 in (10.9 cm) across. The sc round sits on a mid-line of about 12.7 in (32.3 cm) circumference. At 4.5 sc/in, that would call for about 57 sts. Using 56 keeps the edge one stitch snug, which stops rippling and helps the rim roll.
Because 56 divides evenly by 8, the increases stay aligned with the 8 hdc increase columns below. The rev sc adds about 0.1 in (0.3 cm) per side. Together, the two rounds give 0.35 in (0.9 cm) of border per side, so 3.8 + 0.35 + 0.35 = 4.5 in (11.4 cm).
Hanging Loop:
1. Without fastening off, sl st to any border stitch away from the round’s join. This stitch is the top.
2. Ch 16, which is about 4 in (10.2 cm).
3. Sl st into the same border stitch.
4. Work 20 sc into the ch-16 loop, packing them tightly to create the rope-like cord.
5. Sl st into the top border stitch again and fasten off, leaving an 8 in (20.3 cm) tail.
6. Wrap the tail 4 times around the base of the loop, then weave it in.
The loop should stand about 1.5 in (3.8 cm) tall.
Final Blocking
- Mist the assembled ornament lightly until it is damp but not wet.
- Lay it right side up on the blocking mat.
- Pin the ring into a true circle at 4.5 in (11.4 cm), placing 8 pins evenly around the border.
- Check that the center hole is round and about 1.8 in (4.6 cm) across. Stretch it gently with your fingers if needed.
- Pin the hanging loop straight up.
- Shape the bow loops with your fingertips. Optionally, stuff each loop with a small roll of paper to hold it open.
- If you like stiffer bows, brush a little fabric stiffener onto the bows only.
- Let the ornament dry completely, usually 6-12 hours, before unpinning.
Final Quality-Control Checklist
- [ ] Ring measures 4.5 in (11.4 cm) across in every direction
- [ ] Rnds 1-3 have 32, 40, and 48 hdc
- [ ] Border Rnd 1 has 56 sc, and Border Rnd 2 has 56 rev sc
- [ ] The rim rolls evenly with no flat spots
- [ ] Center hole is about 1.8 in (4.6 cm) and round
- [ ] Hanging loop is about 1.5 in (3.8 cm) tall and centered at the top
- [ ] Each bow strip is 20 sc x 4 rows
- [ ] Each bow is 2.2 in (5.6 cm) wide with two even loops
- [ ] Center knots are tight and neat
- [ ] Bows are centered 28 sts from the hanging loop
- [ ] All ends are woven in invisibly
Troubleshooting
The ring ruffles. Your hdc is too loose. Go down a hook size, or check that you are not adding extra increases.
The ring cups. Your hdc is too tight. Go up a hook size and relax your tension.
The rev sc edge flares. Your rev sc stitches are loose. Work them more snugly, or redo Border Rnd 1 with a 3.75 mm hook.
The bow loops are uneven. Unwrap the knot, re-center the fold so each loop is 1.1 in (2.8 cm), and wrap again.
The bows droop forward. Add one more tacking stitch behind each Bow A loop, or use fabric stiffener.
The hanging loop twists. Remove it and work fewer sc, such as 18 instead of 20, into the chain loop.
The join seam shows. Rotate the seam to the back. Next time, start each round with ch 2 in a new position.
Care
Hand wash in cool water with mild soap. Press out the water in a towel, then reshape and dry flat.
Final Notes
The measurement chain is simple to follow:
- Foundation ring: 1.9 in (4.8 cm)
- Rnd 1: 2.6 in (6.6 cm)
- Rnd 2: 3.2 in (8.1 cm)
- Rnd 3: 3.8 in (9.7 cm)
- Border Rnd 1: 4.3 in (10.9 cm)
- Border Rnd 2: 4.5 in (11.4 cm)
Each bow is a 4.4 in (11.2 cm) strip folded to 2.2 in (5.6 cm). Adding the 1.5 in (3.8 cm) hanging loop and the bows brings the ornament to about 6.5 in (16.5 cm) tall. If each checkpoint matches, the finished ornament will too.
Optional: for a matching set, simply repeat the full pattern as many times as you like.
Happy crocheting!