

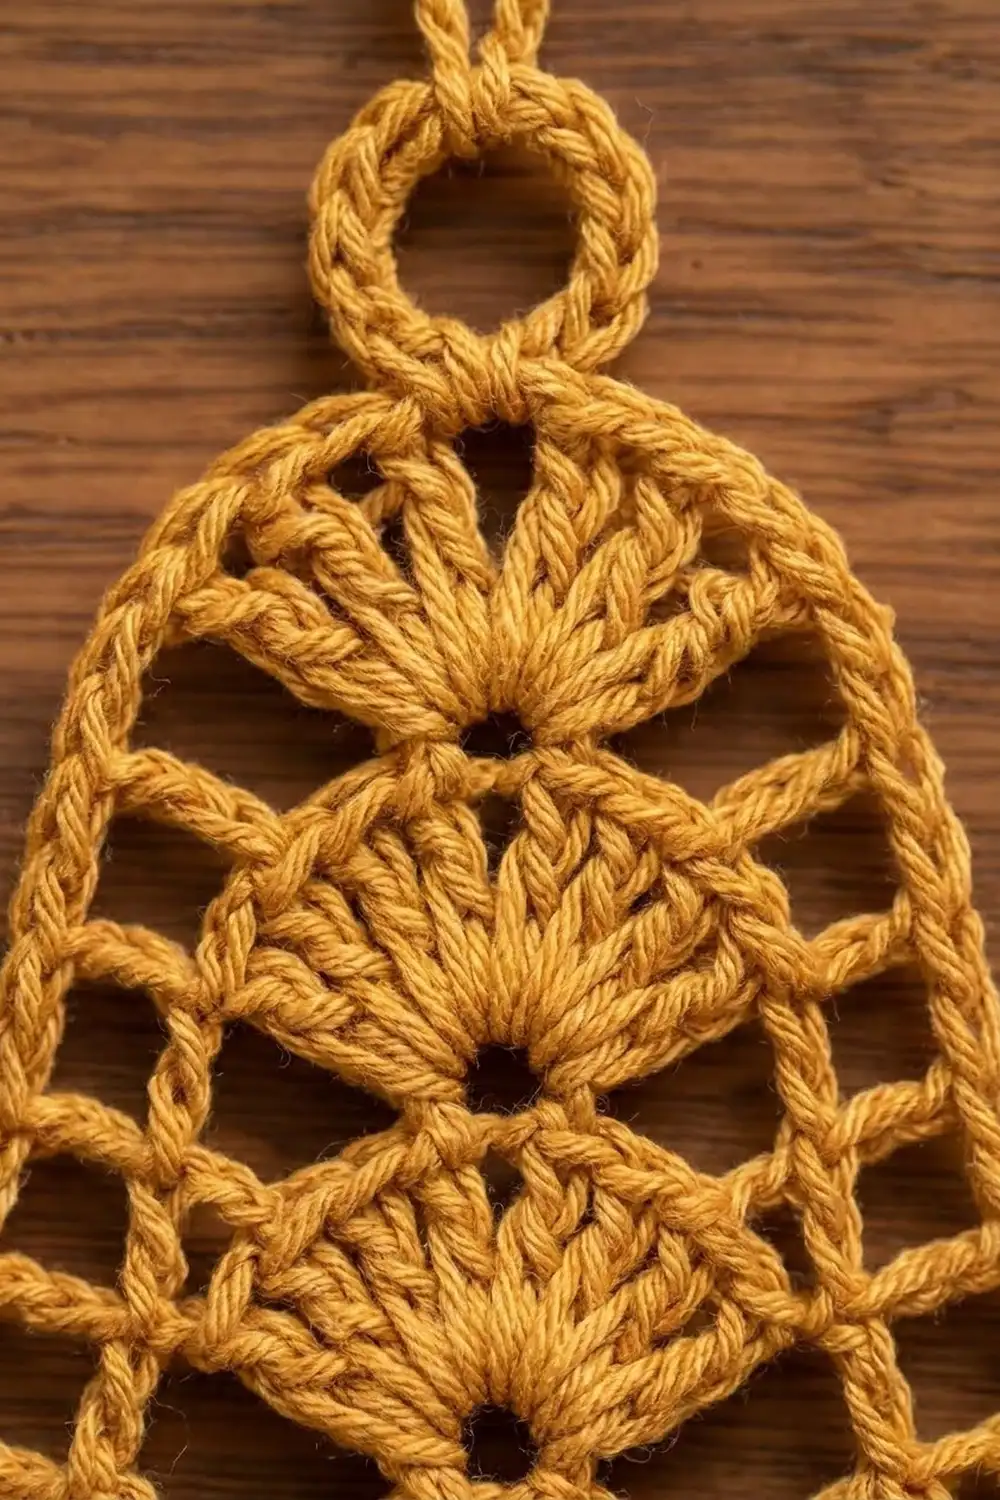
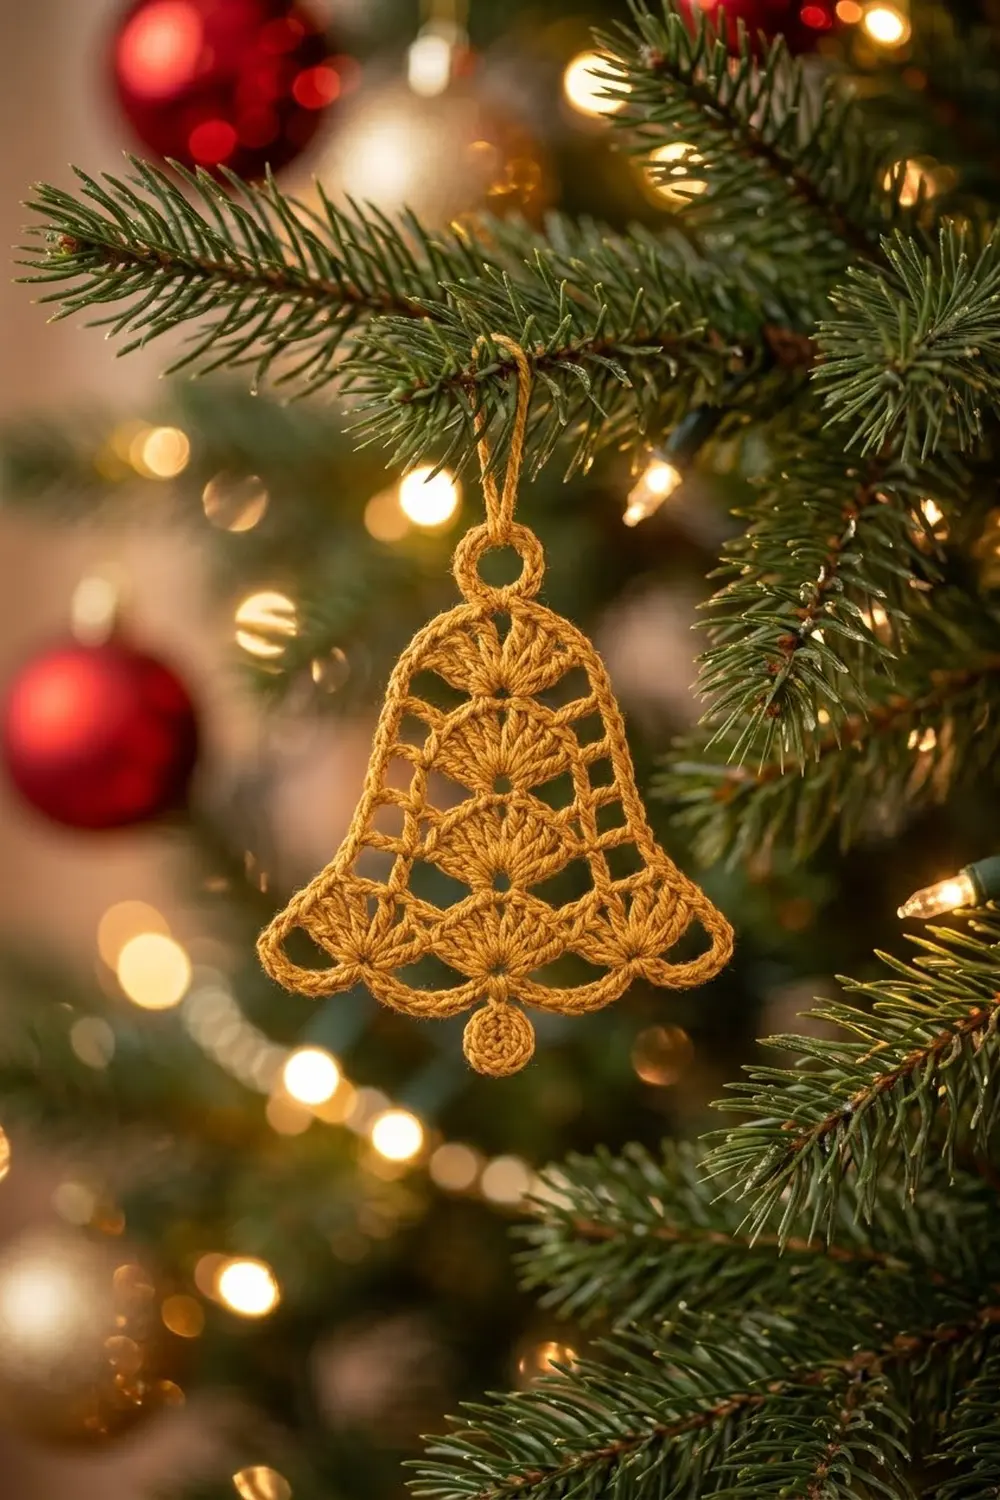
The Golden Chime Bell is a flat, lacy holiday ornament in warm golden mustard yarn. Tiers of shell stitches stack down the middle of the bell, framed by an open lattice of double crochet bars. The top is a small rounded ring, the sides flare outward, and the bottom finishes in a wavy scalloped edge formed by three shells.
A matching hanging loop rises from the top of the ring, and a tiny crocheted ball dangles from the bottom point. The style is classic and vintage, the kind of piece that looks lovely on a tree, a gift tag, or a window.
This pattern uses US crochet terms throughout. The finished bell measures 3.5 in (8.9 cm) tall and 3.5 in (8.9 cm) wide at the scalloped bottom. The hanging loop adds 1 in (2.5 cm) above, and the ball adds 0.5 in (1.3 cm) below, for an overall length of 5.0 in (12.7 cm).
Construction is simple and all in one piece. You work a small ring for the top, then work four rows back and forth from the bottom of the ring downward, widening each row. A single border row of sc outlines the sides and scallops. Finally, you add the hanging loop and work the little ball directly off the bottom edge.
Finished Size and Construction
- Finished size: 3.5 in (8.9 cm) tall x 3.5 in (8.9 cm) wide, not including loop and ball
- Overall length with loop and ball: 5.0 in (12.7 cm)
- Skill level: Easy-Intermediate
- Terminology: US crochet terms
- Yarn weight: DK (3), cotton or cotton blend
- Hook: 3.5 mm (E-4)
- Number of pieces: 1 (the loop and ball are worked directly onto the bell)
- Layout: Top ring, 4 rows worked downward, 1 border row, hanging loop, ball
- Piece size before border: 3.0 in (7.6 cm) wide x 3.25 in (8.3 cm) tall
- Border depth: 0.25 in (0.6 cm) along the sides and bottom
Materials
Yarn: Choose a smooth, mercerized DK cotton. Cotton holds the shell definition and takes starch well, so the bell keeps its shape on the tree. Avoid fuzzy or very stretchy yarns, which blur the lattice.
- Golden yellow / mustard: 10 g, approximately 23 m
The quantity includes a margin for your gauge swatch (the first bell itself), the tails, and the small amount of scrap yarn used to fill the ball.
Tools:
- 3.5 mm (E-4) crochet hook
- Tapestry needle
- Scissors
- 1 stitch marker
- Rust-proof pins
- Foam blocking board or folded towel
- Plastic wrap
- Spray starch or fabric stiffener (optional, recommended)
Abbreviations (US Terms)
- ch – chain
- sl st – slip stitch
- sc – single crochet
- dc – double crochet
- sc2tog – single crochet 2 together
- sp – space
- st(s) – stitch(es)
- RS / WS – right side / wrong side
- tch – turning chain
Special stitch:
- Shell: 7 dc worked into the same stitch.
Gauge and Checkpoints
Gauge is not critical for an ornament, but it controls the final size. Treat your first bell as the test piece and measure at each checkpoint.
Working gauge:
- One 7-dc shell measures about 1 in (2.5 cm) across its curved edge.
- One dc row measures about 0.6 in (1.5 cm) tall.
- Border: 5 sc per 1 in (2.5 cm) along the row ends.
Checkpoints:
- After the ring: Outer diameter is 0.75 in (1.9 cm).
- After Row 2: The piece measures about 2 in (5.1 cm) from the top of the ring.
- After Row 4: 3.0 in (7.6 cm) wide x 3.25 in (8.3 cm) tall.
- After the border: 3.5 in (8.9 cm) wide x 3.5 in (8.9 cm) tall.
If your piece is too big, try a 3.0 mm hook. If it is too small, try a 4.0 mm hook. Change hooks rather than changing stitch counts, because the counts are what keep the bell symmetrical.
Pattern
Top Ring
Ch 8, sl st in first ch to form a ring.
Rnd 1: Ch 1, 16 sc into ring, sl st in first sc to join. (16 sc)
Number the sc 1 to 16, with sc 1 as the joining stitch. Place a marker in sc 1. This is the top center of the bell, where the hanging loop will go later. Sc 9 sits directly opposite and is the bottom center.
Sl st in next 6 sc. You are now in sc 7.
Row 1 (RS)
Ch 5 (counts as dc + ch 2), skip sc 8, shell in sc 9, ch 2, skip sc 10, dc in sc 11. Turn.
(9 dc: 1 shell + 2 edge dc; 2 ch-2 sp)
Ring sc 12 through 16 and 1 through 6 stay free. They form the rounded top of the bell.
Row 2 (WS)
Ch 5 (counts as dc + ch 2), dc in next ch-2 sp, ch 2, skip next 3 dc, shell in next dc (center of shell), ch 2, skip next 3 dc, dc in tch sp, ch 2, dc in 3rd ch of tch. Turn.
(11 dc: 1 shell + 4 dc; 4 ch-2 sp)
Each side has gained one ch-2 sp. The single dc bars land in the spaces of the row below, which starts the zigzag lattice.
Row 3 (RS)
Ch 5 (counts as dc + ch 2), dc in next ch-2 sp, ch 2, dc in next ch-2 sp, ch 2, skip next 3 dc, shell in next dc, ch 2, skip next 3 dc, dc in next ch-2 sp, ch 2, dc in tch sp, ch 2, dc in 3rd ch of tch. Turn.
(13 dc: 1 shell + 6 dc; 6 ch-2 sp)
Check: 6 single dc + 7 shell dc = 13 dc. There are 3 ch-2 sp on each side of the shell.
Row 4 (WS) – Scalloped Bottom Tier
This row places three shells side by side to form the scalloped bottom.
Ch 1, sc in first dc, skip next ch-2 sp, shell in next dc, skip next ch-2 sp, sc in next dc, ch 2, skip next ch-2 sp and next dc (1st dc of shell), sc in next dc (2nd dc of shell), skip next dc, shell in next dc (center dc), skip next dc, sc in next dc (6th dc of shell), ch 2, skip next dc and next ch-2 sp, sc in next dc, skip next ch-2 sp, shell in next dc, skip tch sp, sc in 3rd ch of tch.
(21 dc in 3 shells; 6 sc; 2 ch-2 sp)
Check: 3 shells x 7 dc = 21 dc. The sc anchors are 2 edge sc, 2 sc on the single dc bars, and 2 sc on the center shell. That makes 6 sc.
Each shell now bridges about 5 stitch-widths of the row below. This makes the shells flare outward and curve into scallops. The two side shells push past the side line and give the bell its outward flare.
Fasten off. The piece should measure 3.0 in (7.6 cm) wide x 3.25 in (8.3 cm) tall.
Border
The border is a single row of sc. It runs from the ring, down one side, around the scallops, and up the other side back to the ring. It smooths the lattice edge and defines each scallop.
Border gauge: There are two placement methods, and each applies to a different part of the edge:
- Row ends (sides): Work 3 sc per dc row end. One dc row is 0.6 in (1.5 cm) tall, so 3 sc per 0.6 in equals 5 sc per 1 in (2.5 cm), which matches the border gauge.
- Shells (bottom): Work 1 sc into each existing dc, plus 1 extra sc at each end of the shell to ease around the curve. This is a conversion row, so it does not use the row-end gauge.
Border Row (RS facing)
With RS facing, join yarn with a sl st in the free ring sc beside the end of Row 1 (sc 6 or sc 12, whichever is on your right).
First side: Ch 1, work 3 sc in the row end of each of Rows 1, 2, and 3 (9 sc), then sc in the edge sc of Row 4. (10 sc)
Bottom:
- Side shell: 2 sc in first dc, sc in next 5 dc, 2 sc in last dc. (9 sc)
- Valley: sl st in next sc, 2 sc in ch-2 sp, sl st in next sc.
- Center shell: 2 sc in first dc, sc in next 5 dc, 2 sc in last dc. (9 sc)
- Valley: sl st in next sc, 2 sc in ch-2 sp, sl st in next sc.
- Side shell: 2 sc in first dc, sc in next 5 dc, 2 sc in last dc. (9 sc)
Bottom total: (7 dc x 3 shells = 21 sc worked 1-per-dc) + (2 extra sc x 3 shells = 6) + (2 sc x 2 ch-2 sp = 4) = 31 sc, plus 4 sl st in the valleys.
Second side: Sc in the edge sc of Row 4, then 3 sc in the row ends of each of Rows 3, 2, and 1. (10 sc)
Sl st in the free ring sc beside Row 1 on this side. Fasten off and weave in the ends.
Border total: 10 + 31 + 10 = 51 sc, plus 4 valley sl st and 2 joining sl st.
Why the math works: Both sides receive identical counts (10 sc), so the bell stays symmetrical. The 9 row-end sc cover 1.8 in (4.6 cm) of side edge at exactly 5 sc per 1 in (2.5 cm), so the sides lie flat without ruffling or pulling. On the bottom, the 1-per-dc placement keeps each shell at its natural length. The 2 extra sc per shell round the scallop tips, and the valley sl sts sit low to sharpen the wave.
Hanging Loop
Join yarn with a sl st in the marked ring sc 1 (top center). Ch 14, sl st in same sc. Turn. Work 20 sc into the ch-14 loop, then sl st in sc 1. Fasten off and weave in the ends.
The loop stands about 1 in (2.5 cm) above the ring.
Ball
The ball is worked directly off the border, so the ornament stays a single piece.
Locate the center shell’s 9 border sc. The 5th sc sits above the shell’s center dc. Join yarn there with a sl st.
Ch 2 for the stem, then ch 2 more.
Rnd 1: 6 sc in 2nd ch from hook. Do not join; work in a spiral. (6 sc)
Rnd 2: 2 sc in each sc around. (12 sc)
Rnd 3: Sc in each sc around. (12 sc)
Tuck a small wad of scrap yarn inside the cup.
Rnd 4: Sc2tog 6 times. (6 sc)
Fasten off, leaving a 6 in (15.2 cm) tail. Thread the tail through the front loops of the 6 sts, pull tight to close, and weave in.
The ball measures about 0.5 in (1.3 cm) across and hangs just below the center scallop.
Final Blocking
- Soak the bell in cool water for 5 minutes, then press it gently in a towel. Do not wring it.
- Lay plastic wrap over the foam board so starch won’t stick.
- Place the bell RS up. Pin the top ring into a round shape.
- Pin the sides straight, so the bell measures 3.5 in (8.9 cm) across the bottom.
- Pin each of the three scallop tips, then pin the two valleys slightly higher to emphasize the wave.
- Open the lattice spaces with a pin tip so they look even.
- Check that the height is 3.5 in (8.9 cm) from the top of the ring to the bottom of the scallops.
- Spray with starch or brush on stiffener. Let it dry completely, at least 6 hours.
- Unpin the bell. Roll the ball between your fingers to round it, and smooth the hanging loop.
Final Quality-Control Checklist
- Ring: 16 sc, 0.75 in (1.9 cm) across, rounded on top.
- Row counts: 9 dc, 11 dc, 13 dc, then 21 dc + 6 sc.
- The center shells of Rows 1 to 3 line up vertically.
- The three bottom shells are even in size.
- Border: 10 sc on each side, 31 sc + 4 sl st across the bottom.
- Size: 3.5 in (8.9 cm) x 3.5 in (8.9 cm).
- The loop is centered over sc 1, and the ball is centered under the middle scallop.
- All ends are woven in and invisible from the RS.
Troubleshooting
Bell leans to one side: You likely missed a ch-2 sp in Row 2 or 3. Count 3 sp on each side of the Row 3 shell before starting Row 4.
Shells cup or ruffle: Your tension is too loose for the 7-dc shell. Go down half a hook size, or keep each dc a little shorter.
Bottom scallops look flat: Make sure the valley stitches are sl sts, not sc. Pin the valleys higher during blocking.
Sides ripple: You worked more than 3 sc per row end. Rework the border with exactly 9 sc across Rows 1 to 3.
Sides pucker: Your border tension is too tight. Loosen up, or use a hook half a size larger for the border only.
Ball won’t close neatly: Thread the tail through the front loops only, then pull firmly.
Loop twists: Make sure the ch-14 is not twisted before you sl st it closed.
Care
Spot clean or hand wash in cool water. Reshape and re-starch while damp, then dry flat. Store flat, away from crushing.
Final Notes
The measurement chain is short and easy to check. The 16-sc ring measures 0.75 in (1.9 cm). Each dc row adds about 0.6 in (1.5 cm), and Row 4’s shells flare the piece to 3.0 in (7.6 cm) x 3.25 in (8.3 cm). The sc border adds 0.25 in (0.6 cm) to bring the bell to 3.5 in (8.9 cm) x 3.5 in (8.9 cm). The loop and ball bring the overall length to 5.0 in (12.7 cm).
If every count matches (9, 11, 13, 21+6, then 10 / 31 / 10), your bell will be symmetrical every time.
Optional: For a matching set, make several bells. Each one remains its own single ornament.
Happy crocheting!