

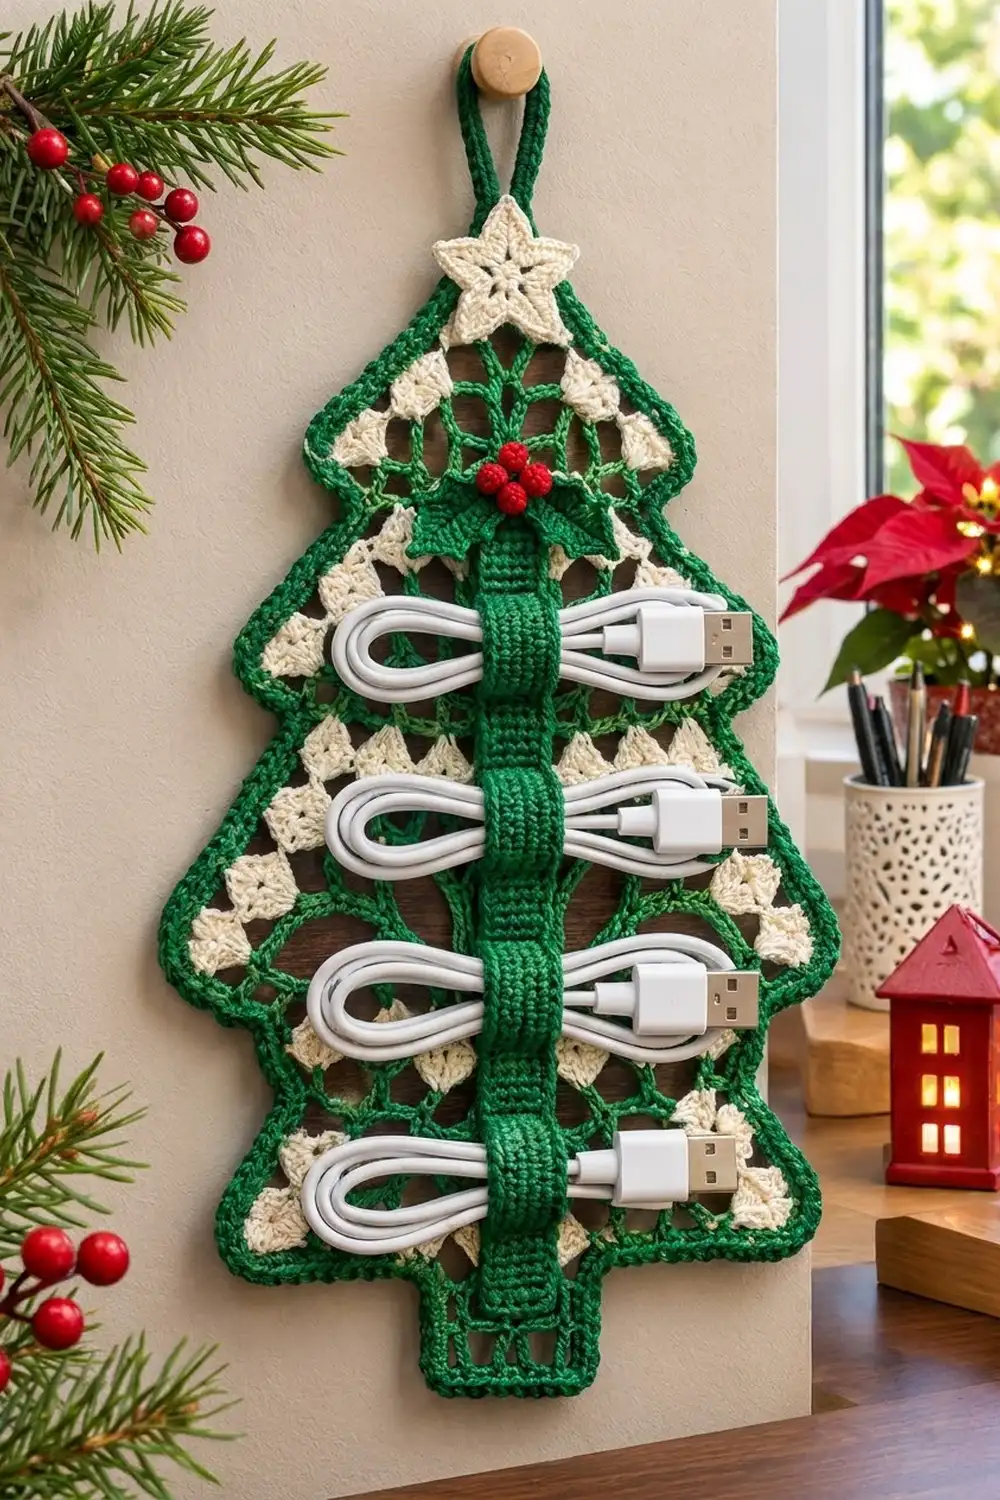
This lace Christmas tree hangs on the wall and holds your charging cables. The panel is a three-tier tree in green open mesh, with bands of cream diamonds running across each tier. A solid green border outlines the silhouette, and a hanging loop rises from the top point.
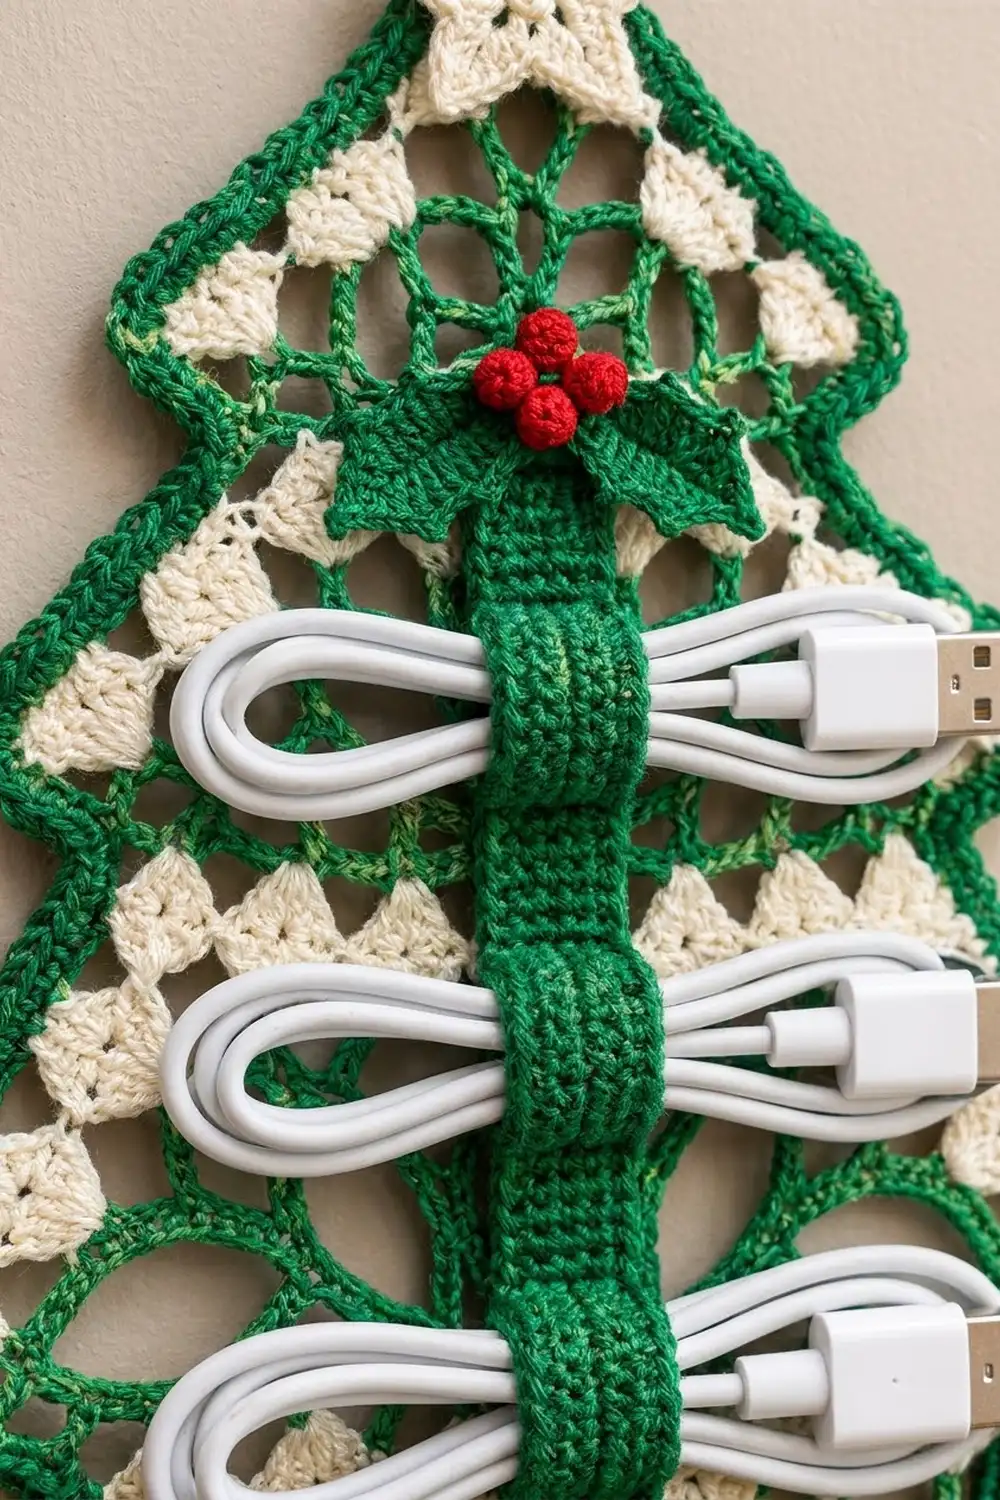
The decorations are a cream star at the tip and a holly sprig with three red berries. Below the holly, a solid green strap runs down the center of the tree to the trunk. Four raised bands cross the strap, and you slide a coiled cable under each band. The colors are forest green, cream, and red.
The pattern uses US crochet terms. The finished tree is 9.4 in (23.9 cm) wide and 12.2 in (31.0 cm) tall without the loop, or 14.2 in (36.1 cm) tall with it.
You work the tree top-down in one piece, using rows of ch-5 loops and cream diamond rows. The trunk is a small dc mesh worked off the last row. Two rounds of sc border the panel, and then you sew on the small pieces.
Finished Size and Construction
- Finished size: 9.4 in x 12.2 in (23.9 cm x 31.0 cm), plus a 2 in (5.1 cm) hanging loop
- Skill level: Intermediate
- Terminology: US
- Yarn weight: Sport (#2) cotton
- Hook: 3.25 mm (US D-3)
- Number of pieces: 1 tree panel plus 10 small pieces (1 star, 2 holly leaves, 3 berries, 1 strap, 4 bands)
- Layout: One vertical panel with appliqués stacked down the centerline
- Panel size before border: 8.8 in (22.4 cm) wide x 11.6 in (29.5 cm) tall
- Border depth: 0.3 in (0.8 cm), 2 rounds of sc
Materials
Use a smooth, mercerized sport-weight cotton. It keeps the lace crisp and the strap firm, and it holds up to cables sliding in and out. Avoid fuzzy yarns, because they blur the mesh.
- Green (A): 70 g / 217 m (237 yd)
- Cream (B): 25 g / 78 m (85 yd)
- Red (C): 5 g / 16 m (17 yd)
Tools:
- 3.25 mm (US D-3) hook
- Tapestry needle
- Stitch markers
- Rustproof pins and a blocking mat
- Spray starch or fabric stiffener (optional)
- Two 6 mm pearl beads and sewing thread (optional, for the flowers)
These quantities include a margin of about 15%, so you have enough yarn for a gauge test and the sewing.
Abbreviations (US Terms)
- ch – chain
- sl st – slip stitch
- sc – single crochet
- hdc – half double crochet
- dc – double crochet
- sc2tog / sc3tog – single crochet 2 / 3 together
- sp – space
- st(s) – stitch(es)
- RS / WS – right side / wrong side
Special stitches
- Anchor sc: a sc worked into a ch-5 loop, the ch-3 tip of a diamond, or an end sc. The loops hang between anchors.
- Diamond: (hdc, dc, ch 3, dc, hdc) in the same ch-5 loop. The ch-3 is the diamond’s tip.
- Picot: ch 3, sl st in the 3rd ch from the hook.
- Popcorn: work 5 dc in the same place, remove the hook, insert it in the 1st dc, pick up the dropped loop, and pull it through.
Gauge and Checkpoints
- Lace: 5 ch-5 loops = 4 in (10.2 cm) wide. One green row is 0.4 in (1.0 cm) tall, and one cream row is 0.6 in (1.5 cm) tall.
- Trunk mesh: 4 ch-2 sps = 1.6 in (4.1 cm). One row is 0.5 in (1.3 cm).
- Solid sc: 11 sc and 12 rows = 2 in (5.1 cm).
- Border: 13 sc = 2 in (5.1 cm).
Use the top tier (Rows 1–7) as your gauge test. Measure it gently stretched, the way it will be blocked.
Checkpoints:
- After Row 7: 4 in (10.2 cm) wide x 3.2 in (8.1 cm) tall
- After Row 14: 6.4 in (16.3 cm) wide x 6.4 in (16.3 cm) tall
- After Row 21: 8.8 in (22.4 cm) wide x 9.6 in (24.4 cm) tall
- After the trunk: 11.6 in (29.5 cm) tall
If your tier comes out too big, go down 0.25 mm in hook size. If it’s too small, go up 0.25 mm. If only the height is off, change your ch-5 loops to ch-4 or ch-6, but keep the stitch counts the same.
Tree Panel
How the shaping works: A normal green row puts an anchor sc in each end sc and in every loop or diamond tip of the row below. That gives one more loop than the row below had. A cream row works one diamond into each loop, so it doesn’t change the count. A notch row anchors only into the diamond tips and skips the end sc, so it has one fewer loop. That step-in creates the tier edge.
At the end of each cream row, fasten off. Join green for the next row with the RS or WS facing as it falls. Weave in the ends as you go.
Green row (G): Ch 1, turn. Sc in the first sc, ch 5, sc in the next loop or diamond tip, repeat across, ch 5, sc in the last sc.
Cream row (C): Join B with a sc in the first sc. Work a diamond in the next ch-5 loop, sc in the next sc, repeat across. Fasten off.
Notch row (N): Join A with a sc in the tip of the first diamond. Ch 5, sc in the tip of the next diamond, repeat across. Do not work into the end sc.
Tier 1
With A, ch 8.
Row 1: Sc in the 2nd ch from the hook, skip the next 5 ch, sc in the last ch. (2 sc, 1 ch-5 loop)
Row 2 (G): 3 sc, 2 loops
Row 3 (G): 4 sc, 3 loops
Row 4 (C): 4 sc, 3 diamonds
Row 5 (G): 5 sc, 4 loops
Row 6 (G): 6 sc, 5 loops
Row 7 (C): 6 sc, 5 diamonds
Checkpoint: 4 in (10.2 cm) wide.
Tier 2
Row 8 (N): 5 sc, 4 loops
Row 9 (G): 6 sc, 5 loops
Row 10 (C): 6 sc, 5 diamonds
Row 11 (G): 7 sc, 6 loops
Row 12 (G): 8 sc, 7 loops
Row 13 (G): 9 sc, 8 loops
Row 14 (C): 9 sc, 8 diamonds
Checkpoint: 6.4 in (16.3 cm) wide.
Tier 3
Row 15 (N): 8 sc, 7 loops
Row 16 (G): 9 sc, 8 loops
Row 17 (C): 9 sc, 8 diamonds
Row 18 (G): 10 sc, 9 loops
Row 19 (G): 11 sc, 10 loops
Row 20 (G): 12 sc, 11 loops
Row 21 (C): 12 sc, 11 diamonds
Checkpoint: 8.8 in (22.4 cm) wide x 9.6 in (24.4 cm) tall.
Trunk
Row 1: Join A in the tip of diamond 5. Ch 5 (counts as dc + ch 2), dc in the next sc, ch 2, dc in the tip of diamond 6, ch 2, dc in the next sc, ch 2, dc in the tip of diamond 7. (5 dc, 4 ch-2 sps)
Rows 2–4: Ch 5, turn. Dc in the next dc, ch 2, repeat 3 times, then dc in the 3rd ch of the turning ch. (5 dc, 4 ch-2 sps)
Don’t fasten off yet. Check the size: 1.6 in (4.1 cm) wide x 2 in (5.1 cm) tall. The panel is now 11.6 in (29.5 cm) tall.
Small Pieces
Star (B, make 1): Make a magic ring and work 10 sc into it. Sl st to the first sc.
Next round: Ch 5. Sl st in the 2nd ch from the hook, then work sc, hdc, and dc in the next 3 ch. Skip 1 sc, sl st in the next sc. Repeat 5 times to make 5 points. The star measures 2 in (5.1 cm).
Holly leaf (A, make 2): Ch 11. Work along one side of the chain, starting in the 2nd ch from the hook:
- sl st, sc, hdc, dc, picot, dc, dc, picot, dc, hdc, sc
- (sc, ch 2, sc) in the last ch for the tip
Now work along the other side of the chain into the free loops:
- sc, hdc, dc, picot, dc, dc, picot, dc, hdc, sc, sl st
Fasten off. Each leaf has 4 picot spikes and a pointed tip, and is 2 in (5.1 cm) long.
Berry (C, make 3): Make a magic ring, ch 2, and work 1 popcorn into the ring. Pull the ring tight and fasten off. Each berry measures 0.4 in (1.0 cm).
Cable strap (A, make 1): Ch 8.
- Row 1: Sc in the 2nd ch from the hook and in each ch across. (7 sc)
- Rows 2–42: Ch 1, turn, sc in each sc. (7 sc)
The strap measures 1.25 in x 7 in (3.2 cm x 17.8 cm).
Band (A, make 4): Ch 17.
- Row 1: Sc in the 2nd ch from the hook and in each ch across. (16 sc)
- Rows 2–4: Ch 1, turn, sc in each sc. (16 sc)
Each band measures 2.9 in x 0.7 in (7.4 cm x 1.8 cm).
Optional flowers (B, make 2): These are for a purely decorative tree with no strap. Make a magic ring and work 10 sc into it. Next round: Ch 6. Sl st in the 2nd ch from the hook, then work sc, hdc, dc, and dc in the next 4 ch. Skip 1 sc, sl st in the next sc. Repeat 5 times. Sew a pearl bead to the center. Each flower measures 2.25 in (5.7 cm).
Border
Border gauge is 13 sc = 2 in (5.1 cm). Each tier side is 3.2 in (8.1 cm) tall with a slight slant, and 21 sc covers about 3.2 in (8.1 cm). The border lies flat without ruffling.
Round 1: Using A, sc evenly around the whole tree as follows. Start at the top point and work down the left side.
- Top point: 3 sc in the center ch of the Row 1 strand
- Each tier side: 3 sc per row end (7 rows = 21 sc)
- Each tier corner: 3 sc in the end sc of Rows 7, 14, and 21
- Each ledge under Tier 1 and Tier 2: 3 sc along the outer half of the end diamond
- Each inner notch corner: sc2tog
- Bottom of Tier 3: 5 sc under each of diamonds 1–4, then 3 sc under the outer half of diamond 5 (23 sc)
- Trunk inner corner: sc2tog
- Trunk side: 3 sc per row end (12 sc)
- Trunk corners: 3 sc in each corner dc
- Trunk bottom: 2 sc in each ch-2 sp and 1 sc in each of the 3 middle dc (11 sc)
Mirror the left side as you work up the right side, then sl st to the first sc.
Count for each half: 21 + 3 + 3 + 1 + 21 + 3 + 3 + 1 + 21 + 3 + 23 + 1 + 12 = 116.
Round 1 total: 3 at the top point + 116 + 3 + 11 + 3 at the trunk bottom + 116 = 252 sc.
Round 2: Ch 1. Sc in each st around, with these changes:
- Work 3 sc in the center st of each of the 9 outer corners (the top point, 6 tier corners, and 2 trunk corners).
- Work sc3tog centered on each of the 6 inner corners.
Sl st to the first sc. The count is 225 sts worked 1-to-1, + 27 sts from the 9 outer corners, + 6 sts from the sc3tog = 258 sc.
Why the math works: Each outer corner adds 2 sts and each inner corner removes 2. The 18 sts added at the outer corners and the 12 removed at the inner corners keep the outline sharp without cupping. The border adds 0.3 in (0.8 cm) on each side, bringing the panel to 9.4 in x 12.2 in (23.9 cm x 31.0 cm).
Hanging loop: At the top point, ch 30 and sl st in the same st. Work 36 sc over the loop and sl st to the base. Fasten off. The loop is 2 in (5.1 cm) tall.
Assembly
Every step in this section uses matching yarn and a tapestry needle.
- Center a band across the strap at row 8, counted from the strap’s top end. Wrap both ends around the strap edges and whipstitch them to the back. The front arch should stand up about 0.5 in (1.3 cm) so a cable fits underneath.
- Repeat at rows 17, 26, and 35. The bands are 1.5 in (3.8 cm) apart.
- Pin the strap down the centerline. Its bottom end should meet the top of the trunk, and its top end should sit 2.6 in (6.6 cm) below the tip of the panel (measured before the border). Whipstitch both long edges to the mesh anchors.
- Sew the star over the top point.
- Sew the holly leaves in a V centered 2.75 in (7.0 cm) below the tip, so they cover the top end of the strap. Cluster the 3 berries where the leaves meet.
Final Blocking
- Soak the piece in cool water for 10 minutes, then press out the water in a towel. Don’t wring it.
- Pin the panel to 9.4 in x 12.2 in (23.9 cm x 31.0 cm).
- Pin each diamond tip and tier corner sharp, and pin the top of each ch-5 loop into an even arch.
- Lift the strap bands so they dry with an open arch.
- If you want a stiffer panel, mist it with starch.
- Leave it to dry completely, about 24 hours.
Final Quality-Control Checklist
- Row 21 has 11 diamonds, and the trunk has 5 dc per row.
- Border Round 2 counts 258 sc.
- The panel measures 9.4 in x 12.2 in (23.9 cm x 31.0 cm).
- All three tiers are symmetrical, and the notches match on both sides.
- All four bands open wide enough to take a cable.
- The strap, star, and holly sit on the centerline.
- All ends are woven in.
Troubleshooting
- The tier slants to one side: You probably skipped an end sc. Count the anchors: every green row should have one more anchor than the row below.
- The diamonds are crowded: Your ch-5 loops are too tight. Loosen them or use ch 6.
- The border ruffles: Work 2 sc per row end on the green rows.
- The border pulls in: Work 4 sc per row end on the cream rows.
- The cables won’t fit: Add 2 sc to each band so it arches higher.
- The panel sags on the wall: Starch it, or sew a thin backing strip behind the strap.
Care
Hand wash in cool water, then reshape the piece and dry it flat. Re-starch it if the lace softens.
Final Notes
The measurements chain from one stage to the next. Five ch-5 loops make 4 in (10.2 cm), so 11 diamonds give an 8.8 in (22.4 cm) tree. The 21 tier rows plus the 4 trunk rows reach 11.6 in (29.5 cm). The 2-round border brings the panel to 9.4 in x 12.2 in (23.9 cm x 31.0 cm). If your top tier matches its checkpoint, the rest of the tree will follow.
Happy crocheting!