
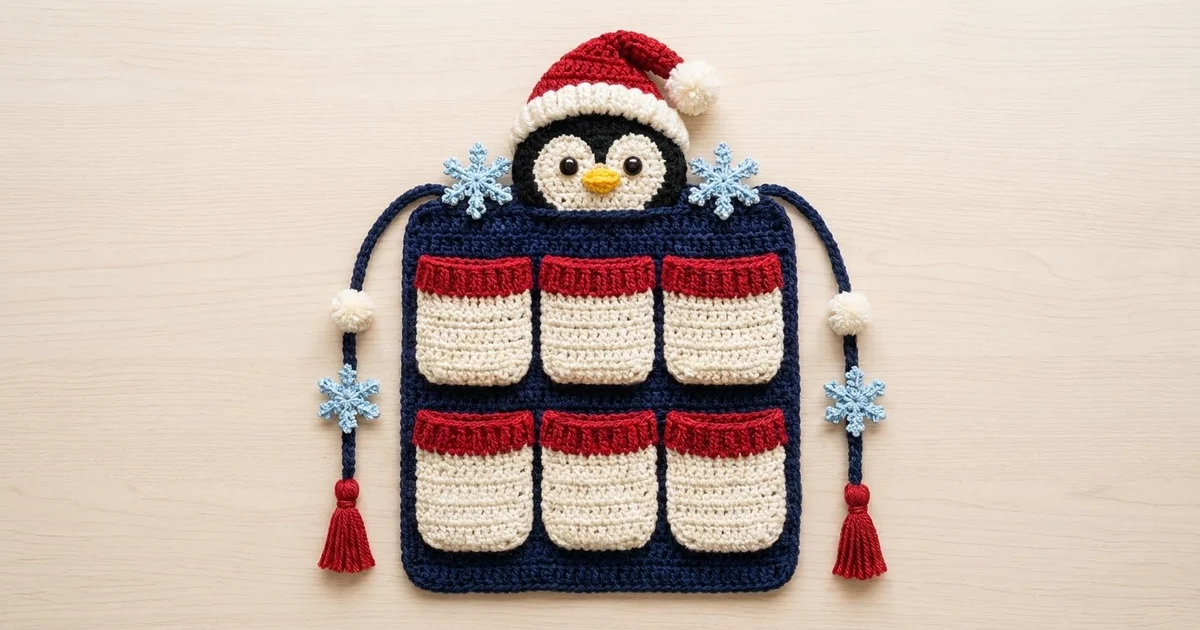
This armrest caddy has a navy back panel and six cream pockets, each with a chunky red ribbed cuff. A penguin in a Santa hat peeks over the top edge, with a snowflake on each side of him. Two navy side cords hang down the edges, and each one has a cream pompom, a snowflake and a red tassel.
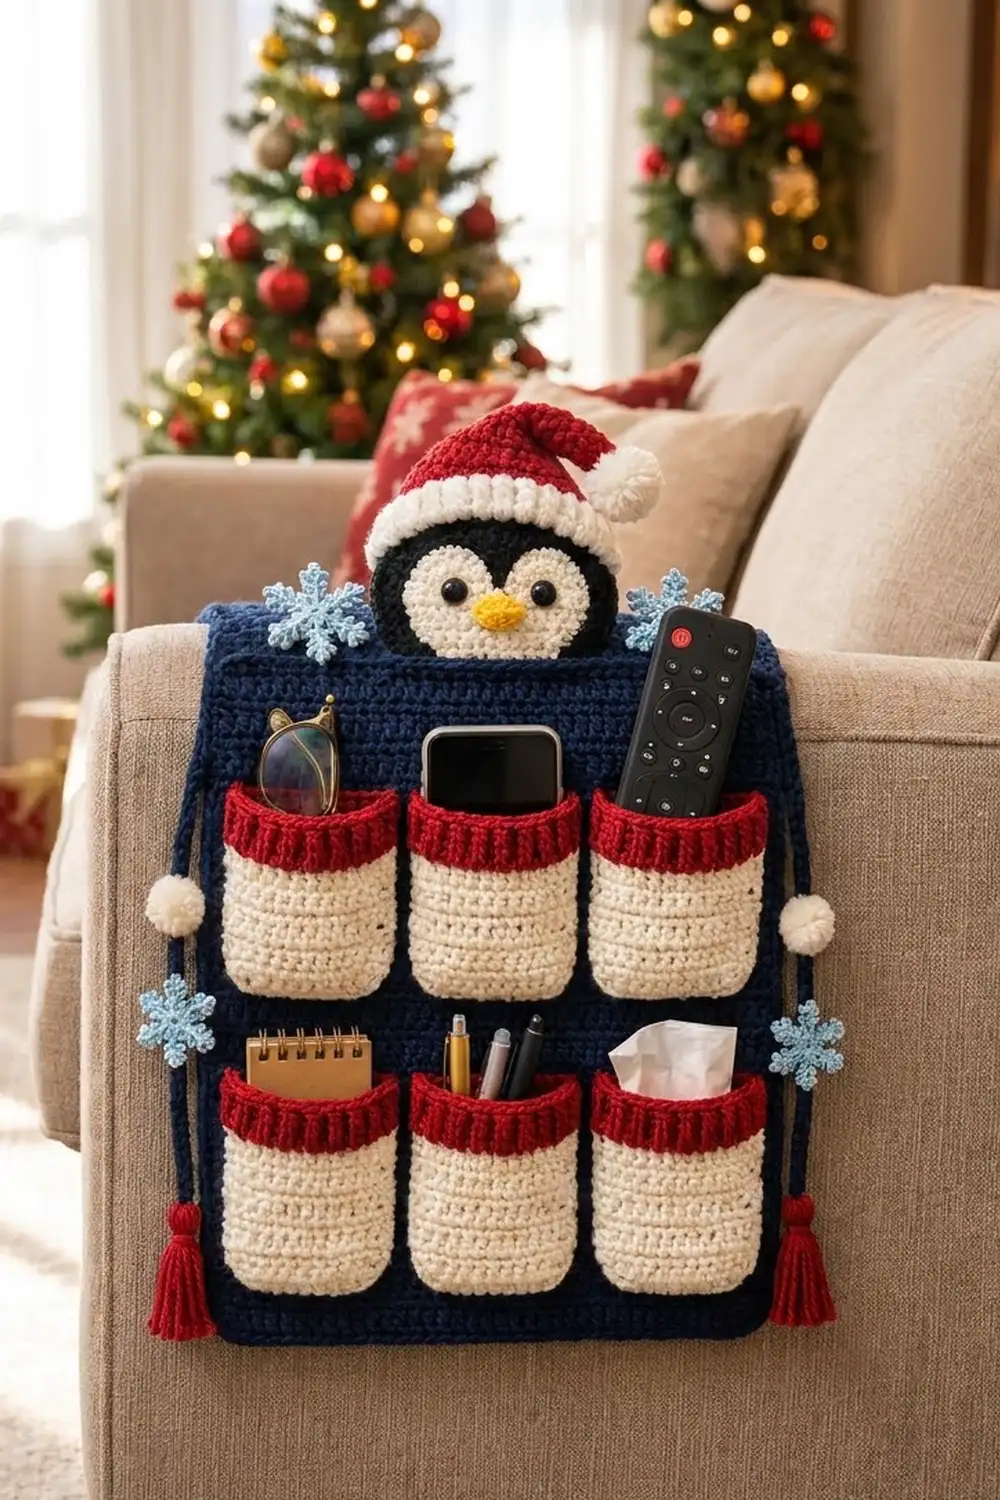
The colors are navy, cream, red, light blue, black and a little yellow. The style is cozy and festive but still practical. The pockets hold a remote, a phone, glasses, pens, a small notepad and tissues.
All instructions use US crochet terms. The finished back panel measures 12 in wide x 14 in tall (30.5 x 35.6 cm). Each pocket measures 3 x 5 in (7.6 x 12.7 cm).
Construction is simple. Work the back panel in rows of half double crochet and edge it with two rounds of single crochet. Make six pockets from the bottom up, each with a ribbed cuff, and sew them onto the panel in a 3 x 2 grid. Last, add the penguin head, hat, snowflakes, cords, pompoms and tassels.
Finished Size and Construction
- Finished size: 12 x 14 in (30.5 x 35.6 cm), not counting the penguin and cords
- Skill level: Intermediate (uses post stitches and needs neat sewing)
- Terminology: US
- Yarn weight: Worsted (#4)
- Hook: 4.5 mm (US 7)
- Number of pieces: 1 back panel, 6 pockets, 1 head, 2 face pieces, 1 beak, 1 hat, 4 snowflakes, 2 cords, 3 pompoms, 2 tassels
- Layout: pockets in 3 columns x 2 rows
- Pocket size: 3 x 5 in (7.6 x 12.7 cm)
- Panel size before border: 11 x 13 in (27.9 x 33.0 cm)
- Border depth: about 1/2 in (1.3 cm) per side
Materials
Choose a smooth acrylic or cotton-acrylic worsted yarn. It shows the ribbing clearly and holds up to daily use. Avoid fuzzy yarns, because they hide the stitch columns you need to count when you place the pockets.
- Navy: 100 g / 180 m (panel, border, cords)
- Cream: 70 g / 126 m (pockets, face, hat brim, pompoms)
- Red: 30 g / 54 m (cuffs, hat, tassels)
- Light blue: 10 g / 18 m (snowflakes)
- Black: 8 g / 14 m (head)
- Yellow: 3 g / 5 m (beak)
These amounts include an extra margin of about 10 to 15 percent.
Tools: 4.5 mm (US 7) hook, tapestry needle, stitch markers, scissors, two 9 mm black safety eyes or black yarn to embroider them, pompom maker or cardboard, blocking mat, rust-proof pins, spray bottle, liquid fabric stiffener (optional, for the snowflakes).
Abbreviations (US Terms)
- ch: chain
- sl st: slip stitch
- sc: single crochet
- hdc: half double crochet
- sc2tog: single crochet 2 together
- FPhdc: front post half double crochet
- BPhdc: back post half double crochet
- MR: magic ring
- st(s): stitch(es)
- RS / WS: right side / wrong side
FPhdc: Yarn over and insert the hook from front to back to front around the post of the stitch. Yarn over and pull up a loop, then yarn over and pull through all 3 loops.
BPhdc: Work it like an FPhdc, but insert the hook from back to front to back around the post.
Gauge and Checkpoints
Gauge: 16 hdc and 12 rows = 4 in (10.2 cm). In sc, 16 sts and 18 rows = 4 in (10.2 cm).
Make one pocket first. It is small, uses the same stitch as the panel and shows your gauge quickly.
- After pocket Row 12: 3 x 4 in (7.6 x 10.2 cm).
- After pocket Row 15: 3 x 5 in (7.6 x 12.7 cm).
- After panel Row 12: 11 in (27.9 cm) wide and 4 in (10.2 cm) tall.
- After panel Row 39: 11 x 13 in (27.9 x 33.0 cm).
- After the border: 12 x 14 in (30.5 x 35.6 cm).
If your test pocket is too big, go down a hook size. If it is too small, go up a hook size. Gauge matters most for the panel, because the pocket layout relies on each hdc column being 1/4 in wide and each row being 1/3 in tall.
Back Panel
Use navy. The turning chain does not count as a stitch.
Row 1 (RS): Ch 46. Hdc in 3rd ch from hook and in each ch across. Turn. (44 hdc)
Rows 2–39: Ch 1, hdc in each st across. Turn. (44 hdc)
At the end of Row 39, do not fasten off. Go straight on to the Border section below.
Checkpoint: 11 x 13 in (27.9 x 33.0 cm).
Pockets (Make 6)
The increases in Row 2 give the pocket its rounded bottom.
Row 1: With cream, leave a 24 in (61.0 cm) starting tail for sewing, then ch 12. Hdc in 3rd ch from hook and in each ch across. Turn. (10 hdc)
Row 2: Ch 1, 2 hdc in first st, hdc in next 8 sts, 2 hdc in last st. Turn. (12 hdc)
Rows 3–12: Ch 1, hdc in each st across. Turn. (12 hdc)
Checkpoint: 3 x 4 in (7.6 x 10.2 cm). Fasten off cream.
Row 13 (cuff set-up): Join red. Ch 1, hdc in each st across. Turn. (12 hdc)
Row 14: Ch 1, *FPhdc around next st, BPhdc around next st; rep from * across. Turn. (12 sts)
Row 15: Ch 1, *BPhdc around the FPhdc, FPhdc around the BPhdc; rep from * across. (12 sts)
Fasten off. Checkpoint: 3 x 5 in (7.6 x 12.7 cm). The red cuff is 1 in (2.5 cm) deep, with raised ribs running up and down.
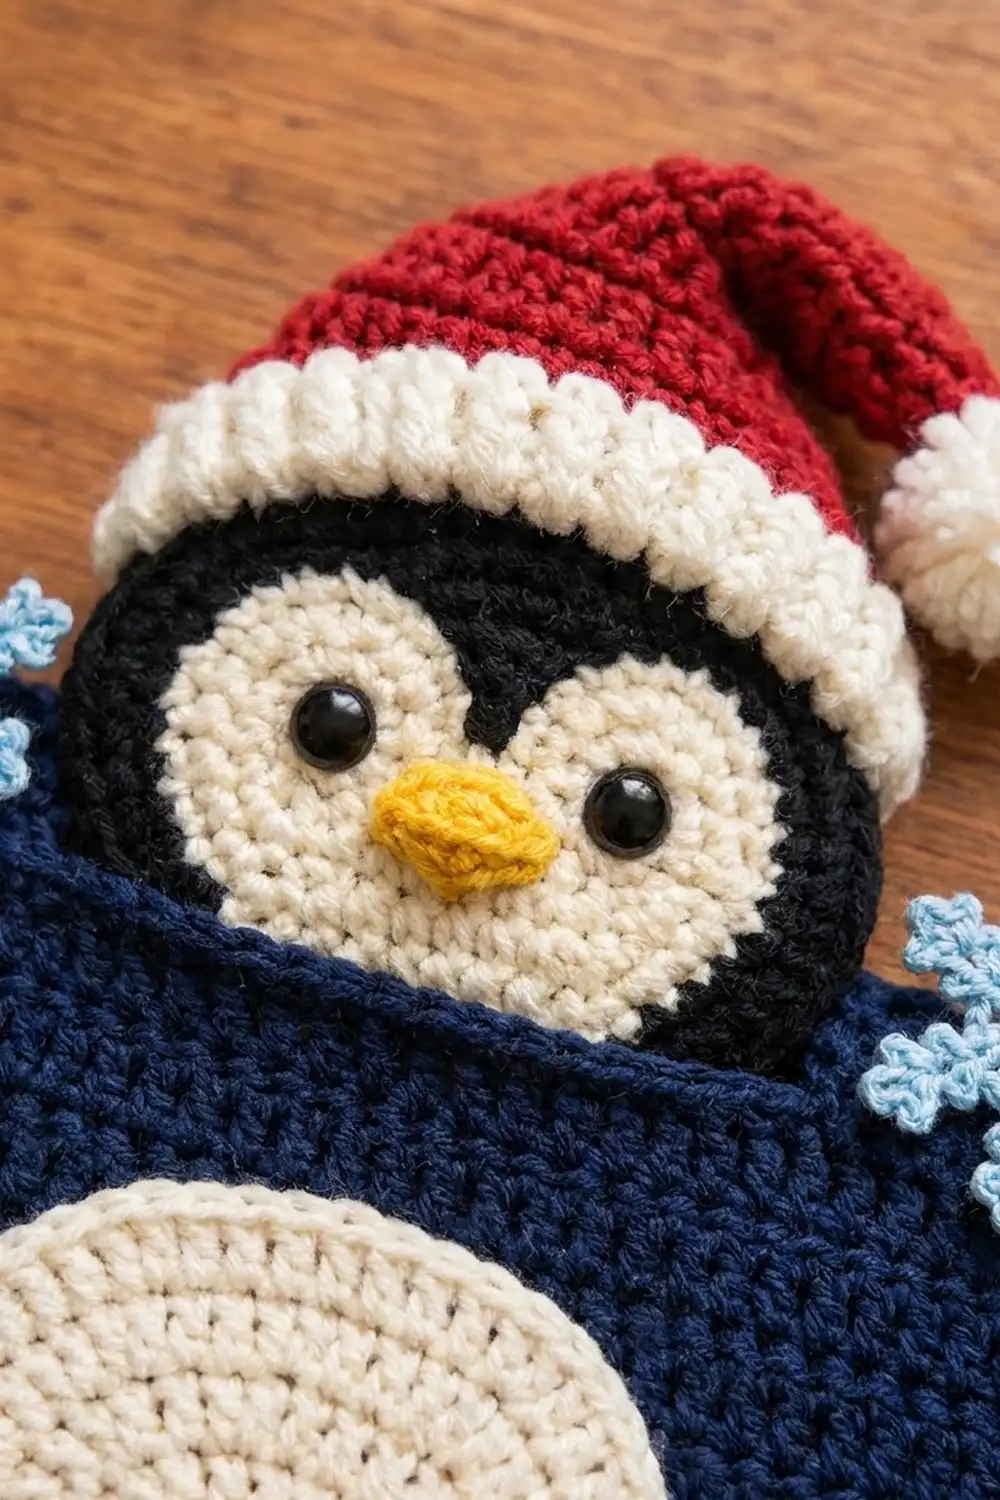
Penguin Head
Head (black): Work in continuous rounds. Mark the first st of each round.
- Rnd 1: 6 sc in MR. (6)
- Rnd 2: 2 sc in each st. (12)
- Rnd 3: *Sc in next st, 2 sc in next; rep 6 times. (18)
- Rnd 4: *Sc in next 2, 2 sc in next; rep 6 times. (24)
- Rnd 5: *Sc in next 3, 2 sc in next; rep 6 times. (30)
- Rnd 6: *Sc in next 4, 2 sc in next; rep 6 times. (36)
- Rnd 7: *Sc in next 5, 2 sc in next; rep 6 times. (42)
- Rnd 8: *Sc in next 6, 2 sc in next; rep 6 times. (48)
Sl st in the next st and fasten off. The head is a flat circle 3.5 in (8.9 cm) across.
Face (cream, make 2): Work Rnds 1–4 of the head (24 sts each). Each circle is 1.75 in (4.4 cm) across.
Overlap the two circles by 1/2 in (1.3 cm) to make a face 3 in (7.6 cm) wide. Sew it to the lower half of the head. Attach or embroider an eye in the center of each circle.
Beak (yellow): Ch 4. Starting in the 2nd ch from hook, sc in each ch. Turn. (3)
- Row 2: Ch 1, sc2tog, sc. Turn. (2)
- Row 3: Ch 1, sc2tog. (1)
Fasten off. Sew the beak, point down, where the two face circles meet.
Santa Hat
Brim (cream): Ch 17. Sc in 2nd ch from hook and in each ch across. Turn. (16 sc)
Rows 2–3: Ch 1, sc in each st. Turn. (16)
Fasten off. The brim measures 4 x 3/4 in (10.2 x 1.9 cm).
Hat (red): Join red to one long edge of the brim. Work in back loops only to get a ribbed texture.
- Rows 1–2: Ch 1, sc in each st. Turn. (16)
- Row 3: Ch 1, sc2tog, sc in next 12, sc2tog. Turn. (14)
- Rows 4–9: Rep Row 3, decreasing 2 sts each row. Counts: 12, 10, 8, 6, 4, 2.
- Row 10: Ch 1, sc2tog. (1)
Fasten off. Bend the tip to one side and tack it to the hat. Sew the brim across the top of the head, just above the eyes. Add a 1.25 in (3.2 cm) cream pompom to the tip.
Snowflakes (Make 4)
Use light blue.
- Rnd 1: 6 sc in MR, sl st to first sc. (6)
- Rnd 2: *Sc in next st, ch 5, sl st in 3rd ch from hook (picot), sl st in next 2 ch; rep from * 5 more times, sl st to first sc. (6 spokes)
Each snowflake is about 2 in (5.1 cm) across. Stiffen them if you like.
Side Cords (Make 2)
Use navy. Ch 60, then sl st in the back bump of each ch (60 sl sts). Each cord is about 15 in (38.1 cm) long.
Make All Pieces
- Navy: 1 panel, 2 cords
- Cream: 6 pocket bodies, 2 face circles, 1 hat brim, 3 pompoms (one 1.25 in / 3.2 cm, two 1 in / 2.5 cm)
- Red: 6 cuffs, 1 hat, 2 tassels 3 in (7.6 cm) long
- Light blue: 4 snowflakes
- Black: 1 head
- Yellow: 1 beak
Layout (RS facing; panel columns are counted from the right edge and rows from the bottom):
          [ penguin head + hat ]
   *                                  *
+------------------------------------------+
| rows 35-39: open top area                |
| [Pocket 4]    [Pocket 5]    [Pocket 6]   |  rows 20-34
|  gap rows 18-19                          |
| [Pocket 1]    [Pocket 2]    [Pocket 3]   |  rows 3-17
| rows 1-2: bottom margin                  |
+------------------------------------------+
Columns: 1-2 margin | 3-14 pocket | 15-16 gap |
17-28 pocket | 29-30 gap | 31-42 pocket | 43-44 margin
Width check: 2 + 12 + 2 + 12 + 2 + 12 + 2 = 44 columns. Height check: 2 + 15 + 2 + 15 + 5 = 39 rows.
Joining
Sew the pockets on after the panel has its border and has been blocked, so it lies flat and square.
Method: Use the cream tail to whipstitch through the outer edge of the pocket and one strand of the panel stitch underneath. Leave the cuff edge open.
Stitch-to-stitch logic: Each pocket is 15 rows tall, and each pocket side covers 15 panel rows, so sew 1 pocket row end to each panel row. Each pocket bottom is 12 sts wide (10 foundation sts plus the 2 Row 2 increases at the curved corners). It sits on 12 panel columns, so sew 1 stitch to each column. Ease the curved corners in gently.
Tension: Keep your stitches snug but not tight. If the panel puckers behind a pocket, loosen them. If the pocket gapes, tighten them.
Sew the head centered over columns 22–23 (the middle of the panel), with its lower 1.25 in (3.2 cm) overlapping the top edge. Sew a snowflake to the top border on each side of the head.
Sew one end of each cord to a top corner. Let it curve outward slightly, then tack it down the side border every 2 in (5.1 cm). Sew a pompom and a snowflake onto each cord, and tie a tassel to the bottom end.
Size checkpoint: The panel still measures 12 x 14 in (30.5 x 35.6 cm), and all the pockets lie flat.
Border
Border gauge: 4 sc = 1 in (2.5 cm), along both the stitch edges and the row-end edges. Each hdc row is 1/3 in tall, so work 4 sc for every 3 row ends.
In this section, the side counts do not include the corner groups.
Round 1: Ch 1. Work 3 sc in the first st of Row 39 for the first corner group. Sc in the next 42 sts, then work 3 sc in the last st for the next corner group. Down the side, work 52 sc across the 39 row ends (4 sc for every 3 rows, 13 times). Work 3 sc in the first foundation ch, sc in the next 42 ch, then 3 sc in the last ch. Work 52 sc up the second side and sl st to the first sc.
Total: (4 corner groups x 3) + 42 + 42 + 52 + 52 = 200 sc.
Round 2: Ch 1. Sc in each sc around. At each corner, sc in the first corner sc, work 2 sc in the center sc, then sc in the third corner sc. Sl st to join.
Total: 200 sts worked one into each st, plus 4 extra = 204 sc. The sides stay at 42 and 52 sts, and each corner group grows to 4 sts. Fasten off.
Why the math works: Along the top and bottom, the 42 straight sc and the 2 corner groups cover the 44 panel stitches at 4 sc per inch. Along the sides, 52 sc = 13 in (33.0 cm) at the same density, so the border lies flat. Round 2 uses a gentle 2-sc corner instead of 3 sc, which softens the corners into the rounded shape.
Final Blocking
- Mist the panel until it is damp but not soaked.
- Pin it to 12 x 14 in (30.5 x 35.6 cm), shaping the corners into smooth curves.
- Pin each pocket to 3 x 5 in (7.6 x 12.7 cm). Don’t stretch the ribbing.
- Let everything dry completely.
- Lightly steam the head and snowflakes flat.
- Sew the pieces together only once they are dry.
Final Quality-Control Checklist
- The panel measures 12 x 14 in (30.5 x 35.6 cm).
- All six pockets measure 3 x 5 in (7.6 x 12.7 cm).
- The gaps are even: 2 columns between pockets and 2 rows between the two tiers.
- The cuffs are open and the ribs run up and down.
- The head is centered and the hat is sewn on securely.
- The snowflakes sit evenly on each side of the head.
- The cords and tassels hang at the same length.
- All ends are woven in on the WS.
Troubleshooting
- Panel edges are wavy: There are too many border sc. Recount so there are 52 per side.
- Border cups: There are too few sc. Check that you worked 4 sc for every 3 rows.
- Pockets are too wide for the grid: Your gauge is loose. Remake them with a smaller hook.
- Ribbing looks flat: In Row 15, work the FP stitches around the raised ribs.
- Head curls: Block it firmly.
- Snowflake spokes droop: Use fabric stiffener.
Care
Hand wash in cool water and lay flat to dry. Fluff the pompoms once they are dry.
Final Notes
The measurements build in a short, reliable chain. Your gauge gives 1/4 in per hdc column and 1/3 in per row. That makes the panel 11 x 13 in (27.9 x 33.0 cm), and the border brings it to 12 x 14 in (30.5 x 35.6 cm).
Each pocket is 12 columns by 15 rows, or 3 x 5 in (7.6 x 12.7 cm). Six pockets fit exactly into the panel’s 44 columns and 39 rows. Check your size at each stage, and the penguin will end up right where he belongs.
Happy crocheting!