

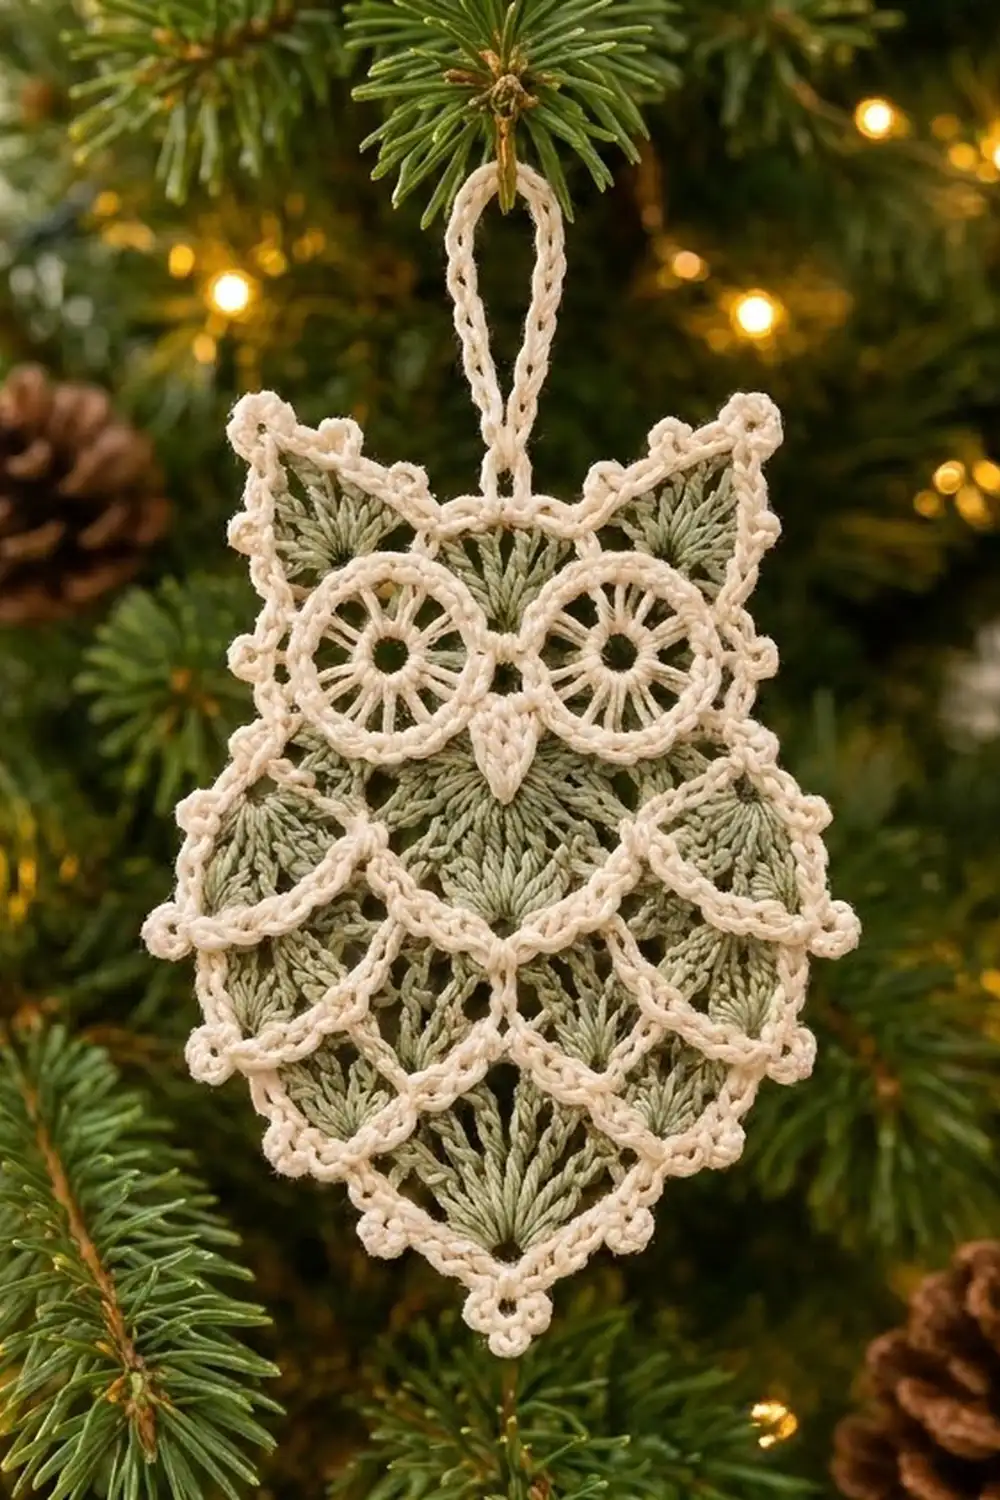
This lace owl is a single flat ornament with a soft vintage look. Cream thread outlines every feature, and sage green fans fill the feathers and ears. Picots run around the edge, and a cream loop at the top lets it hang on a tree, a window latch, or a gift.
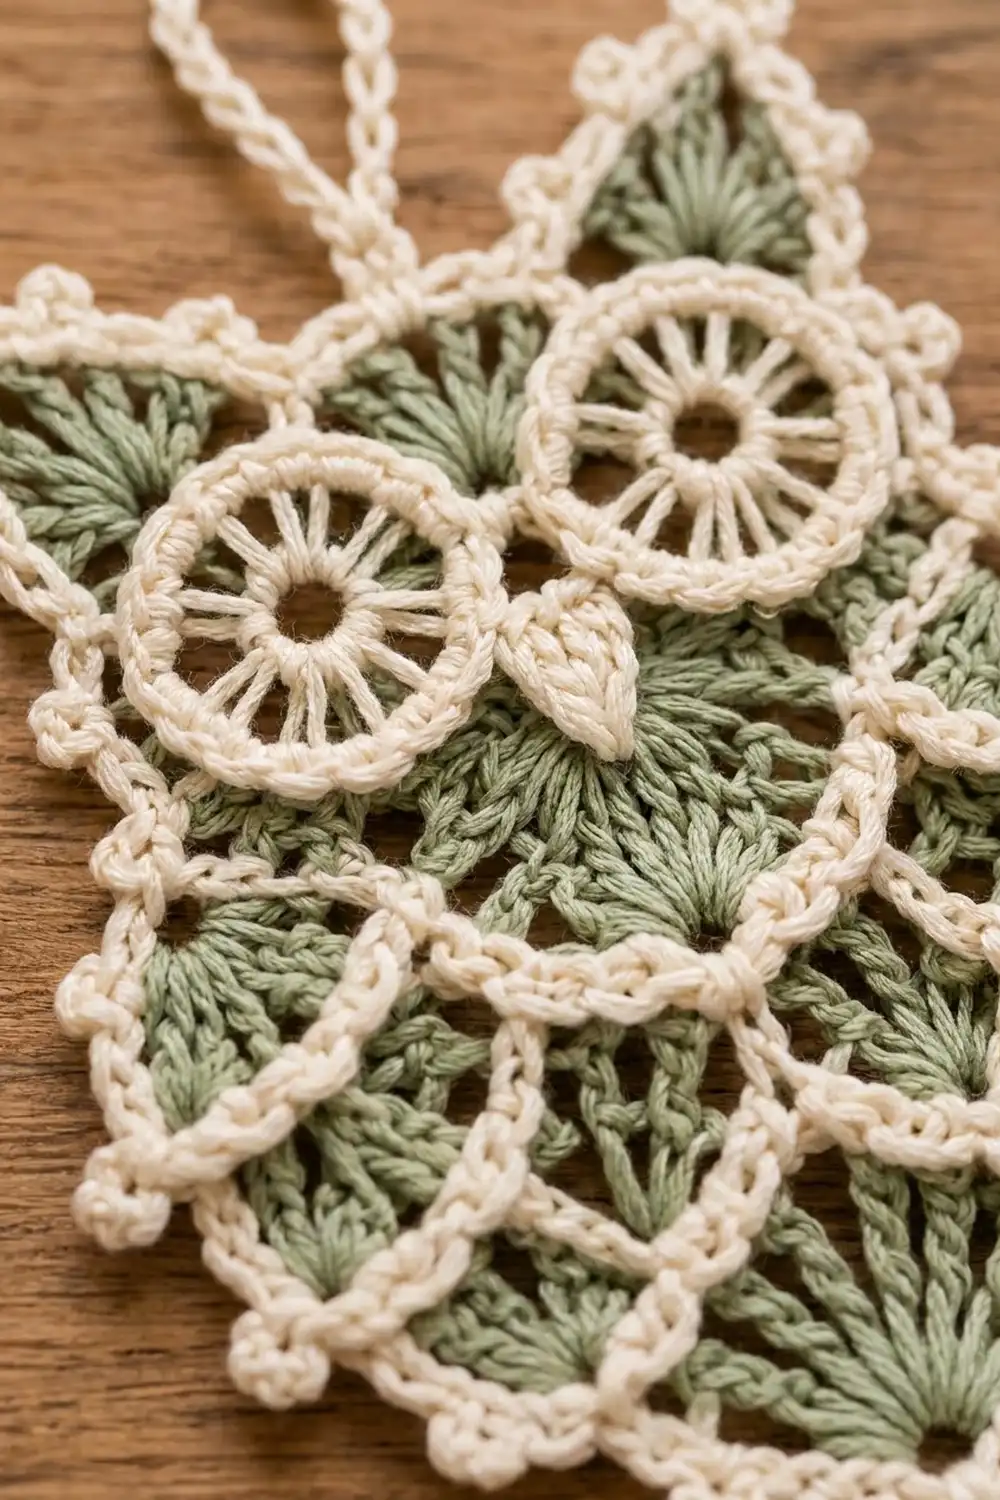
The body is covered in cream scallop arches. Each arch frames a green fan of tall stitches that spreads out from the point where the two arches below it meet. Two cream wheel eyes sit side by side across the head, with a small cream beak pointing down between them. Pointed green ears finish the two top corners.
The pattern uses US crochet terms. The finished owl measures 3 5/8 in (9.2 cm) wide by 4 3/4 in (12.1 cm) tall, not counting picots or the loop. The hanging loop adds about 1 1/2 in (3.8 cm).
You work the body from the bottom up in right-side rows, switching between green fan rows and cream single crochet rows. It grows from one fan at the tip to four fans at the widest row. Green ears are worked onto the top corners, and the eyes and beak are small motifs sewn onto the head. Two cream border rounds and the loop finish the piece.
Finished Size and Construction
- Finished size: 3 5/8 in (9.2 cm) wide x 4 3/4 in (12.1 cm) tall, plus a 1 1/2 in (3.8 cm) loop
- Skill level: Intermediate
- Terminology: US crochet terms
- Yarn weight: Size 3 cotton crochet thread (Lace, category 0)
- Hook: 2.25 mm (US B-1)
- Number of pieces: 1 ornament (a body with two sewn-on eye wheels and a beak)
- Layout: One owl shape, no joining
- Piece size before border: 3 1/8 in (7.9 cm) wide x 4 1/4 in (10.8 cm) tall, ears included
- Border depth: 1/4 in (0.6 cm) per side, not counting picots
Materials
Choose a firm, mercerized cotton thread in size 3. Its crisp twist keeps the fans sharp and holds starch well. Avoid fuzzy or very soft blends, because they blur the lace.
- Cream (Color A): 10 g, about 35 m (38 yd), for the cream rows, eyes, beak, border and loop
- Sage green (Color B): 5 g, about 20 m (22 yd), for the fans and ears
Both amounts include extra for a gauge test and for weaving in ends.
Tools:
– 2.25 mm (US B-1) crochet hook
– Small tapestry needle
– Sharp scissors
– Rust-proof pins and a blocking mat
– Spray starch or fabric stiffener (optional)
Abbreviations (US Terms)
- ch: chain
- sl st: slip stitch
- sc: single crochet
- hdc: half double crochet
- dc: double crochet
- tr: treble crochet
- sc3tog: single crochet 3 together
- BLO: back loop only
- st(s): stitch(es)
- sp: space
- beg: beginning
- RS: right side
Special stitches:
– Fan: 5 tr in the same st. When a fan is the first st of a row, ch 4 (counts as first tr) and work 4 tr in the same st.
– Half fan: 3 tr in the same st. At the start of a row, ch 4 (counts as first tr) and work 2 tr in the same st.
– Picot: Ch 3, sl st in 3rd ch from hook.
Row note: Work every body row with the RS facing, from right to left. Fasten off at the end of each row and leave 3 in (7.6 cm) tails. Border Round 1 is worked over these tails, so most ends don’t need separate weaving.
Gauge and Checkpoints
Gauge: 8 sc = 1 in (2.5 cm). One tier (a tr fan row plus a cream sc row) = 5/8 in (1.6 cm) tall. One fan repeat (6 sts) = 3/4 in (1.9 cm) wide.
Use your first owl as the test piece. Measure at each checkpoint:
- After Row 6: 19 sts, 2 3/8 in (6.0 cm) wide, 1 7/8 in (4.8 cm) tall
- After Row 8: 25 sts, 3 1/8 in (7.9 cm) wide, 2 1/2 in (6.4 cm) tall
- After Row 12: 3 1/8 in (7.9 cm) wide, 3 3/4 in (9.5 cm) tall
- After ears: 4 1/4 in (10.8 cm) tall at the ear tips
- Each eye after Round 3: 1 1/8 in (2.9 cm) across
If the owl comes out too big, go down to a 2.0 mm hook. If it comes out too small, go up to a 2.5 mm hook. If the width is right but the fans look short, pull each tr up a little taller before you finish it.
Body
Begin with green at the bottom tip.
Row 1 (green): Make a magic ring. Ch 4 (counts as tr), 4 tr in ring. Pull the ring closed. (5 tr: 1 fan) Fasten off.
Row 2 (cream): Join with sl st in top of beg ch-4. Ch 1 (does not count, here and throughout). 2 sc in same st, sc in next 3 sts, 2 sc in last st. (7 sc) Fasten off.
Row 3 (green): Join with sl st in first sc. Fan in same st, skip 2 sts, sc in next st, skip 2 sts, fan in last st. (11 sts: 2 fans, 1 sc) Fasten off.
The sc goes in the center of the Row 1 fan, and the new fans start from the V points on either side of it. This offset creates the scale pattern.
Row 4 (cream): Join in first st. Ch 1, 2 sc in first st, sc in next 9 sts, 2 sc in last st. (13 sc) Fasten off.
Row 5 (green): Join in first sc. Fan in same st, skip 2 sts, sc in next st, skip 2 sts, fan in next st. Repeat from * to * once more. (17 sts: 3 fans, 2 sc) Fasten off.
Row 6 (cream): Join in first st. Ch 1, 2 sc in first st, sc in next 15 sts, 2 sc in last st. (19 sc) Fasten off.
Row 7 (green): Join in first sc. Fan in same st, skip 2 sts, sc in next st, skip 2 sts, fan in next st. Repeat from * to * twice more. (23 sts: 4 fans, 3 sc) Fasten off.
Row 8 (cream): Join in first st. Ch 1, 2 sc in first st, sc in next 21 sts, 2 sc in last st. (25 sc) Fasten off.
This is the widest row. From here, the sides go straight up.
Row 9 (green): Join in first sc. Half fan in same st, skip 2 sts, sc in next st, skip 2 sts, fan in next st, skip 2 sts, sc in next st. Repeat from * to * twice more. Skip 2 sts, 3 tr in last st. (25 sts: 2 half fans, 3 fans, 4 sc) Fasten off.
Row 10 (cream): Join in first st. Ch 1, sc in each st across. (25 sc) Fasten off.
Row 11 (green): Join in first sc. Ch 1, sc in same st, skip 2 sts, fan in next st, skip 2 sts, sc in next st. Repeat from * to * 3 more times. (25 sts: 4 fans, 5 sc) Fasten off.
Row 12 (cream): Join in first st. Ch 1, sc in each st across. (25 sc) Fasten off.
The body should now measure 3 1/8 in (7.9 cm) wide and 3 3/4 in (9.5 cm) tall.
Ears
Each ear is a small green wedge that rises toward the outer corner. It is worked over 5 sts of Row 12. Number the Row 12 sts 1–25, starting from the right edge.
Right ear (sts 1–5): With RS facing, join green with sl st in st 5. Hdc in st 4, [dc, tr, tr] in st 3, ch 4, skip st 2, sl st in st 1. (sl st, hdc, dc, 2 tr, ch-4 sp) Fasten off.
Left ear (sts 21–25): Join green with sl st in st 25. Ch 4, skip st 24, [tr, tr, dc] in st 23, hdc in st 22, sl st in st 21. (sl st, ch-4 sp, 2 tr, dc, hdc) Fasten off.
The ear’s point is where the outer tr meets the ch-4. Sts 6–20 stay unworked and form the straight top edge between the ears. The piece is now 4 1/4 in (10.8 cm) tall at the ear tips.
Eyes (make 2)
With cream: Ch 8, sl st in first ch to form a ring.
Round 1: Ch 4 (counts as dc and ch 1). [Dc, ch 1] 11 times in ring. Sl st in 3rd ch of beg ch-4. (12 dc spokes, 12 ch-1 sps)
Round 2: Ch 1. Sc in next dc, sc in next ch-1 sp. Repeat around. Sl st in first sc. (24 sc) The eye should now be 1 in (2.5 cm) across.
Round 3: Sl st in BLO of each sc around. (24 sl sts) This makes a raised rim that looks like a chain. Fasten off, leaving a 6 in (15.2 cm) tail.
Beak
With cream:
Row 1: Ch 4, sc in 2nd ch from hook and next 2 ch. (3 sc)
Row 2: Ch 1, turn, sc3tog. (1 st)
Fasten off, leaving a 6 in (15.2 cm) tail. The beak is 3/8 in (1.0 cm) wide.
Attach the Eyes and Beak
Lay the eyes side by side so they touch at the center line of the owl, with their tops level with the top edge of Row 12. Together they span 2 1/4 in (5.7 cm), leaving 7/16 in (1.1 cm) of body showing on each side. Pin them, then whipstitch around the outer sc of Round 2. Catch only the cream sc rows underneath so the stitches stay hidden.
Center the beak just below the point where the eyes touch, with the sc3tog point facing down. Sew around its edges.
Border
Use cream throughout. The border gauge matches the body gauge: 8 sc = 1 in (2.5 cm). Work over the row tails as you go.
Round 1: With RS facing, join with sl st in st 6 of Row 12. Ch 1, then work:
- Top edge: Sc in sts 6–20. (15 sc)
- Left ear: Sc in hdc, sc in dc, sc in first tr, [sc, ch 2, sc] in outer tr, 4 sc over ch-4 sp. (9 sc, 1 ch-2 tip)
- Left side: Work down the row ends. Work 1 sc in each cream row end (Rows 12, 10, 8, 6, 4, 2) and 4 sc over each green row end (Rows 11, 9, 7, 5, 3, 1). (6 + 24 = 30 sc)
- Bottom tip: [Sc, ch 2, sc] at the magic ring point. (2 sc, 1 ch-2 tip)
- Right side: Work up the row ends the same way. (30 sc)
- Right ear: 4 sc over ch-4 sp, [sc, ch 2, sc] in outer tr, sc in next tr, sc in dc, sc in hdc. (9 sc, 1 ch-2 tip)
Sl st in first sc. Round 1 total: 15 + 9 + 30 + 2 + 30 + 9 = 95 sc, plus 3 ch-2 tips.
Round 2: Ch 1, then work:
- Top edge: Sc in each of 15 sc. (15 sc)
- Left ear: Sc in next 4 sc, [sc, picot, sc] in ch-2 tip, sc in next 5 sc. (11 sc, 1 picot)
- Left side: [Sc in next 3 sc, picot] 10 times. (30 sc, 10 picots)
- Bottom tip: Sc in next sc, [sc, picot, sc, picot, sc, picot, sc] in ch-2 tip, sc in next sc. (6 sc, 3 picots)
- Right side: [Picot, sc in next 3 sc] 10 times. (30 sc, 10 picots)
- Right ear: Sc in next 5 sc, [sc, picot, sc] in ch-2 tip, sc in next 4 sc. (11 sc, 1 picot)
Sl st in first sc. Round 2 total: 95 sc worked one in each Round 1 sc, plus 8 sc worked into the three ch-2 tips (2 + 4 + 2) = 103 sc, plus 25 picots.
Hanging loop: Sl st along the top edge to the 8th of the 15 top sc, which is the center. Ch 24, sl st in the same st to form a loop. Ch 1, work 32 sc over the loop, sl st in the base. Fasten off. The loop stands about 1 1/2 in (3.8 cm) high.
Why the math works: At 8 sc per inch, a 1/8 in (0.3 cm) cream row needs 1 sc and a 1/2 in (1.3 cm) green row needs 4 sc. That gives 5 sc per 5/8 in (1.6 cm) tier, which is exactly the gauge rate, so the sides lie flat. Six tiers make 30 sc per side, matching the 3 3/4 in (9.5 cm) body height. The top edge uses one sc per st, so it keeps the width of Row 12. Extra sc go only into the three tips, which keeps the points sharp without cupping. The two sc rounds add 1/4 in (0.6 cm) on every side: 3 1/8 + 1/4 + 1/4 = 3 5/8 in (9.2 cm) wide, and 4 1/4 + 1/4 + 1/4 = 4 3/4 in (12.1 cm) tall.
Final Blocking
- Weave in any remaining ends along the cream rows.
- Soak the owl in cool water for a few minutes, then press the water out in a towel.
- Lay it RS up on the blocking mat.
- Pin the bottom tip and both ear tips so the owl measures 4 3/4 in (12.1 cm) from tip to ear tip.
- Pin the widest point (Row 8) to 3 5/8 in (9.2 cm).
- Pin out each side picot so the scallops are even.
- Press each eye flat and round with your fingertips.
- If you want a stiff ornament, spray lightly with starch.
- Let it dry completely before you unpin it.
Final Quality-Control Checklist
- Row 8 has 25 sc, and Rows 9–12 have 25 sts each.
- Every fan starts at a V between two arches below it.
- The two ears mirror each other and have sharp points.
- The eyes are round, touching and level.
- The beak is centered and points straight down.
- Round 1 has 95 sc. Round 2 has 103 sc and 25 picots.
- The owl measures 3 5/8 in (9.2 cm) x 4 3/4 in (12.1 cm).
- The loop is centered and the owl hangs straight.
Troubleshooting
Fans curl or ruffle: The tr stitches are too loose compared with the sc rows. Tighten them, or use a smaller hook for the green rows only.
Top of the body is too narrow: Check that Rows 9–12 have exactly 25 sts each. A missed half fan often loses 3 sts.
Sides pull in: Work 4 sc over each green row end, not 2 or 3.
Edges ripple: The border is looser than the body. Go down half a hook size for the border only.
Eyes cup: Round 1 is too tight. Chain the starting ring more loosely.
Owl hangs crooked: The loop is off center. Count to the 8th top sc and redo the loop there.
Care
Hand wash in cool water with mild soap, press dry in a towel, and block flat again. Store flat or hanging, away from damp.
Final Notes
Every size in this pattern comes from the gauge. At 8 sc = 1 in (2.5 cm) and 5/8 in (1.6 cm) per tier, you get a 25-st body 3 1/8 in (7.9 cm) wide and 3 3/4 in (9.5 cm) tall after 12 rows. The ears bring it to 4 1/4 in (10.8 cm). Two border rounds add 1/4 in (0.6 cm) per side, for a finished owl of 3 5/8 in (9.2 cm) x 4 3/4 in (12.1 cm). If you check each measurement as you go, the next step will fit.
Happy crocheting!