

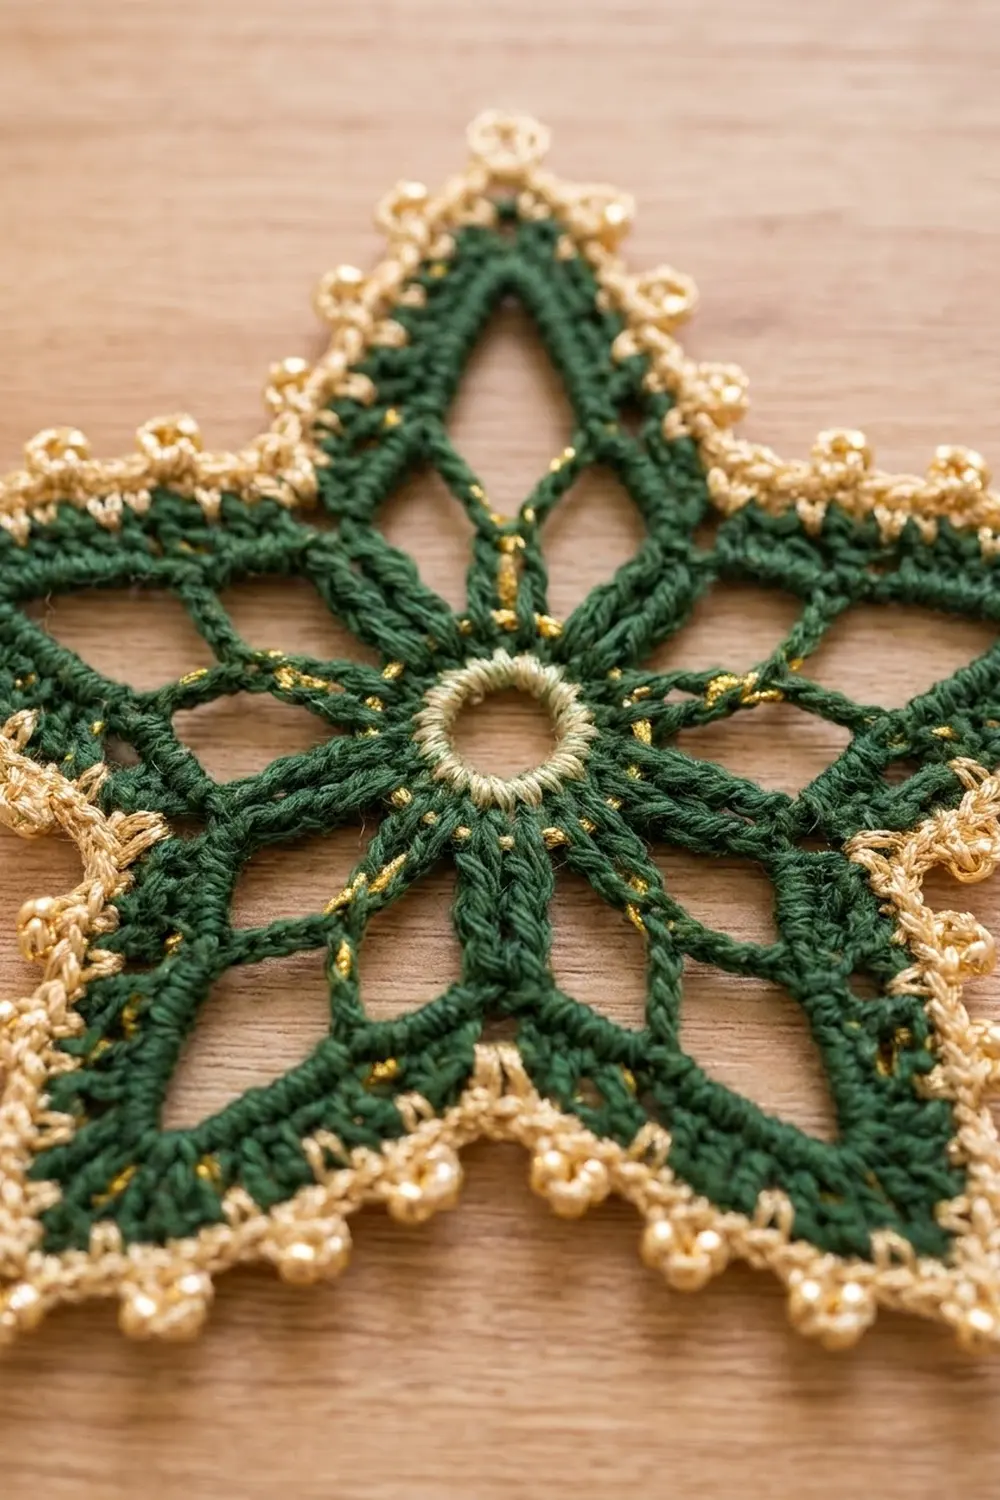
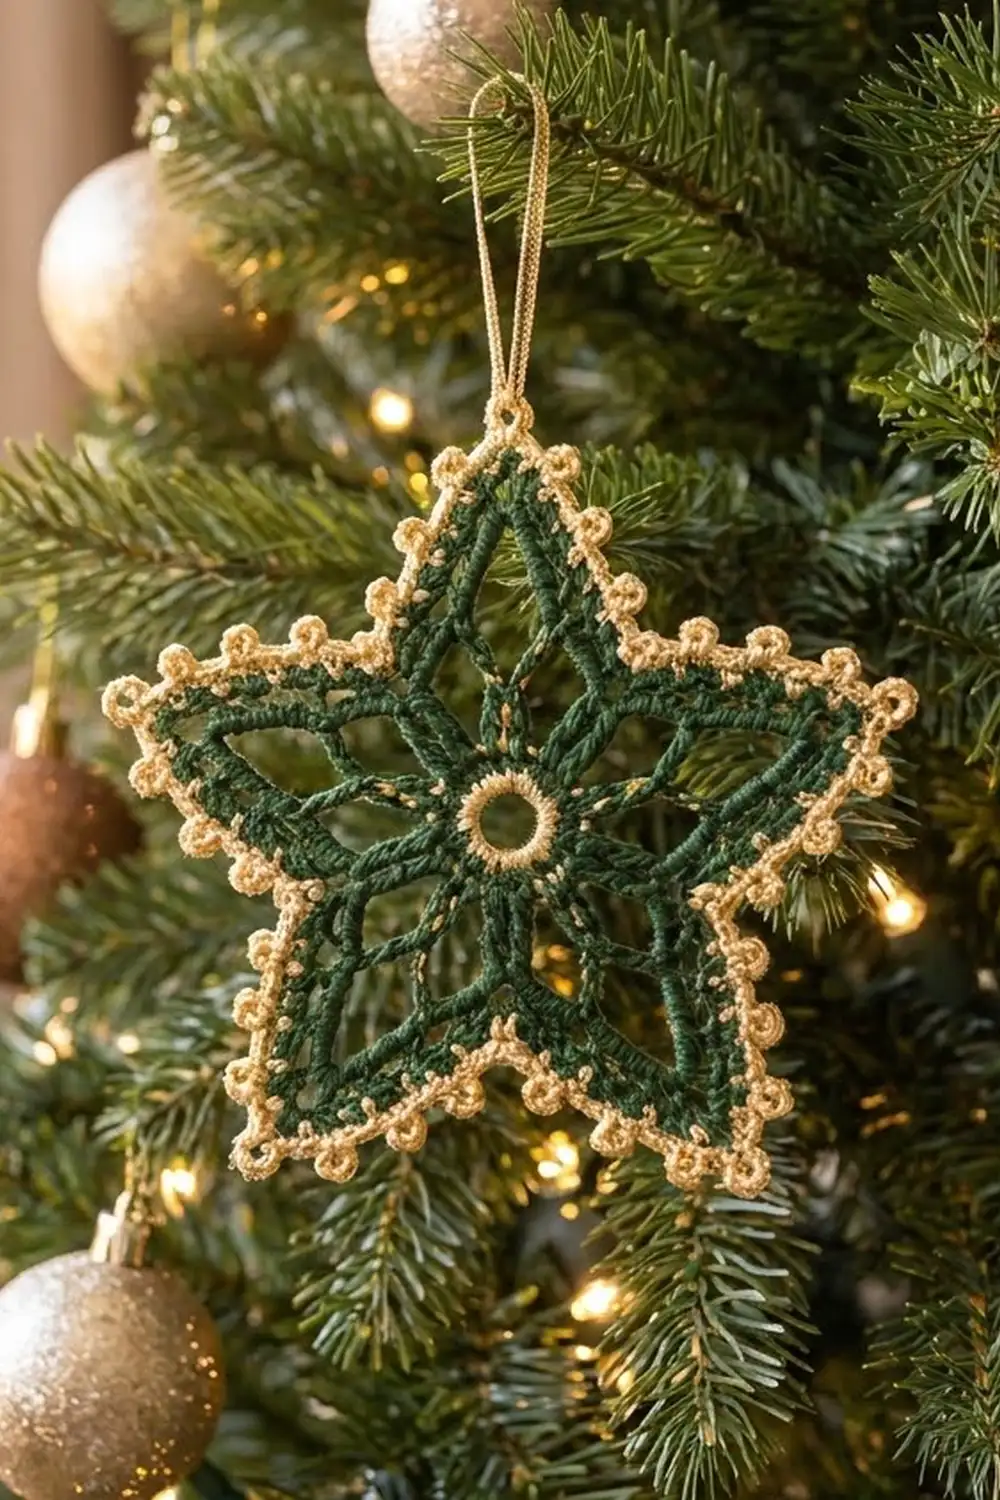
This openwork star is a small, elegant motif for the holidays. A deep forest green star with lacy points sits inside a light gold outline, and a row of tiny gold picots runs all the way around the edge. At the center, a small gold ring catches the light like a jewel.
The look is traditional and festive: evergreen and gold, with a light, see-through texture. Long treble spokes run out from the center toward each point, and chain spaces between them keep the star airy. It lies flat and stays easy to see whether it rests on a table or hangs on a branch.
The pattern uses US crochet terms. After blocking, the star measures about 4.5 in (11.4 cm) from point to point.
You work the whole star in the round. Start with a gold center ring. Switch to green for four rounds that build the spokes, the points, and the solid green outline. Finish with two gold border rounds: a single crochet round that sharpens the shape, then a picot round. It is one motif, so there is no joining.
Finished Size and Construction
- Finished size: about 4.5 in (11.4 cm) point to point
- Skill level: Intermediate (you work into chain spaces and keep counts per point)
- Terminology: US crochet terms
- Yarn weight: Size 3 crochet thread / fine cotton (Lace–Super Fine, weight 0–1)
- Hook: 2.25 mm (US B-1)
- Number of pieces: 1
- Layout: one five-pointed star motif
- Piece size: 4.5 in (11.4 cm) point to point, with border
- Size before border: 4 in (10.2 cm) point to point, after Round 5
- Border depth: about 0.25 in (0.6 cm) per side, 2 rounds
Materials
Choose a smooth, mercerized cotton thread with a firm twist. It keeps the points sharp and blocks well. A gold thread with a slight metallic blend gives the shimmer seen here, but plain light gold cotton works too. Avoid fuzzy fibers, because they blur the lace.
- Color A, Forest Green: 7 g, about 18 m
- Color B, Light Gold: 4 g, about 10 m
These amounts include a margin of about 20% for your gauge test and for weaving in ends.
Tools:
- 2.25 mm (US B-1) crochet hook
- Tapestry needle with a small eye
- Scissors
- Blocking mat and rust-proof pins
- Spray bottle or light fabric stiffener (optional)
- Ruler or tape measure
Abbreviations (US Terms)
- ch – chain
- sl st – slip stitch
- sc – single crochet
- sc2tog – single crochet 2 together
- dc – double crochet
- tr – treble crochet
- sp(s) – space(s)
- lp – loop
- st(s) – stitch(es)
- rep – repeat
Special stitch – picot: ch 3, sl st into the 3rd ch from hook (the first ch you made). A picot does not count as a stitch.
Point sc / valley sc: In Round 3, each sc worked into the middle tr of a group is a “point sc,” because it sits under a star point. Each sc worked into a ch-3 sp is a “valley sc,” because it sits under an inner corner.
Gauge and Checkpoints
You check gauge on the star itself. Make one star through Round 3 and measure it before you go on.
Base gauge: 9 sc = 1 in (2.5 cm) in thread with the 2.25 mm hook.
Checkpoints:
- After Round 1: center ring about 0.5 in (1.3 cm) across
- After Round 2: about 1.25 in (3.2 cm) across
- After Round 3: about 2 in (5.1 cm) across
- After Round 4: about 3.75 in (9.5 cm) point to point
- After Round 5: about 4 in (10.2 cm) point to point
- After Border Round 1: about 4.25 in (10.8 cm) point to point
- After Border Round 2: about 4.5 in (11.4 cm) point to point
If your star is too big, go down to a 2.0 mm hook and tighten your chains. Chain loops that are too large are the most common cause. If it is too small, go up to a 2.5 mm hook, and make sure each tr is pulled up to full height.
Pattern
Round 1 – Center Ring (Color B, Gold)
With gold, ch 5, then sl st to the first ch to form a ring.
Ch 1, work 15 sc into the ring, then sl st to the first sc to join. (15 sc)
Fasten off gold, leaving a 4 in (10.2 cm) tail. Pull the starting tail gently to close the ring until it is about 0.5 in (1.3 cm) across, but leave a clear opening in the middle.
Round 2 – Spokes (Color A, Green)
Join green with a sl st in any sc.
Ch 4 (counts as first tr), tr in next 2 sc, ch 3, *tr in next 3 sc, ch 3; rep from * 3 more times, then sl st to the top of the beginning ch-4 to join.
(15 tr in 5 groups of 3, 5 ch-3 sps)
These five tr groups are the main spokes. Each group will sit under one star point. Work over the gold tails as you go to save weaving later.
Round 3 – Loop Round
Sl st in the next tr (the middle tr of the first group).
Ch 1, sc in the same tr (point sc), ch 6, sc in the next ch-3 sp (valley sc), ch 6, *sc in the middle tr of the next group (point sc), ch 6, sc in the next ch-3 sp (valley sc), ch 6; rep from * 3 more times, then sl st to the first sc to join.
(10 sc: 5 point sc and 5 valley sc; 10 ch-6 lps)
Checkpoint: about 2 in (5.1 cm) across, lying flat with no cupping. If it helps, place a stitch marker in each point sc.
Round 4 – Points
This round builds the open star shape. Each point ends in a ch-7 tip between two tr.
Ch 4 (counts as tr), ch 7, tr in the same sc (first tip made).
*Ch 4, dc in next ch-6 lp, ch 4, sc in next valley sc, ch 4, dc in next ch-6 lp, ch 4, (tr, ch 7, tr) in next point sc; rep from * 3 more times.
Ch 4, dc in next ch-6 lp, ch 4, sc in next valley sc, ch 4, dc in next ch-6 lp, ch 4, then sl st to the top of the beginning ch-4 to join.
(25 sts: 10 tr, 10 dc, 5 sc; 20 ch-4 sps; 5 ch-7 tip sps)
Each point has 5 sts (2 tr, 2 dc, 1 sc), 4 ch-4 sps, and 1 ch-7 tip. The dc anchored in the old ch-6 loops make the inner diagonal lines of the lace.
Checkpoint: about 3.75 in (9.5 cm) point to point. Gently pull each tip outward to check the shape.
Round 5 – Green Outline (Conversion Round)
This round turns the chain frame into a solid green outline. You skip the valley sc so the inner corners pull in.
Sl st into the next ch-7 tip sp.
Ch 1, (3 sc, ch 3, 3 sc) in the same tip sp, *sc in next tr, 4 sc in next ch-4 sp, sc in next dc, 4 sc in next ch-4 sp, skip valley sc, 4 sc in next ch-4 sp, sc in next dc, 4 sc in next ch-4 sp, sc in next tr, (3 sc, ch 3, 3 sc) in next tip sp; rep from * 3 more times.
Sc in next tr, 4 sc in next ch-4 sp, sc in next dc, 4 sc in next ch-4 sp, skip valley sc, 4 sc in next ch-4 sp, sc in next dc, 4 sc in next ch-4 sp, sc in top of beginning ch-4, then sl st to the first sc to join.
Count: 20 sc worked 1-per-existing tr and dc, plus 80 sc in the ch-4 sps and 30 sc in the tip sps = 130 sc, plus 5 ch-3 tip sps. You skip all 5 valley sc.
Each point has 26 sc. From one tip to the next, that is 13 sc down one side and 13 sc up the next.
Fasten off green. Checkpoint: about 4 in (10.2 cm) point to point.
Border
The border is two gold rounds. Border gauge: 9 sc = 1 in (2.5 cm), the same as the body. Each side of the star is about 1.4 in (3.6 cm) long, which holds 13 sts comfortably.
Border Round 1 – Gold Single Crochet (Trim Round)
Join gold with a sl st in any ch-3 tip sp.
Ch 1, (sc, ch 3, sc) in the same tip sp, *sc in next 12 sc, sc2tog over next 2 sc (the valley), sc in next 12 sc, (sc, ch 3, sc) in next tip sp; rep from * 3 more times, sc in next 12 sc, sc2tog over next 2 sc, sc in next 12 sc, then sl st to the first sc to join.
Count: 120 sc worked 1-per-existing-st, plus 5 sc2tog (each worked over 2 sts), plus 10 extra sc in the tip sps = 135 sts, plus 5 ch-3 tip sps.
Each point has 27 sts: 13 sts on one side (1 tip sc + 12 sc), 1 sc2tog in the valley, and 13 sts on the next side (12 sc + 1 tip sc).
Border Round 2 – Picot Edge
Sl st into the next ch-3 tip sp.
Ch 1, (sc, picot, sc) in the same tip sp, *(sc in next 3 sts, picot) 4 times, sc in next st, sl st in sc2tog, sc in next st, (picot, sc in next 3 sts) 4 times, (sc, picot, sc) in next tip sp; rep from * 3 more times, (sc in next 3 sts, picot) 4 times, sc in next st, sl st in sc2tog, sc in next st, (picot, sc in next 3 sts) 4 times, then sl st to the first sc to join.
Count: 140 sc + 5 sl st = 145 sts, plus 45 picots (9 per point: 4 on each side and 1 at the tip).
Fasten off and weave in all ends.
Why the math works: Each side holds 13 sts, and 13 splits evenly as 1 + (3 × 4): one corner stitch plus four groups of 3. So every side gets exactly 4 picots, one every 3 sts. The valley sl st has no picot, which keeps the inner corner crisp. The tip picot sits in the ch-3 sp between the two tip sc, so it points straight out. The two sides of every point mirror each other.
Optional hanging loop: To hang the star, join gold at any tip picot, ch 25, sl st in the same picot, and fasten off.
Final Blocking
- Weave each tail along stitches of the same color, not across open spaces.
- Soak the star in cool water for 10 minutes, then press the water out in a towel. Do not wring.
- Lay it right side up on a blocking mat.
- Pin the center ring flat first.
- Pin each of the 5 tips outward until the star measures 4.5 in (11.4 cm) point to point. Use a ruler. The tips should be evenly spaced, about 72 degrees apart.
- Pin each valley gently inward to sharpen the inner corners.
- Open each picot with the tip of a pin so it sits like a small round bead.
- For a stiffer ornament, spray lightly with fabric stiffener.
- Let it dry completely, at least 12 hours, before you remove the pins.
Final Quality-Control Checklist
- The center ring is gold, flat, and about 0.5 in (1.3 cm) across
- Round 2 has 15 tr in 5 groups of 3
- Round 3 has 10 sc and 10 ch-6 lps
- Round 4 has 5 tips, each with a ch-7 sp
- Round 5 has 130 sc and 5 ch-3 tips
- Border Round 1 has 135 sts; Border Round 2 has 45 picots
- All 5 points are the same length, within 0.125 in (0.3 cm)
- The finished size is 4.5 in (11.4 cm) point to point
- No ends show on the front
Troubleshooting
The center cups or ruffles. Cupping means the Round 3 chains are too short or tight. Ruffling means they are too loose. Adjust your ch-6 tension, or work ch 5 or ch 7 to suit your hand.
The points look rounded. Make sure you work (tr, ch 7, tr) in each point sc and (3 sc, ch 3, 3 sc) in each tip sp. Pin the tips firmly when blocking.
The valleys look flat instead of V-shaped. Check that you skipped the valley sc in Round 5 and worked sc2tog in Border Round 1.
The picots are uneven. Count 3 sts between picots on every side. If one side has an extra st, recount Border Round 1 at that point.
The gold rounds look wavy. Your gold thread may be thicker than the green. Try a hook 0.25 mm smaller for the border only.
The Round 5 count is off. Each point should have 26 sc. The usual mistake is at a valley, where a valley sc was worked by accident.
Care
Hand wash in cool water with mild soap, then lay flat to dry and reshape the points. If you stiffened the star, stiffen it again after washing.
Final Notes
The measurements build step by step. The 0.5 in (1.3 cm) gold ring grows to 1.25 in (3.2 cm) after the spoke round, 2 in (5.1 cm) after the loop round, 3.75 in (9.5 cm) after the points, and 4 in (10.2 cm) after the green outline. The two gold border rounds add 0.25 in (0.6 cm) per side, for a finished star of 4.5 in (11.4 cm) point to point.
If you check each measurement as you go, the counts stay right: 15, 15, 10, 25, 130, 135, and 145 sts, with 45 picots. Make one star, block it well, and enjoy how the gold edge frames the green lace.
Happy crocheting!