

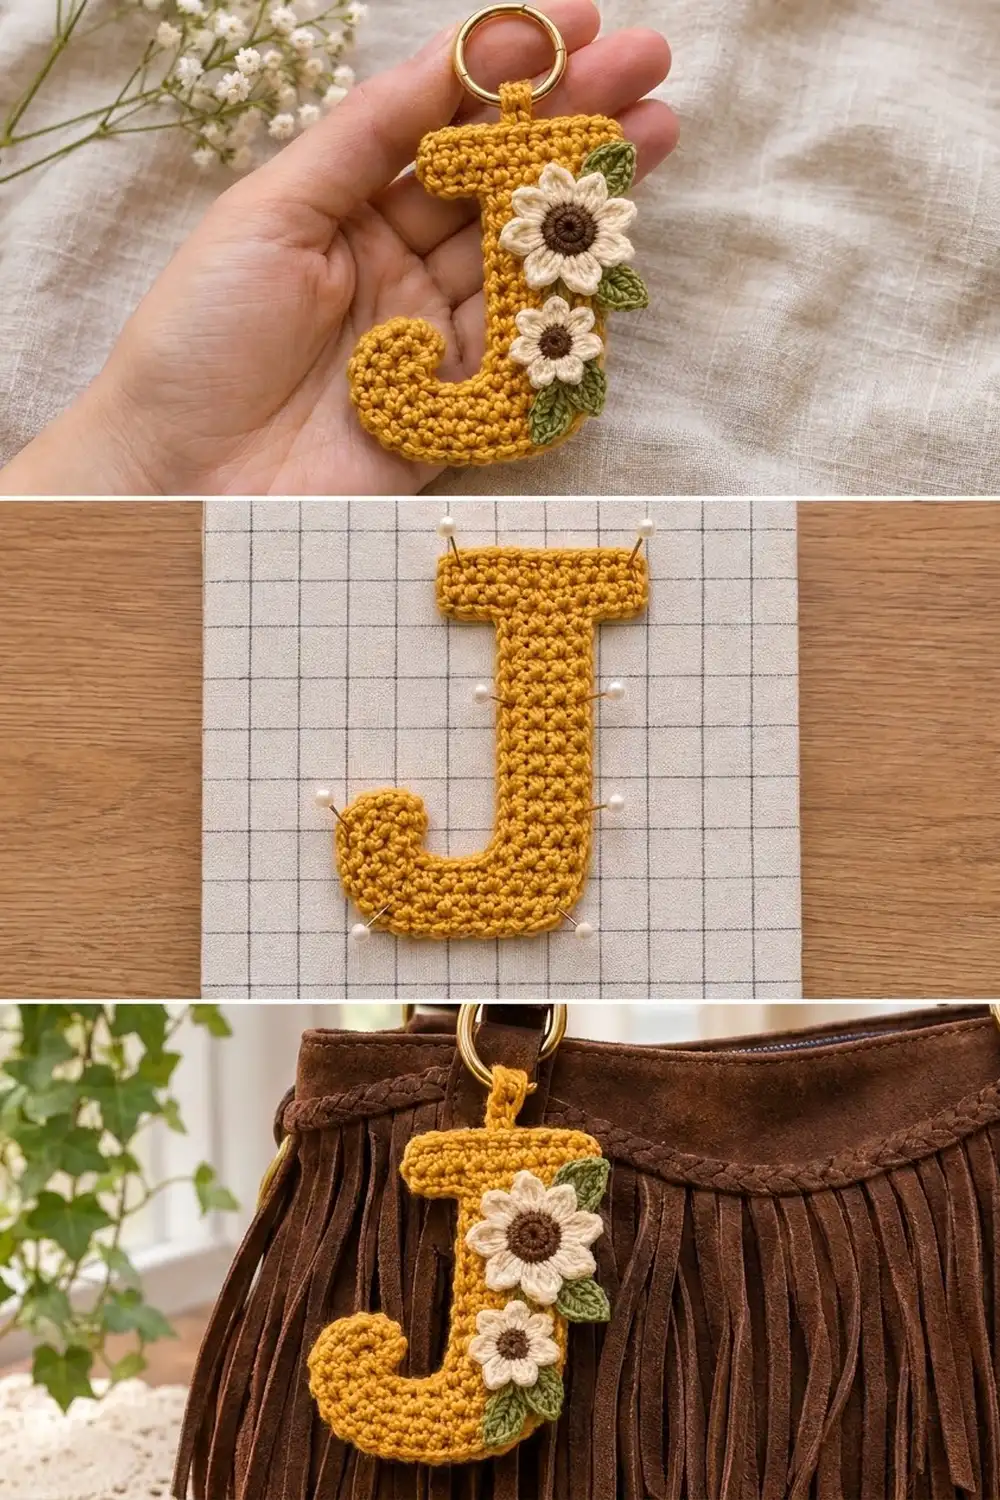
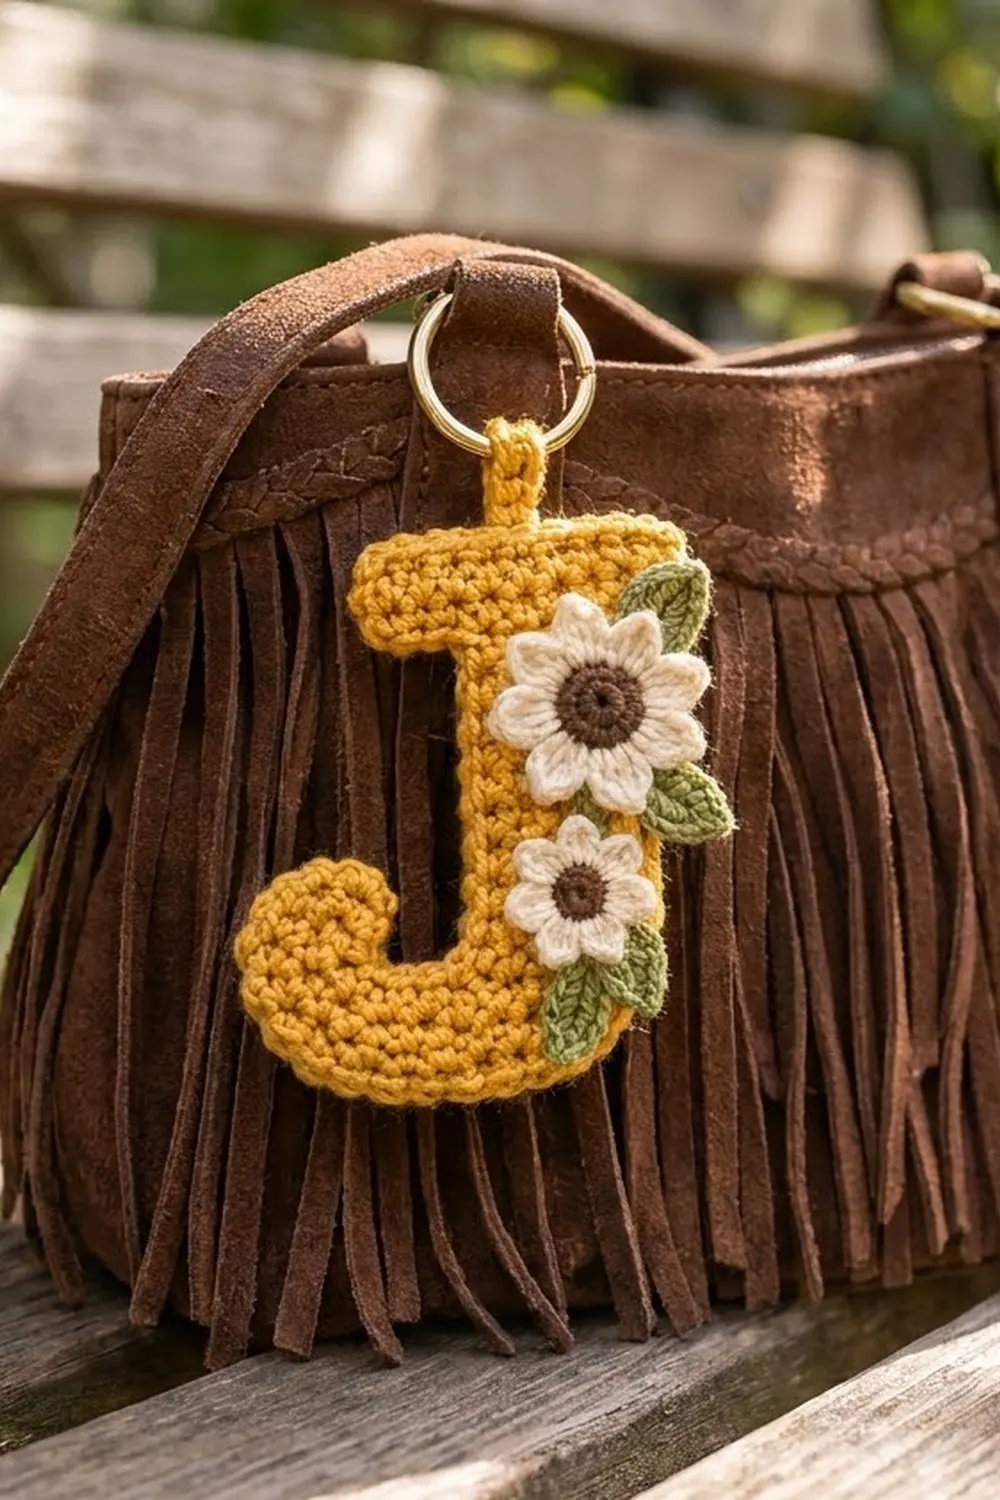
This is a flat letter J worked in mustard yellow single crochet. Two cream daisies with chocolate-brown centers and four small sage-green leaves trail down its right side. A short folded tab at the top holds a gold ring, so you can clip the letter to a bag, a key ring, or a zipper pull.
The look is warm, cozy and a little boho. Dense single crochet gives the letter a pebbly texture, and one round of sc edging softens the outline. The daisies have pointed petal tips, and the leaves have a natural center ridge.
The pattern uses US crochet terms. The finished letter measures 3.7 in (9.4 cm) wide and 4.4 in (11.2 cm) tall. That doesn’t include the hanging tab, which adds about 0.8 in (2.0 cm).
You work the letter flat from the top down: first the top bar, then the stem, then a bottom bar that extends to the left. A small curl knob is worked upward from the bottom bar. One edging round outlines the shape and the tab grows from the top edge. The flowers and leaves are sewn on last.
Finished Size and Construction
- Finished size: 3.7 in (9.4 cm) wide x 4.4 in (11.2 cm) tall, plus a 0.8 in (2.0 cm) tab
- Skill level: Easy / advanced beginner
- Terminology: US crochet terms
- Yarn weight: Worsted (#4)
- Hook: 4.0 mm (G-6)
- Number of pieces: 1 letter body, plus 6 small appliqués (2 flowers, 4 leaves) sewn on to make one finished keychain
- Layout: large daisy at the upper right of the stem, small daisy at the lower right, with leaves tucked behind both
- Letter size before edging: 3.3 in (8.4 cm) wide x 4.0 in (10.2 cm) tall
- Edging depth: about 0.2 in (0.5 cm) on every side
- Appliqué sizes: large daisy 1.6 in (4.1 cm), small daisy 1.2 in (3.0 cm), leaves 1.0 x 0.5 in (2.5 x 1.3 cm)
Materials
Choose a smooth worsted yarn with good stitch definition. Cotton or a cotton blend holds its shape best on something that gets handled every day. The amounts assume a yarn of about 200 m per 100 g.
- Mustard yellow: 15 g / 30 m (letter, edging, tab)
- Cream: 5 g / 10 m (petals)
- Chocolate brown: 2 g / 4 m (flower centers)
- Sage green: 3 g / 6 m (leaves)
All quantities include a small safety margin.
Tools:
- 4.0 mm (G-6) crochet hook
- 1 in (2.5 cm) gold spring ring or split key ring
- Tapestry needle and stitch marker
- Scissors
- Blocking mat, rustproof pins and a spray bottle
Abbreviations (US Terms)
- ch – chain
- sl st – slip stitch
- sc – single crochet
- hdc – half double crochet
- dc – double crochet
- sc2tog – single crochet 2 together
- BLO – back loop only
- MR – magic ring
- st(s) – stitch(es)
- RS / WS – right side / wrong side
Special stitches
- Standing sc: with a slip knot on your hook, insert the hook into the stitch and complete a sc as usual.
- Ch-2 picot: ch 2, sl st in the 2nd ch from the hook. This makes the point on each petal and leaf tip.
Gauge and Checkpoints
Gauge: 18 sc and 20 rows = 4 in (10.2 cm) in sc rows. That works out to 4.5 sts and 5 rows per inch.
The letter is its own gauge swatch. Work the top bar first and measure it before you go further.
- After Row 4: the top bar is 2.7 in (6.9 cm) wide and 0.8 in (2.0 cm) tall.
- After Row 16: the letter is 3.2 in (8.1 cm) tall, and the stem is 1.3 in (3.3 cm) wide.
- After Row 20: the letter is 4.0 in (10.2 cm) tall, and the bottom bar is 2.7 in (6.9 cm) wide.
- After the knob: the widest point is 3.3 in (8.4 cm).
- After edging: 3.7 in (9.4 cm) x 4.4 in (11.2 cm).
If the bar is wider than 2.8 in (7.1 cm), go down to a 3.75 mm hook. If it is narrower than 2.6 in (6.6 cm), go up to a 4.5 mm hook. Keep the fabric firm. A loose keychain loses its crisp shape and stretches when it hangs.
Letter J Body
Work in mustard yellow. Row 1 is the top of the letter, and each new row is added below the one before it.
Top Bar
Ch 13.
Row 1: Sc in the 2nd ch from the hook and in each ch across. (12 sc)
Rows 2–4: Ch 1, turn, sc in each st across. (12 sc)
Fasten off and check the bar against the first checkpoint.
Stem
The stem is centered under the bar, with 3 bar stitches left free on each side.
Row 5 (WS): Skip the first 3 sts of Row 4. Join with a standing sc in the 4th st, then sc in the next 5 sts. Leave the last 3 sts unworked. (6 sc)
From here on, the side facing away from you while you work Row 5 is the RS.
Rows 6–16: Ch 1, turn, sc in each st across. (6 sc)
Row 16 is a RS row. With the RS facing, it ends at the left edge of the stem, which is where the bottom bar begins. Do not fasten off.
Bottom Bar
Row 17 (WS): Ch 7. Sc in the 2nd ch from the hook and in the next 5 ch, then sc in each of the 6 stem sts. (12 sc)
Row 17 is a conversion row: 6 sts worked one into each stem stitch, plus 6 new sts worked on the chain.
Rows 18–20: Ch 1, turn, sc in each st across. (12 sc)
Fasten off. The bottom bar reaches 3 sts farther left than the top bar. The right edge of the stem runs straight down into it.
Curl Knob
The free loops of the Row 17 chain face upward, toward the stem. The knob uses the 3 leftmost loops.
Row K1 (RS): With the RS facing, count 3 free chain loops in from the left tip of the bottom bar. Join with a standing sc in the 3rd loop, then sc in the next 2 loops, working toward the tip. (3 sc)
Row K2: Ch 1, turn, sc in each st across. (3 sc)
Fasten off. The 3 free loops left between the knob and the stem form the inside of the J hook. The knob measures 0.7 in (1.8 cm) wide and 0.4 in (1.0 cm) tall.
Daisies
Large Daisy (make 1)
Rnd 1 (brown): Make a MR and work 5 sc in it. Join with a sl st to the first sc. (5 sc)
Rnd 2: Ch 1, 2 sc in each st around. Join. (10 sc) Fasten off brown.
Rnd 3 (cream): Join cream in the BLO of any st. Ch 1, 2 sc in the BLO of each st around. Join. (20 sc)
Rnd 4 (petals): Sl st in the next st, then work (hdc, dc, ch-2 picot, dc, hdc) in the next st. Repeat from * 9 more times. Join with a sl st to the first sl st. (10 petals)
Fasten off, leaving a 12 in (30.5 cm) tail. The daisy is 1.6 in (4.1 cm) across.
Small Daisy (make 1)
Rnd 1 (brown): Make a MR and work 8 sc in it. Join. (8 sc) Fasten off.
Rnd 2 (petals, cream): Join cream with a sl st in any st. Work (ch 2, dc, ch-2 picot, ch 2, sl st) in the same st, then sl st in the next st. Repeat from * 7 more times. The last sl st lands in the joining st. (8 petals)
Fasten off, leaving a 12 in (30.5 cm) tail. The daisy is 1.2 in (3.0 cm) across.
Leaves (make 4)
Use sage green. Ch 6.
Side 1: Sc in the 2nd ch from the hook, hdc in the next ch, dc in the next ch, hdc in the next ch, 3 sc in the last ch. (7 sts)
Side 2: Rotate and work into the free loops of the chain: hdc in the next ch, dc in the next ch, hdc in the next ch, sc in the next ch. (4 sts)
Tip: Ch-2 picot, then sl st in the first sc.
Each leaf has 11 sts plus the picot. Fasten off, leaving an 8 in (20.3 cm) tail. The leaves measure 1.0 in (2.5 cm) long and 0.5 in (1.3 cm) wide. The two halves meet along the chain and form a soft center vein.
Border: Edging Round and Hanging Tab
Border Gauge
The edging uses the same 4.5 sc per inch as the body and adds about 0.2 in (0.5 cm) on every side. That takes the letter from 3.3 x 4.0 in (8.4 x 10.2 cm) to 3.7 x 4.4 in (9.4 x 11.2 cm).
Edging Round
With the RS facing and mustard yellow, join with a standing sc in the free loop of the Row 1 foundation chain at the top-right corner. Work counterclockwise:
- Top edge: 2 more sc in the same corner loop, sc in the next 10 loops, 3 sc in the last loop. (16 sc)
- Left side of bar: sc in the row ends of Rows 2 and 3. (2 sc)
- Lower-left bar corner: 3 sc in the left corner st of Row 4. (3 sc)
- Underside of bar, left: sc in the next st, then sc2tog over the 3rd unworked st and the Row 5 row end. (2 sts)
- Left side of stem: sc in the row ends of Rows 6–15. (10 sc)
- Inside of hook: sc2tog over the Row 16 row end and the next free chain loop, sc in the next loop, then sc2tog over the last free loop and the K1 row end. (3 sts)
- Knob: 3 sc in the right end st of K2, sc in the center st, 3 sc in the left end st. (7 sc)
- Outer left side: sc in the row ends of K1 and Rows 17, 18 and 19. (4 sc)
- Bottom edge: 3 sc in the left corner st of Row 20, sc in the next 10 sts, 3 sc in the right corner st. (16 sc)
- Right side: sc in the row ends of Rows 19–6. (14 sc)
- Underside of bar, right: sc2tog over the Row 5 row end and the next unworked st of Row 4, sc in the next st, 3 sc in the corner st. (5 sts)
- Right side of bar: sc in the row ends of Rows 3 and 2. (2 sc)
Join with a sl st to the first sc. Total: 84 sts (16 + 2 + 3 + 2 + 10 + 3 + 7 + 4 + 16 + 14 + 5 + 2 = 84).
Why the math works:
- Stitch edges get 1 sc per stitch, so they stay at gauge.
- Outer corners each take 3 sc, which turns the edging 90 degrees and lets it lie flat.
- Inner corners (there are four) use sc2tog to remove extra fullness, so the J doesn’t ruffle where it turns.
- Side edges get 1 sc per row end. That is 5 sc per inch against the 4.5-per-inch gauge. On the longest edge, the 14-row right side, this adds only about one stitch, and firm tension and blocking take it up.
Do not fasten off.
Hanging Tab
The 8th and 9th sc of the 16-st top edge are the center pair.
Row 1: Sl st in each of the next 7 sc to reach the 8th sc. Ch 1, sc in the 8th and 9th sc. (2 sc)
Rows 2–8: Ch 1, turn, sc in each st. (2 sc)
Fasten off, leaving a 10 in (25.4 cm) tail. The tab is 0.4 in (1.0 cm) wide and 1.6 in (4.1 cm) long.
Final Blocking
- Weave in all of the letter’s ends except the tab tail.
- Pin the J face down. Square the top bar first, then pin the stem straight and the bottom bar level.
- Check that it measures 3.7 in (9.4 cm) wide and 4.4 in (11.2 cm) tall.
- Mist until damp, not wet. Pat the edging flat with your fingers and gently round the knob.
- Let it dry completely, about 2–4 hours.
- Pin the leaves flat with each picot tip pointing. Mist the leaves and daisies and let them dry.
- Slip the ring onto the tab. Fold the tab to the back and sew Row 8 to the WS just below the top edge, leaving a 0.8 in (2.0 cm) loop.
- Sew on the appliqués using their tails. Leaves go on first, then the daisies on top.
- Large daisy: center it 0.5 in (1.3 cm) below the top bar, with its petals overlapping the right edge of the stem.
- Small daisy: center it 1.0 in (2.5 cm) above the bottom edge, also on the right side of the stem.
- Leaves: tuck one behind the upper-right petals of the large daisy, pointing up beside the bar, and one below it, pointing right. Place two under the small daisy, one pointing down-left and one pointing right.
- Stitching: use small stitches around each brown center and at each leaf base. Keep them off the front of the petals.
Final Quality-Control Checklist
- The letter measures 3.7 x 4.4 in (9.4 x 11.2 cm).
- The edging total is 84 sts, with no gaps at the inner corners.
- The top bar is level and the stem is straight.
- The knob curls up cleanly and the hook gap is open.
- The tab is centered and firmly sewn, and the ring turns freely.
- The daisies and leaves sit flat, with the petal points visible.
- All ends are woven in and trimmed on the WS.
Troubleshooting
- Edges wave along the stem: The row-end sc are too loose. Redo that side with a smaller hook.
- Inner corners pucker: Check that you worked the sc2tog. A plain sc there adds bulk.
- Bottom bar extends to the wrong side: Row 16 ended on the other edge. Flip the piece and treat the other face as the RS. The letter is symmetrical above the bottom bar, so this works.
- Daisy cups: Block it flat, or work Rnd 3 with a larger hook.
- Leaf curls: Pin it flat while damp, or work it with a 3.75 mm hook.
- Tab stretches: Stitch down both sides of the fold as well as the end.
Care
Hand wash in cool water with mild soap, press out the water in a towel, and dry flat. Keep it out of the dryer, because heat can loosen the appliqué stitches and the ring tab.
Final Notes
The whole keychain comes back to one gauge: 4.5 sts and 5 rows per inch. That gives a 2.7 in (6.9 cm) top bar, a height of 3.2 in (8.1 cm) at Row 16, and a 4.0 in (10.2 cm) body. The knob brings the width to 3.3 in (8.4 cm). The 84-stitch edging takes the letter to 3.7 x 4.4 in (9.4 x 11.2 cm), and the folded tab adds 0.8 in (2.0 cm). Measure at each checkpoint and the daisies will land right where they belong.
Happy crocheting!