

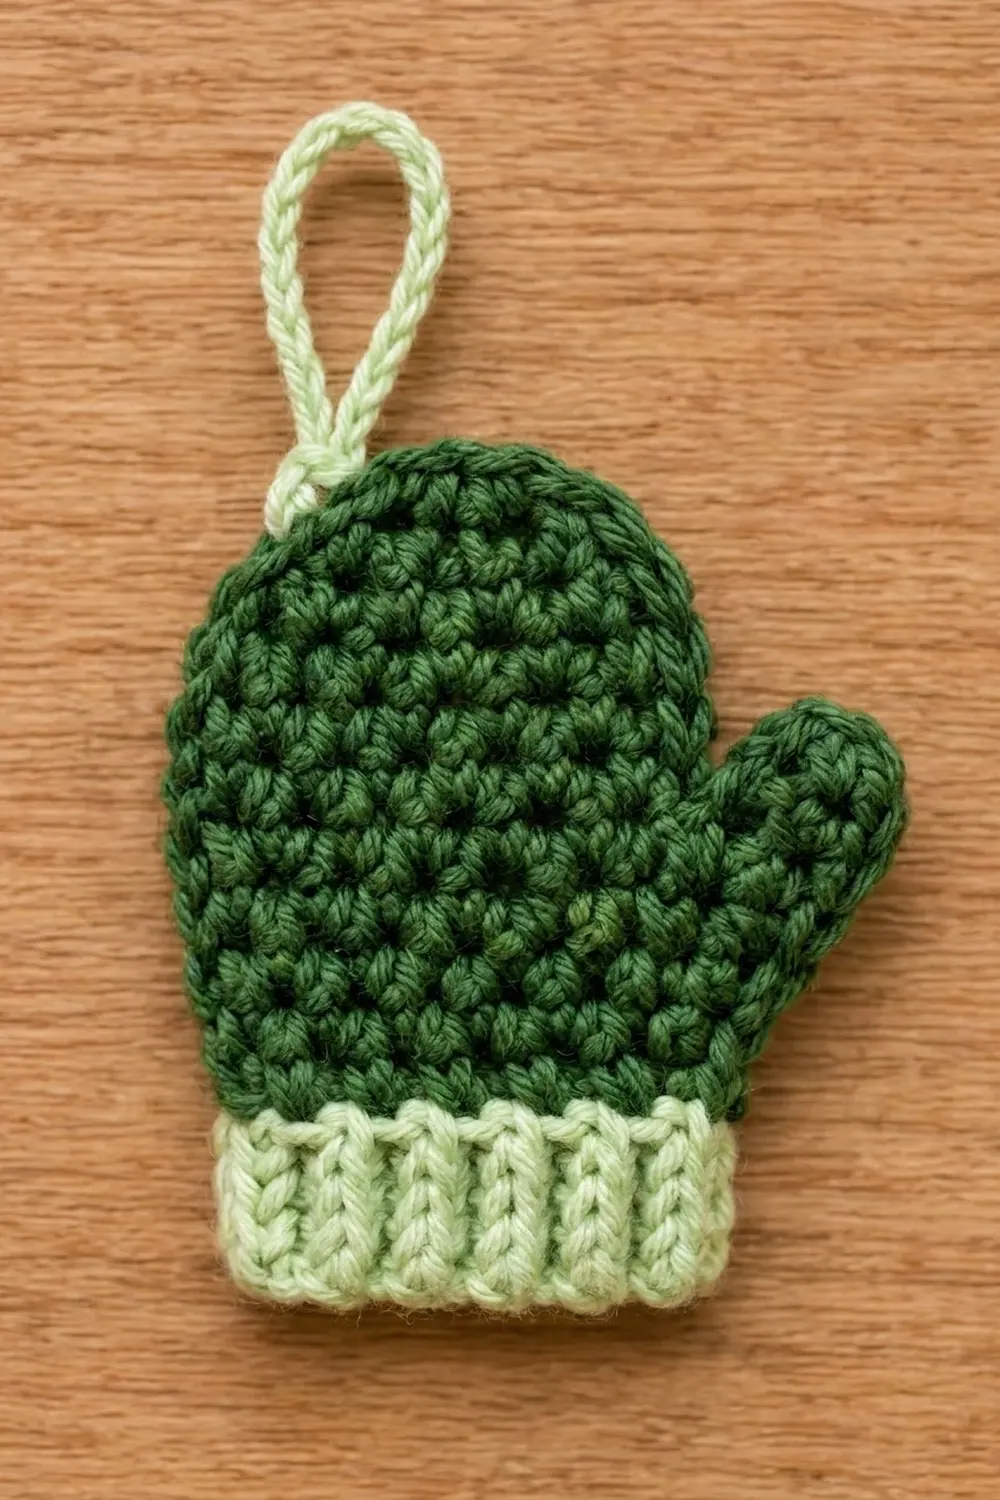
This small mitten ornament is quick to make. The body is deep forest-green single crochet with a slightly pebbly texture. The pale mint cuff has crisp vertical ribs, and a matching mint loop at the top lets it hang straight from a branch.
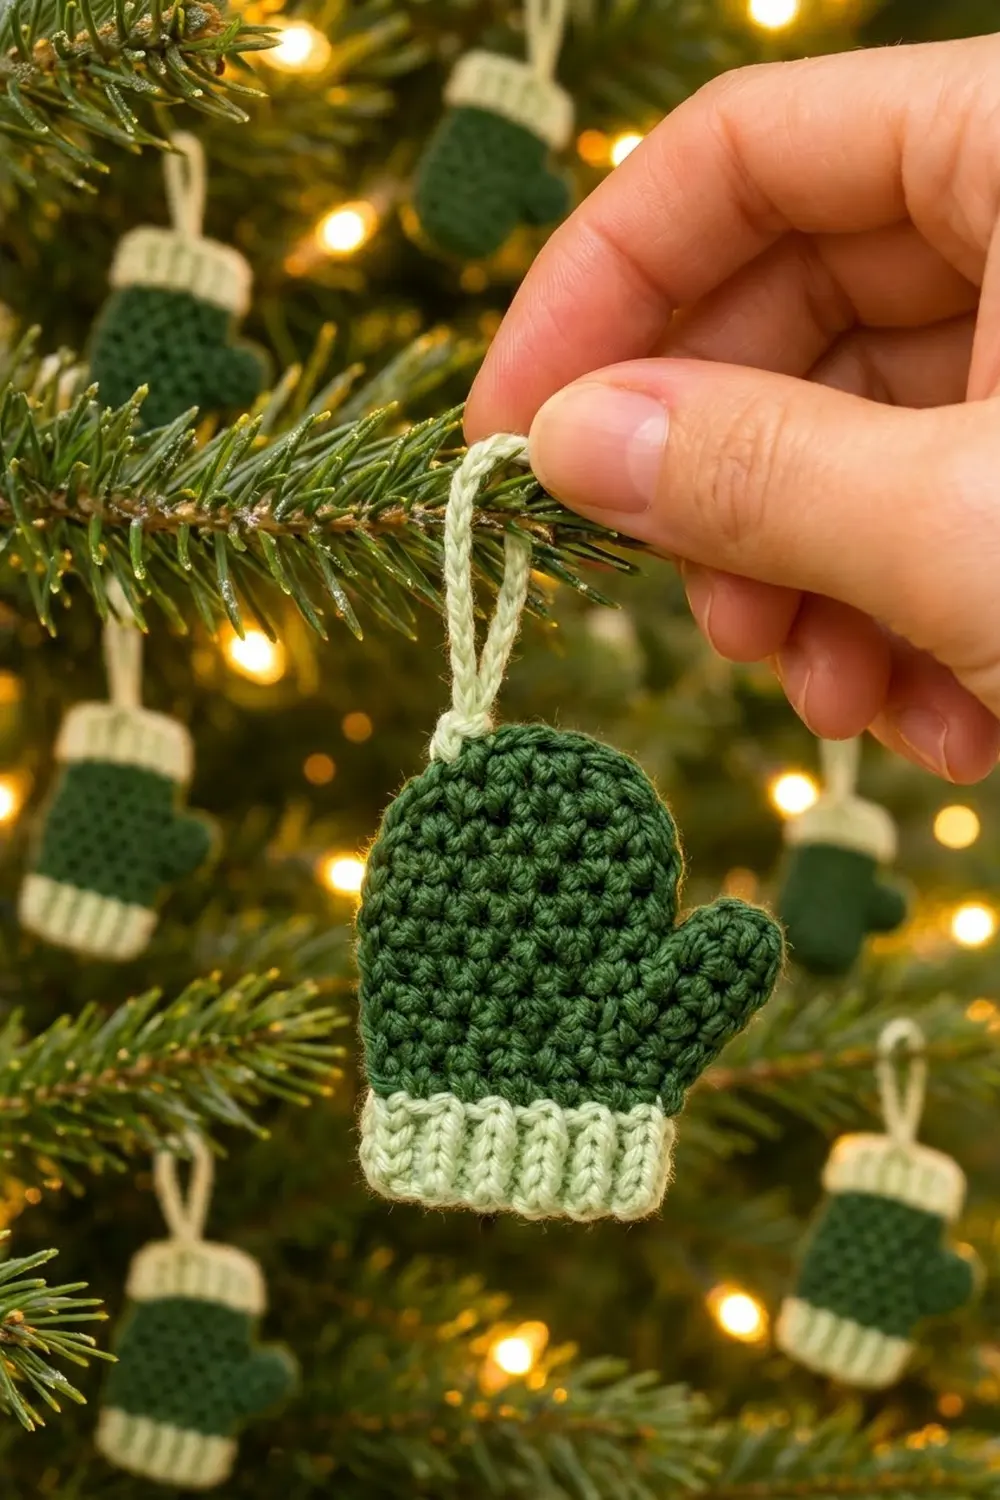
The style is classic Christmas cottage: two quiet greens, a solid flat shape and a thumb that tilts out to the right. It works as a tree ornament, a gift tag, a garland charm or an Advent-calendar token. The pattern uses US crochet terms throughout.
The finished mitten measures 3 in (7.6 cm) wide across the thumb and 3.6 in (9.1 cm) tall, not counting the loop. The loop adds about 1.5 in (3.8 cm).
Construction is simple and all in one piece:
1. Work the cuff sideways in back-loop single crochet so that the ribs stand upright.
2. Work the green body in rows along the long edge of the cuff, increasing toward the thumb.
3. Work the thumb on its own over a few stitches, then finish the hand separately and shape the rounded top.
4. Add one round of green edging around the body, then the mint loop.
Finished Size and Construction
- Finished size: 3 in (7.6 cm) wide × 3.6 in (9.1 cm) tall, plus a 1.5 in (3.8 cm) loop
- Skill level: Easy (beginner with some shaping practice)
- Terminology: US crochet terms
- Yarn weight: Worsted (#4), cotton or cotton blend
- Hook: 3.75 mm (F-5)
- Number of pieces: 1 (the cuff, body, thumb, edging and loop are all worked onto the same piece)
- Layout: Single mitten, thumb on the right when the right side faces you
- Piece size before edging: 2.8 in (7.1 cm) wide × 3.5 in (8.9 cm) tall
- Edging depth: About 0.1 in (0.3 cm) on the sides and top of the body; the cuff sides are not edged
Materials
Choose a smooth, tightly plied worsted cotton. Cotton holds the flat shape well and shows off the stitch texture. Acrylic also works, but it is springier, so block it carefully.
- Color A (forest green): 10 g (about 16 m)
- Color B (pale mint): 4 g (about 6 m)
These amounts include a comfortable margin for gauge swatches and weaving in ends. A single mitten uses noticeably less.
Tools:
– 3.75 mm (F-5) crochet hook
– Tapestry needle
– Scissors
– Stitch marker
– Ruler or tape measure
– Blocking mat and rust-proof pins
– Spray bottle with water
Abbreviations (US Terms)
- ch: chain
- sl st: slip stitch
- sc: single crochet
- sc2tog: single crochet 2 together (insert hook in the next st, pull up a loop, insert hook in the following st, pull up a loop, yarn over and pull through all 3 loops on hook)
- BLO: back loop only
- st(s): stitch(es)
- RS / WS: right side / wrong side
Special stitch: sc BLO. Work a single crochet into the back loop of the stitch only. Over the rows, the unused front loops build up into raised ridges. Because the cuff is worked sideways, those ridges stand vertically on the finished mitten.
Gauge and Checkpoints
Body gauge: 5 sc and 6 rows = 1 in (2.5 cm) in sc worked flat. In a 4 in (10.2 cm) swatch, that is 20 sc × 24 rows.
Cuff gauge: 10 rows of sc BLO = 2 in (5.1 cm) wide, and 4 sts = 0.8 in (2.0 cm) tall.
Make one complete test mitten before starting a batch, and measure at each checkpoint:
- After the cuff: 2.0 in (5.1 cm) wide × 0.8 in (2.0 cm) tall
- After Row 6 of the body: 2.8 in (7.1 cm) wide; total height 1.8 in (4.6 cm) including the cuff
- After the thumb: the thumb rises about 0.7 in (1.8 cm) above Row 6
- After hand Row 13: total height about 3.0 in (7.6 cm)
- After Row 16: 3.5 in (8.9 cm) total height
- After the edging: 3.0 in (7.6 cm) × 3.6 in (9.1 cm)
If your mitten is too big, go down to a 3.5 mm (E-4) hook. If it is too small or feels stiff, go up to a 4.0 mm (G-6). The stitch counts never change, only the hook. Keep the stitches firm, because a tight fabric keeps the outline crisp and stops stuffing-free ornaments from curling.
Cuff (Color B)
The cuff is worked sideways, so each row becomes one vertical rib.
Foundation: With Color B, ch 5.
Row 1: Sc in the 2nd ch from hook and in each of the next 3 ch. Turn. (4 sc)
Rows 2–10: Ch 1 (does not count as a st), sc BLO in each st across. Turn. (4 sc per row)
Fasten off Color B and leave a 4 in (10.2 cm) tail.
You now have 10 rows, which form 5 visible ridges on each face. The strip should measure 2.0 in (5.1 cm) long × 0.8 in (2.0 cm) tall. Turn the strip so the rows run vertically. One long edge, made of 10 row ends, is the top of the cuff, and the body is worked along it.
Body (Color A)
Hold the cuff with the RS facing you. The body is worked from right to left on RS rows, so the thumb edge is the right-hand edge. Every increase is placed at that edge.
Row 1 (RS): Join Color A with a sl st in the top-right row end of the cuff, then ch 1. Work 1 sc in each row end across the top of the cuff. Turn. (10 sc)
Row 2 (WS): Ch 1, sc in each of the next 9 sts, 2 sc in the last st. Turn. (11 sc)
Row 3 (RS): Ch 1, 2 sc in the first st, sc in each of the next 10 sts. Turn. (12 sc)
Row 4 (WS): Ch 1, sc in each of the next 11 sts, 2 sc in the last st. Turn. (13 sc)
Row 5 (RS): Ch 1, 2 sc in the first st, sc in each of the next 12 sts. Turn. (14 sc)
Row 6 (WS): Ch 1, sc in each st across. Turn. (14 sc)
Checkpoint: The piece should be 2.8 in (7.1 cm) wide and 1.8 in (4.6 cm) tall including the cuff. Row 1 sits flush with the cuff, and the right edge slants outward in a gentle step.
Thumb
Row 7 (RS): Ch 1, sc in each of the first 4 sts only. Turn, leaving the remaining 10 sts unworked. (4 sc)
Rows 8–9: Ch 1, sc in each st across. Turn. (4 sc per row)
Row 10: Ch 1, sc2tog twice. (2 sts)
Fasten off and leave a short tail. The thumb stands about 0.7 in (1.8 cm) above Row 6 and has a softly tapered tip.
Hand
Row 7 (RS): With the RS facing, join Color A with a sl st in the 5th st of Row 6, which is the first unworked st beside the thumb. Ch 1, then sc in the same st and in each of the remaining 9 sts. Turn. (10 sc)
Place a marker in the first st of this row so you can find the thumb notch later.
Rows 8–13: Ch 1, sc in each st across. Turn. (10 sc per row)
Checkpoint: The total height should now be about 3.0 in (7.6 cm).
Row 14: Ch 1, sc2tog, sc in each of the next 6 sts, sc2tog. Turn. (8 sts)
Row 15: Ch 1, sc2tog, sc in each of the next 4 sts, sc2tog. Turn. (6 sts)
Row 16: Ch 1, sc2tog 3 times. (3 sts)
Do not fasten off; the edging starts from here. Before you continue, check the measurements: 2.8 in (7.1 cm) wide across the thumb and 3.5 in (8.9 cm) tall. The decreases form a small dome that the edging will round off.
Border (Green Edging)
Border gauge: 1 sc in each row end and 1 sc in each st along tops. Because the body has 6 rows per inch and the sc edging lies slightly compressed along the edge, 1 sc per row end sits flat without ruffling or pulling. The extra stitches at the thumb tip and the top corners allow for the curves.
The edging runs around the green body only. The cuff’s ribbed sides stay clean and mint.
Edging Round
Turn the piece so the RS faces you. Cut the working yarn, then rejoin Color A with a sl st in the row end of body Row 1 on the thumb (right) side. Working counterclockwise:
- Thumb outer side: Ch 1, then 1 sc in each row end of Rows 1–9 on the thumb edge (body Rows 1–6 plus thumb Rows 7–9). (9 sc)
- Thumb tip: 3 sc in each of the 2 sts of thumb Row 10. (6 sc)
- Thumb inner side: 1 sc in each row end of thumb Rows 9 and 8. (2 sc)
- Thumb notch: Sc2tog across the thumb Row 7 row end and the hand Row 7 row end at the marker. (1 st)
- Hand right side: 1 sc in each row end of hand Rows 8–15. (8 sc)
- Top: 2 sc in the first st of Row 16, sc in the middle st, 2 sc in the last st. (5 sc)
- Left side: 1 sc in each row end of Rows 15 down to 1. (15 sc)
Edging total: 9 + 6 + 2 + 1 + 8 + 5 + 15 = 46 sts
Sl st into the top corner of the cuff on the left side. Fasten off and weave in the end.
Why the math works: Each side receives exactly one stitch per row it has. The thumb outer side has 9 rows, the hand right side has 8 rows above the notch, and the left side has 15 rows below the top row. Increases appear only where the outline turns a curve: the thumb tip and the two top corners. The sc2tog at the notch pulls the crotch between thumb and hand in neatly so that no gap shows. The edging adds about 0.1 in (0.3 cm) on each side and on top. That takes the width from 2.8 in (7.1 cm) to 3.0 in (7.6 cm) and the height from 3.5 in (8.9 cm) to 3.6 in (9.1 cm). The cuff is not edged, so it stays at 2.0 in (5.1 cm) and gives the hand a slight, natural flare above it.
Hanging Loop (Color B)
- With the RS facing, join Color B with a sl st in the middle sc of the 5 top edging sts.
- Ch 16, then sl st into the same st to close the loop.
- Fasten off. Weave the tail down through the green edging on the WS so that it doesn’t show.
The loop should stand about 1.5 in (3.8 cm) tall when laid flat.
Final Blocking
- Weave in every remaining tail on the WS. Run each tail through stitches of its own color.
- Lay the mitten face up on the blocking mat.
- Pin the cuff first: a rectangle 2.0 in (5.1 cm) wide × 0.8 in (2.0 cm) tall, with the ribs straight and vertical.
- Pin the outer edge of the thumb so the full width measures 3.0 in (7.6 cm).
- Pin the top dome so the total height is 3.6 in (9.1 cm). Use 3–4 pins around the curve to keep it smooth.
- Lay the loop straight up from the top center.
- Mist lightly until damp, but not soaked. Pat the surface gently so the stitches settle evenly.
- Leave the mitten to dry completely, usually 2–4 hours, before you unpin it.
For extra stiffness on the tree, you can brush the WS with a thin fabric stiffener solution before drying.
Final Quality-Control Checklist
- Cuff: 10 rows, 5 clear vertical ridges, 0.8 in (2.0 cm) tall
- Body Row 1 has 10 sc, one in each cuff row end, with no gaps at the color change
- All increases sit on the thumb edge only, and the left edge is straight
- Thumb has 4 sts and 4 rows and tapers to 2 sts
- Hand has 10 rows at 10 sts before the top shaping
- Edging has 46 sts in total, with no ruffles or puckers
- The notch between thumb and hand is closed and tidy
- Loop is centered at the top and stands about 1.5 in (3.8 cm)
- Finished size: 3.0 in (7.6 cm) × 3.6 in (9.1 cm)
- No tails visible on the RS
Troubleshooting
Cuff ribs look horizontal. Rotate the strip so the rows run up and down before working Row 1 of the body.
Cuff is wavy where the body joins. You worked more than 1 sc per row end. Pull back Row 1 and work exactly 10 sc.
Thumb is on the wrong side. The increases were worked at the left edge. On RS rows, increase in the first st; on WS rows, increase in the last st.
Gap at the thumb notch. Pull the sc2tog firmly. You can also close the gap on the WS with a single stitch of the Color A tail.
Edging ruffles. Your stitches are looser than your body stitches. Go down one hook size for the edging only.
Edging pulls the curves flat. Make sure you worked 3 sc in each thumb-tip st and 2 sc at each top corner.
Mitten curls. Block again while damp and pin it until it is completely dry. Cotton holds the shape best.
Loop flops sideways. Anchor it into the exact middle top st and secure the tail with a couple of stitches straight down the WS.
Care
Hand wash in cool water, press out the moisture in a towel, and dry flat, reshaping to the blocked size. Store flat or hanging between seasons so the loop doesn’t crease.
Final Notes
The measurement chain is short and easy to check:
– The cuff is 2.0 in × 0.8 in (5.1 cm × 2.0 cm).
– After Row 6, the body reaches 2.8 in (7.1 cm) wide.
– The thumb adds about 0.7 in (1.8 cm) above Row 6.
– After Row 16, the piece is 3.5 in (8.9 cm) tall.
– The 46-stitch edging brings it to 3.0 in × 3.6 in (7.6 cm × 9.1 cm).
– The mint loop adds 1.5 in (3.8 cm) on top.
If your measurements match at each checkpoint, every mitten in a batch will come out the same size. Once you have the rhythm, each one takes well under an hour.
Happy crocheting!