
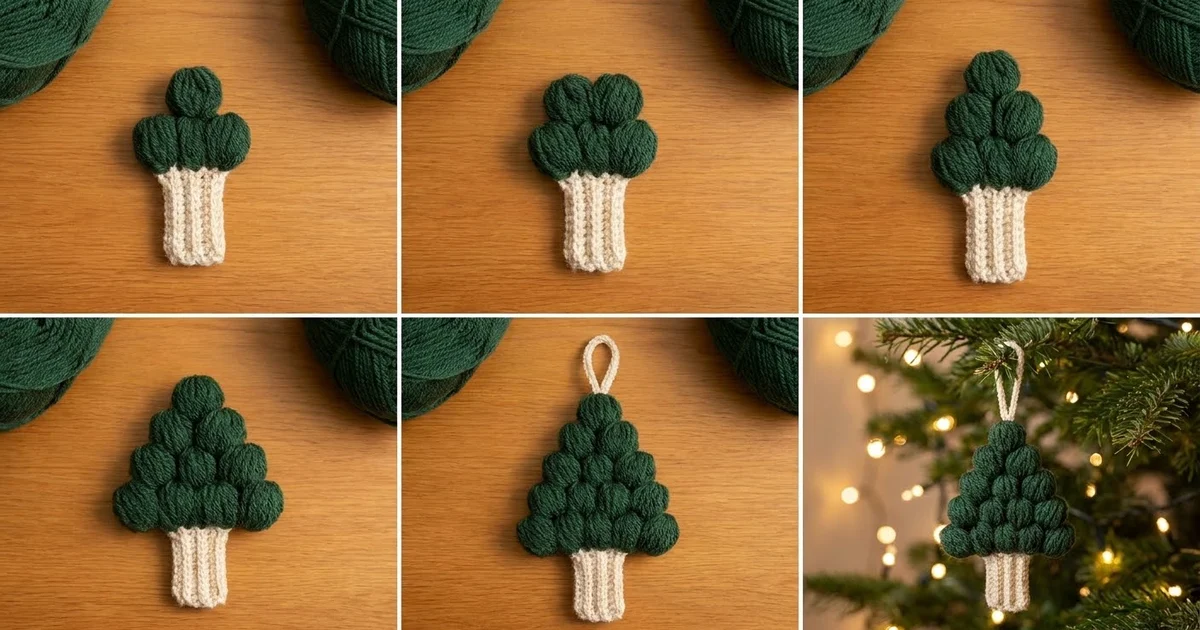
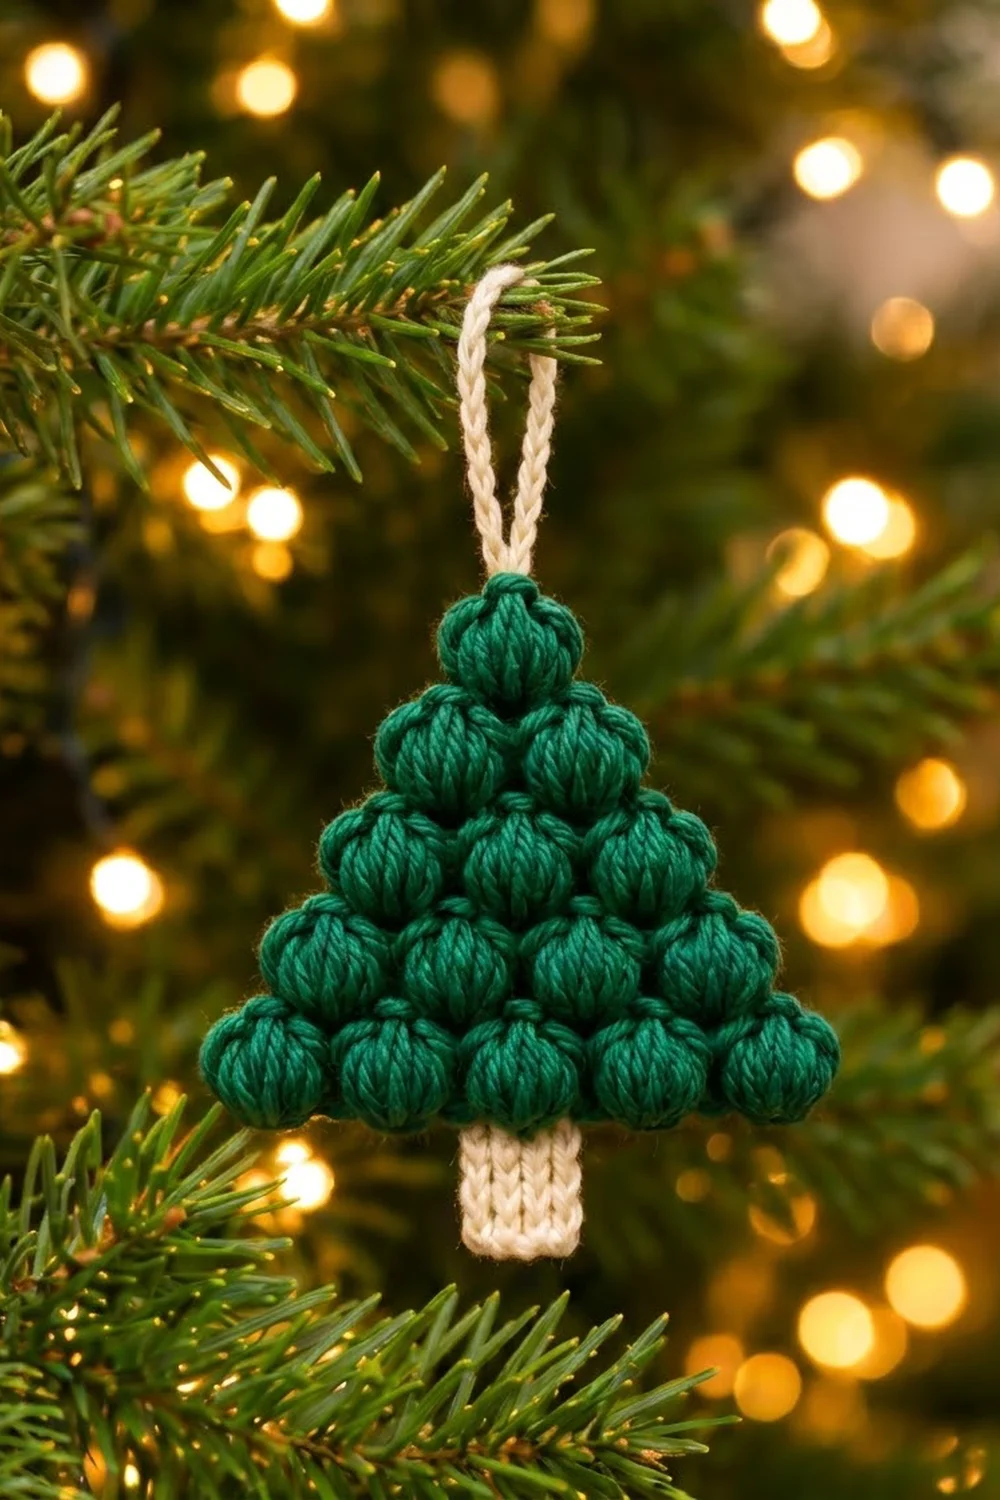
This little tree is made from fifteen plump puff stitches stacked into a neat triangle. The rows go 5, 4, 3, 2 and 1 puffs, and each puff sits in the gap between the two puffs below it, so the tree has soft, bumpy edges and a single round puff at the top.
The body is a deep forest green. The ribbed trunk and the chain hanging loop are cream, which stands out against the green and looks good on a real tree, a garland, or a gift package.
The pattern uses US crochet terms. The finished ornament is about 4 in (10.2 cm) wide and 4.75 in (12.1 cm) tall without the loop. The loop adds about 2 in (5.1 cm).
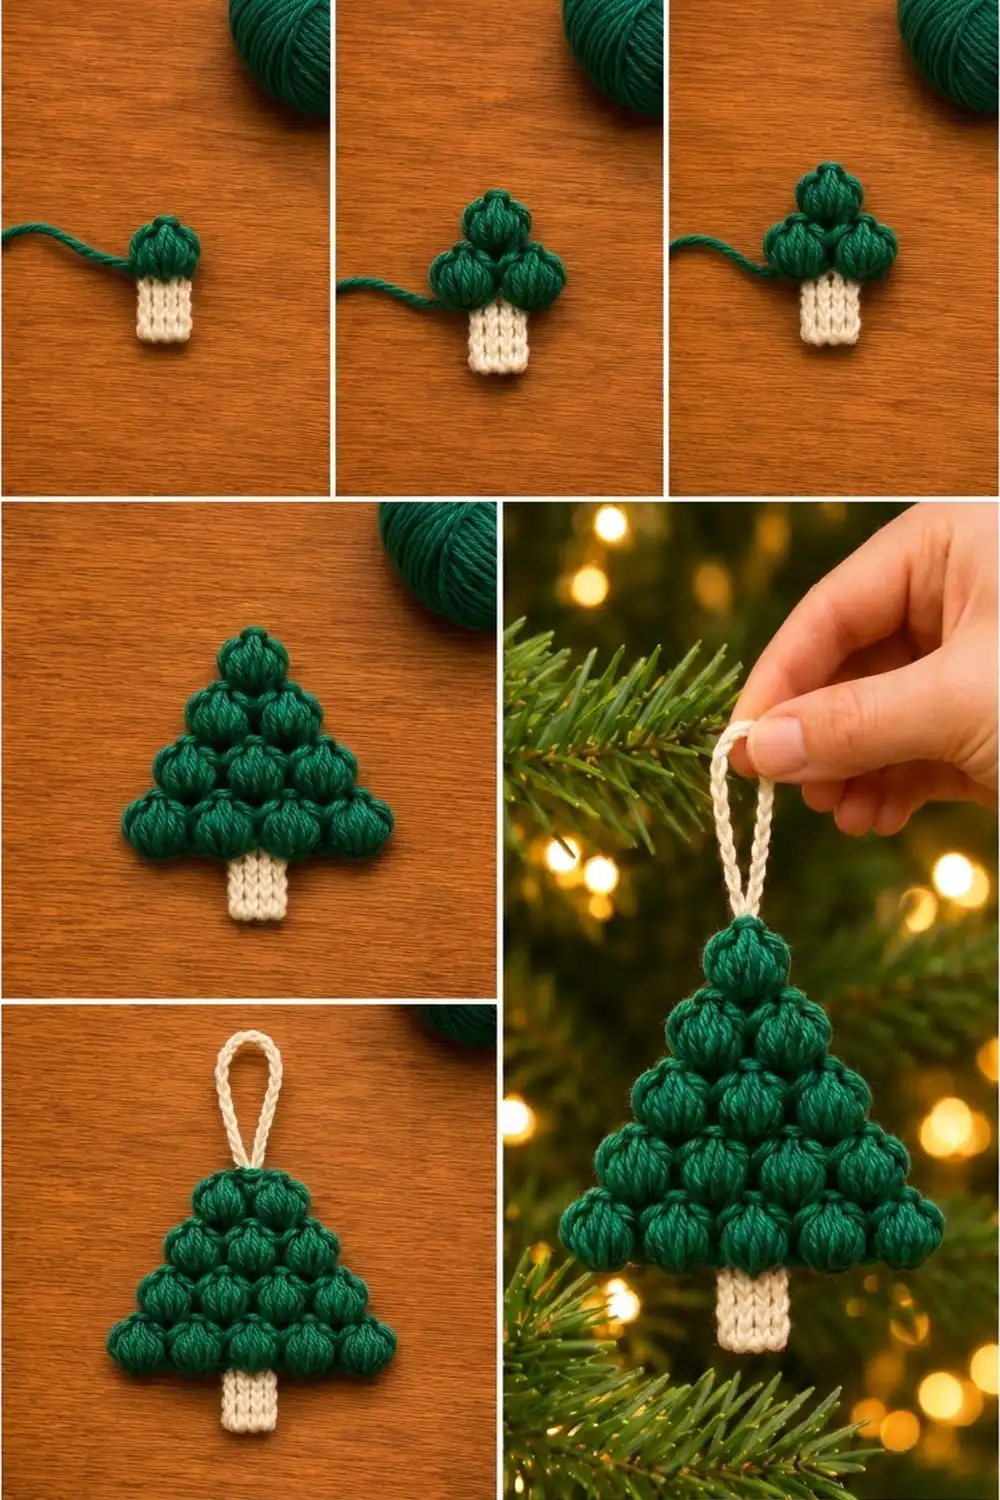
The tree is worked flat from the bottom up. Puff rows (right side) alternate with single crochet rows (wrong side), and each wrong-side row decreases one stitch at each edge. A slip stitch edging tidies the outline. The trunk is a tiny strip of ribbing worked sideways onto the bottom edge, and the loop is chained from the top.
Finished Size and Construction
- Finished size: 4 in (10.2 cm) wide × 4.75 in (12.1 cm) tall, loop not included
- Tree body: 4 in (10.2 cm) wide × 3.5 in (8.9 cm) tall
- Trunk: 1 in (2.5 cm) wide × 1.25 in (3.2 cm) tall
- Hanging loop: about 2 in (5.1 cm) tall
- Skill level: Easy
- Terminology: US
- Yarn weight: Worsted (#4)
- Hook: 4.5 mm (US 7)
- Number of pieces: 1 ornament, worked in one piece (body, trunk and loop are all worked directly onto the tree)
- Layout: Puffs in rows of 5-4-3-2-1 (15 puffs total)
- Size before edging: 4 in (10.2 cm) × 3.5 in (8.9 cm)
- Edging depth: under 1/16 in (0.2 cm); it does not change the measured size
Materials
Yarn: Use a smooth worsted-weight cotton or cotton blend. Cotton gives crisp puffs that hold their round shape. Acrylic also works but makes slightly softer, flatter puffs. Avoid fuzzy yarns, because they hide the puff texture.
- Color A – Forest Green: 8 g, about 16 m (17.5 yd)
- Color B – Cream: 3 g, about 6 m (6.6 yd)
These amounts include a safety margin of roughly 25%, so you won’t run short if your puffs come out a little larger.
Tools:
– 4.5 mm (US 7) crochet hook
– Tapestry needle
– Scissors
– 2 stitch markers
– Ruler or tape measure
– Pins and a blocking mat or folded towel
– Spray bottle with water
Abbreviations (US Terms)
- ch – chain
- sl st – slip stitch
- sc – single crochet
- sc2tog – single crochet 2 together (1 stitch decreased)
- sc3tog – single crochet 3 together (2 stitches decreased)
- BLO – back loop only
- st(s) – stitch(es)
- RS / WS – right side / wrong side
- [ ] – repeat the instructions in brackets as directed
Special stitch – Puff stitch (puff): [Yarn over, insert hook in the indicated stitch, yarn over and pull up a loop to about 1/2 in (1.3 cm) tall] 4 times, for 9 loops on the hook. Yarn over and pull through all 9 loops. Don’t add a closing chain. The puff counts as 1 stitch.
Turning chains: The ch 1 at the start of a row does not count as a stitch.
Gauge and Checkpoints
Make the tree body first and measure it before adding the edging, trunk or loop. The tree is small, so the body is your gauge swatch.
Gauge: Row 2 (the first puff row of 11 sts) measures 4 in (10.2 cm) wide. Rows 1–11 together measure 3.5 in (8.9 cm) tall.
Checkpoints:
– After Row 2: 4 in (10.2 cm) wide, about 0.75 in (1.9 cm) tall.
– After Row 6: about 2 in (5.1 cm) tall; Row 6 measures about 2.5 in (6.4 cm) wide.
– After Row 11: 3.5 in (8.9 cm) tall from the foundation to the tip.
If your tree is too big: go down to a 4 mm (US G-6) hook, or pull up shorter puff loops (about 3/8 in, 1 cm).
If your tree is too small: go up to a 5 mm (US H-8) hook, or pull up the puff loops a little taller.
The puff loop height affects size as much as the hook does. Keep all the loops the same height so every puff matches.
Tree Body
With Color A, ch 12.
Row 1 (WS): Sc in 2nd ch from hook and in each ch across, turn. (11 sts)
Row 2 (RS): Ch 1, sc in first st, [puff in next st, sc in next st] 5 times, turn. (11 sts: 5 puffs + 6 sc)
The puffs sit in stitches 2, 4, 6, 8 and 10. Place a marker in the first and last stitch of this row so you can see the edges.
Row 3 (WS): Ch 1, sc2tog over first 2 sts, sc in next 7 sts, sc2tog over last 2 sts, turn. (9 sts)
Work the sc stitches into the top of each puff firmly, so the puff stays round and doesn’t flatten.
Row 4 (RS): Ch 1, sc in first st, [puff in next st, sc in next st] 4 times, turn. (9 sts: 4 puffs + 5 sc)
These puffs land on stitches 2, 4, 6 and 8 of Row 3. Those stitches sit directly above the sc stitches between the puffs of Row 2, which is what staggers each new puff into the gap below it.
Row 5 (WS): Ch 1, sc2tog, sc in next 5 sts, sc2tog, turn. (7 sts)
Row 6 (RS): Ch 1, sc in first st, [puff in next st, sc in next st] 3 times, turn. (7 sts: 3 puffs + 4 sc)
Checkpoint: About 2 in (5.1 cm) tall. Row 6 measures about 2.5 in (6.4 cm) wide.
Row 7 (WS): Ch 1, sc2tog, sc in next 3 sts, sc2tog, turn. (5 sts)
Row 8 (RS): Ch 1, sc in first st, [puff in next st, sc in next st] 2 times, turn. (5 sts: 2 puffs + 3 sc)
Row 9 (WS): Ch 1, sc2tog, sc in next st, sc2tog, turn. (3 sts)
Row 10 (RS): Ch 1, sc in first st, puff in next st, sc in last st, turn. (3 sts: 1 puff + 2 sc)
Row 11 (WS): Ch 1, sc3tog. (1 st)
Don’t fasten off. Go straight on to the edging.
Puff count check: 5 + 4 + 3 + 2 + 1 = 15 puffs, all facing the RS.
Stitch count summary: Rows 1–2 have 11 sts. Each WS row from Row 3 to Row 9 removes 2 sts (11 → 9 → 7 → 5 → 3). Row 11 reduces 3 sts to 1. Each puff row keeps the count of the row before it.
Edging (Border)
The edging is a single round of slip stitches in Color A. It smooths the stepped row ends along the slanted sides and gives the foundation edge a firm line for the trunk.
Edging gauge: 1 sl st per row end on the slanted sides and 1 sl st per foundation ch on the bottom. Slip stitches add almost no width, so the body stays 4 in (10.2 cm) × 3.5 in (8.9 cm).
Hold the tree RS facing. The loop on your hook is at the top stitch (Row 11), which is the top corner.
Edging round:
1. Left slanted side: Work 1 sl st in the end of each row from Row 10 down to Row 2. (9 sl sts)
2. Bottom edge: Work 1 sl st in each of the 11 foundation ch loops, working into the loops left free by Row 1. (11 sl sts; the first and last are the bottom corners)
3. Right slanted side: Work 1 sl st in the end of each row from Row 2 up to Row 11. (10 sl sts; the last one sits in the top stitch and is the top corner)
Total: 9 + 11 + 10 = 30 sl sts. Join with a sl st to the first edging sl st, then fasten off and weave in the end.
Why the math works: The tree has 11 rows and 11 foundation stitches. Each corner stitch is counted on exactly one side. The bottom side includes both of its own corners (11 sts). The right side runs from Row 2 to Row 11, so it includes the top corner (10 sts). That leaves 9 sts for the left side, covering Rows 10 to 2. No row end or foundation stitch is used twice, so the edging lies flat without pulling or ruffling.
Trunk
The trunk is worked sideways onto the bottom edge as a strip of BLO ribbing, which makes vertical ridges. Use the three center stitches of the bottom edge, which are bottom sl sts 5, 6 and 7, counting from the left bottom corner. Mark stitch 6, the exact center.
Hold the tree RS facing with the bottom edge at the top. Join Color B with a sl st under both loops of bottom sl st 5.
Row 1: Ch 5, sc in 2nd ch from hook and in next 3 ch (4 sc), sl st under both loops of bottom sl st 6, turn.
Row 2: Skip the sl st, sc BLO in each of the 4 sc, ch 1, turn. (4 sc)
Row 3: Sc BLO in each of the 4 sc, sl st under both loops of bottom sl st 7, turn. (4 sc)
Row 4: Skip the sl st, sc BLO in each of the 4 sc. (4 sc)
Fasten off and leave a 6 in (15.2 cm) tail. Use the tail to tack the top corner of Row 4 to the edge just beyond bottom sl st 7, so the trunk lies flat and straight. Weave in both ends on the WS.
Checkpoint: The trunk is 1 in (2.5 cm) wide (4 ribbed rows) and 1.25 in (3.2 cm) tall (4 sc), centered under the middle puff of the bottom row. The tree now measures 4.75 in (12.1 cm) tall.
Hanging Loop
Join Color B with a sl st in the top sl st (the top corner, above the single top puff).
Ch 20, then sl st in the same stitch to close the loop. Fasten off and weave the ends into the top puff on the WS.
The loop stands about 2 in (5.1 cm) above the tree.
Final Blocking
- Weave in all remaining ends on the WS. Run each end through a few stitches of the same color.
- Lightly mist the ornament with water until it is damp, not soaked.
- Lay it RS up on a blocking mat or folded towel.
- Pin the 3 corners: the 2 bottom corners 4 in (10.2 cm) apart, and the tip 3.5 in (8.9 cm) above the bottom edge.
- Pin the bottom of the trunk straight down, 1.25 in (3.2 cm) below the bottom edge.
- Use your fingertips to gently push each puff back into a round shape. Don’t press the puffs flat.
- Lay the loop straight up from the tip.
- Leave it to dry completely, then remove the pins.
Final Quality-Control Checklist
- 15 puffs in rows of 5, 4, 3, 2 and 1, all on the RS
- Each puff sits centered between the two puffs below it
- Both slanted sides are straight and the same length
- Edging has 30 sl sts with no gaps at the corners
- Base measures 4 in (10.2 cm), body height measures 3.5 in (8.9 cm)
- Trunk is centered on bottom sl st 6, and measures 1 in (2.5 cm) wide and 1.25 in (3.2 cm) tall
- Trunk ridges run vertically
- Loop is centered on the tip and about 2 in (5.1 cm) tall
- All ends are woven in invisibly on the WS
Troubleshooting
The puffs look flat or thin. Pull each loop up taller before closing the puff, and keep the loops even. Make the sc stitches on top firm.
The puffs lean to one side. Hold all the loops on your hook straight and upright, and close the puff with one smooth pull.
The tree edges curve inward. You may be skipping the sc2tog at one edge or working it too tightly. Recount each WS row against the stitch counts given.
The puffs are not staggered. Check that every puff row starts with sc in the first stitch. Puffs go in even-numbered stitches only.
The edging ruffles. You have worked more than 1 sl st per row end. Undo it and work exactly 9, 11 and 10 stitches.
The edging puckers. Your slip stitches are too tight. Loosen your tension, or go up 0.5 mm for the edging round only.
The trunk flares out at the bottom. Make sure every row has exactly 4 sc and that all the sc go into the back loops only.
The loop twists. Block it flat while damp, or chain more loosely next time.
Care
Hand wash in cool water with mild soap, press the water out in a towel, and reshape the puffs while damp. Dry flat. Don’t tumble dry or iron the puffs.
Final Notes
The size is controlled by one chain of measurements. Row 2 must measure 4 in (10.2 cm) across its 11 stitches. Rows 1–11 must reach 3.5 in (8.9 cm). The 30-stitch edging keeps the body at 4 in (10.2 cm) × 3.5 in (8.9 cm). The 4-row trunk adds 1.25 in (3.2 cm), for a total height of 4.75 in (12.1 cm), and the loop adds about 2 in (5.1 cm) on top.
If you check the stitch count at the end of every row and keep your puff loops even, each tree will come out the same size and shape. That makes it easy to sew a matching set for your tree or tie one onto every gift.
Happy crocheting!