

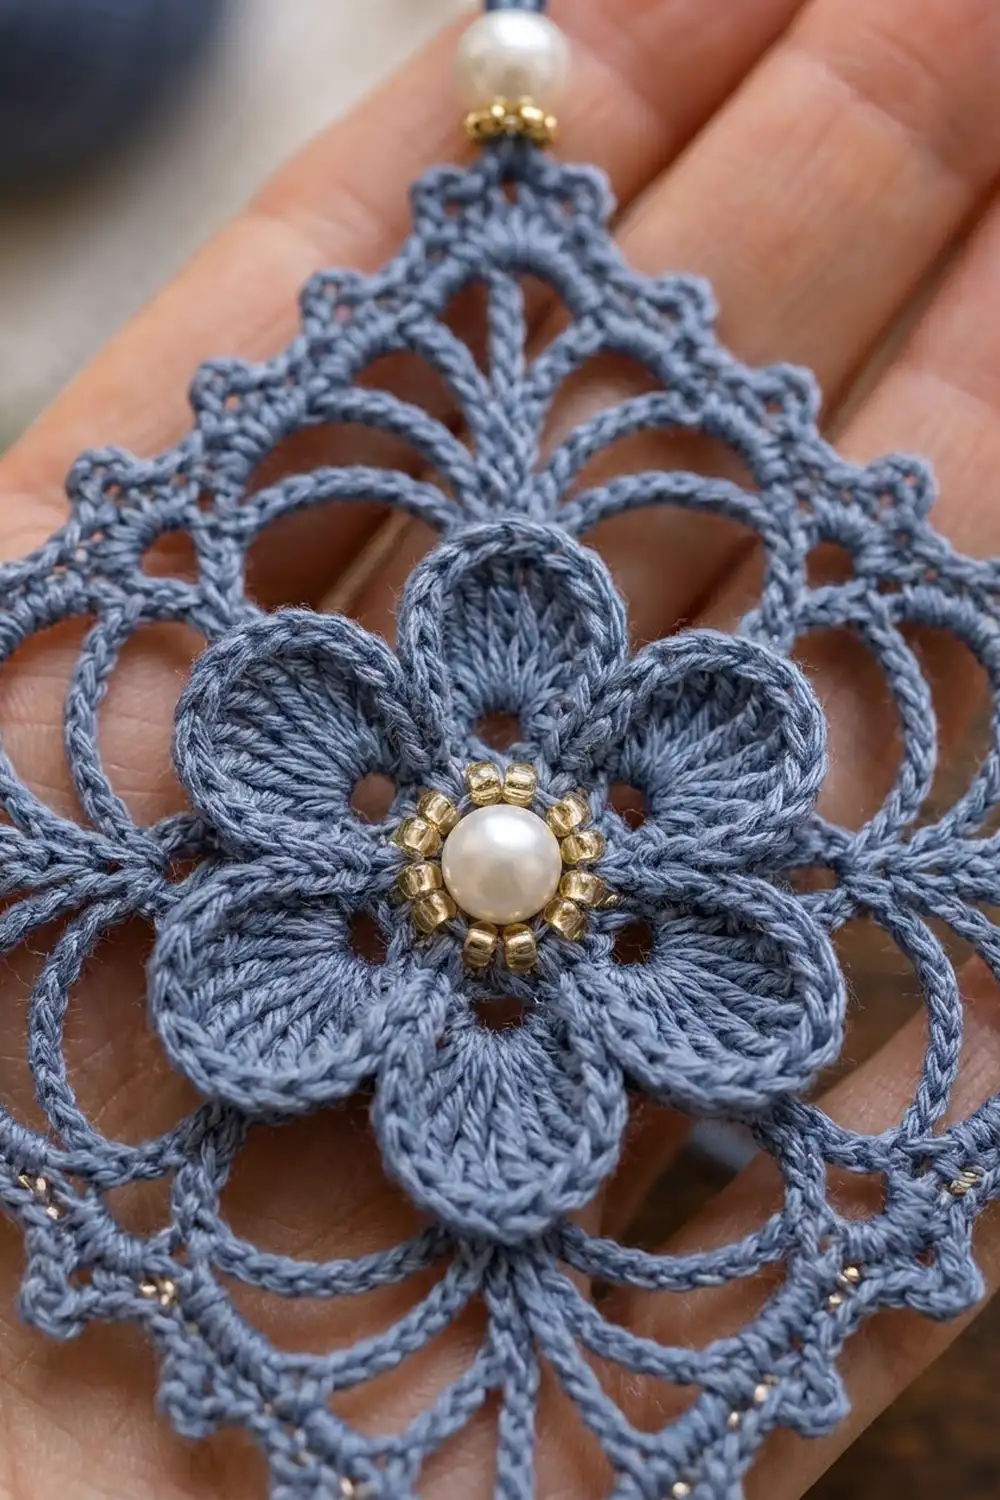
The Frosted Bloom Diamond is a lacy thread ornament. You make it as one square motif and hang it on point, so it reads as a diamond. A raised six-petal flower sits in the center. Around it are open chain arches, corner shells, a solid frame, and a fine picot edge. A pearl cluster fills the flower center, and a pearl, a gold filigree bead, and a clear crystal teardrop hang from the bottom point.
The whole ornament is worked in one dusty blue cotton thread. The beads add a little winter sparkle without competing with the lace. It looks lovely on a tree, in a window, or tied to a gift.
This pattern uses US crochet terms. The finished motif is 3.75 in (9.5 cm) per side, or about 5.3 in (13.5 cm) from point to point. With the hanging loop and bead drop added, the ornament hangs about 8.5 in (21.6 cm) long.
Construction is simple. You crochet the flower in the round, work a round of chain loops behind the petals, square it off, and build out the lace frame. A picot border finishes the edge. After you block the piece with starch, you add the hanging loop, the bead drop, and the center beads.
Finished Size and Construction
- Finished size: 3.75 in (9.5 cm) per side; about 5.3 in (13.5 cm) point to point
- Total hanging length: about 8.5 in (21.6 cm), including loop and drop
- Skill level: Intermediate (thread work, back post stitches, picots)
- Terminology: US
- Yarn weight: Size 3 mercerized cotton crochet thread (similar to fingering weight)
- Hook: 2.25 mm (US B-1)
- Number of pieces: 1 single motif
- Layout: One square motif turned on point to hang as a diamond
- Piece size: 3.75 in (9.5 cm) per side
- Size before border: 3.5 in (8.9 cm) per side after Round 7
- Border depth: about 0.125 in (0.3 cm) per edge
Materials
Choose a smooth, tightly plied mercerized cotton thread. It shows stitch definition, holds starch well, and gives the crisp edge seen on this ornament. Avoid fuzzy or very soft yarns, because the arches will collapse.
- Thread: Size 3 mercerized cotton in dusty blue, 10 g (about 40 m)
- Beads for the drop: one 6 mm white pearl, one 6 mm gold filigree bead, one 10 x 15 mm clear faceted crystal teardrop
- Bead for the hanging loop: one 6 mm white pearl with a hole large enough for 2 strands of thread
- Center beads: one 8 mm white pearl and six 3 mm gold seed beads
- Findings: one gold eye pin, about 1.5 in (3.8 cm), and two 5 mm gold jump rings
- 2.25 mm (US B-1) crochet hook
- Tapestry needle and a fine beading needle
- Matching sewing thread for the center beads
- Two pairs of small pliers
- Scissors, rust-proof pins, and a blocking board
- Fabric stiffener or heavy spray starch
These quantities include a margin. The ornament itself uses about 6 g (about 25 m) of thread. The extra covers a test motif, the hanging loop, and the tails.
Abbreviations (US Terms)
- ch: chain
- sl st: slip stitch
- sc: single crochet
- hdc: half double crochet
- dc: double crochet
- BPsc: back post single crochet. Insert the hook from back to front to back around the post of the stitch, yarn over, pull up a loop, yarn over, and pull through both loops.
- sp(s): space(s)
- sk: skip
- st(s): stitch(es)
Special stitches:
- Picot: ch 3, sl st in the 3rd ch from the hook.
- V-st: (dc, ch 2, dc) in the same stitch.
- Shell: (3 dc, ch 3, 3 dc) in the same space.
Gauge and Checkpoints
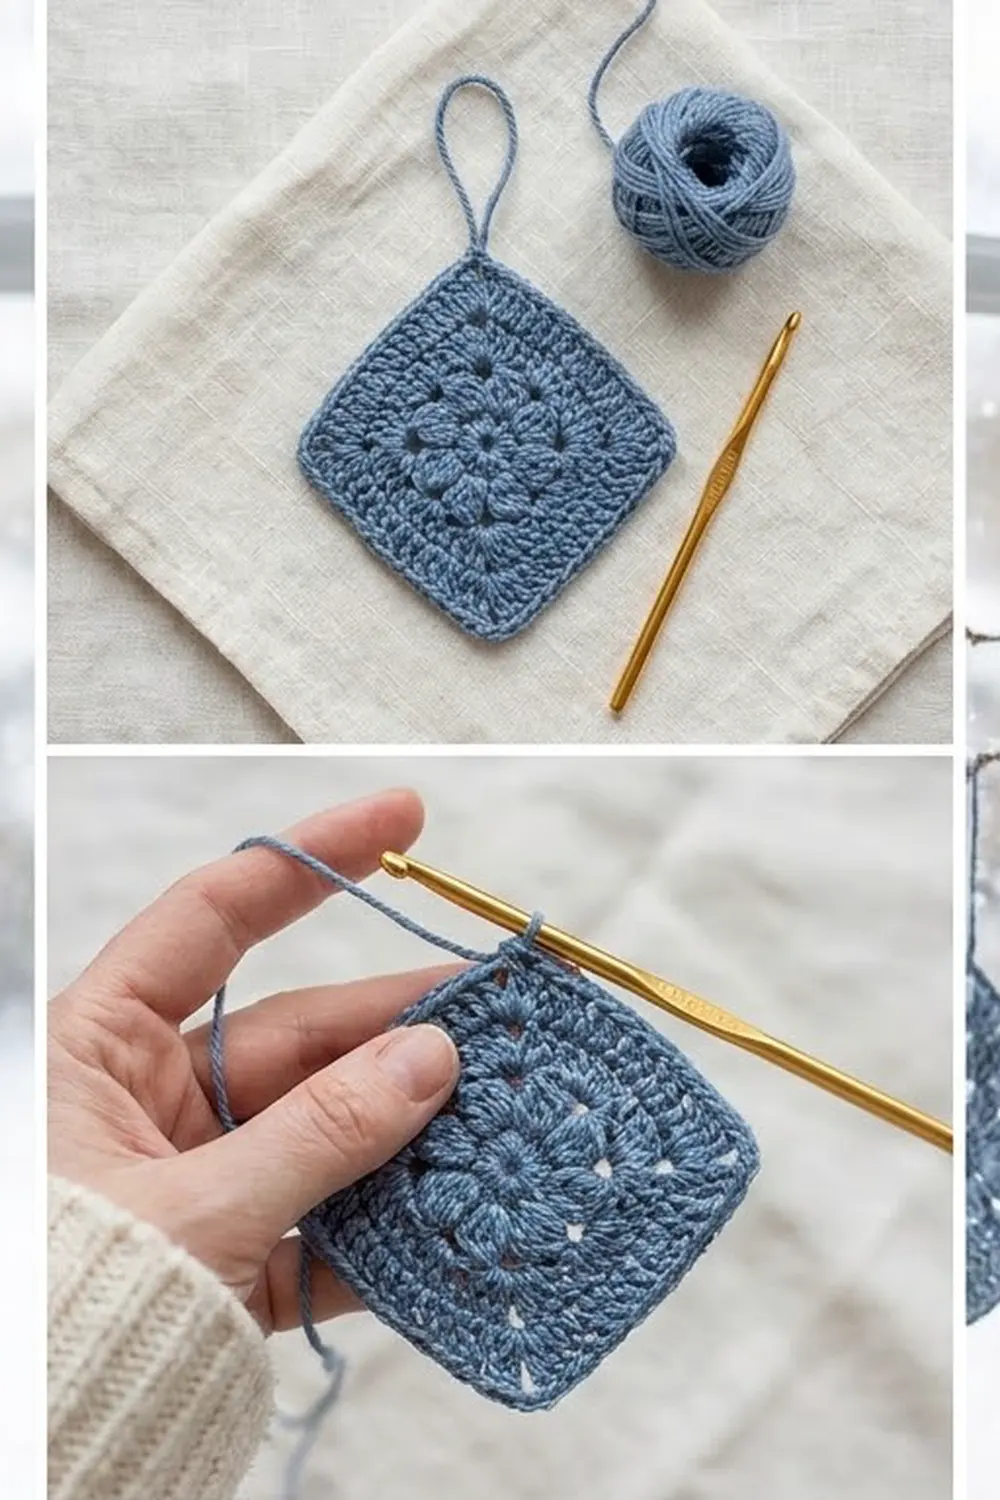
Gauge matters for an ornament because the lace only lies flat when each round reaches its target size. Make one test motif through Round 3 before you commit to beads.
- After Round 3 (flower): 1.75 in (4.4 cm) across, petal tip to petal tip
- After Round 4 (loops): about 2.25 in (5.7 cm) across
- After Round 5 (squared): 2.5 in (6.4 cm) per side
- After Round 6 (arches): 3 in (7.6 cm) per side
- After Round 7 (frame): 3.5 in (8.9 cm) per side
- After Round 8 (border): 3.75 in (9.5 cm) per side
Measure with the piece pressed lightly flat, not stretched. From Round 5 on, the piece may cup slightly before blocking. Being up to 0.25 in (0.6 cm) small at this stage is normal.
If your flower is larger than 1.75 in (4.4 cm), switch to a 2.0 mm hook. If it is smaller, switch to a 2.5 mm hook. If the flower is the right size but the square ruffles at Round 6, your chains are loose. Work them a little tighter instead of changing hooks.
Pattern
Flower Center
Ch 6, sl st in the first ch to form a ring.
Round 1: Ch 1, 12 sc in the ring, sl st in the first sc. (12 sc)
Round 2: Ch 1, [sc in next sc, ch 3, sk next sc] 6 times, sl st in the first sc. (6 sc, 6 ch-3 sps)
Round 3 (petals): In each ch-3 sp, work (sc, hdc, 4 dc, hdc, sc). Sl st in the first sc. (6 petals of 8 sts each, 48 sts)
The petals sit in a ring around an open center hole. The pearl cluster goes there later.
Back Loops
Round 4: Fold the petals toward you and work behind them for the whole round. Ch 1, BPsc around the first sc of Round 2, ch 5, sc around the ch-3 of Round 2 behind the next petal, ch 5. *BPsc around the next sc of Round 2, ch 5, sc around the ch-3 of Round 2 behind the next petal, ch 5; repeat from * 4 more times, sl st in the first BPsc. (12 anchor sts, 12 ch-5 loops)
The anchors alternate. One sits between two petals, and the next sits behind the middle of a petal. This keeps the flower raised in front and gives you 12 even loops, which divide into 4 groups of 3 for squaring.
Squaring Off
Round 5: Sl st in the first ch-5 loop. Ch 3 (counts as dc), then work (2 dc, ch 3, 3 dc) in the same loop for the first corner. Sk next anchor st, 5 hdc in next loop, sc in next anchor st, 5 hdc in next loop, sk next anchor st, (3 dc, ch 3, 3 dc) in next loop; repeat from * 3 more times, ending the last repeat at *. Sl st in the top of the beginning ch-3.
Each side has 17 sts: 3 dc, 5 hdc, 1 sc, 5 hdc, 3 dc. (68 sts plus 4 corner ch-3 sps)
The shorter hdc and sc in the middle of each side keep the square flat. The side midpoints sit closer to the center than the corners, so they need shorter stitches.
Lace Arches
Round 6: Sl st in the next 2 dc and in the corner ch-3 sp. Ch 3 (counts as dc), then work (2 dc, ch 3, 3 dc) in the same sp. Ch 5, sk next 4 sts, sc in next st, ch 5, sk next 3 sts, V-st in next st (the center sc), ch 5, sk next 3 sts, sc in next st, ch 5, sk next 4 sts, shell in next corner ch-3 sp; repeat from * 3 more times, ending the last repeat at *. Sl st in the top of the beginning ch-3.
Each side has 4 ch-5 loops, 2 sc, and 1 V-st between the corner shells. (4 shells, 16 ch-5 loops, 8 sc, 4 V-sts)
To check a 17-st side: 4 skipped + 1 sc + 3 skipped + 1 V-st + 3 skipped + 1 sc + 4 skipped = 17. The sc land on sts 5 and 13, mirrored around the center st 9.
Frame
Round 7: Sl st in the next 2 dc and in the corner ch-3 sp. Ch 3 (counts as dc), then work (dc, ch 3, 2 dc) in the same sp. Dc in next 3 dc, 4 dc in next ch-5 loop, sk sc, 4 dc in next ch-5 loop, dc in next dc, 2 dc in the V-st ch-2 sp, dc in next dc, 4 dc in next ch-5 loop, sk sc, 4 dc in next ch-5 loop, dc in next 3 dc, (2 dc, ch 3, 2 dc) in next corner ch-3 sp; repeat from * 3 more times, ending the last repeat at *. Sl st in the top of the beginning ch-3.
Count each side from corner space to corner space: 2 + 3 + 4 + 4 + 4 + 4 + 4 + 3 + 2 = 30 dc. The 30 include the 2 dc on each side of the corner spaces. The corner ch-3 sps are not counted. (120 dc plus 4 corner ch-3 sps)
The beginning ch-3 and the dc next to it are the last 2 sts of Side 4.
Checkpoint: each side measures 3.5 in (8.9 cm). The arches from Round 6 should look like open fans pointing toward each corner shell.
Border
Border gauge: 30 sc across 3.5 in (8.9 cm), about 8.5 sts per inch (3.4 sts per cm). Work snugly so the picots stand out crisply without stretching the frame.
Round 8: Ch 1, sc in the same st as the join and in the next dc. These are sts 29 and 30 of Side 4. *(2 sc, picot, 2 sc) in corner ch-3 sp, sc in next 3 sts, [picot, sc in next 3 sts] 9 times; repeat from * 2 more times (Sides 1 to 3). For Side 4: (2 sc, picot, 2 sc) in corner ch-3 sp, sc in next 3 sts, [picot, sc in next 3 sts] 8 times, picot, sc in next st. Sl st in the first sc. Fasten off, leaving a 6 in (15.2 cm) tail.
Each side has 30 sc and 9 picots. Each corner has 4 sc and 1 picot. Total: 136 sc (120 + 16) and 40 picots (36 + 4).
Why the math works: Each side has 30 sts. The picots come after sts 3, 6, 9, and so on through 27, so the spacing mirrors from each corner: 3 sc before the first picot and 3 sc after the last. The 4 extra sc in each corner space round the point. They also add the 0.125 in (0.3 cm) border depth on every edge, which takes each side from 3.5 in (8.9 cm) to 3.75 in (9.5 cm).
Side 4 is split because you started on its last 2 sts. You work its first 28 sts at the end of the round, so it still totals 30 sc and 9 picots.
Final Blocking
- Weave in all tails except the border tail. Keep that one as a backup anchor.
- Soak the motif in fabric stiffener, or dampen it and spray it heavily with starch.
- Press out the extra liquid in a towel. Do not wring.
- Pin the motif to a board as a square with 3.75 in (9.5 cm) sides. Check that both diagonals measure about 5.3 in (13.5 cm).
- Pin each corner picot out to a sharp point.
- Pin each side picot so it stands straight out from the frame.
- Open each ch-5 arch from Round 6 with a pin so the fans spread evenly.
- Gently push the petals forward so they cup slightly above the lace.
- Let the piece dry completely, at least 12 hours, before you remove the pins.
Finishing
Center beads: Using the beading needle and sewing thread, sew the 8 mm pearl over the center ring. Sew the six 3 mm gold beads in a circle around it, one opposite each petal. Knot the thread on the back and hide it in Round 1.
Hanging loop: Cut 10 in (25.4 cm) of thread. Pass it through the top corner picot and even up the ends. Thread both strands through the 6 mm pearl and slide it down to the picot. Tie both strands together in an overhand knot about 1.25 in (3.2 cm) above the pearl. Trim the ends to 0.25 in (0.6 cm) and seal the knot with a dot of stiffener.
Bead drop: Thread the 6 mm pearl and the gold filigree bead onto the eye pin, then bend and turn a loop at the top. Open a jump ring, pass it through the bottom corner picot and the top loop of the eye pin, and close it. Open the second jump ring, add the crystal teardrop, hook it into the bottom loop of the eye pin, and close it.
Final Quality-Control Checklist
- The flower has 6 even petals and an open center ring.
- The petals sit raised in front, and no Round 4 chains show between them from the front.
- Round 5 has 17 sts per side.
- Round 6 has 4 arches and 1 centered V-st per side.
- Round 7 has 30 dc per side.
- Round 8 has 9 picots per side plus 1 picot at each corner.
- All 4 sides measure 3.75 in (9.5 cm), and the diagonals match within 0.125 in (0.3 cm).
- The top and bottom points line up so the ornament hangs straight.
- The beads are secure and the jump rings are fully closed.
Troubleshooting
Flower ruffles: Your petal dc are loose. Use a hook one size smaller for Rounds 1 to 3 only.
Round 4 loops show from the front: You worked in front of the petals. Fold the petals firmly forward and work each sc around the Round 2 chain, not into the petal stitches.
Square cups after Round 5: Your hdc are too tight. Loosen them slightly. Blocking also fixes mild cupping.
Wavy edges after Round 7: Check that you placed exactly 4 dc in each ch-5 loop. Extra stitches cause waves.
Sides measure unequal: Recount Round 7. A missing dc on one side throws off the picot spacing in Round 8.
Ornament hangs crooked: Make sure the loop and the drop are in exactly opposite corner picots, then re-block the diagonals.
Picots lean or flatten: Pin each picot outward during blocking and use a firmer stiffener.
Care
Dust gently with a soft brush. If it needs washing, hand wash in cool water, then re-stiffen and re-block it flat; don’t leave the beads and metal findings soaking for long.
Final Notes
The measurement chain is short and easy to check: a 1.75 in (4.4 cm) flower, a 2.5 in (6.4 cm) squared center, 3 in (7.6 cm) arches, a 3.5 in (8.9 cm) frame, and a 3.75 in (9.5 cm) bordered square. Turned on point, that square becomes a 5.3 in (13.5 cm) diamond and an 8.5 in (21.6 cm) hanging ornament. If every checkpoint matches, the finished piece will block flat with crisp corners.
Happy crocheting!