

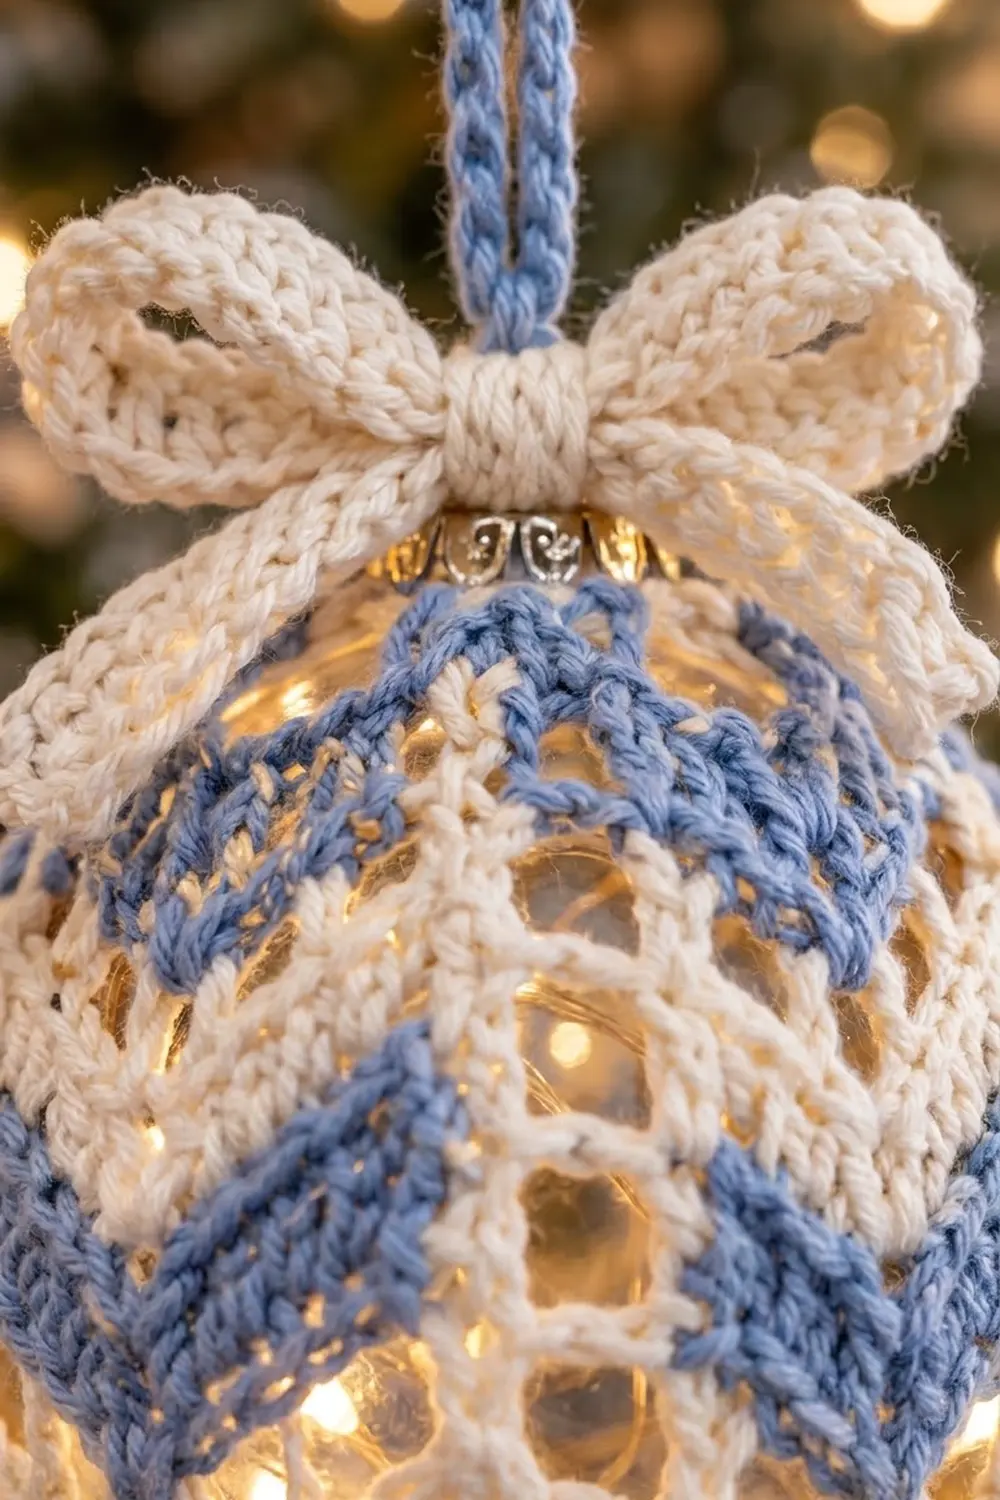
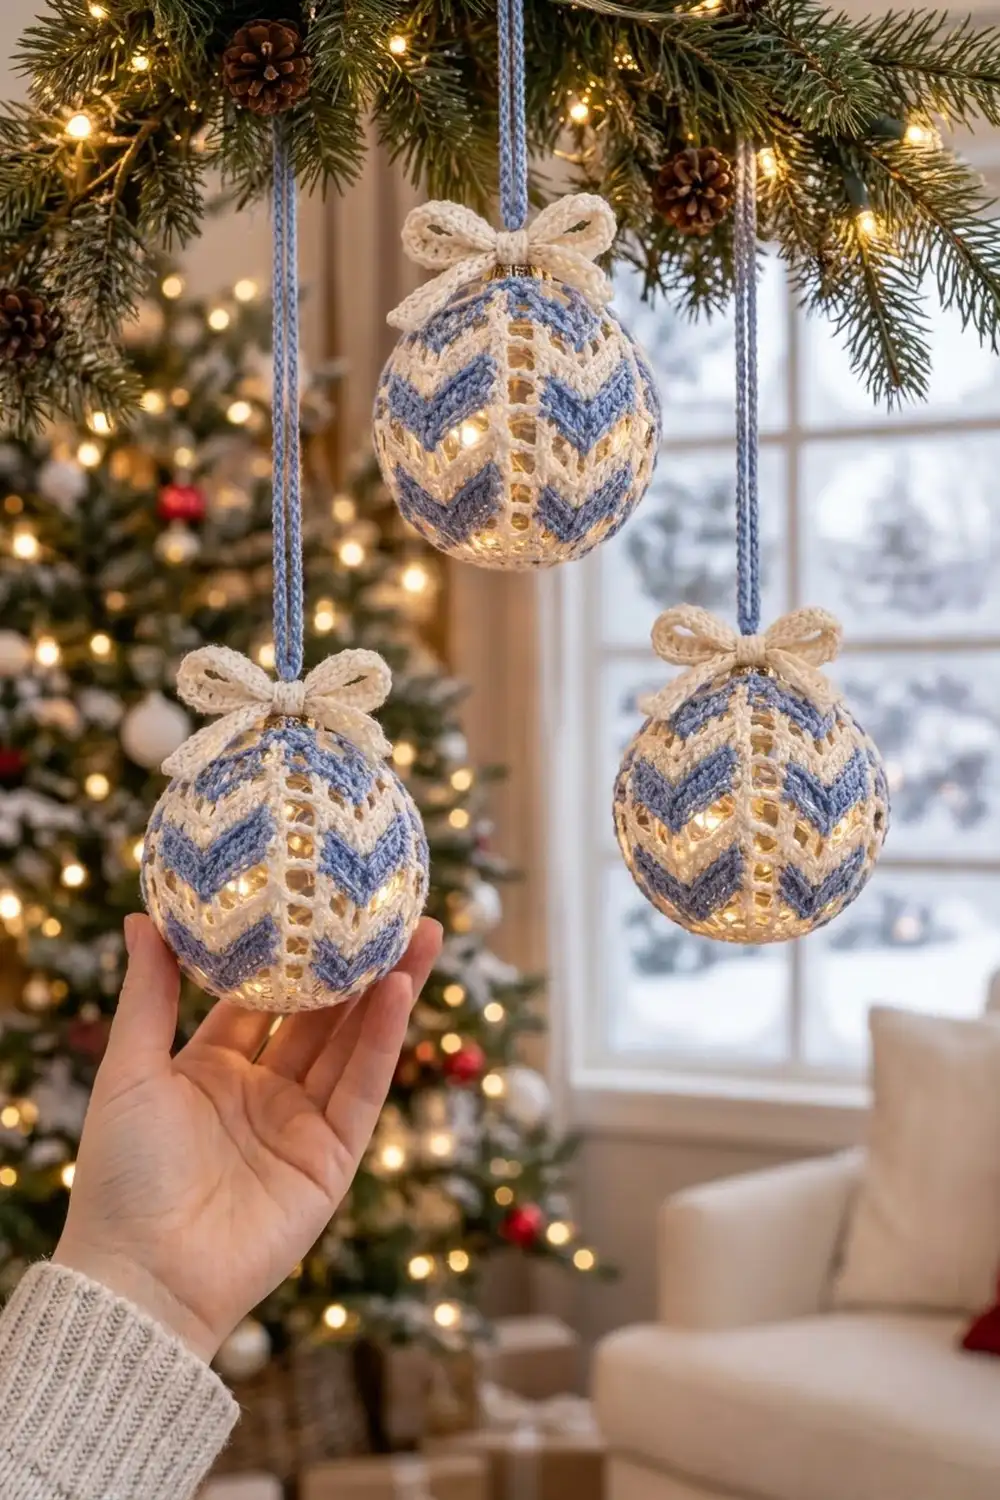
This ornament cover is a close-fitting lace sleeve for a clear 3.15 in (8.0 cm) ball. Cornflower-blue chevrons point downward around the ornament, and columns of open eyelets run between them from the bottom to the top. If you put micro fairy lights inside a fillable ball, the light shows through every eyelet.
The color scheme is cream and soft blue, which reads as wintery rather than red-and-green. A cream bow sits at the front of the neck, and a blue cord makes the hanging loop. The pattern uses US crochet terms throughout.
The finished cover is 9.6 in (24.4 cm) around and 4.5 in (11.4 cm) long, measured from the bottom center to the top edge. It sits with slight negative ease on a ball that is 9.9 in (25.1 cm) around.
You work the cover from the bottom up in joined rounds. It starts with a flat cream cap, then a set-up round places the six eyelet columns, and seven rounds of ripple build the chevrons. A single blue trim round finishes the top edge. After that you add a drawstring, a hanging cord and a small three-part bow.
Finished Size and Construction
- Finished size: 9.6 in (24.4 cm) circumference × 4.5 in (11.4 cm) long; fits a 3.15 in (8.0 cm) ball
- Skill level: Easy–Intermediate
- Terminology: US
- Yarn weight: Super fine / fingering (#1) cotton
- Hook: 2.5 mm
- Number of pieces: 1 main cover, plus bow parts (3 small strips), 1 drawstring, 1 hanging cord
- Layout: Single seamless piece worked in joined rounds
- Piece size before trim: 9.6 in (24.4 cm) around × 4.3 in (10.9 cm) long
- Top trim depth: 1 round of sc, about 0.2 in (0.5 cm)
Materials
Use a smooth mercerized cotton or a cotton blend of about 170 m per 50 g. Mercerized cotton gives crisp stitch definition and keeps the eyelets open. Avoid fuzzy yarn, because it blurs the chevrons and blocks the light.
- Cornflower blue: 10 g (about 34 m)
- Cream: 10 g (about 34 m)
Both quantities include a safety margin of roughly 30%.
Tools:
– 2.5 mm crochet hook
– One clear ornament ball, 3.15 in (8.0 cm), plastic or glass
– Optional: battery micro LED fairy-light string to fit inside a fillable ball
– Tapestry needle
– Scissors
– Stitch marker
– Spray bottle for blocking
Abbreviations (US Terms)
- ch – chain
- sl st – slip stitch
- sc – single crochet
- dc – double crochet
- sp – space
- st(s) – stitch(es)
- rep – repeat
- beg – beginning
Special stitch: dc3tog (double crochet 3 together). Yarn over, insert the hook in the next st, pull up a loop, yarn over, draw through 2 loops. Repeat from * to * in each of the next 2 sts (4 loops on hook). Yarn over and draw through all 4 loops. A dc3tog counts as 1 dc.
Peak: (dc, ch 1, dc) worked in the same st or sp.
Gauge and Checkpoints
Gauge: 30 dc and 13 rounds = 4 in (10.2 cm) in dc fabric.
The cover itself is your gauge swatch, so check these measurements as you go:
- After Rnd 2: the circle is 1.25 in (3.2 cm) across.
- After Rnd 4: the circle is 2.5 in (6.4 cm) across.
- After Rnd 6: the circle is 3.75 in (9.5 cm) across. A slight cup is fine.
- After Rnd 7: the circumference is 9.6 in (24.4 cm). Slip the ball in to test; the fabric should hug it with a light stretch.
- After Rnd 14: the length from the bottom center to the edge is 4.3 in (10.9 cm).
If the cover is too big (the ball rattles or the circle measures more than 3.9 in / 9.9 cm after Rnd 6), go down to a 2.25 mm hook. If it is too small (the ball won’t go in, or the eyelets strain open), go up to a 2.75 mm hook. Change only the hook; the stitch counts stay the same.
Cover Pattern
You will need cream for Rnds 1–6, 9 and 12, and blue for Rnds 7–8, 10–11 and 13–15. To change color, finish the joining sl st with the new color, then cut the old yarn, leaving a 4 in (10.2 cm) tail.
Bottom Cap (Cream)
Rnd 1: Make a magic ring. Ch 3 (counts as dc, here and throughout), work 11 dc in the ring, and join with a sl st in the top of the beg ch-3. Pull the ring closed tightly. (12 dc)
Rnd 2: Ch 3, dc in the same st, then 2 dc in each st around. Join. (24 dc)
Rnd 3: Ch 3, 2 dc in the next st, dc in the next st, 2 dc in the next st; rep from * to * 10 more times. Join. (36 dc)
Rnd 4: Ch 3, dc in the next st, 2 dc in the next st, dc in each of the next 2 sts, 2 dc in the next st; rep from * to * 10 more times. Join. (48 dc)
Rnd 5: Ch 3, dc in each of the next 2 sts, 2 dc in the next st, dc in each of the next 3 sts, 2 dc in the next st; rep from * to * 10 more times. Join. (60 dc)
Set-Up Round (Cream)
Rnd 6: Ch 4 (counts as dc + ch 1), dc in the same st as the join (first peak made), then dc in each of the next 9 sts. Work (dc, ch 1, dc) in the next st, then dc in each of the next 9 sts; rep from * to * 4 more times. Join with a sl st in the 3rd ch of the beg ch-4.
Count: 72 sts in total (66 dc + 6 ch-1 sps). That is 6 repeats of 12, and each repeat has 11 dc and 1 ch-1 sp.
Each ch-1 sp marks the start of an eyelet column. The 9 plain dc between peaks become the center of a chevron.
Chevron Rounds
All seven ripple rounds use this ripple round:
Sl st into the first ch-1 sp. Ch 3, ch 1, dc in the same sp (first peak made). Dc in each of the next 4 sts, dc3tog over the next 3 sts, then dc in each of the next 4 sts. Work (dc, ch 1, dc) in the next ch-1 sp, dc in each of the next 4 sts, dc3tog, dc in each of the next 4 sts; rep from * to * 4 more times. Join with a sl st in the top of the beg ch-3.
Count: 72 sts per round (66 dc + 6 ch-1 sps).
Why the round stays balanced: each repeat uses 11 sts from the previous round (4 + 3 + 4) and makes 11 new dc (2 at the peak, 4, 1 dc3tog, 4), plus the new ch-1 sp. The peak adds 1 stitch and the dc3tog removes 2, so the total holds at 72.
The ch-1 sps stack straight above each other, which forms the eyelet ladders. The dc3tog always lands on the center stitch of the 11 between peaks, which forms the downward V.
If you change color at the start of a round, the first sl st into the ch-1 sp is worked with the new color.
- Rnd 7 (blue): ripple round. (72 sts)
- Rnd 8 (blue): ripple round. (72 sts)
- Rnd 9 (cream): ripple round. (72 sts)
- Rnd 10 (blue): ripple round. (72 sts)
- Rnd 11 (blue): ripple round. (72 sts)
- Rnd 12 (cream): ripple round. (72 sts)
- Rnd 13 (blue): ripple round. (72 sts)
- Rnd 14 (blue): ripple round. (72 sts) Do not fasten off.
Checkpoint: the cover now measures 4.3 in (10.9 cm) from the bottom center and 9.6 in (24.4 cm) around. You should see three blue chevron bands, each 2 rounds deep, separated by single cream rounds.
Bow, Drawstring and Hanging Cord
Bow Loops Strip (Cream)
Row 1: Ch 41. Sc in the 2nd ch from the hook and in each ch across. Turn. (40 sc)
Rows 2–3: Ch 1, sc in each st across. Turn. (40 sc)
Fasten off. The strip measures about 5.3 in × 0.4 in (13.5 cm × 1.0 cm).
Bow Tails Strip (Cream)
Row 1: Ch 21. Sc in the 2nd ch from the hook and in each ch across. Turn. (20 sc)
Rows 2–3: Ch 1, sc in each st across. Turn. (20 sc)
Fasten off. The strip measures about 2.7 in × 0.4 in (6.9 cm × 1.0 cm).
Center Wrap (Cream)
Row 1: Ch 9. Sc in the 2nd ch from the hook and in each ch across. Turn. (8 sc)
Rows 2–3: Ch 1, sc in each st across. Turn. (8 sc)
Fasten off, leaving a 6 in (15.2 cm) tail. The wrap measures about 1.1 in (2.8 cm) long.
Assemble the Bow
- Fold both short ends of the loops strip to the center and overlap them by about 0.2 in (0.5 cm). This makes two flat loops, and the bow is now about 2.6 in (6.6 cm) wide.
- Fold the tails strip into a shallow V and lay it behind the center.
- Wrap the center wrap tightly around all layers and sew its ends together at the back. The wrap pinches the center into a knot.
Drawstring (Blue)
Ch 70, about 9 in (22.9 cm), and fasten off.
Hanging Cord (Blue)
Ch 57. Sl st in the back bump of the 2nd ch from the hook and in each ch across, for 56 sl sts. Fasten off. The cord measures about 7 in (17.8 cm).
Top Trim
The cover has no corners or sides, so its edge is a single straight round. The per-side rule becomes a per-repeat rule.
Trim gauge: 72 sc fill 9.6 in (24.4 cm), the same as the dc rounds below.
Rnd 15 (blue, trim): Ch 1. Sc in each dc (count each dc3tog as one dc) and work 1 sc in each ch-1 sp. Join with a sl st in the first sc.
Count: 72 sc = 66 sc worked one per dc + 6 sc worked one per ch-1 sp, with 0 extra stitches. That is 12 sc per repeat × 6 repeats.
Why the math works: every stitch and space of Rnd 14 gets exactly one sc, so the circumference stays 9.6 in (24.4 cm). The sc are shorter than the ripple dc, so they flatten the wavy edge into a level band about 0.2 in (0.5 cm) deep. The total length becomes 4.3 + 0.2 = 4.5 in (11.4 cm).
Fasten off.
Fit and finish:
1. Weave in all ends on the wrong side, following stitches of the same color.
2. Slip the ball into the cover with the cap of the ball facing the opening.
3. Starting at the back, weave the drawstring through the posts of Rnd 14, going over 2 dc and under 2 dc all the way around.
4. Pull until the edge sits snugly just under the metal cap. Tie a firm double knot, trim the ends to 0.5 in (1.3 cm), and tuck them inside.
5. Thread the hanging cord through the ornament’s wire hanger and knot the ends together. This makes a loop about 3.5 in (8.9 cm) high.
6. Sew the bow to the front of the gathered top, just below the cap, so that it covers the drawstring knot area.
Final Blocking
- Fit the cover onto the ball before blocking, with the drawstring gathered.
- Line up the eyelet columns so they run straight from the bottom pole to the neck.
- Mist the cover lightly with cool water until it is damp but not dripping. Do not steam a plastic ball, because heat can warp it.
- With your fingertips, nudge each chevron point so it sits centered between two eyelet columns.
- Pinch the bow loops into shape, and lay the bow flat on a towel with the tails angled.
- Let everything air-dry completely on the ball, about 6–8 hours.
- After it dries, re-tighten the drawstring if it has relaxed.
Final Quality-Control Checklist
- Each ripple round, Rnds 7–14, counts 72 sts (66 dc + 6 ch-1 sps).
- There are 6 eyelet columns, evenly spaced and running vertically.
- Every chevron point aims straight down.
- The color sequence is cream cap, then blue-blue, cream, blue-blue, cream, blue-blue, with a blue trim round.
- Rnd 15 has 72 sc.
- The cover measures 9.6 in (24.4 cm) around and 4.5 in (11.4 cm) long.
- The bow is about 2.6 in (6.6 cm) wide and sewn securely at the front.
- The hanging loop is about 3.5 in (8.9 cm) high, and its knot is hidden at the hanger.
- No ends are showing.
Troubleshooting
The chevrons lean or spiral. The dc3tog has drifted off center. Check that you work exactly 4 dc on each side of every dc3tog.
The count is off by 1–2 stitches. You probably missed or doubled the peak. Make sure both dc of each peak go into the ch-1 sp, not into the stitches beside it.
The bottom cap ruffles. Your tension is loose on the increase rounds. Use a hook 0.25 mm smaller for Rnds 1–6.
The cover won’t stretch over the ball. Gauge is tight. Remake it with a 2.75 mm hook.
The top flares after gathering. Weave the drawstring through Rnd 14, not through the trim round, and pull it tighter.
The eyelets close up. Keep the ch-1 relaxed, about the height of a loop on the hook.
Care
Spot-clean with a damp cloth. If needed, remove the cover, hand-wash it in cool water and dry it flat, then re-block it on the ball.
Final Notes
Everything in this pattern follows from one measurement chain. A gauge of 30 dc = 4 in (10.2 cm) gives a 3.75 in (9.5 cm) cap after Rnd 6. That cap opens into 72 stitches, which is 9.6 in (24.4 cm) around and holds steady through every ripple round. After Rnd 14 the cover is 4.3 in (10.9 cm) long, and the 0.2 in (0.5 cm) trim brings it to 4.5 in (11.4 cm), which covers a 3.15 in (8.0 cm) ball from the bottom to the neck. If you check those numbers as you go, the chevrons will sit straight and the cover will fit snugly.
Happy crocheting!