

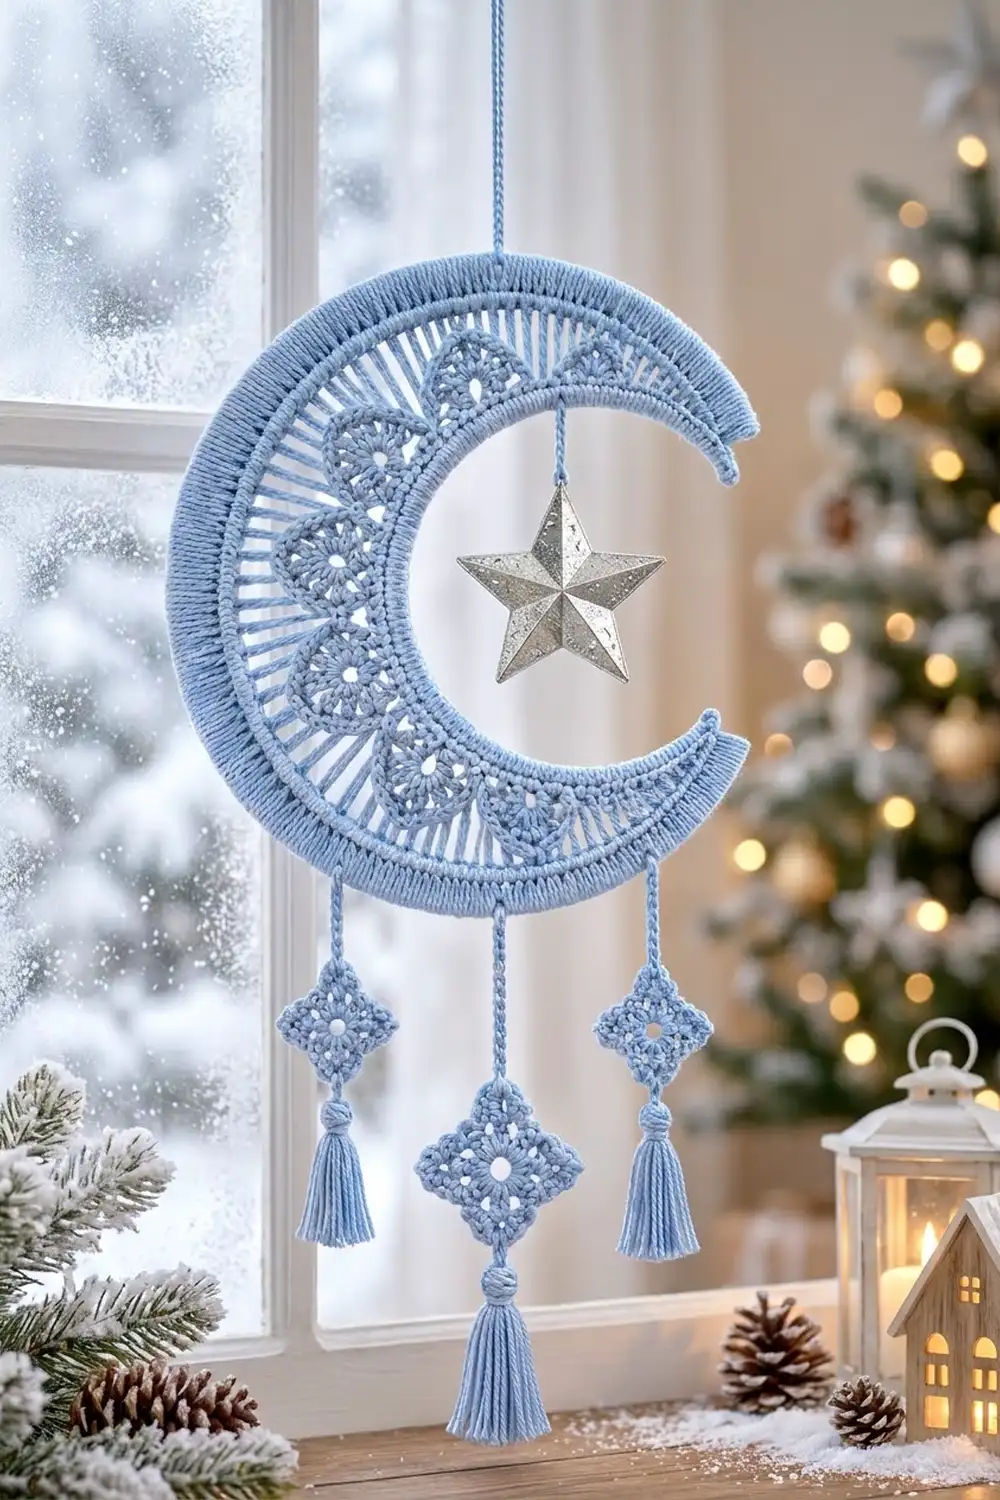
The Frosted Crescent Moon is a light, lacy wall hanging in one soft shade of sky blue. A solid crescent band frames a row of scalloped fans and a ring of tall, airy spokes. Three small diamond motifs hang underneath on slim cords, and each one ends in a full tassel.
The style is calm and wintry. It suits a window, a nursery wall or seasonal decor. Because the pattern uses only one color, the texture does all the work: smooth single crochet edges, open fans, and long double treble spokes that catch the light.
All instructions use US crochet terms. The finished crescent is about 8 in (20.3 cm) tall and 7 in (17.8 cm) wide. The whole hanging is about 16.6 in (42.2 cm) long, measured from the top of the crescent to the tip of the middle tassel.
Construction is simple. You work the crescent in 6 rows, from tip to tip, starting at the inner edge, so it curves naturally as the rows grow. Then you work a 2-round border over cotton cord to firm up the shape. Finally, you make three diamond motifs and three tassels and attach them with chain cords.
Finished Size and Construction
- Crescent size: 8 in (20.3 cm) tall x 7 in (17.8 cm) wide
- Total length with drops: about 16.6 in (42.2 cm)
- Skill level: Intermediate
- Terminology: US terms
- Yarn weight: DK / light (3), cotton
- Hook: 3.5 mm (E-4)
- Number of pieces: 7 (1 crescent, 3 diamonds, 3 tassels), plus chain cords worked in place
- Layout: crescent on top, three drops hanging from the lower outer edge
- Diamond size: 1.8 in (4.6 cm) per side, about 2.6 in (6.6 cm) from point to point
- Crescent before border: 7.2 in (18.3 cm) x 6.2 in (15.7 cm), band depth 2 in (5.1 cm)
- Border depth: 0.4 in (1.0 cm) on each edge; band depth after the border is 2.8 in (7.1 cm)
Materials
Choose a smooth mercerized or combed cotton in DK weight. Cotton holds the spokes straight and takes stiffener well. Avoid fuzzy or very stretchy yarns, because they blur the lace.
- Light Sky Blue: 80 g, about 190 m
Tools:
- 3.5 mm (E-4) crochet hook
- 40 in (101.6 cm) of 3 mm cotton macramé cord, or 18-gauge craft wire if you want a rigid frame
- A piece of cardboard 3 in (7.6 cm) tall, for winding tassels
- Tapestry needle and scissors
- Rustproof pins and a blocking board
- Optional: fabric stiffener or spray starch
- Optional: a small metal star ornament to hang inside the crescent
The yarn amount includes about 15 g extra for your gauge swatch and for trimming the tassels.
Abbreviations (US Terms)
- ch – chain
- sl st – slip stitch
- sc – single crochet
- hdc – half double crochet
- dc – double crochet
- tr – treble crochet (yarn over twice)
- dtr – double treble crochet (yarn over 3 times)
- sp – space
- st(s) – stitch(es)
- BLO – back loop only
- rep – repeat
Special stitch – Shell: 9 dc worked into the same stitch.
Working over cord: Hold the cord along the edge and work each sc around both the edge stitch and the cord. The cord ends up hidden inside the stitches.
Gauge and Checkpoints
Gauge: 20 sc and 24 rows = 4 in (10.2 cm) in single crochet. Chain gauge: 6 ch = 1 in (2.5 cm).
Make one diamond motif first. It is quick and shows your tension on dc. It should measure 1.8 in (4.6 cm) per side.
Checkpoints:
- After Row 2: the strip is 13 in (33.0 cm) long and about 0.3 in (0.8 cm) deep.
- After Row 5: the top edge measures about 16.2 in (41.1 cm) along its curve.
- After Row 6: the crescent is 7.2 in (18.3 cm) x 6.2 in (15.7 cm), and the band is 2 in (5.1 cm) deep.
- After the border: the crescent is 8 in (20.3 cm) x 7 in (17.8 cm).
If your pieces come out too big, use a hook 0.5 mm smaller. If they are too small, use a hook 0.5 mm larger. Do not change the stitch counts, because the curve depends on them.
Crescent
The crescent is worked in rows. Turn at the end of every row. The ch 1 at the start of a row does not count as a stitch.
Foundation: Ch 66.
Row 1: Sc in 2nd ch from hook and in each ch across. Turn. (65 sc)
Row 2: Ch 1, sc in each sc across. Turn. (65 sc)
These two rows make the smooth inner band.
Row 3 (shells): Ch 1, sc in first sc, *skip 3 sc, Shell in next sc, skip 3 sc, sc in next sc; rep from * 7 more times. Turn. (8 shells: 72 dc + 9 sc = 81 sts)
Check: 1 + (8 x 8) = 65, so every stitch of Row 2 is used. The shells fan out, and the strip starts to curve.
Row 4 (fan loops): Ch 1, sc in first sc, *ch 3, skip next dc, sc in next dc, [ch 3, skip next dc, sc in next dc] 3 times, ch 3, skip next dc, sc in next sc; rep from * 7 more times. Turn. (40 ch-3 loops, 41 sc)
On each shell you work a sc into the 2nd, 4th, 6th and 8th dc, which makes 5 loops per fan. The loops outline each fan with a lacy, scalloped edge.
Row 5 (base row): Ch 1, sc in first sc, *1 sc in next ch-3 loop, sc in next sc; rep from * across. Turn. (41 sc + 40 sc = 81 sc)
Working only 1 sc into each loop gathers the fan tops slightly, which keeps the band from rippling.
Row 6 (spokes): Ch 1, sc in first sc, ch 1, skip 1 sc, hdc in next sc, ch 1, skip 1 sc, dc in next sc, ch 1, skip 1 sc, tr in next sc, ch 1, skip 1 sc, *dtr in next sc, ch 1, skip 1 sc; rep from * 32 more times (33 dtr), tr in next sc, ch 1, skip 1 sc, dc in next sc, ch 1, skip 1 sc, hdc in next sc, ch 1, skip 1 sc, sc in last sc. Do not fasten off. (41 posts: 1 sc, 1 hdc, 1 dc, 1 tr, 33 dtr, 1 tr, 1 dc, 1 hdc, 1 sc; 40 ch-1 sps)
Check: the posts sit in Row 5 stitches 1, 3, 5 … 81, which gives 41 posts. The stitch heights step down at each end, so the band tapers into the crescent tips. The dtr spokes are about 0.75 in (1.9 cm) tall.
Make All Pieces
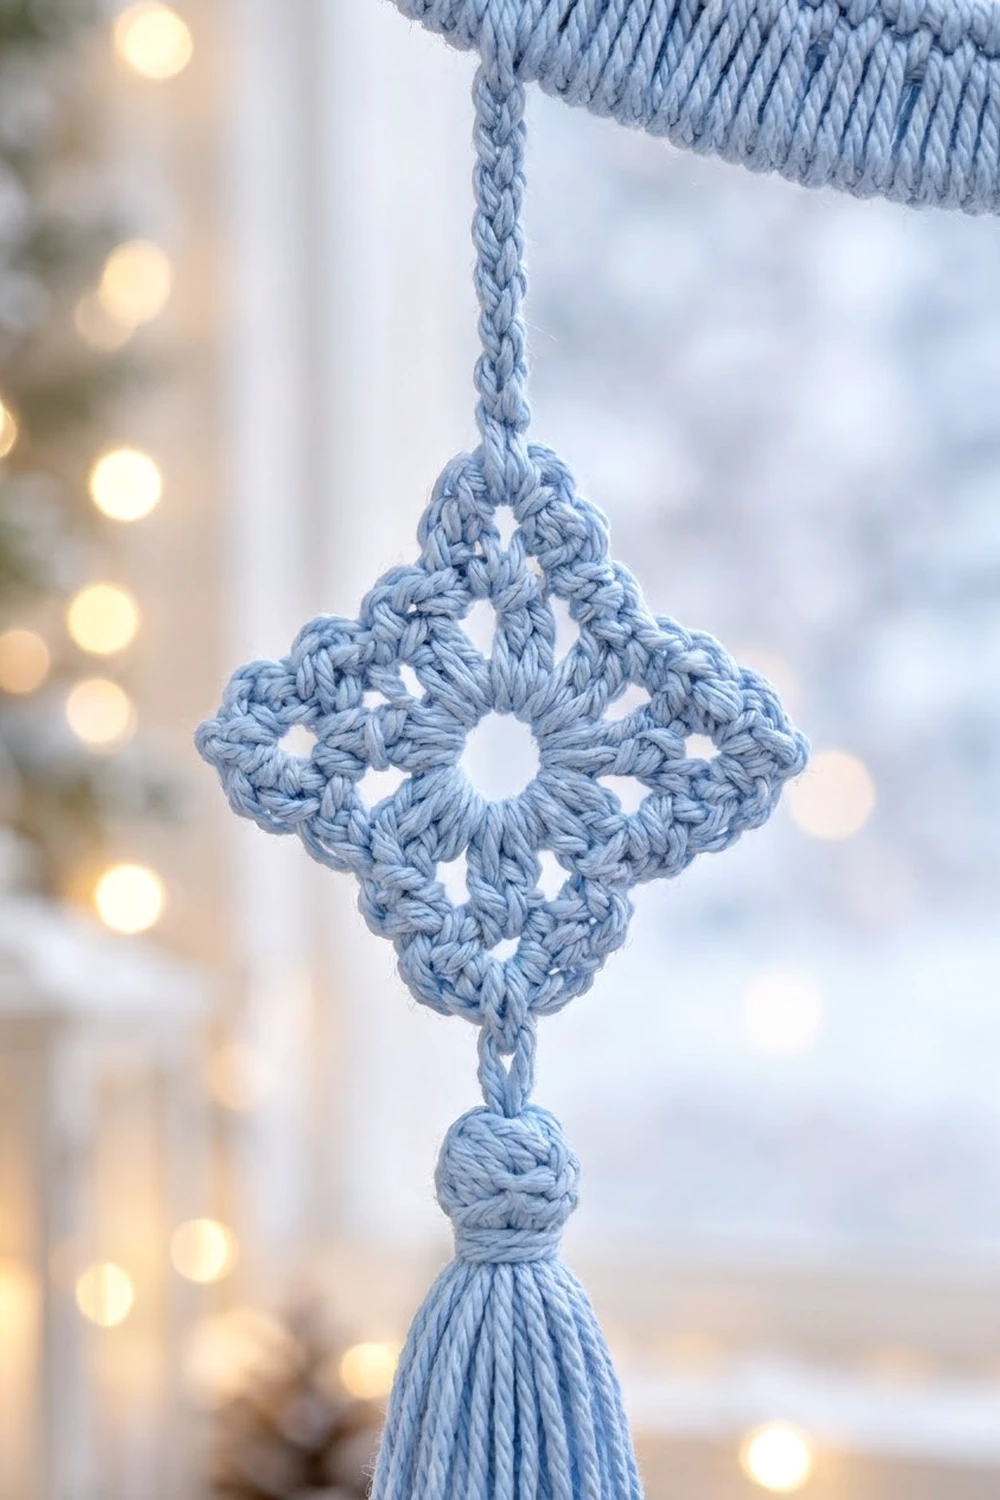
Diamond Motif (make 3)
Rnd 1: Ch 6, sl st to first ch to form a ring. Ch 1, 16 sc in ring, join with sl st to first sc. (16 sc)
Rnd 2: Ch 1, sc in first sc, *ch 3, skip 1 sc, sc in next sc; rep from * 6 more times, ch 3, skip last sc, join to first sc. (8 sc, 8 ch-3 loops)
Rnd 3: Sl st into first loop. Ch 3 (counts as dc), (2 dc, ch 2, 3 dc) in same loop, 3 dc in next loop, *(3 dc, ch 2, 3 dc) in next loop, 3 dc in next loop; rep from * 2 more times, join to top of ch 3. Fasten off, leaving a 6 in (15.2 cm) tail. (36 dc, 4 ch-2 corners)
Each side has 9 dc between corner spaces: 3 from one corner, 3 in the side loop and 3 from the next corner. 4 x 9 = 36. The open hole in the center is the ring from Rnd 1.
Tassel (make 3)
- Side tassels (make 2): wrap yarn 25 times around a card 2.75 in (7.0 cm) tall.
- Middle tassel (make 1): wrap yarn 30 times around a card 3 in (7.6 cm) tall.
Slide a 12 in (30.5 cm) tie strand under the wraps at the top and knot it tightly. Cut the loops at the bottom. Wrap a second strand 6 times around the bundle, 0.4 in (1.0 cm) below the top, to form a rounded head. Knot it and hide the ends inside the tassel. Trim the bottom evenly.
Layout
              [hanging loop]
      (        crescent        )
        |         |         |
        |         |         |
     [diamond]    |      [diamond]
        |         |         |
     [tassel]  [diamond]  [tassel]
                  |
               [tassel]
Each side cord is ch 12, about 2 in (5.1 cm). The middle cord is ch 18, about 3 in (7.6 cm), so the center drop hangs lowest.
Border
Work the border before you attach the drops. Border gauge is the same as the main gauge: 5 sc = 1 in (2.5 cm), even when you work over cord.
Round 1 (over cord): Continue from the end of Row 6. Lay the cord along the outer edge and work over it.
- Outer edge: Work 2 sc in the last sc of Row 6 (corner). Then work back along Row 6: 1 sc in each of the 4 ch-1 sps at this tip, and 1 sc in each remaining post. In the 32 spaces between dtr spokes, work 2 sc in the odd-numbered spaces and 1 sc in the even-numbered spaces. Work 1 sc in each of the 4 tip spaces at the far end, and finish with 2 sc in the final sc (corner).
- Tip A: 1 sc in the end of each of the 6 rows. (6 sc)
- Inner edge: 2 sc in the first remaining loop of the foundation ch (corner), 1 sc in each remaining loop, 2 sc in the last loop (corner).
- Tip B: 1 sc in the end of each of the 6 rows. (6 sc)
Join with sl st to first sc. Overlap the cord ends by 0.4 in (1.0 cm) and trim.
Counts per side:
- Outer edge: 41 posts + 8 tip sps + (16 x 2) + (16 x 1) = 97 sts worked 1-per-existing, + 2 corner extras = 99 sc
- Tip A: 6 sc
- Inner edge: 65 sc + 2 corner extras = 67 sc
- Tip B: 6 sc
- Total: 174 + 4 corner extras = 178 sc
Round 2: Ch 1. Working in BLO, sc in each sc around, but work 2 sc in the second sc of each corner pair on the outer edge only. Join and fasten off. (Outer edge 101, Tip A 6, inner edge 67, Tip B 6: 178 + 2 = 180 sc)
Why the math works: for the crescent to lie flat, the outer edge has to be about 1.5 times as long as the inner edge. The inner edge has 65 sc, or 13 in (33.0 cm). Before the corners, the outer edge has 97 sc, or 19.4 in (49.3 cm). Alternating 2 sc and 1 sc in the spoke spaces adds just enough length without making the edge frilly. The inner edge gets no increases in Round 2 because it curves inward, and extra stitches there would make it ruffle.
After Round 2, the outer edge measures 20.2 in (51.3 cm) and the inner edge measures 13.4 in (34.0 cm). Each tip is 6 sc, about 1.2 in (3.0 cm) across.
Joining
Hold the crescent with the opening on the right. Number the Round 2 stitches along the outer edge, starting at the lower tip (Tip B).
Drop cords: Join yarn with a sl st in the stitch, chain the cord length, and sl st into the top ch-2 corner of a diamond. Sl st back along the cord, working into the back bump of each ch, up to the crescent. Sl st into the starting stitch and fasten off.
- Right drop: stitch 6, ch 12
- Middle drop: stitch 20, ch 18
- Left drop: stitch 34, ch 12
The sl st return keeps the cord from stretching under the weight of the tassel. Keep the sl sts just loose enough to fit your hook into them. If they are looser, the cord will twist.
Tassels: Thread each tassel’s tie strand through the bottom ch-2 corner of a diamond. Tie it so the tassel head sits 0.4 in (1.0 cm) below the point. Put the longer tassel on the middle diamond.
Hanging loop: Join yarn at outer-edge stitch 84 (top center). Ch 30, about 5 in (12.7 cm), sl st in the same stitch and fasten off.
Optional star: Join yarn at the top center of the inner edge, ch 10, about 1.6 in (4.1 cm), tie on the star ornament and fasten off.
Size checkpoint: hang the piece. The drops should hang straight, and the tip of the middle tassel should be about 16.6 in (42.2 cm) below the top of the crescent.
Final Blocking
- Weave in all ends along the border or inside the tassel heads.
- Mist the crescent with water until it is damp but not soaked.
- Pin it flat to 8 in (20.3 cm) x 7 in (17.8 cm).
- Pin each dtr spoke straight, pointing outward from the inner curve.
- Open out each fan and pin the scalloped loops evenly.
- Pin the diamonds square, 1.8 in (4.6 cm) per side.
- For a stiff hanging, brush on fabric stiffener now.
- Let everything dry flat for 24 hours before you hang it.
- Steam the tassels lightly and trim them straight.
Final Quality-Control Checklist
- Rows 1–2 each have 65 sc.
- Row 3 has 8 shells of 9 dc each.
- Row 4 has 40 ch-3 loops.
- Row 5 has 81 sc.
- Row 6 has 41 posts, with 33 dtr in the center.
- Border Round 1 has 178 sc, and Round 2 has 180 sc.
- The cord is completely hidden inside the border.
- Each diamond has 36 dc and 4 corner spaces.
- The two side cords are the same length, and the middle cord is longer.
- The crescent measures 8 in (20.3 cm) x 7 in (17.8 cm).
Troubleshooting
The crescent ripples. Your spoke spaces are probably too loose. Rework Round 1 with a hook 0.5 mm smaller, and keep the same counts.
The crescent cups instead of lying flat. The outer edge is too tight. Rework Round 1 with a hook 0.5 mm larger.
The spokes lean sideways. Pin them straight while damp, or use stiffener.
The fans look crowded. Make sure you skip 3 sc on both sides of each Shell.
The diamonds curl. Block them flat and check that each side has 9 dc.
The cord shows through. Work your sc tighter and push them close together.
The drops hang crooked. Count the attachment stitches again, starting from the lower tip.
Care
Dust it lightly, or hand wash it in cool water. Reshape it, dry it flat, and apply stiffener again if needed.
Final Notes
Each measurement leads to the next. Gauge sets the inner edge at 13 in (33.0 cm). Rows 3–6 build the curve, so the crescent measures 7.2 in (18.3 cm) x 6.2 in (15.7 cm) before the border. The border adds 0.4 in (1.0 cm) to each edge, bringing the crescent to 8 in (20.3 cm) x 7 in (17.8 cm). The drops then add the rest of the length, for a total of about 16.6 in (42.2 cm).
Check each stage, and your finished hanging will match these measurements.
Happy crocheting!