

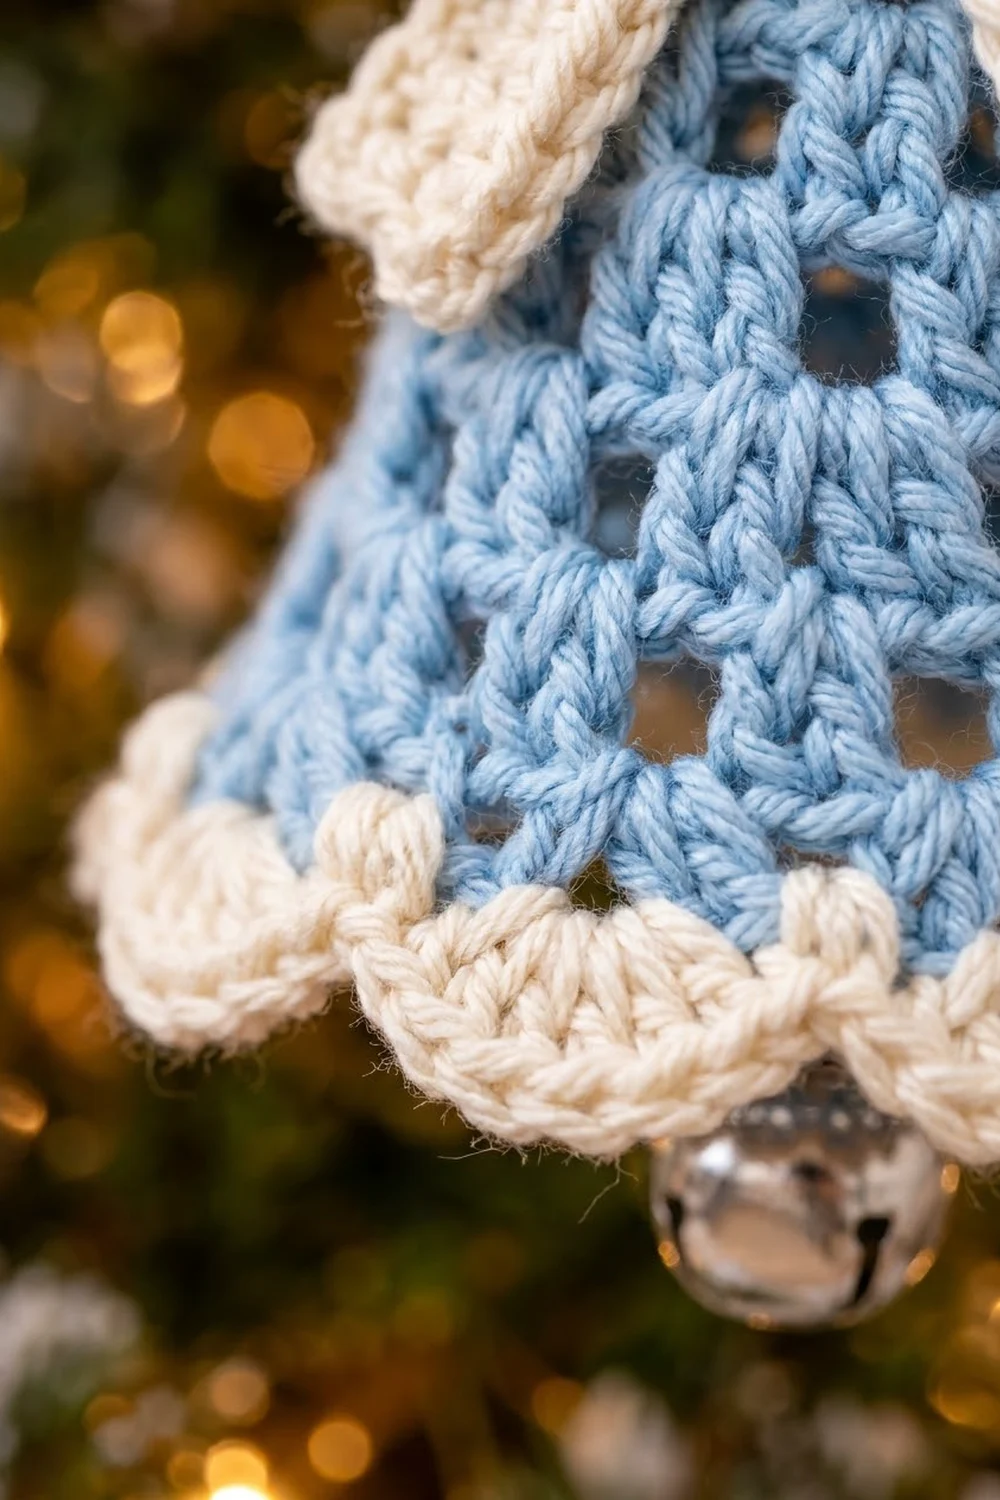
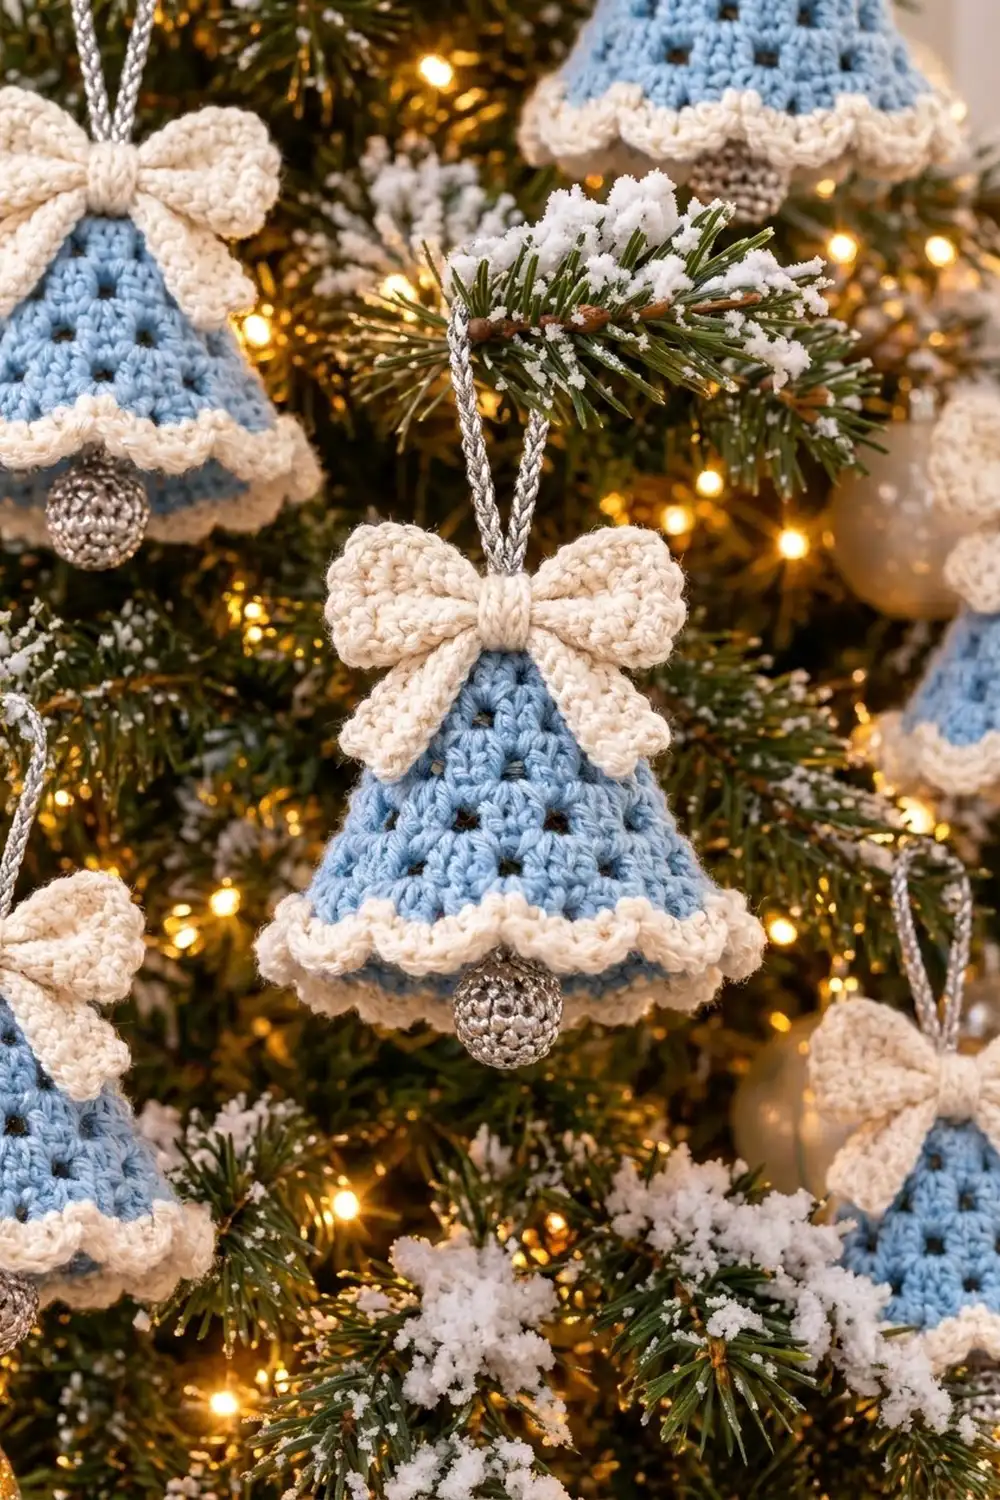
This bell ornament is a small, quick project for the tree. The body is a powder-blue cone covered in tiny staggered eyelets. A ruffled cream scalloped hem flares out at the bottom, and a little silver ball hangs inside like a clapper. A cream bow sits on top, and a twisted cream-and-silver cord makes the hanging loop.
The palette is soft winter blue, ivory, and silver, so it suits both classic and Scandinavian-style trees. The eyelets let light through the bell, which looks lovely near fairy lights.
The pattern uses US crochet terms. The finished bell is about 3.25 in (8.3 cm) tall and 4 in (10.2 cm) across the scalloped hem. Including the loop and clapper, it hangs about 6.75 in (17.1 cm) long.
You work the bell top-down in joined rounds. You start with a flat 12-stitch top, then work six rounds of eyelet groups that grow by six stitches each round. A cream sc round and a shell round finish the hem. Last, you make the bow, the ball, and the cord, and sew everything together.
Finished Size and Construction
- Finished size: 3.25 in (8.3 cm) tall × 4 in (10.2 cm) wide at the scallops
- Skill level: Easy
- Terminology: US
- Yarn weight: DK (light worsted, #3), plus a metallic DK or fingering yarn for the silver parts
- Hook: 3.5 mm (E-4), and a 2.75 mm (C-2) hook for the ball
- Number of pieces: 1 bell body. The small add-ons are a bow (3 tiny parts), 1 ball, and 1 cord.
- Layout: One single ornament. There is no grid and no joining of motifs.
- Bell body size before border: 2.75 in (7.0 cm) tall, 3.4 in (8.6 cm) across the open hem
- Border depth: 0.5 in (1.3 cm)
- Bow: 2.8 in (7.1 cm) wide × 1.75 in (4.4 cm) tall
- Clapper ball: 0.75 in (1.9 cm) across
- Hanging loop: 3 in (7.6 cm) above the top of the bell
Materials
Use a smooth DK yarn so the stitches and eyelets show up clearly. A cotton blend gives the crispest scallops. Acrylic is softer and slightly lighter.
- Light blue DK: 12 g (about 30 m) for the bell body
- Cream DK: 10 g (about 25 m) for the hem, bow, cord, and clapper strand
- Silver metallic yarn: 4 g (about 10 m) for the ball and cord
Tools:
- 3.5 mm (E-4) hook
- 2.75 mm (C-2) hook
- Tapestry needle
- Scissors
- A small pinch of fiberfill
- Stitch marker
- Pins
- A steam iron or spray bottle
- A small cone or a rolled-up towel for blocking
The quantities above include a margin of about 20% for gauge checks and weaving in ends.
Abbreviations (US Terms)
- ch – chain
- sl st – slip stitch
- sc – single crochet
- dc – double crochet
- sc2tog – single crochet 2 together
- sp(s) – space(s)
- MR – magic ring
- st(s) – stitch(es)
- rep – repeat
Special stitch – Scallop: Work 5 dc in the same stitch.
Note: In every round of the bell, the beginning ch 3 counts as the first dc. It is worked into the same stitch as the join, so “next dc” always means the stitch after that one.
Gauge and Checkpoints
Gauge: 18 dc and 9 rounds = 4 in (10.2 cm) in dc with the 3.5 mm hook. For the bow, 20 sc and 22 rows = 4 in (10.2 cm).
Since the ornament is small, the bell itself works as your gauge test. Make Rounds 1–4 first and check them:
- After Round 1: a flat disc about 1 in (2.5 cm) across
- After Round 4: an open edge about 2.1 in (5.3 cm) across and about 1.5 in (3.8 cm) tall from the top
- After Round 7: an open edge 3.4 in (8.6 cm) across and 2.75 in (7.0 cm) tall
- After the border: 3.25 in (8.3 cm) tall and 4 in (10.2 cm) across the scallops
Too big? Go down to a 3.25 mm hook. Too small or stiff? Go up to a 3.75 mm hook. If the cone ruffles before Round 7, your dc are short. Use a looser tension or a bigger hook rather than changing the counts.
Bell Body (Light Blue)
Use the 3.5 mm hook.
Round 1: MR, ch 3 (counts as dc), 11 dc in ring. Pull the ring tight and join with sl st to the top of ch-3. (12 dc)
This is the flat, closed top of the bell.
Round 2: Ch 3, dc in next dc, ch 1, dc in next 2 dc, ch 1; rep from * 4 more times. Join to the top of ch-3. (12 dc + 6 ch-1 sps = 18 sts)
The edge will start to turn downward. This is the first row of eyelets.
Round 3: Ch 3, ch 1, dc in next dc, dc in next ch-1 sp, dc in next dc, ch 1, dc in next dc, dc in next ch-1 sp; rep from * 4 more times. Join. (18 dc + 6 ch-1 sps = 24 sts; 6 groups of 3 dc)
Each new ch-1 sits in the middle of a group from the round below, so the holes stagger.
Round 4: Ch 3, dc in next ch-1 sp, dc in next dc, ch 1, dc in next dc, dc in next dc, dc in next ch-1 sp, dc in next dc, ch 1, dc in next dc; rep from * 4 more times. Join. (24 dc + 6 ch-1 sps = 30 sts; 6 groups of 4 dc)
Round 5: Ch 3, ch 1, dc in next 2 dc, dc in next ch-1 sp, dc in next dc, dc in next dc, ch 1, dc in next 2 dc, dc in next ch-1 sp, dc in next dc; rep from * 4 more times. Join. (30 dc + 6 ch-1 sps = 36 sts; 6 groups of 5 dc)
Round 6: Ch 3, dc in next ch-1 sp, dc in next 3 dc, ch 1, dc in next dc, dc in next dc, dc in next ch-1 sp, dc in next 3 dc, ch 1, dc in next dc; rep from * 4 more times. Join. (36 dc + 6 ch-1 sps = 42 sts; 6 groups of 6 dc)
Round 7: Ch 3, dc in next dc, ch 1, dc in next 3 dc, dc in next ch-1 sp, dc in next dc, dc in next 2 dc, ch 1, dc in next 3 dc, dc in next ch-1 sp, dc in next dc; rep from * 4 more times. Join. (42 dc + 6 ch-1 sps = 48 sts; 6 groups of 7 dc)
Fasten off the blue.
How the shaping works: Each round adds exactly 1 dc per group, so the bell grows by 6 stitches per round, from 18 to 24, 30, 36, 42, and 48 sts. A flat dc circle needs about 12 extra stitches per round. Growing by only 6 makes the even cone you see, with six rows of staggered eyelets.
Bow (Cream)
Use the 3.5 mm hook. Leave long tails for sewing.
Loop strip: Ch 29.
- Row 1: Sc in 2nd ch from hook and in each ch across. (28 sc)
- Rows 2–6: Ch 1, turn, sc in each sc across. (28 sc)
The strip measures 5.6 in × 1.1 in (14.2 cm × 2.8 cm). Fasten off.
Fold both short ends to the center on the back so they meet. Sew them down. This gives two loops 2.8 in (7.1 cm) wide in total.
Tail strip: Ch 15.
- Row 1: Sc in 2nd ch from hook and in each ch across. (14 sc)
- Rows 2–3: Ch 1, turn, sc in each sc. (14 sc)
The strip measures 2.8 in × 0.55 in (7.1 cm × 1.4 cm). Fasten off.
Fold it at the middle into an upside-down V, so each tail is 1.4 in (3.6 cm) long. Shape each tail end into a point by tacking the corners under.
Center band: Ch 9.
- Row 1: Sc in 2nd ch from hook and in each ch across. (8 sc)
- Row 2: Ch 1, turn, sc in each sc. (8 sc)
The band measures 1.6 in (4.1 cm) long. Fasten off.
Assemble the bow:
- Lay the loops on top of the tail V.
- Pinch the stack tightly at the center.
- Wrap the center band around the pinch and sew its ends together at the back.
Clapper Ball (Silver)
Use the 2.75 mm hook. Work in continuous rounds and mark the first stitch of each round.
- Round 1: MR, 6 sc in ring. (6 sc)
- Round 2: 2 sc in each sc. (12 sc)
- Rounds 3–4: Sc in each sc. (12 sc)
- Round 5: Sc2tog 6 times. (6 sc)
Stuff the ball firmly. Thread the tail through the front loops of the last round, pull it closed, and fasten off. The ball measures 0.75 in (1.9 cm).
Hanging Cord and Assembly
Cord:
- Cut one strand of cream and one strand of silver, each 20 in (50.8 cm) long.
- Knot them together at both ends.
- Twist them until the strand kinks.
- Fold the strand in half and let it twist back on itself.
- Knot the cut ends.
Hanging loop: Fold the cord into a loop that stands 3 in (7.6 cm) tall. Thread both ends down through the center of Round 1 and knot them inside the bell.
Clapper:
- Tie an 8 in (20.3 cm) cream strand to the top of the ball.
- Thread the strand up through the center of Round 1.
- Adjust it so there is 2.75 in (7.0 cm) of strand between the inside of the top and the top of the ball. The lower half of the ball should show below the scallops.
- Knot the strand to the cord knot and weave in the ends.
Bow: Sew the bow to the front of Rounds 1–2 so the cord rises behind its center band.
Border (Cream Scalloped Hem)
Border gauge: Each scallop covers 4 sc of Round 8. That is about 0.9 in (2.3 cm) along the hem, and it fans out to about 1 in (2.5 cm) once worked.
The bell is round, so it has no sides. All counts are for the full round.
Round 8 (trim round): Join cream with sl st in the top of the beginning ch-3 of Round 7. Ch 1, sc in the same st, then sc in each dc and each ch-1 sp around. Join with sl st to the first sc.
The count is 42 sc worked one into each dc, plus 6 sc worked one into each ch-1 sp, plus 0 extra. (48 sc)
Round 9: Ch 1, sc in the same st, skip 1 sc, 5 dc in next sc, skip 1 sc, sc in next sc; rep from * 10 more times. To finish, skip 1 sc, 5 dc in next sc, skip 1 sc, and join with sl st to the first sc. (12 scallops: 12 sc + 60 dc = 72 sts)
Fasten off and weave in the ends.
Why the math works: Round 8 turns the 48 stitches of Round 7 into exactly 48 sc, with no extra stitches. Each scallop repeat uses 4 sc (1 sc + 1 skipped + 1 shell base + 1 skipped). That gives 48 ÷ 4 = 12 full scallops with no leftover stitches. Each shell is 5 dc wide over a 4-stitch base, so the hem flares outward from 3.4 in (8.6 cm) to about 4 in (10.2 cm) across.
Final Blocking
- Weave in all ends before blocking.
- Fill the bell with a small cone or a tightly rolled towel so it holds an even, slightly flared shape.
- Hold a steam iron 1 in (2.5 cm) above the bell and steam it. Do not touch the yarn with the iron. Use a spray bottle instead if your yarn is acrylic and you prefer not to steam it.
- Pat the eyelets so they are even. Ease the scallops outward so they fan evenly all the way around.
- Pin the bow flat, then steam or mist it. Shape the loops so they stay rounded.
- Let everything dry completely before you take it off the form.
- Measure again: 3.25 in (8.3 cm) tall and 4 in (10.2 cm) across the scallops.
Final Quality-Control Checklist
- Round 1 has 12 dc, and the ring is pulled fully closed.
- Each of Rounds 2–7 has 6 ch-1 eyelets, staggered from the round below.
- Round 7 has 48 sts (42 dc + 6 ch-1 sps).
- Round 8 has 48 sc, and Round 9 has 12 even scallops.
- The bell measures 3.25 in (8.3 cm) tall × 4 in (10.2 cm) wide.
- The bow is centered, and its loops are the same size.
- The ball hangs straight, with its lower half showing below the hem.
- The hanging loop is 3 in (7.6 cm) tall and firmly knotted.
Troubleshooting
- The cone is ruffling: Your tension is too tight for the stitch heights. Go up a hook size, or check that you didn’t add an extra dc in a ch-1 sp.
- The bell is a flat disc instead of a cone: You probably worked 2 dc into the ch-1 sps. Each round should add only 6 sts.
- The holes line up instead of staggering: Check that each ch-1 lands inside a group from the round below, never above the previous ch-1.
- The last scallop is crowded: Recount Round 8. It must have exactly 48 sc.
- The bow is floppy: Steam it pinned flat, or add one more sc row to the loop strip.
- The ball is tilted: Re-tie the strand at the center top of the ball.
Care
Spot clean with cool water and mild soap, then reshape the bell over a form and let it dry. Store it with tissue paper inside the bell so it keeps its shape.
Final Notes
Keep the measurement chain in mind:
- Round 1 is a 1 in (2.5 cm) top.
- Round 4 is 2.1 in (5.3 cm) across.
- Round 7 is a 48-stitch hem, 3.4 in (8.6 cm) across and 2.75 in (7.0 cm) tall.
- The 48-sc trim round becomes 12 scallops.
- The finished bell is 3.25 in (8.3 cm) tall and 4 in (10.2 cm) wide.
If your checkpoints match, the bow, clapper, and loop will sit in the right place. Make one, check it, and then make a whole set for the tree.
Happy crocheting!