

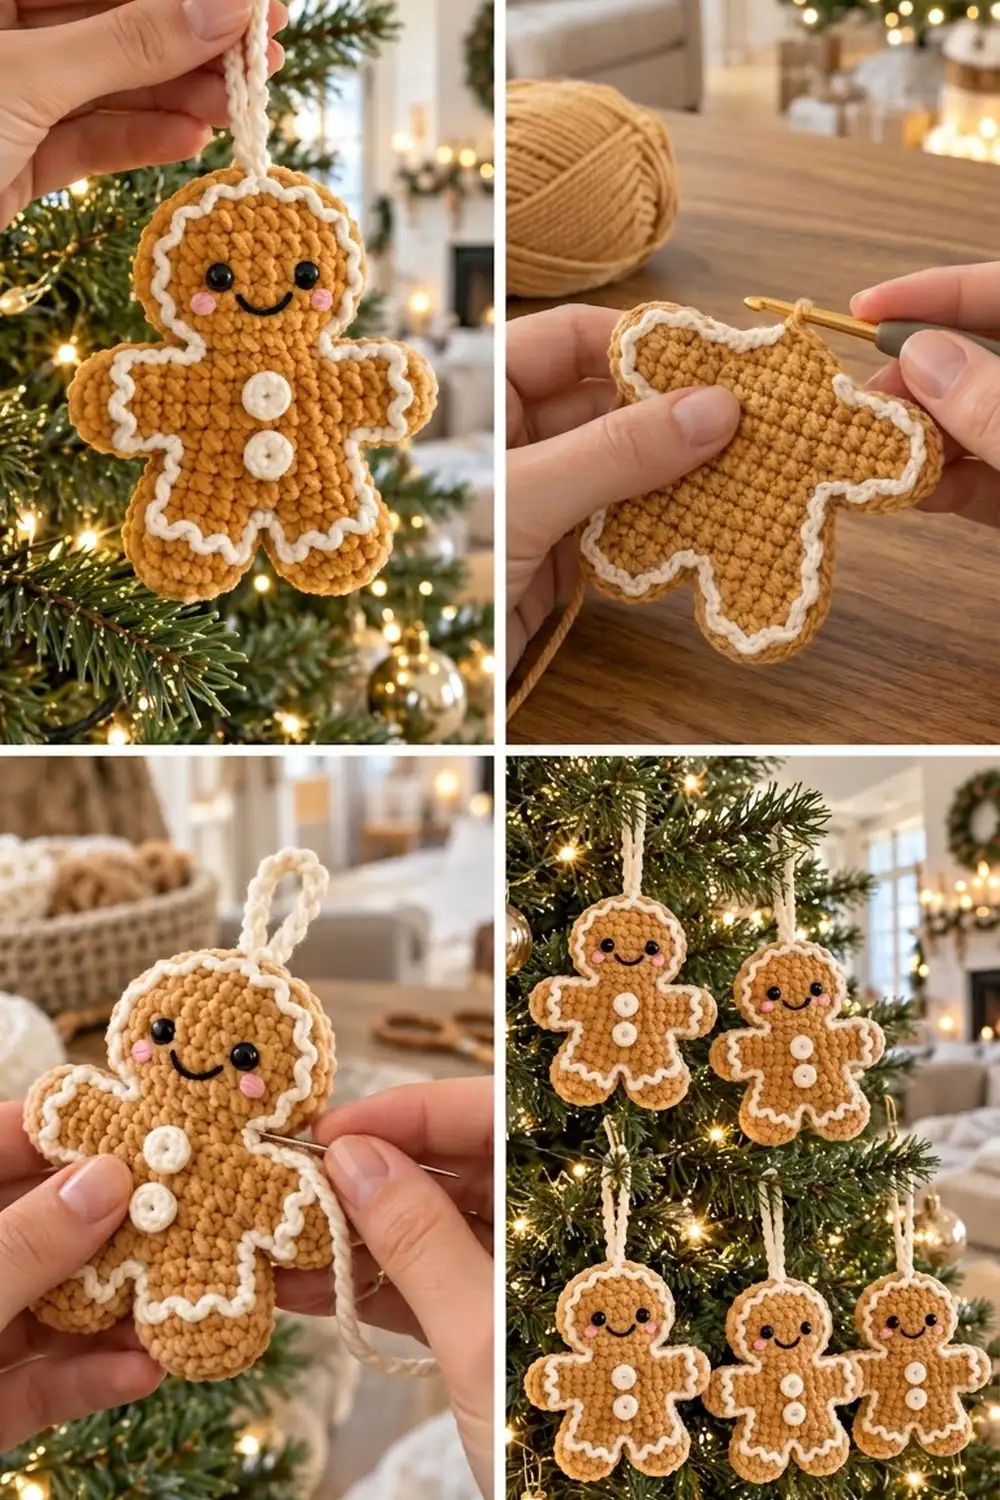
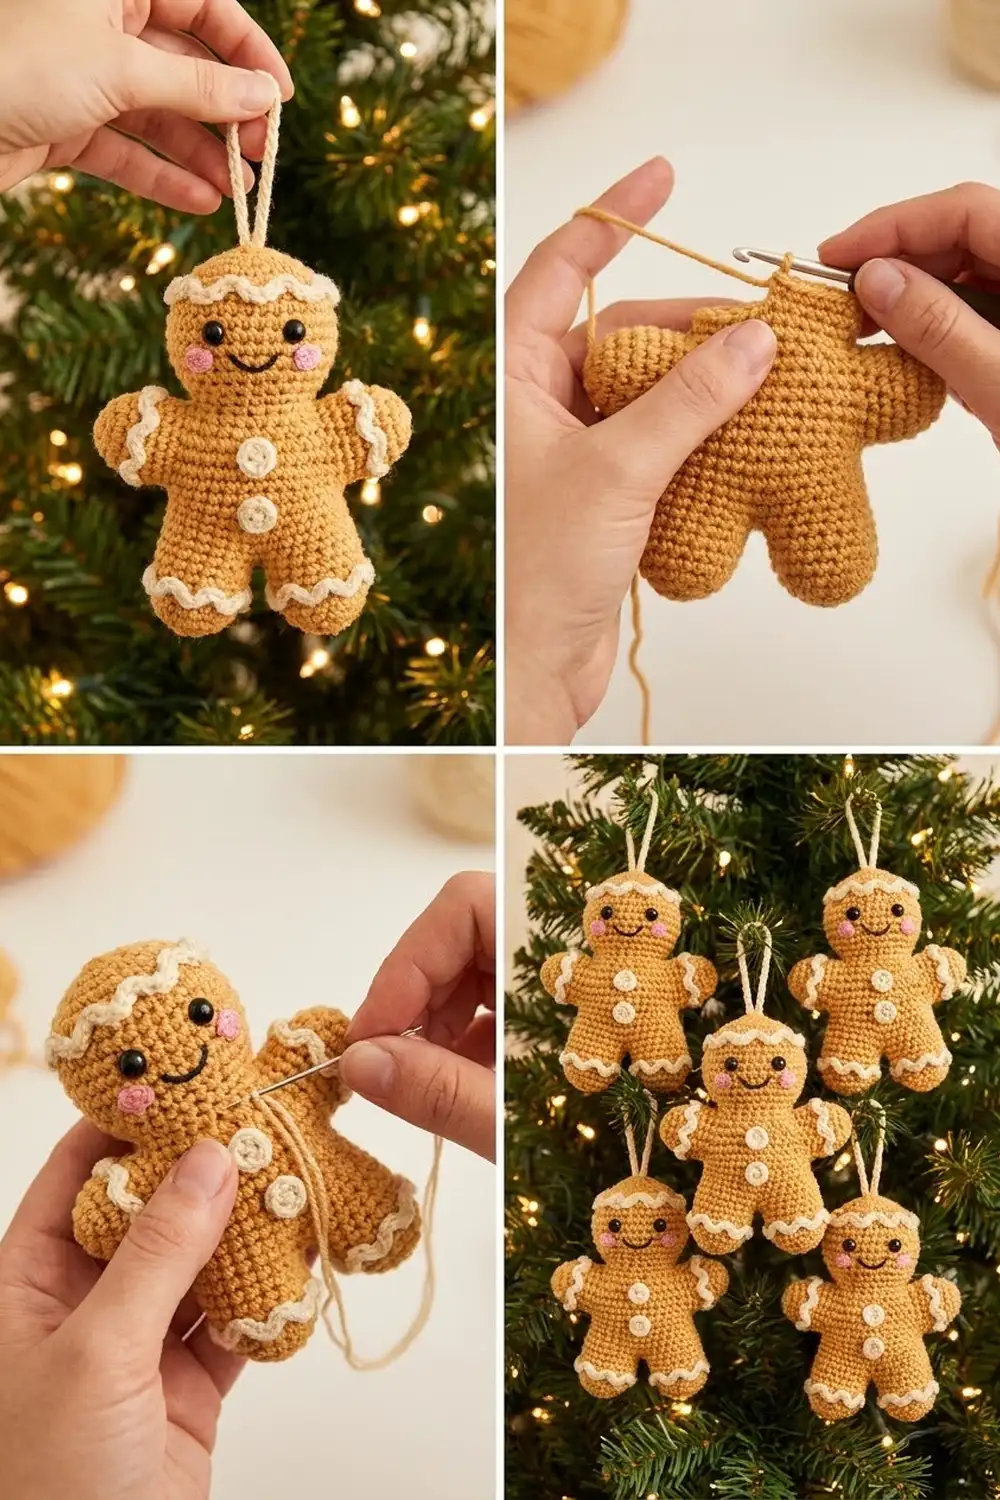
The Frosted Ginger Buddy is a small, puffy gingerbread man ornament that looks like a cookie with fresh icing. A wavy cream line follows the whole outline, and two cream buttons, shiny black eyes, a little smile and pink cheeks finish the front.
The colors are simple: warm caramel tan for the cookie, cream for the icing, buttons and hanging loop, and tiny bits of black and pink for the face. It looks great alone on a tree branch, and it also looks great as a matching set.
This pattern uses US crochet terms. The finished ornament is about 4.8 in (12.2 cm) tall and 4.2 in (10.7 cm) wide, not counting the loop.
Here’s how it’s made. You crochet two identical flat layers in rows, from the legs up to the top of the head. Then you hold the layers together and join them with one round of single crochet, adding a little stuffing as you go. Last, you sew a cream chain onto the front in waves for the icing, add the buttons and face, and attach the loop.
Finished Size and Construction
- Finished size: 4.8 in (12.2 cm) tall × 4.2 in (10.7 cm) wide, without the loop
- Skill level: Advanced beginner
- Terminology: US
- Yarn weight: Worsted (#4)
- Hook: 3.5 mm (US E-4)
- Number of pieces: 1 ornament, made from 2 identical body layers plus 2 buttons, 1 icing chain and 1 hanging loop
- Layout: Two layers stacked wrong sides together
- Layer size before border: 3.8 in (9.7 cm) wide × 4.4 in (11.2 cm) tall
- Border depth: 0.2 in (0.5 cm) on every edge, which is one round of sc
Materials
Yarn: Use a smooth worsted-weight acrylic or cotton blend. Soft yarn with a slight halo gives the cozy cookie texture in the photo. Avoid very splitty yarns, because you’ll be working tight stitches into row ends.
- Caramel tan (main color): 25 g, about 50 m
- Cream (icing, buttons, loop): 5 g, about 10 m
- Black: 1 m, for the smile (you can also use embroidery floss)
- Pink: 0.5 m, for the cheeks
These quantities include a safety margin of about 20%.
Tools:
- 3.5 mm (US E-4) crochet hook
- Two 6 mm black safety eyes
- A small handful of polyester fiberfill, about 3 g
- Tapestry needle
- 2 stitch markers
- Straight pins
- Scissors
Abbreviations (US Terms)
- ch: chain
- sl st: slip stitch
- sc: single crochet
- sc2tog: single crochet 2 together (a decrease)
- inc: 2 sc in the same stitch
- st(s): stitch(es)
- rep: repeat
- RS / WS: right side / wrong side
- fsc: foundation single crochet extension (see below)
fsc extension (used for the second arm): Insert your hook into the “chain” at the base of the last stitch you made. Yarn over and pull up a loop. Yarn over and draw through 1 loop; this makes the new base chain. Yarn over and draw through both loops. Each fsc counts as 1 sc.
Gauge and Checkpoints
Gauge: 5 sc and 5 rows = 1 in (2.5 cm) in sc worked flat with the 3.5 mm hook.
This square gauge is what makes the border math work, so check it before you start. Make one body layer first and measure it before making the second.
Checkpoints (measure flat, without stretching):
- After Row 4 (one leg): 1 in (2.5 cm) wide × 0.8 in (2.0 cm) tall
- After Row 8: 2.2 in (5.6 cm) wide × 1.6 in (4.1 cm) tall
- After Row 12: 3.8 in (9.7 cm) wide, measured arm tip to arm tip × 2.4 in (6.1 cm) tall
- After Row 22: 4.4 in (11.2 cm) tall. The head is 1.8 in (4.6 cm) wide.
- After the border: 4.2 in (10.7 cm) × 4.8 in (12.2 cm)
If your layer is too big: Switch to a 3.25 mm hook.
If your layer is too small or stiff: Switch to a 3.75 mm hook.
Don’t change the stitch counts. The border math depends on them.
Body Layer (Make 2)
Use caramel tan. The ch 1 at the start of each row does not count as a stitch.
Legs
Leg 1:
– Row 1: Ch 4. Sc in 2nd ch from hook and in the next 2 ch, turn. (3 sts)
– Row 2: Ch 1, inc in first st, sc 1, inc in last st, turn. (5 sts)
– Rows 3–4: Ch 1, sc in each st across, turn. (5 sts)
Fasten off, leaving a short tail.
Leg 2: Work Rows 1–4 the same as Leg 1, but don’t fasten off. Both legs should now be 1 in (2.5 cm) wide × 0.8 in (2.0 cm) tall.
Torso
- Row 5 (joining row): Ch 1, turn. Sc in each of the 5 sts of Leg 2, then ch 1. Place Leg 1 next to it with the same side facing you, and sc in each of its 5 sts, turn. (11 sts: 5 sc + 1 ch + 5 sc)
- Rows 6–8: Ch 1, sc in each st across, working into the ch-1 as a stitch, turn. (11 sts)
Checkpoint: 2.2 in (5.6 cm) wide × 1.6 in (4.1 cm) tall.
Arms
- Row 9: Ch 5. Sc in 2nd ch from hook and in the next 3 ch (4 sts for the first arm). Sc in each of the 11 torso sts (15 sts so far). Then work 4 fsc extensions off the last sc for the second arm, turn. (19 sts)
- Rows 10–12: Ch 1, sc in each st across, turn. (19 sts)
Checkpoint: 3.8 in (9.7 cm) wide × 2.4 in (6.1 cm) tall. Each arm is 0.8 in (2.0 cm) long and 0.8 in (2.0 cm) tall.
Shoulders and Neck
- Row 13: Don’t ch. Sl st in the first 4 sts. Ch 1, sc in the next 11 sts. Leave the last 4 sts unworked, turn. (11 sc; the sl sts don’t count)
- Row 14: Ch 1, sc2tog, sc 7, sc2tog, turn. (9 sts)
- Row 15: Ch 1, sc2tog, sc 5, sc2tog, turn. (7 sts)
This narrow row makes the neck.
Head
- Row 16: Ch 1, inc in first st, sc 5, inc in last st, turn. (9 sts)
- Rows 17–20: Ch 1, sc in each st across, turn. (9 sts)
- Row 21: Ch 1, sc2tog, sc 5, sc2tog, turn. (7 sts)
- Row 22: Ch 1, sc2tog, sc 3, sc2tog. (5 sts)
Fasten off and weave in all ends, including the Leg 1 tail.
Checkpoint: The layer is 4.4 in (11.2 cm) tall. The head is 1.8 in (4.6 cm) wide and 1.4 in (3.6 cm) tall.
Prepare the Front Layer
Pick the neater layer for the front. Insert the safety eyes between Rows 18 and 19, 4 sts apart: center each eye on the 3rd and 7th sts of the head row. Fasten the washers on the WS.
The second layer is the back. No changes are needed.
Buttons (Make 2)
Use cream.
- Rnd 1: Make a magic ring. Work 6 sc into the ring. (6 sts)
- Rnd 2: Inc in each st around. Sl st into the first sc to join. (12 sts)
Fasten off, leaving a 6 in (15.2 cm) tail. Pull the ring snug but not fully closed, so a small dimple stays in the center like the buttons in the photo. Each button is about 0.6 in (1.5 cm) across.
Icing Chain and Hanging Loop
Icing: In cream, ch 120, which is about 20 in (50.8 cm) at 6 ch per inch. Leave both tails 8 in (20.3 cm) long. Don’t fasten off the working loop yet; put a stitch marker in it so you can add or remove chains during placement.
Hanging loop: In cream, ch 24, which is about 4 in (10.2 cm). Fasten off and leave long tails at both ends. Folded in half, it makes a loop about 2 in (5.1 cm) tall.
Border (Joining Round)
Border gauge: You’ll make 5 sc per inch along every edge, the same as the fabric.
Hold the two layers WS together, with the front layer facing you and all edges lined up. Pin them at the arms, legs and head. Work every sc through both layers.
Join caramel tan in the first st of Row 22 (the top of the head). Work the segments in this order:
- Head top: Ch 1, inc in first st, sc 3, inc in last st. (7)
- Side A, Rows 22–13: 1 sc in each row end. (10)
- Arm A top: 1 sc in each of the 4 arm-top sts. (4)
- Arm A tip, Rows 12–9: 2 sc in the first row end, 1 sc in each of the next 2, 2 sc in the last. (6)
- Arm A underside: 1 sc in each of the 4 foundation sts. (4)
- Torso side A, Rows 8–5: 1 sc in each row end. (4)
- Leg A outer side, Rows 4–1: 1 sc in each row end. (4)
- Leg A bottom: Inc in the first foundation st, sc 1, inc in the last. (5)
- Leg A inner side, Rows 1–4: 1 sc in each row end. (4)
- Crotch: 1 sc in the base of the Row 5 ch-1. (1)
- Leg B inner side: 1 sc in each row end. (4)
- Leg B bottom: Same as segment 8. (5)
- Leg B outer side: 1 sc in each row end. (4)
- Torso side B: 1 sc in each row end. (4)
- Arm B underside: 1 sc in each of the 4 sts. (4)
- Arm B tip: Same as segment 4. (6)
You now have 76 sts. Stop here.
Push small tufts of fiberfill into the legs, arms and body. Keep the ornament puffy but still flat; it should be about 0.6 in (1.5 cm) thick. Then finish the round:
- Arm B top: 1 sc in each of the 4 sts, working through the sl sts. (4)
- Side B, Rows 13–22: 1 sc in each row end. Add a little more stuffing to the head before the last few stitches. (10)
Sl st to the first sc. Total: 90 sts. Fasten off and hide the tail between the layers.
Count per half: Each side of the ornament gets 41 sts: 10 + 4 + 6 + 4 + 4 + 4 + 5 + 4. Two halves (82), plus the head top (7) and the crotch (1), make 90.
Why the math works: The stitches already on the edges are:
- 6 leg-bottom sts
- 8 outer leg row ends and 8 inner leg row ends
- 1 crotch st
- 8 torso row ends
- 8 arm-underside sts, 8 arm-tip row ends and 8 arm-top sts
- 20 row ends from Rows 13–22
- 5 head-top sts
That’s 80. You work 1 sc into each of those, plus 10 extra stitches for the corners: 4 at the feet, 4 at the hands and 2 at the head. 80 + 10 = 90.
The gauge is square (5 sts and 5 rows per inch), so 1 sc per row end lies flat. The extra corner stitches let the hands, feet and head curve without cupping.
Checkpoint: 4.2 in (10.7 cm) wide × 4.8 in (12.2 cm) tall.
Icing, Buttons, Face and Loop
Icing: Start at the top of the head. Pin the cream chain on the front layer, along the outermost round of front-layer stitches just inside the tan border. Shape it into waves:
- Make one wave crest every 2 border sts, for about 45 waves in total.
- Along the torso and head, the waves curve gently.
- At the hands and feet, push the waves closer together so they look like piped icing.
Add or remove chains at the marked loop so the ends meet neatly. Then fasten off and use one tail to tack the chain down at each crest and each dip. Join the ends invisibly and hide the tails between the layers.
Buttons: Sew one button centered on Rows 10–11 and the second on Rows 7–8, using the tails. Bury the ends.
Smile: In black, backstitch a shallow curve 2 sts wide and centered below the eyes, between Rows 17 and 18.
Cheeks: In pink, work 3 small straight stitches beside each end of the smile, just below and outside each eye. Brush them lightly so they look soft.
Loop: Thread both loop tails through the center top of the head, around the 3rd st of Row 22, from front to back. Knot them inside the edge and hide the ends between the layers.
Final Blocking
- Mist the ornament lightly with water. Don’t soak it, because of the stuffing.
- Pin it flat on a foam mat to 4.2 in (10.7 cm) × 4.8 in (12.2 cm).
- Ease the arms and legs so they match each other. Gently round the head.
- Press the icing waves flat with your fingertips.
- Let it dry completely, about 4–6 hours. Then unpin and fluff it gently.
Final Quality-Control Checklist
- [ ] Each layer measures 3.8 in (9.7 cm) × 4.4 in (11.2 cm) before joining.
- [ ] The border has 90 sts, and both halves have 41 sts.
- [ ] The arms and legs are mirror images.
- [ ] The stuffing is even, with no lumps, and the ornament is still flat enough to hang.
- [ ] The icing runs all the way around with even waves and no loose loops.
- [ ] The eyes are level and 4 sts apart, and the smile is centered.
- [ ] Both buttons are centered on the torso.
- [ ] The loop is centered and firmly secured.
- [ ] All ends are hidden between the layers.
Troubleshooting
- The border ruffles: You’re working too loosely. Use a 3.25 mm hook for the border only.
- The border pulls the arms or legs inward: Check that the corner increases are there.
- The arms are uneven: Make sure Row 9 has 4 sts on each side of the torso, and that Row 13 leaves 4 sts free on both sides.
- The neck disappears: Recount Row 15; it must be 7 sts.
- The icing looks flat: Use more chains and tighter wave spacing.
- The icing sags: Tack it down at every crest and every dip.
- The ornament is bulging: Take out some stuffing before you close the round.
Care
Spot clean with a damp cloth and mild soap, and lay it flat to dry. Store it flat in tissue between seasons so the icing waves stay crisp.
Final Notes
Here’s the measurement chain:
- Gauge is 5 sc and 5 rows = 1 in (2.5 cm).
- Each layer is 19 sts × 22 rows, or 3.8 in (9.7 cm) × 4.4 in (11.2 cm).
- One 90-st border round adds 0.2 in (0.5 cm) on every edge.
- That gives a finished ornament of 4.2 in (10.7 cm) × 4.8 in (12.2 cm).
If each checkpoint is right, the next one will be too. Once you’ve made one, it’s easy to make a whole batch for gifts and gift toppers.
Happy crocheting!