

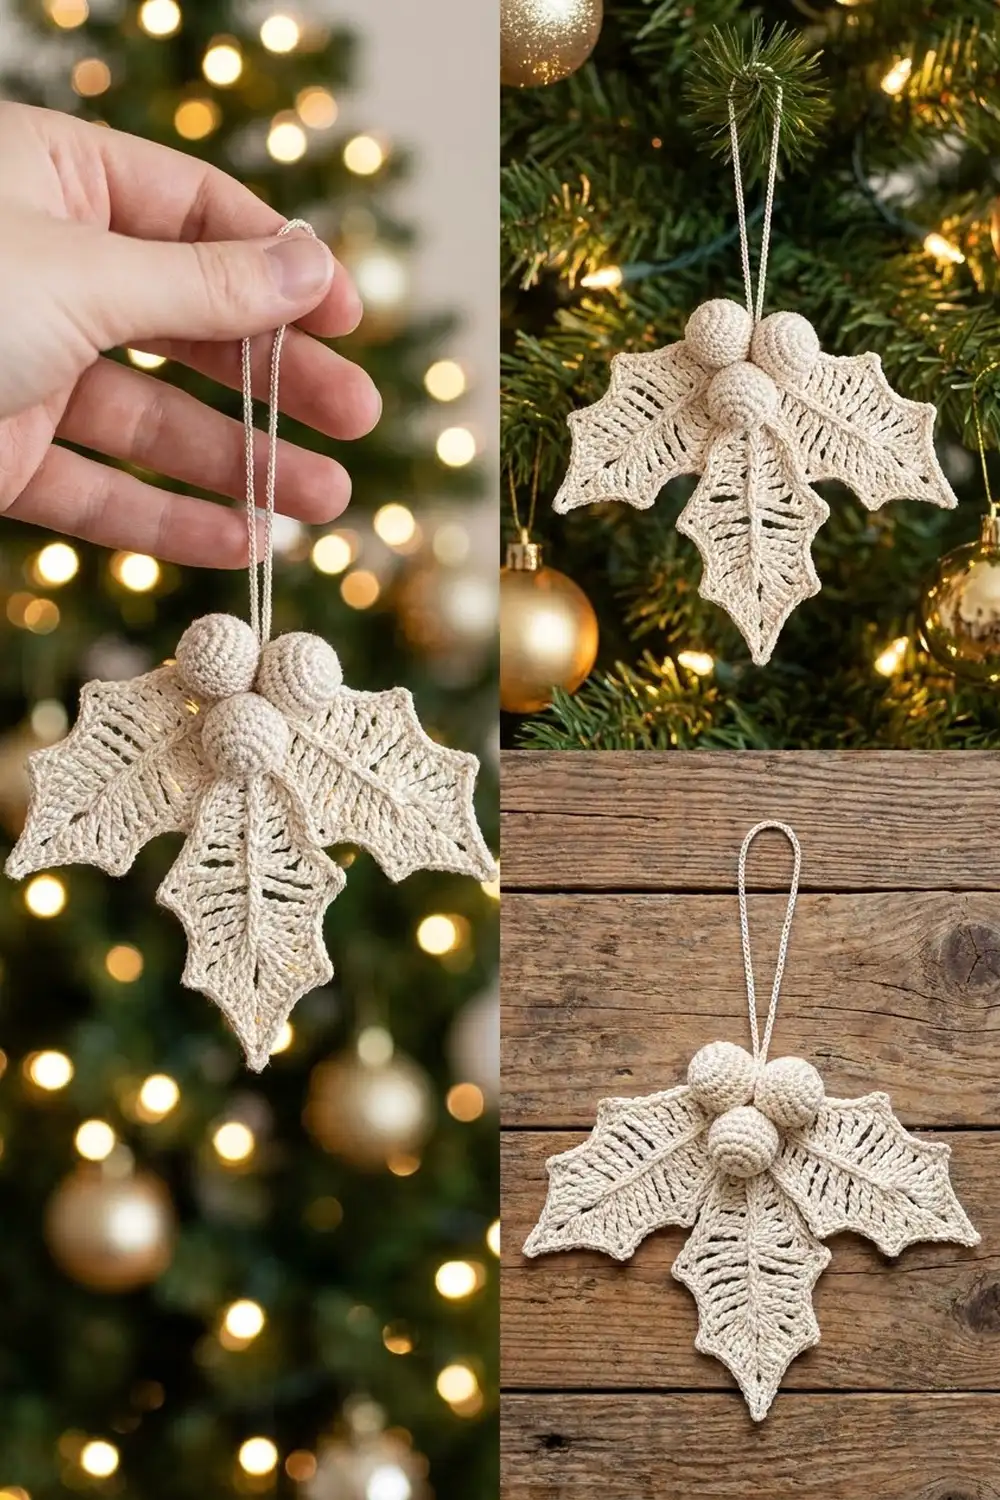
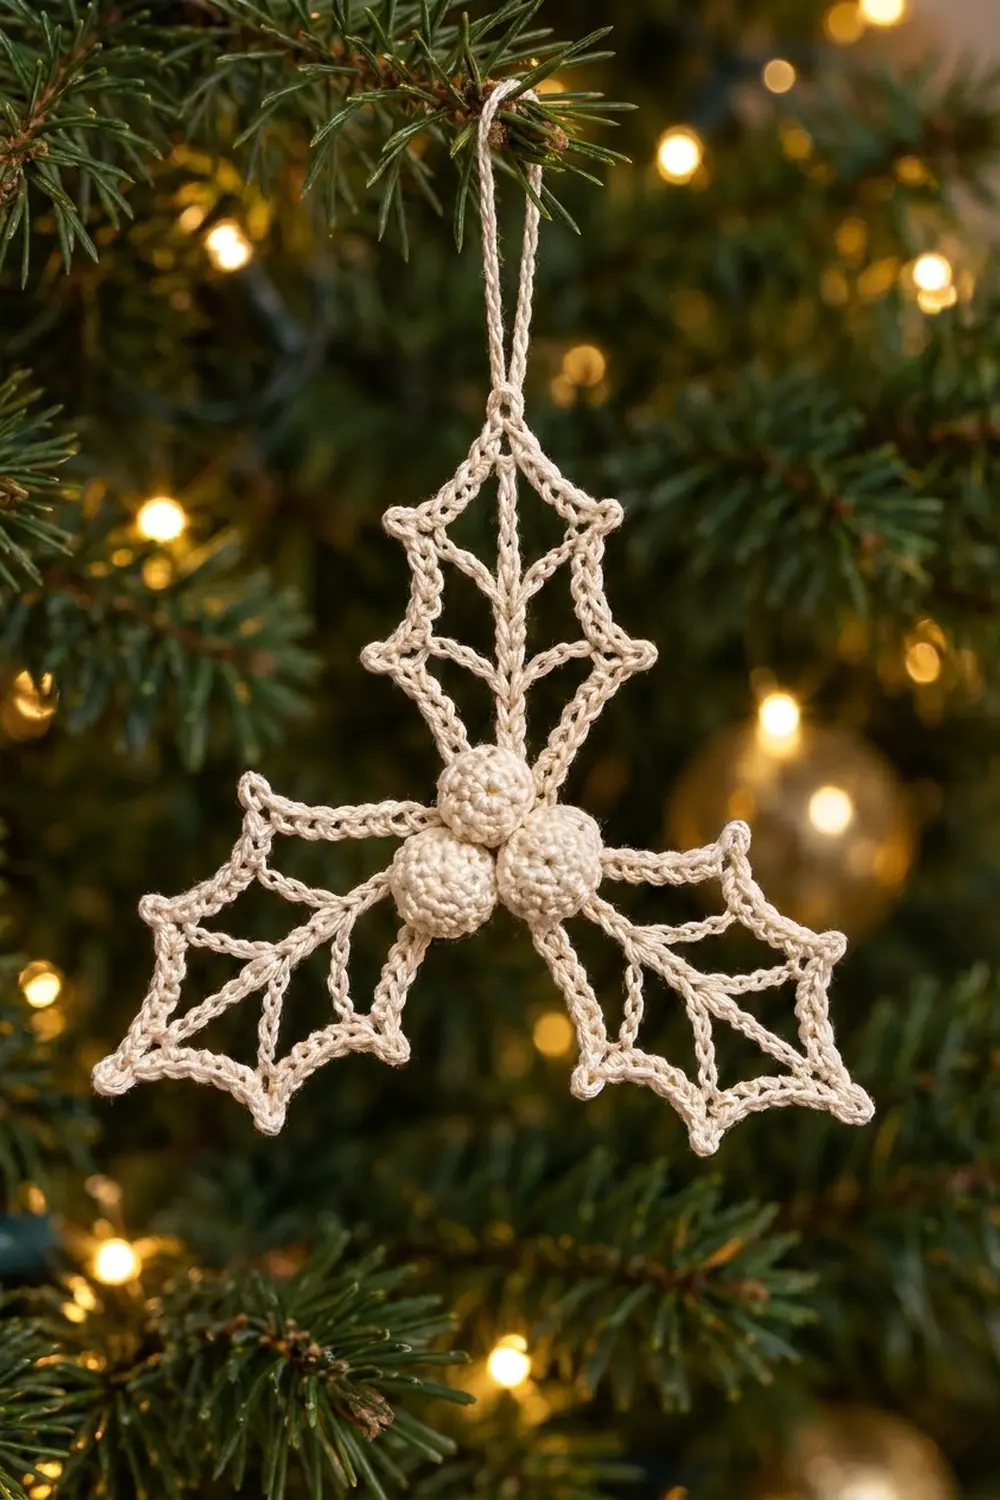
This delicate holly sprig is made of three open, lacy leaves around a cluster of three round berries. The leaves get their shape from fine slip-stitch veins and a crisp single-crochet outline with sharp holly points. The finished ornament looks like frosted lace hanging on the tree.
It is worked entirely in cream crochet thread, so it suits a neutral, Scandinavian, or vintage-white tree. It also looks lovely tied onto gift wrap. The pattern uses US crochet terms throughout.
The finished ornament measures about 4.75 in (12.1 cm) wide and 4 in (10.2 cm) tall, not counting the 1.75 in (4.4 cm) hanging loop.
Here is the construction in short. You make each leaf in two rounds: a vein round and an outline round. The three leaves are joined at their bases as you go. Then one continuous edging round travels around the whole trefoil to form the pointed holly edge. Finally, you sew three small berries over the center and add the hanging loop.
Finished Size and Construction
- Finished size: 4.75 in (12.1 cm) wide x 4 in (10.2 cm) tall, plus a 1.75 in (4.4 cm) loop
- Skill level: Intermediate (fine thread, working into chain loops)
- Terminology: US crochet terms
- Yarn weight: Size 3 crochet thread (Lace, category 0)
- Hook: 2.0 mm steel hook
- Number of pieces: 1 ornament, made from 3 leaves + 3 berries
- Layout: Trefoil, with leaves 120° apart and berries in a triangle at the center
- Piece size: Each leaf 2.25 in (5.7 cm) long x 1.5 in (3.8 cm) wide after the edging
- Size before border: 4.5 in (11.4 cm) x 3.75 in (9.5 cm); each leaf 2 in (5.1 cm) x 1.25 in (3.2 cm)
- Border depth: about 1/8 in (0.3 cm), one round of single crochet
Materials
Thread: Choose a mercerized cotton crochet thread in size 3. Mercerized cotton holds sharp points and takes stiffener well. Avoid fuzzy or acrylic thread, because the open cells blur and the points go soft.
- Cream / ivory: 10 g (about 50 m) is enough for one ornament, with leftover.
Tools:
- 2.0 mm steel crochet hook
- Fine tapestry needle
- 1 locking stitch marker
- A small pinch of fiberfill or matching thread scraps for the berries
- Rust-proof pins and a foam blocking board
- Fabric stiffener or a starch solution
- Small scissors
The quantities include a margin for a test leaf and for the sewing tails.
Abbreviations (US Terms)
- ch – chain
- sl st – slip stitch
- sc – single crochet
- sc2tog – single crochet 2 together (decrease)
- inc – 2 sc in the same stitch
- MR – magic ring
- sp – space
- st(s) – stitch(es)
- rnd – round
Special stitches:
- Leaf point (Rnd 2): (sc, ch 3, sc) worked into the stitch or space given.
- Edge point (border): (2 sc, ch 3, 2 sc) worked into the ch-3 sp of a leaf point.
Gauge and Checkpoints
Gauge: 16 ch = 2 in (5.1 cm), worked with moderate, even tension.
Make one test leaf before anything else. Work Rnds 1 and 2, then pin it flat without blocking it hard.
Checkpoints:
- Rnd 1: The center vein measures about 1 7/8 in (4.8 cm) from tip to base. Each side vein (spur) is about 3/4 in (1.9 cm) long.
- Rnd 2: The leaf measures about 2 in (5.1 cm) long x 1.25 in (3.2 cm) wide.
- Berry: about 0.5 in (1.3 cm) across.
- After the border: Each leaf is 2.25 in (5.7 cm) x 1.5 in (3.8 cm), and the whole ornament is 4.75 in (12.1 cm) x 4 in (10.2 cm).
If your leaf is more than 1/4 in (0.6 cm) too long, go down to a 1.75 mm hook. If it is too small, go up to a 2.25 mm hook. If the outline chains sag loosely between the points, keep your hook size and tighten your chains rather than changing the stitch counts.
Leaf (Make 3)
Each leaf has one center vein and four spurs, two on each side. You work Side 1 from the tip down to the base, then turn and work Side 2 back up from the base to the tip.
Foundation: Ch 16.
Rnd 1 (veins):
Side 1:
- Sl st in the 2nd ch from the hook. The skipped ch is the tip ch.
- Sl st in the next 4 ch. You now have 5 vein sl sts.
- Make Spur A: ch 7, sl st in the 2nd ch from the hook and in the next 5 ch. That gives 6 sl sts back to the vein, and the skipped ch is the spur tip.
- Sl st in the next 4 foundation ch (9 vein sl sts in total).
- Make Spur B the same way as Spur A.
- Sl st in the last 6 foundation ch (15 vein sl sts in total).
Base: Ch 1. This is the base ch-1 sp. Rotate the leaf so you can work along the opposite side of the foundation chain.
Side 2:
- Sl st in the first 6 ch.
- Make Spur C (same as Spur A).
- Sl st in the next 4 ch.
- Make Spur D (same as Spur A).
- Sl st in the last 5 ch, ending next to the tip ch.
Count: 30 vein sl sts (15 per side), plus 4 spurs (each with 6 sl sts and 1 tip ch), 1 tip ch, and 1 base ch-1 sp.
The spurs mirror each other. Spurs A and D sit 5 sts from the tip, and Spurs B and C sit 6 sts from the base. That gives the leaf its symmetrical veining.
Rnd 2 (outline):
- Ch 1. Work a leaf point into the tip ch.
- Ch 7, then work a leaf point into the tip ch of Spur D.
- Ch 6, then work a leaf point into the tip of Spur C.
- Ch 7, then sl st in the base ch-1 sp.
- Ch 7, then work a leaf point into the tip of Spur B.
- Ch 6, then work a leaf point into the tip of Spur A.
- Ch 7, then sl st in the first sc to join.
Count: 5 leaf points (10 sc and 5 ch-3 sps), 40 outline chains in six segments (7, 6, 7, 7, 6, 7), and 1 base sl st.
On Leaf 1, fasten off. On Leaves 2 and 3, fasten off after the join described in the Joining section below.
The outline chains are a little shorter than the straight distance between spur tips. When you pin the leaf out, the spurs angle toward the tip and the chains curve gently inward, which gives the classic holly scallop.
Berry (Make 3)
Work in a continuous spiral and mark the first stitch of each round.
- Rnd 1: 6 sc in a MR. (6)
- Rnd 2: Inc in each st around. (12)
- Rnd 3: Sc in each st around. (12)
- Rnd 4: Sc in each st around. (12)
- Stuff the berry firmly with a pinch of fiberfill or thread scraps.
- Rnd 5: Sc2tog 6 times. (6)
Fasten off and leave an 8 in (20.3 cm) tail. Weave the tail through the front loops of the last 6 sts and pull it closed. Keep the tail for sewing. The berry should be a firm ball about 0.5 in (1.3 cm) across.
Make All Pieces
- Leaves: 3 in cream, all made from the same instructions
- Berries: 3 in cream
Layout (front view):
              [Leaf 1 – tip up]
                     |
                  (Berry)
              (Berry)(Berry)
            /                \
 [Leaf 3 – 8 o'clock]   [Leaf 2 – 4 o'clock]
The leaves sit 120° apart, and all three bases meet under the berries.
Joining
The leaves are joined at a single point, their bases, using a join-as-you-go slip stitch in Rnd 2.
Leaf 1: Complete Rnds 1 and 2 as written and fasten off.
Leaf 2: Work Rnd 1, then work Rnd 2 up to the base. When you would “sl st in the base ch-1 sp,” do this instead:
- Sl st in your own base ch-1 sp.
- Insert the hook from front to back into Leaf 1’s base sl st and sl st.
- Ch 7 and finish Rnd 2 as written.
Leaf 3: Work it the same way as Leaf 2, joining into Leaf 1’s base sl st as well.
All three bases now share one point, and each leaf still has its full 40 outline chains. The join adds only 1 sl st, which sits at the base. It is never worked into later, so it does not change any outline count.
Tension: Make the joining sl st snug but not tight. A tight join puckers the base and tilts the leaves forward.
Positioning: Lay the trefoil face up. Rotate Leaves 2 and 3 to about 4 and 8 o’clock. Use the tapestry needle to tack the bases together with 2–3 small stitches on the back so the angles hold.
Size checkpoint: The joined piece should measure about 4.5 in (11.4 cm) wide x 3.75 in (9.5 cm) tall.
Border (Leaf Edging Round)
Border gauge: One sc per chain, with the round about 1/8 in (0.3 cm) deep.
You work one continuous round around the outside of the whole trefoil. At each base junction, skip the sl sts and go straight into the first chain of the next leaf’s segment. The berries will cover these junctions.
Border Rnd:
- Join the thread in the ch-3 sp at Leaf 1’s tip. Ch 1, then work an edge point in that sp.
- Sc in each of the next 7 ch. Edge point. Sc in each of the next 6 ch. Edge point. Sc in each of the next 7 ch. You are now at the base.
- Skip the base sl sts. On the adjacent leaf (Leaf 2), sc in each of the next 7 ch. Edge point. Sc 6. Edge point. Sc 7. Work an edge point at Leaf 2’s tip.
- Sc 7. Edge point. Sc 6. Edge point. Sc 7. You are back at the base.
- Repeat steps 3–4 for Leaf 3.
- Back on Leaf 1: sc 7, edge point, sc 6, edge point, sc 7. Sl st in the first sc to join.
Counts per leaf: 40 sc worked 1 per outline chain, plus 20 sc at the points (5 edge points x 4 sc). That is 60 sc and 5 ch-3 points per leaf.
Count for the whole round: 3 leaves x 40 chains = 120 sc worked 1 per chain, plus 60 sc added at the points, for 180 sc and 15 ch-3 points.
Hanging loop: Do not fasten off. Sl st into Leaf 1’s tip ch-3 sp, ch 30, then sl st again in the same ch-3 sp. Fasten off. The loop hangs about 1.75 in (4.4 cm) above the tip.
Why the math works: The border starts with exactly the 120 chains from the three leaves. Nothing is added at the base junctions because those sl sts are skipped. One sc per chain keeps the concave segments flat and slightly cupped. The 4 extra sc and the ch-3 at each point push it outward into a sharp spike. Five points per leaf times three leaves gives the 15 spikes you see around the trefoil.
Add the berries: Sew the 3 berries over the center junction, one just above the bases toward Leaf 1 and two side by side below it. Sew each berry to the leaves and to its neighbors with small hidden stitches. Weave in all ends on the back.
Final Blocking
- Wet the ornament fully in cool water and press it gently in a towel.
- Dip it in fabric stiffener or starch solution, then squeeze out the excess. The open cells should not hold any film.
- Pin it face up on the blocking board. Pin Leaf 1 straight up first, then Leaves 2 and 3 at 4 and 8 o’clock.
- Pin the side veins out toward each point at about a 45° angle toward the leaf tip.
- Pin every ch-3 point outward so it is sharp. Let the edge between points curve inward naturally.
- Check the size: 4.75 in (12.1 cm) x 4 in (10.2 cm), with each leaf 2.25 in (5.7 cm) x 1.5 in (3.8 cm).
- Let it dry completely, about 12 hours, before unpinning. Shape the berries round with your fingers while they are damp.
Final Quality-Control Checklist
- Each leaf has 30 vein sl sts and 4 spurs of 6 sl sts.
- Each leaf outline has 40 chains in segments of 7, 6, 7, 7, 6, 7.
- The border has 180 sc and 15 ch-3 points.
- All open cells are clear, with no twisted spurs.
- The leaves sit 120° apart, and the bases are tacked on the back.
- The berries are firm, 0.5 in (1.3 cm), and arranged one above and two below.
- The hanging loop is secure at Leaf 1’s tip.
- All ends are woven in, and none show through the lace.
- The finished size is 4.75 in (12.1 cm) x 4 in (10.2 cm).
Troubleshooting
- Spurs curl or twist: Work the spur sl sts more loosely and check that the ch-7 isn’t twisted before you slip-stitch back.
- Points look rounded: Pull the ch-3 snug and pin each point out hard while blocking.
- Edge ruffles between points: Your chains are too loose. Redo Rnd 2 with tighter chains, or drop a hook size.
- Edge pulls tight and the leaf cups: Your chains are too tight. Loosen up or go up to a 2.25 mm hook.
- Leaves flop forward at the center: Add another tacking stitch at the back of the bases, and sew the berries through both layers.
- Stuffing shows through the berries: Use a smaller hook for the berries only, or stuff them with matching thread scraps.
Care
Store the ornament flat in tissue paper. If it softens, dampen it, re-stiffen it, and re-block it pinned to the measurements above.
Final Notes
Here is the measurement chain in one place. A gauge of 16 ch = 2 in (5.1 cm) gives a 1 7/8 in (4.8 cm) vein, a 2 in (5.1 cm) leaf after Rnd 2, and a 4.5 in (11.4 cm) trefoil once the leaves are joined. The 180-sc border brings it to 4.75 in (12.1 cm) x 4 in (10.2 cm). If you check each stage, the finished ornament will come out crisp and symmetrical. You may want to make a whole set for the tree. Happy crocheting!