

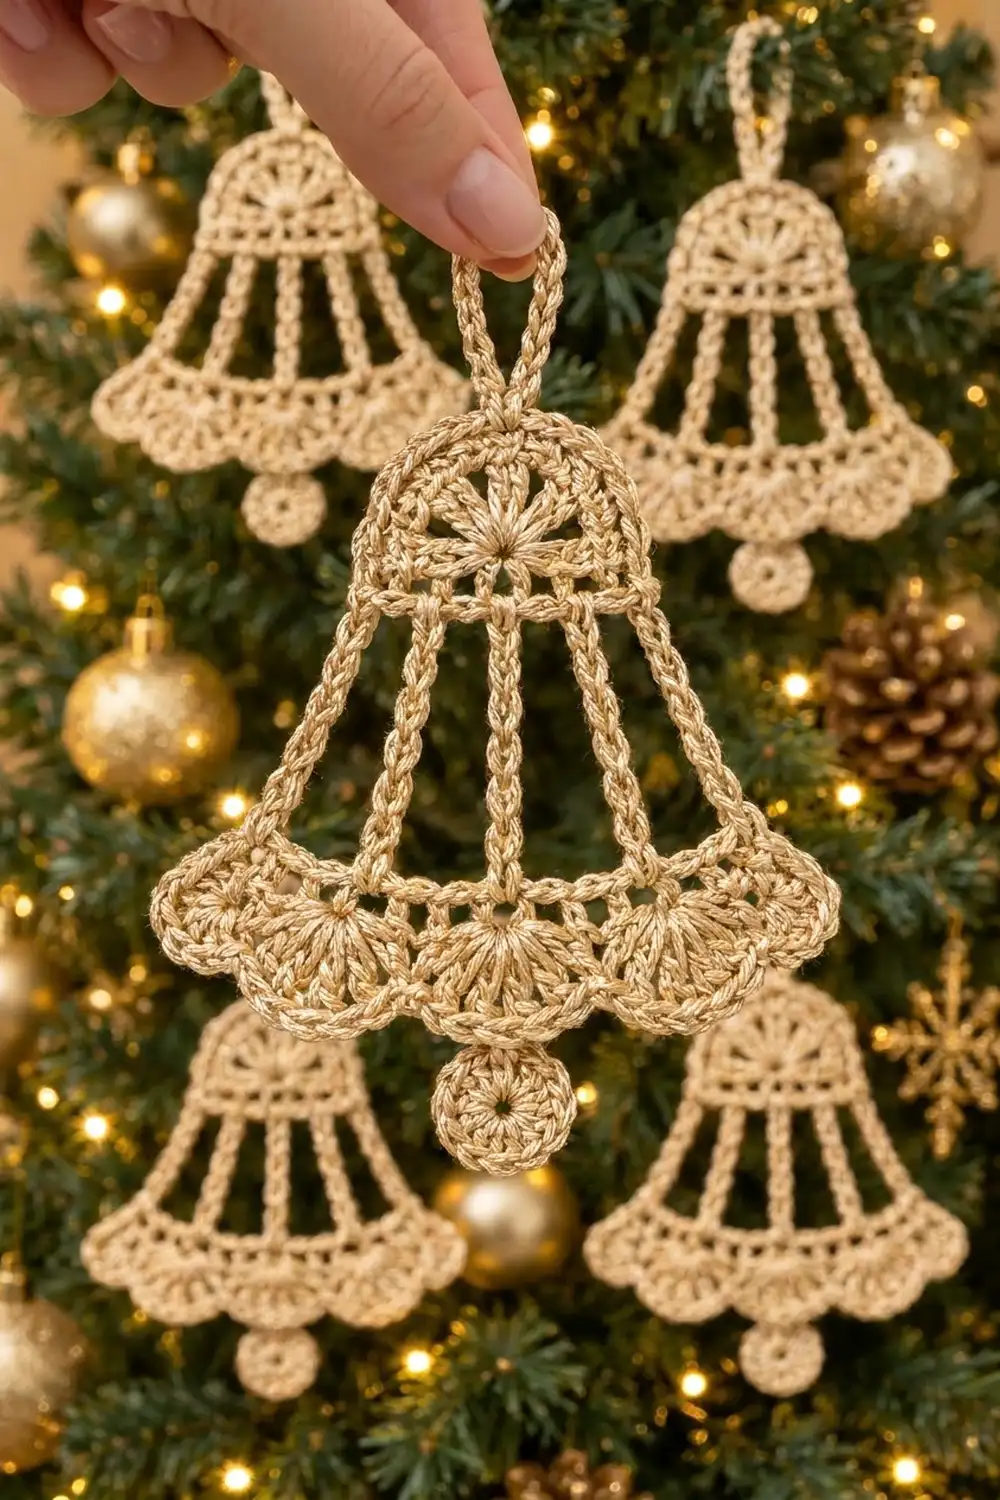
The Golden Chime Bell is a lacy, see-through Christmas ornament with a classic bell shape. A dome of double crochets fans out from a tiny center hole at the top. Below it, an open body with thick cord-like sides flares out to a mesh band and a row of five scalloped shells. A small round clapper hangs from the center, and a sturdy loop at the top lets it hang from a branch.
It is made in one color, a champagne-gold metallic thread. The style is airy and vintage-inspired, a bit like the wire-and-lace bells on old-fashioned trees. Hang one alone, or make several to fill a tree.
This pattern uses US crochet terms. The finished bell body is 5 in (12.7 cm) wide and 5 in (12.7 cm) tall. With the loop and clapper, the whole ornament is about 7.25 in (18.4 cm) long.
The bell is made as one continuous piece. First you work the dome in rows from a center ring. Then you crochet a chain frame for the body and cover it with single crochets, adding the two inner bars as you go. Next comes the mesh band, followed by the scalloped edge. The clapper and the hanging loop are crocheted on at the end.
Finished Size and Construction
- Finished size (bell body): 5 in (12.7 cm) wide × 5 in (12.7 cm) tall
- Overall length with loop and clapper: 7.25 in (18.4 cm)
- Skill level: Intermediate (you need to count carefully and work into chains)
- Terminology: US crochet terms
- Yarn weight: Sport weight (#2), metallic
- Hook: 2.75 mm (C-2)
- Number of pieces: 1. The loop and clapper are crocheted on, not sewn.
- Layout: Single ornament, nothing to join
- Piece size before border: 4.75 in (12.1 cm) wide × 4.25 in (10.8 cm) tall
- Border (scalloped hem) depth: 0.75 in (1.9 cm)
Materials
Yarn: Use a sport-weight metallic or cotton-metallic blend with a firm twist. Cotton blends hold the lace shape best after starching. Fuzzy or very slippery yarns will hide the chain texture.
- Champagne Gold: 15 g, about 55 m (60 yd), enough for one ornament
These amounts include about a 30% margin for your gauge swatch and any ripping back.
Tools:
– 2.75 mm (C-2) crochet hook
– Tapestry needle
– Scissors
– 4 stitch markers
– Blocking mat and rust-proof pins
– Fabric stiffener or heavy spray starch
Abbreviations (US Terms)
- ch – chain
- sl st – slip stitch
- sc – single crochet
- dc – double crochet
- sk – skip
- st(s) – stitch(es)
- sp – space
- RS / WS – right side / wrong side
- [ ] × N – repeat the bracketed steps N times
Special technique – Bar return: After you chain a bar and attach it with a sl st, work 1 sl st into the back bump of each bar chain, going back down to where the bar started. This makes the bar a thick, twisted cord instead of a thin chain.
Gauge and Checkpoints
Gauge: 13 sc = 2 in (5.1 cm), and 13 ch = 2 in (5.1 cm) when worked loosely. Chain gauge matters here because the body frame is built from chains.
Test piece first: Work the dome (Rows 1–5) and measure it before going on. It is small, quick, and shows both your stitch gauge and your chain gauge.
Checkpoints:
– After Row 3: The straight edge measures 1.75 in (4.4 cm).
– After Row 4: The dome is 2 in (5.1 cm) wide and 1 in (2.5 cm) tall.
– After Row 5: The base bar has 13 sc and measures 2 in (5.1 cm).
– After Round 7: The hem line has 31 sc and measures 4.75 in (12.1 cm).
– After Row 10: The bell body is 5 in (12.7 cm) wide and 5 in (12.7 cm) tall.
Too big? Go down to a 2.5 mm hook, or chain more tightly. Too small? Go up to a 3.0 mm hook. Never add or remove stitches, because the scallop count depends on exact numbers.
Dome
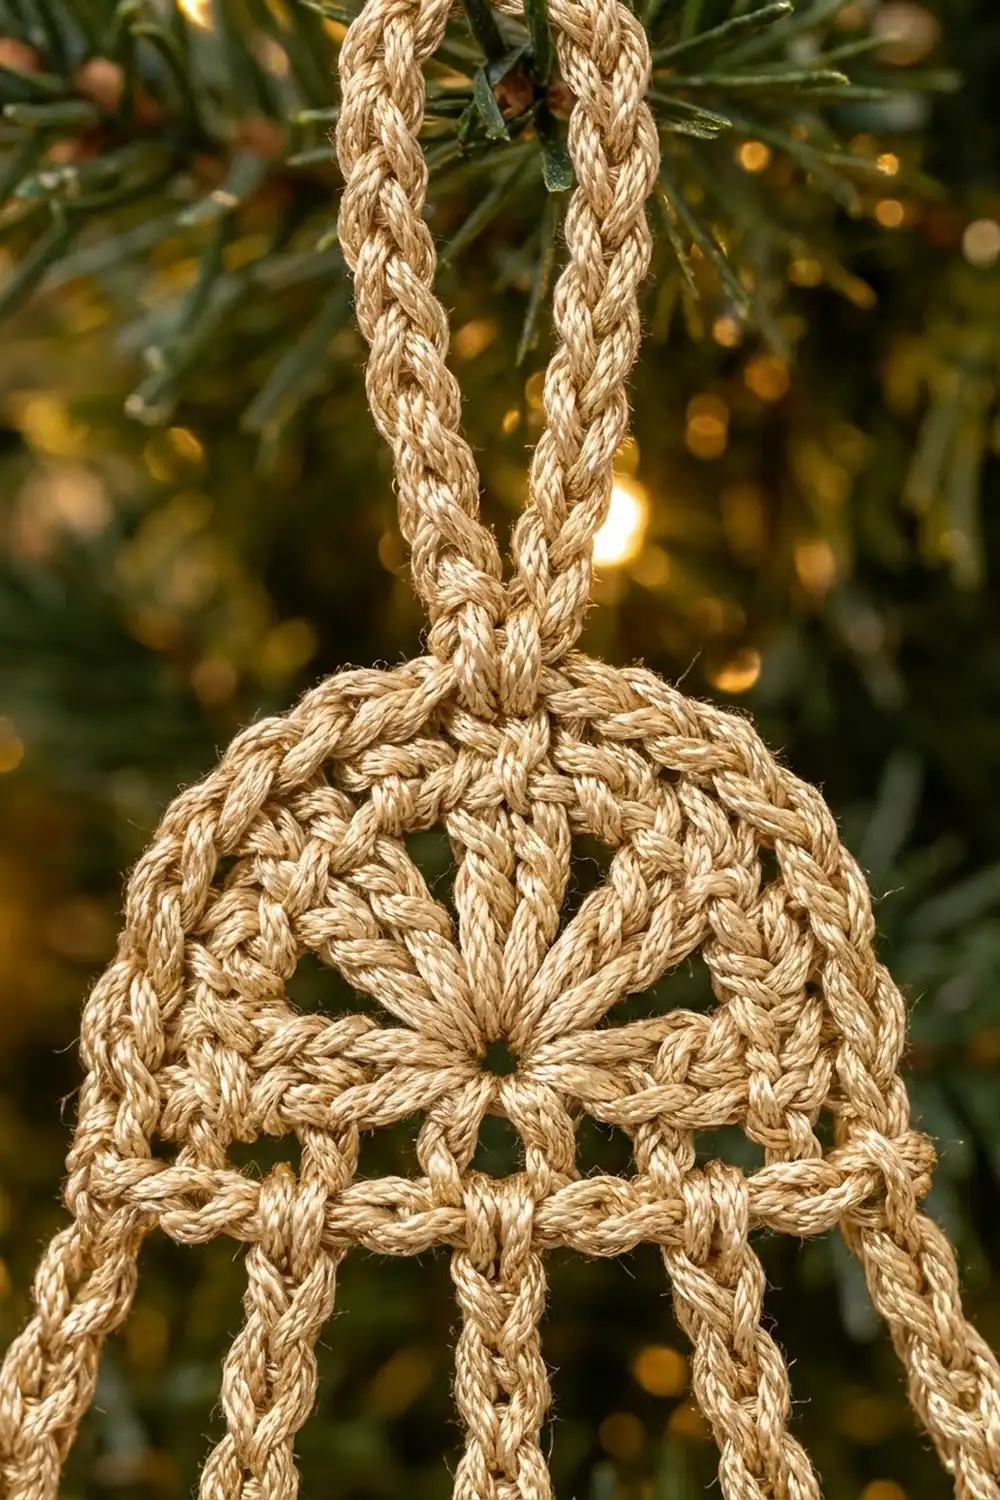
Row 1 (RS): Make a magic ring. Ch 3 (counts as dc), work 8 dc into the ring. Pull the ring snug but leave a small center hole. Do not join. Turn. (9 dc, fanned in a half circle)
Row 2 (WS): Ch 3 (counts as dc), dc in the same st, then work 2 dc in each st across. Turn. (18 dc)
Row 3 (RS): Ch 3 (counts as dc), dc in the same st, dc in the next 2 sts. Then [2 dc in the next st, dc in the next 2 sts] × 5. Turn. (24 dc)
The straight edge should now measure 1.75 in (4.4 cm).
Row 4 (WS): Ch 1, sc in each st across. Do not turn. (24 sc)
This sc row is the outline around the curved top of the dome. Mark sc 12 and sc 13, because the hanging loop goes there later.
Row 5 (RS) – Base bar: Rotate the piece so you can work along the straight edge of the dome. Ch 1. Work across the row ends as follows: 1 sc in the end of Row 4, 2 sc in the end of Row 3, 2 sc in the end of Row 2, and 1 sc in the end of Row 1. Then work 1 sc into the center of the magic ring. Repeat the row ends in reverse: 1 sc in Row 1, 2 sc in Row 2, 2 sc in Row 3, and 1 sc in Row 4. (13 sc: 6 + 1 + 6)
Number the base-bar stitches 1 to 13, starting with the first one you made. Your hook is now at st 13. Place markers in st 5 and st 9, where the inner bars will attach.
Checkpoint: The base bar is 2 in (5.1 cm) wide and the dome is 1.25 in (3.2 cm) tall, base bar included.
Body Frame
Round 6 – Chain frame: Do not turn. Make loose chains, as follows:
– Ch 17 for Leg A, which hangs down from st 13.
– Ch 31 more for the hem chain.
– Ch 17 more for Leg B.
– Sl st into base-bar st 1.
You now have a closed trapezoid made of the base bar, two legs, and the hem chain. (65 ch: 17 + 31 + 17)
Lay the piece flat. Leg A should slant out to the right and Leg B out to the left. The hem chain should hang about 2.25 in (5.7 cm) below the base bar.
Round 7 – Covering the frame: Ch 1, then work into the chains as follows.
- Leg B: Sc in each of the 17 ch. (17 sc)
- Hem, part 1: Sc in each of the first 11 hem ch. Count these as hem sts 1–11.
- Inner bar 1: Ch 15. Sl st into the marked base-bar st 5. Work the bar return: sl st into the back bump of each of the 15 bar ch, back down to the hem.
- Hem, part 2: Sc in each of the next 10 hem ch (hem sts 12–21).
- Inner bar 2: Ch 15, sl st into marked base-bar st 9, then work the bar return over the 15 ch.
- Hem, part 3: Sc in each of the remaining 10 hem ch (hem sts 22–31).
- Leg A: Sc in each of the 17 ch.
- Sl st into base-bar st 13. Fasten off.
(Total: 17 + 31 + 17 = 65 sc, plus 2 bars of 15 ch each)
How the bars line up: On the base bar, sts 1, 5, 9, and 13 are each 4 sts apart. On the hem, sts 1, 11, 21, and 31 are each 10 sts apart. This means the three open windows flare evenly from top to bottom.
Checkpoint: The hem measures 4.75 in (12.1 cm). Both inner bars should lie flat and straight. A bar that bows needs a tighter chain, and a bar that pulls the hem upward needs a looser one.
Hem Band
Turn the piece so the hem line is at the top. With the RS facing, join the yarn in hem st 1, at the Leg B corner. Work into the free loops along the bottom of the hem sc.
Row 8 (RS): Ch 4 (counts as dc + ch 1). Sk the next st. Then [dc in the next st, ch 1, sk the next st] × 14, and dc in the last st (hem st 31). Turn. (16 dc + 15 ch-1 sps = 31 sts)
Checkpoint: The band is about 0.5 in (1.3 cm) deep, and the piece measures 4.75 in (12.1 cm) × 4.25 in (10.8 cm). This is the size before the border.
Scalloped Border
The border is worked only along the bottom edge. The sides and top get no border.
Border gauge: One scallop uses 6 sts of Row 8, which is about 0.92 in (2.3 cm).
Row 9 (WS) – Shells: Ch 1. Sc in the first dc. Then [sk the next 2 sts, work 7 dc into the next ch-1 sp, sk the next 2 sts, sc in the next dc] × 5. Turn. (5 shells: 35 dc + 6 sc = 41 sts)
Row 10 (RS) – Scallop outline: Ch 1. Sc in the first sc. Then [sc in the next 3 dc, 3 sc in the next dc (the center of the shell), sc in the next 3 dc, sc in the next sc] × 5. Fasten off. (41 sts worked 1-per-st + 10 extra sts at the scallop tips = 51 sc)
Why the math works: Row 8 has 31 sts. Each shell repeat uses 6 sts, plus 1 st to finish the row: 5 × 6 + 1 = 31. That gives exactly 5 shells, and every row starts and ends with a sc on a dc. Shells always land in ch-1 sps (the even-numbered sts) and sc always land on dc (the odd-numbered sts). In Row 10, adding 2 extra sc at each shell’s center rounds the tips without pulling the edge in. The scallops reach about 0.125 in (0.3 cm) past each corner, so the width grows from 4.75 in (12.1 cm) to 5 in (12.7 cm). The border adds 0.75 in (1.9 cm) of height, so the bell body ends up 5 in (12.7 cm) tall.
Clapper
Row 10 has 51 sc. The middle one, st 26, is the center sc of the third scallop’s 3-sc tip.
With the RS facing, join the yarn in st 26. Ch 7, then sl st into the 5th ch from the hook to form a ring. This leaves a 2-ch stem.
Rnd 1: Ch 3 (counts as dc), work 13 dc into the ring, and sl st to the top of the ch-3 to join. (14 dc)
Rnd 2: Ch 1, [sc in the next st, 2 sc in the next st] × 7, sl st to the first sc to join. (21 sc)
Fasten off. The disc is about 1 in (2.5 cm) across and hangs about 1 in (2.5 cm) below the scallop tips.
Hanging Loop
With the RS facing, join the yarn in marked dome sc 12. Ch 18, then sl st into sc 13. Ch 1, work 24 sc into the ch-18 loop, and sl st into sc 12. Fasten off.
The loop stands 1.25 in (3.2 cm) above the dome. Weave in all ends along the legs or the hem line, where they won’t show through the open windows.
Final Blocking
- Wet the ornament with a mix of fabric stiffener and water, or soak it and then spray it heavily with starch.
- Gently squeeze out the extra liquid. Do not wring it.
- Lay the bell RS up on the blocking mat.
- Pin the dome into a smooth half circle and the base bar into a straight line 2 in (5.1 cm) wide.
- Pin the hem line straight at 4.75 in (12.1 cm).
- Pin both legs and both inner bars as straight lines from the base bar to the hem.
- Pin each scallop tip so the edge measures 5 in (12.7 cm) across.
- Pin the clapper into a flat circle and the loop into a neat oval.
- Let it dry completely, usually 24 hours.
Final Quality-Control Checklist
- [ ] The dome has 24 sc around the curve and 13 sc across the base bar.
- [ ] Legs A and B each have 17 sc.
- [ ] The hem has 31 sc, with bars at hem sts 11 and 21.
- [ ] The bars attach at base-bar sts 5 and 9.
- [ ] Row 8 has 16 dc posts.
- [ ] There are exactly 5 shells, each with 7 dc.
- [ ] Row 10 has 51 sc.
- [ ] The clapper is centered on st 26.
- [ ] The loop is centered between sc 12 and 13.
- [ ] The body measures 5 in × 5 in (12.7 cm × 12.7 cm).
- [ ] All ends are hidden and the bell hangs straight.
Troubleshooting
The dome cups or ruffles. In Row 2 or 3 your gauge is off. Change your hook size; do not change the stitch counts.
The hem curves upward between the legs. Your Round 6 chains are too tight. Rework them more loosely, or chain with a hook one size larger.
The inner bars sag. Your bar chains are too loose. Use a tighter chain tension for those 15 ch only.
Six shells, or one shell is lopsided. Your Row 8 count is off. Make sure there are exactly 31 sts (16 dc + 15 sps).
The bell tilts when it hangs. The loop or clapper is off-center. Recount Row 4 and Row 10 to find the true middle stitch.
The scallops flop. The ornament needs more stiffener. Re-wet it and block it again.
Care
Spot clean only, with a damp cloth. Store the bell flat in tissue paper so the scallops and loop keep their shape.
Final Notes
Every measurement depends on the one before it. The dome measures 1.75 in (4.4 cm) after Row 3 and 2 in (5.1 cm) after Row 4. The 13-sc base bar is 2 in (5.1 cm) wide, and the 17-ch legs give a body 2.25 in (5.7 cm) deep. The 31-sc hem is 4.75 in (12.1 cm) wide, and the piece is 4.25 in (10.8 cm) tall before the border. The border adds 0.75 in (1.9 cm) of scallops, which brings the finished bell to 5 in × 5 in (12.7 cm × 12.7 cm), or 7.25 in (18.4 cm) long with the loop and clapper. If you check each stage before moving on, the bell will come out the right size.
Happy crocheting!