

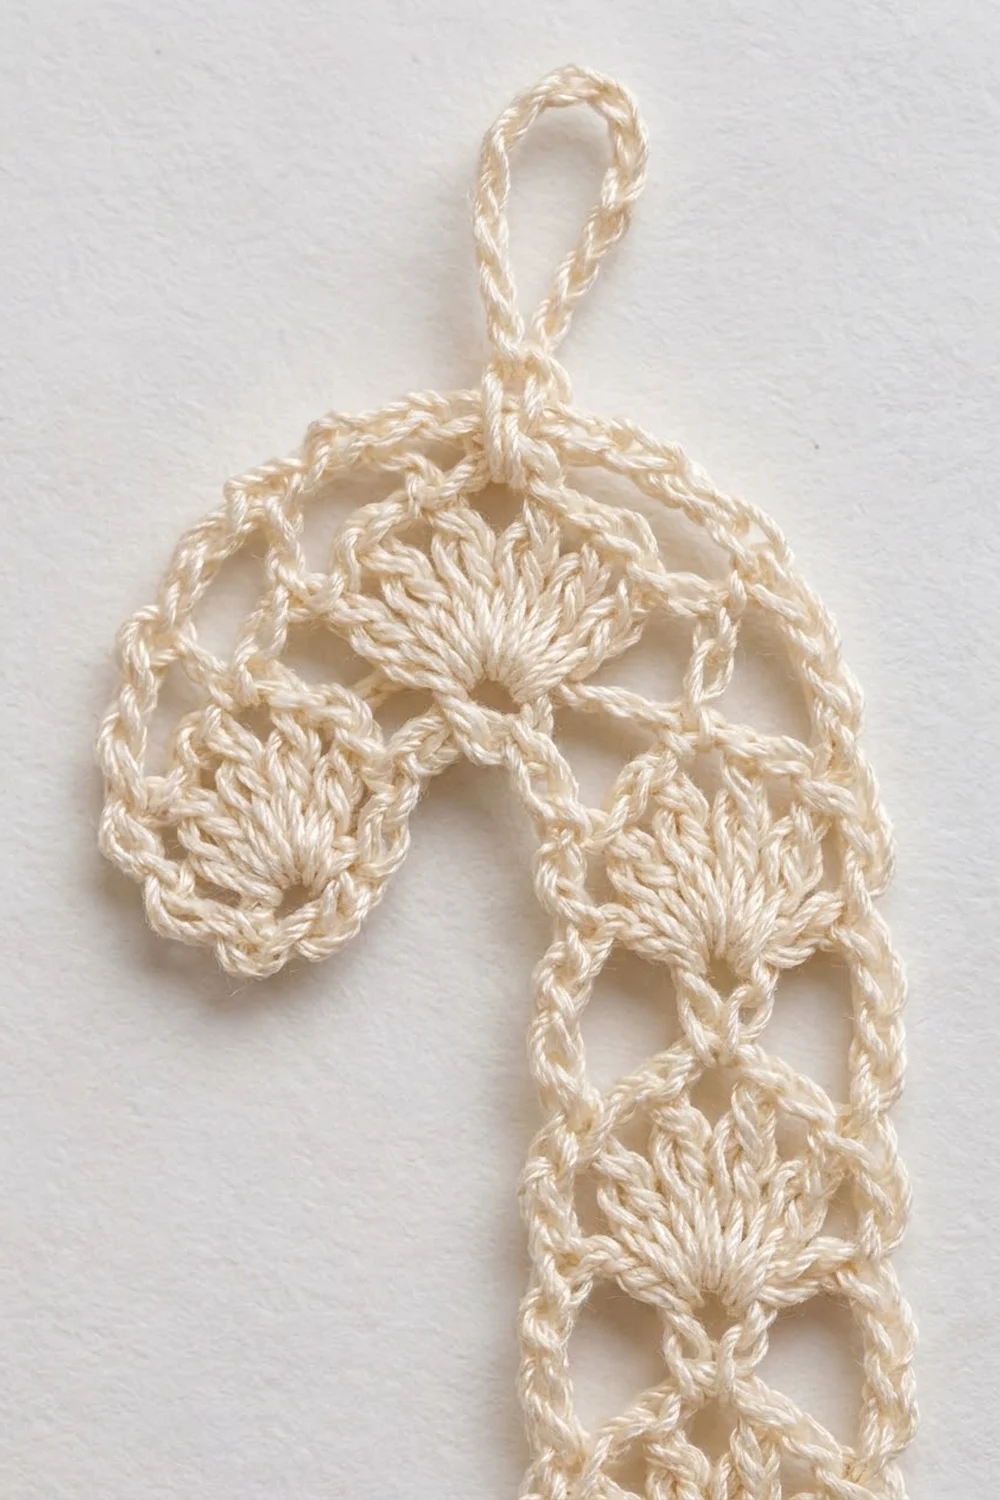
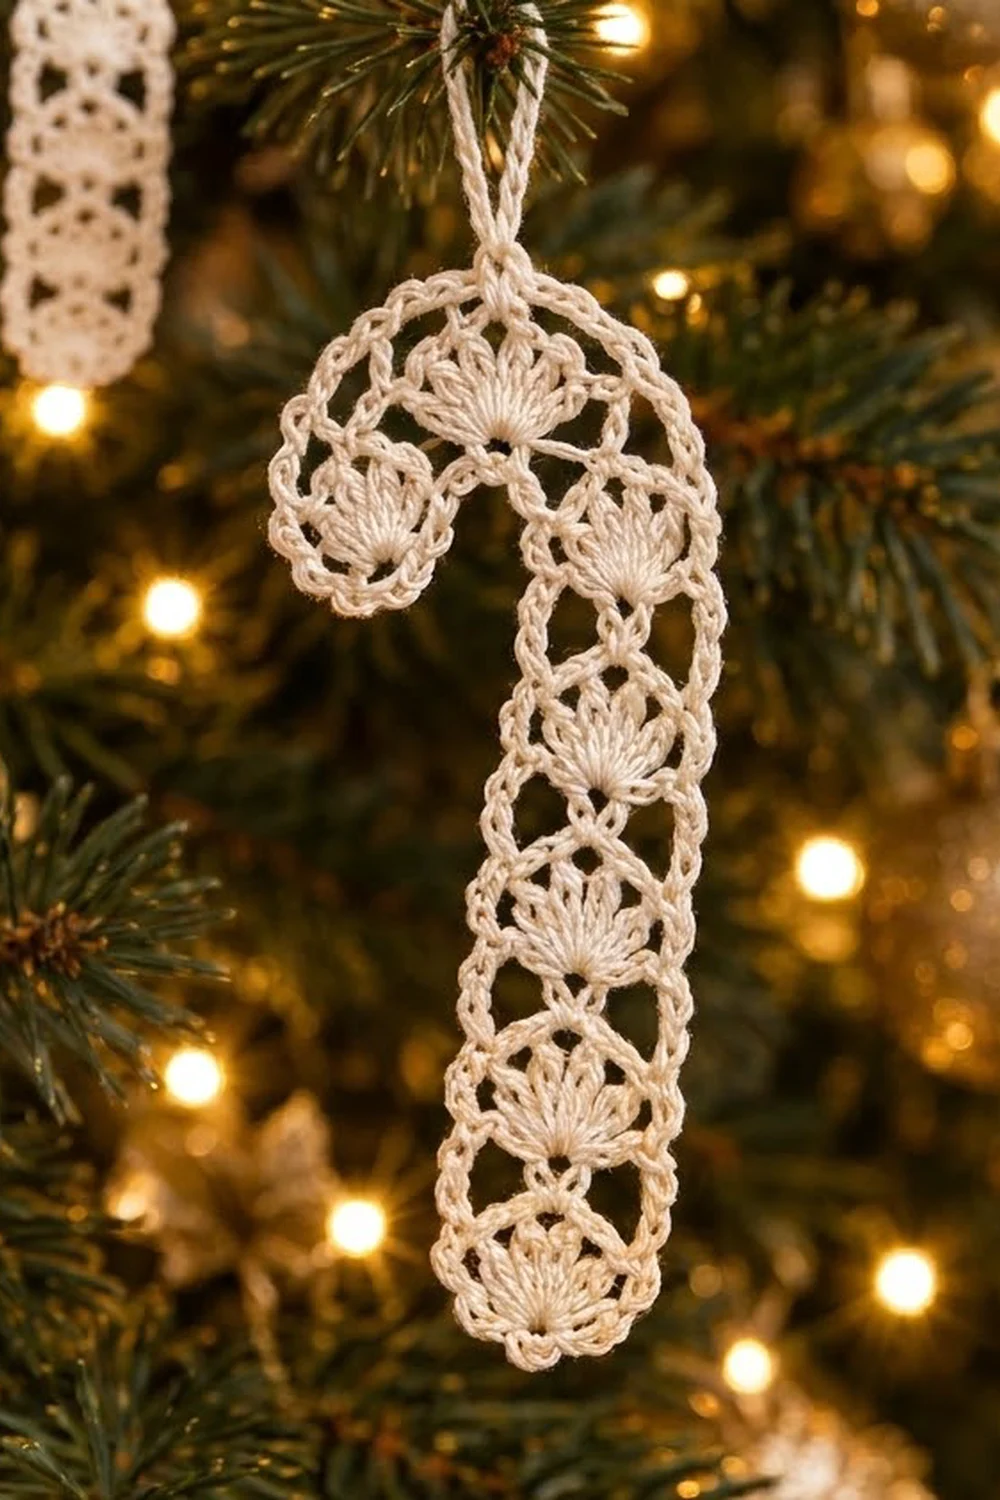
This little lace candy cane is a quick, elegant tree ornament worked in fine cotton thread. Small fans of double crochet are stacked inside a frame of chain arches, so the openwork looks like frost on a window. The edge is a soft line of tiny chain loops, and a slim chain hanger sits at the top of the curve.
The ornament is made in a single cream or ivory color for a vintage, heirloom look. It also looks great in pure white, pale gold, or soft red. All instructions use US crochet terms.
The finished ornament measures about 5.5 in (14.0 cm) tall and 3 in (7.6 cm) wide across the hook. The shaft is 1.5 in (3.8 cm) wide.
The ornament is one single piece. You crochet a narrow strip in short rows from the bottom up. Each row of tall-stitch “posts” holds a center fan, and the next row adds chain arches. In the hook section, one edge gets taller stitches than the other, and that curves the strip over the top. A rounded fan finishes the tip, and one round of chain loops outlines everything. Blocking sets the final curve.
Finished Size and Construction
- Finished size: 5.5 in (14.0 cm) tall x 3 in (7.6 cm) wide overall
- Shaft width: 1.5 in (3.8 cm) after the border
- Skill level: Intermediate (thread work, simple shaping)
- Terminology: US crochet terms
- Yarn weight: Lace (size 10 crochet cotton thread)
- Hook: 1.75 mm steel hook
- Number of pieces: 1
- Layout: Single strip, shaped into a candy cane
- Size before border: 5.25 in (13.3 cm) tall x 2.75 in (7.0 cm) wide, shaft 1.25 in (3.2 cm) wide
- Border depth: about 0.125 in (0.3 cm) on each edge
Materials
Thread: Use mercerized size 10 cotton crochet thread. It holds a crisp shape, shows stitch detail clearly, and takes starch well. Avoid fuzzy or very soft thread, because the fans and diamond openings will lose definition.
- Cream / ivory: 5 g, about 25 m (27 yd) per ornament
The amount includes a comfortable margin for your gauge swatch and the hanging loop. If you plan to make a set of ornaments, one standard ball of size 10 thread is enough for many.
Tools:
– 1.75 mm steel crochet hook
– Fine tapestry needle or beading needle with a large eye
– Small sharp scissors
– Rustproof pins and a foam blocking board
– Spray bottle, plus spray starch or a stiffener (optional)
– Paper and pencil to draw a blocking template
Abbreviations (US Terms)
- ch – chain
- sl st – slip stitch
- sc – single crochet
- hdc – half double crochet
- dc – double crochet
- tr – treble crochet (yarn over twice)
- dtr – double treble crochet (yarn over 3 times)
- sp – space
- sk – skip
- st(s) – stitch(es)
Special stitch – dtr (double treble): Yarn over 3 times, insert the hook in the stitch, yarn over and pull up a loop (5 loops on hook). [Yarn over, pull through 2 loops] 4 times.
Fan: 7 dc worked into one stitch (9 dc for the bottom and tip fans).
Gauge and Checkpoints
Gauge matters less than for a garment, but it controls how well the hook curves. Work Rows 1–4 first as a test and measure them unblocked.
Gauge: Rows 1–4 = 1.25 in (3.2 cm) wide x 1 in (2.5 cm) tall. Each later 2-row cell adds about 0.55 in (1.4 cm).
Checkpoints:
– After Row 4: 1.25 in (3.2 cm) wide, 1 in (2.5 cm) tall
– After Row 14 (end of shaft): about 3.75 in (9.5 cm) tall
– After Row 23 (before border): 5.25 in (13.3 cm) tall x 2.75 in (7.0 cm) wide
– After the border and blocking: 5.5 in (14.0 cm) x 3 in (7.6 cm)
If your piece is too big, go down to a 1.5 mm hook. If it is too small or stiff, go up to a 2.0 mm hook. Keep the chain arches loose enough to lie flat over the fans. Tight arches will make the strip pucker.
Pattern
The strip is worked in turned rows. Fan rows (odd rows) always begin at the same edge, called Edge A. Arch rows (even rows) always begin at Edge B. In the hook, Edge A becomes the outer curve.
Bottom Fan
Row 1: Ch 6, sl st in first ch to form a ring. Ch 3 (counts as dc), 8 dc in ring. Turn. (9 dc)
This semicircle of dc forms the rounded bottom of the cane.
Row 2 (arch row): Ch 1, sc in first dc, ch 5, sk 3 dc, sc in next dc (center dc), ch 5, sk 3 dc, sc in top of ch-3. Turn. (3 sc, 2 ch-5 arches)
Shaft
Row 3 (fan row): Ch 5 (counts as tr + ch 1), 7 dc in center sc, ch 1, tr in last sc. Turn. (2 tr, 7 dc, 2 ch-1 sps)
The fan stands on the center sc. The ch-5 arches from the row below sit to each side and frame the diamond-shaped openings.
Row 4 (arch row): Ch 1, sc in first tr, ch 5, sk ch-1 sp and 3 dc, sc in next dc (center dc of fan), ch 5, sk 3 dc and ch-1 sp, sc in 4th ch of turning ch-5. Turn. (3 sc, 2 ch-5 arches)
Rows 5–14: Repeat Rows 3–4 five more times.
At the end of Row 14 you have the bottom fan plus 6 shaft fans. Checkpoint: the shaft is about 3.75 in (9.5 cm) tall and 1.25 in (3.2 cm) wide.
Hook Curve
In these rows, Edge A gets tall dtr posts and long arches, while Edge B gets short hdc posts and short arches. That makes each cell wedge-shaped, so the strip turns toward Edge B.
Row 15 (wedge fan row): Ch 6 (counts as dtr + ch 1), 7 dc in center sc, ch 1, hdc in last sc. Turn. (1 dtr, 7 dc, 1 hdc, 2 ch-1 sps)
Row 16 (wedge arch row): Ch 1, sc in hdc, ch 3, sk ch-1 sp and 3 dc, sc in center dc, ch 6, sk 3 dc and ch-1 sp, sc in 5th ch of turning ch-6. Turn. (3 sc, 1 ch-3 arch, 1 ch-6 arch)
Rows 17–20: Repeat Rows 15–16 two more times. (3 wedge cells total)
Checkpoint: the strip should now turn about 180 degrees over the top and point downward, parallel to the shaft. If it curls less, tighten the hdc posts slightly. If it cups, loosen the ch-6 arches.
Hook Leg and Tip
Row 21: Work as Row 3. (2 tr, 7 dc, 2 ch-1 sps)
Row 22: Work as Row 4. (3 sc, 2 ch-5 arches)
Row 23 (tip fan): Ch 1, sc in first sc, 9 dc in center sc, sc in last sc. (11 sts: 2 sc, 9 dc) Fasten off.
The 9-dc fan rounds off the end of the hook to match the bottom fan.
Checkpoint before border: 5.25 in (13.3 cm) tall, 2.75 in (7.0 cm) wide overall, shaft 1.25 in (3.2 cm) wide. The piece has 12 fans: 1 bottom, 6 shaft, 3 curve, 1 leg, and 1 tip.
Border
The border is one round of ch-3 loops. Each loop is anchored with an sc worked around a row-end post or into a stitch.
Border gauge: One ch-3 loop covers about 0.18 in (0.5 cm) of edge. This spacing lets the edge lie flat.
Placement rules (one loop = sc, ch 3):
– Each tr row-end: 2 loops
– Each dtr row-end (outer curve): 3 loops
– Each hdc row-end (inner curve): 1 loop
– Each sc row-end on the straight sections and the outer curve: 1 loop
– sc row-ends on the inner curve: skip, so you get 0 loops there
Round 1: With either side facing, join the thread with a sl st around the beginning ch-3 post of Row 1.
- Bottom (Row 1): Ch 1, (sc, ch 3) twice along the ch-3 post, (sc, ch 3) once around the base of the ring, (sc, ch 3) twice along the last dc post. (5 loops)
- Edge A, shaft (Rows 2–14): 6 tr row-ends x 2 loops + 7 sc row-ends x 1 loop. (19 loops)
- Edge A, outer curve (Rows 15–20): 3 dtr row-ends x 3 loops + 3 sc row-ends x 1 loop. (12 loops)
- Edge A, hook leg (Rows 21–22): 1 tr row-end x 2 loops + 1 sc row-end x 1 loop. (3 loops)
- Tip (Row 23): (sc, ch 3) in first sc, then in the 2nd, 4th, 6th, and 8th dc, then in the last sc. (6 loops)
- Edge B, hook leg (Rows 22–21): 1 sc row-end x 1 loop + 1 tr row-end x 2 loops. (3 loops)
- Edge B, inner curve (Rows 20–15): 3 hdc row-ends x 1 loop, skipping the 3 sc row-ends. (3 loops)
- Edge B, shaft (Rows 14–2): 7 sc row-ends x 1 loop + 6 tr row-ends x 2 loops. (19 loops)
Sl st in the first sc to join.
Border total: 5 + 19 + 12 + 3 + 6 + 3 + 3 + 19 = 70 sc and 70 ch-3 loops.
Why the math works: On the shaft, one cell is about 0.55 in (1.4 cm) tall and gets 3 loops, which is one loop about every 0.18 in (0.5 cm). That matches the border gauge, so the straight edges lie flat. The outer curve is much longer than the inner curve, so it gets 4 loops per cell while the inner curve gets 1. This keeps the outside from cupping and the inside from ruffling. Both shaft edges get the same 19 loops, so the shaft stays straight and even. The border adds about 0.125 in (0.3 cm) on each side: 1.25 in + 0.25 in = 1.5 in (3.8 cm) shaft width, and 5.25 in + 0.25 in = 5.5 in (14.0 cm) height.
Hanging Loop
Find the middle loop of the 3 loops on the Row 17 dtr row-end, at the top of the outer curve. Join the thread with a sl st in that loop, ch 15, and sl st in the same loop. Fasten off. The hanger is about 0.75 in (1.9 cm) tall.
Final Blocking
- Draw a template. On paper, draw a candy cane 5.5 in (14.0 cm) tall with a shaft 1.5 in (3.8 cm) wide and a hook 3 in (7.6 cm) across. Place it under clear plastic wrap on your blocking board.
- Wet the piece. Soak it in cool water for a few minutes, then press out the excess water in a towel. Do not wring it.
- Pin the shaft. Pin both shaft edges straight along the template lines, with one pin in every second border loop.
- Shape the curve. Ease the hook around the template curve. Pin each outer loop first, then the inner loops.
- Open the fans. Use a pin tip to fan the dc stitches evenly and open each diamond space.
- Pin the tip and hanger. Round the tip fan and pin the hanging loop straight up.
- Stiffen (optional). Spray lightly with starch or apply a fabric stiffener.
- Dry fully. Leave it pinned until completely dry, usually 12–24 hours.
Final Quality-Control Checklist
- 12 fans in total: 1 bottom, 6 shaft, 3 curve, 1 leg, 1 tip
- Each shaft and leg fan has 7 dc; the bottom and tip fans have 9 dc
- Shaft arches are ch 5; curve arches are ch 3 inside and ch 6 outside
- Border has 70 ch-3 loops, with 19 on each shaft edge
- Shaft is 1.5 in (3.8 cm) wide from top to bottom
- Overall size is 5.5 in (14.0 cm) x 3 in (7.6 cm)
- Hanger is centered at the top of the curve
- All ends are woven in securely and trimmed close
Troubleshooting
The hook won’t curve enough. Pull the hdc posts on Edge B snug, and make sure you skipped the inner sc row-ends in the border. Re-block on the template.
The outer curve ripples. Your dtr stitches may be loose, or your border loops tight. Work the dtr more firmly, or use ch 4 loops on the outer curve only.
The shaft is wider at the top than at the bottom. Check that every fan row has exactly 7 dc. One extra dc widens the strip.
The fans lean to one side. Make sure each fan goes into the center sc, not into an arch.
The border pulls in. Loosen your chains, or go up half a hook size for the border round only.
The diamond openings collapse. Your thread may be too soft. Use mercerized cotton and starch the piece when you block it.
Care
Hand wash in cool water with mild soap, press dry in a towel, and re-block flat. Store flat or hang it away from direct sun so the cream color stays even.
Final Notes
The measurement chain keeps this ornament on track. Rows 1–4 measure 1.25 in (3.2 cm) x 1 in (2.5 cm). The shaft reaches 3.75 in (9.5 cm) by Row 14. Three wedge cells turn the hook, and the piece measures 5.25 in (13.3 cm) x 2.75 in (7.0 cm) before the border. The 70-loop border then brings it to 5.5 in (14.0 cm) x 3 in (7.6 cm), with a 1.5 in (3.8 cm) shaft. Check each stage and the final shape will come out right. Make one for every branch, or tie one onto a gift as a keepsake.
Happy crocheting!