

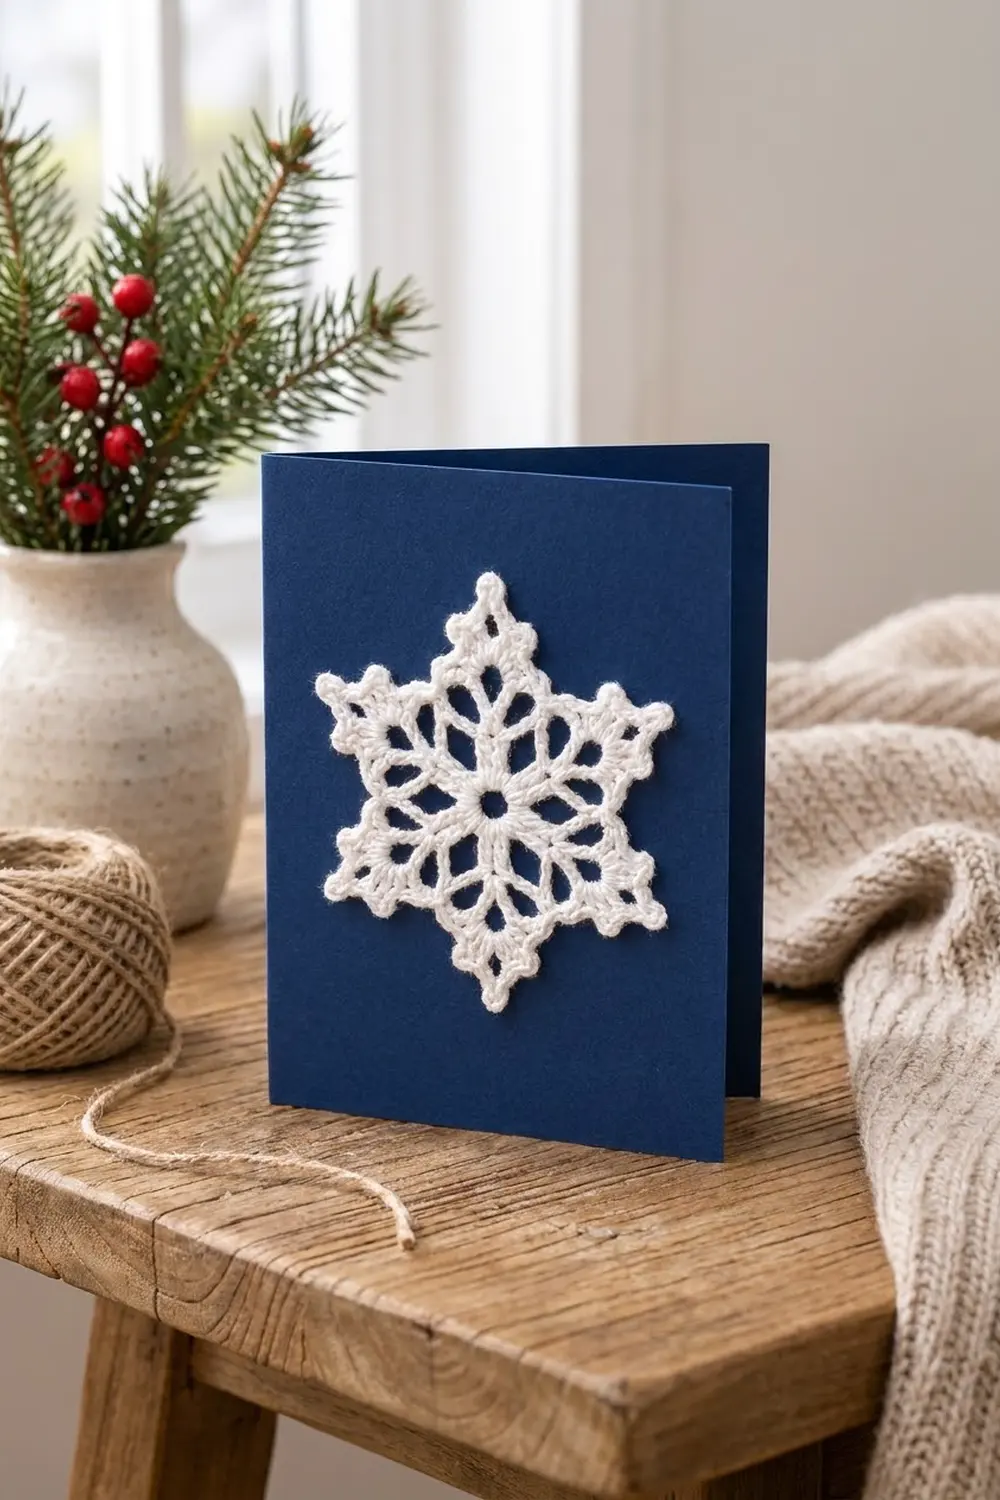
This little snowflake is a single lace motif, six points and a lot of open space, made to sit flat on the front of a handmade holiday card. Crisp white cotton against a deep navy card gives it a clean, wintry look that reads well from across a room.
The design starts from a small open ring. Six open chain petals radiate out from it, a hexagonal chain ring ties the petals together, and six pointed loops form the tips. A final round of single crochet with tiny picots firms up every edge, so the motif holds its shape once blocked.
All instructions use US crochet terms. The finished snowflake measures about 3.5 in (8.9 cm) from point to point and about 3 in (7.6 cm) from valley to opposite valley.
Construction overview: six rounds worked in the round from the center out, with no turning and no separate pieces. Rounds 1–5 build the structure, and Round 6 is the picot edging, which this pattern treats as the border.
Finished Size and Construction
- Finished size: 3.5 in (8.9 cm) point to point; 3 in (7.6 cm) valley to valley
- Skill level: Easy–Intermediate (chain counting matters)
- Terminology: US crochet terms
- Yarn weight: Size 3 crochet cotton thread (light fingering)
- Hook: 2.25 mm (US B-1)
- Number of pieces: 1 (single motif)
- Layout: One six-pointed snowflake, worked in the round
- Piece size: 3.5 in (8.9 cm) point to point after blocking
- Size before border (after Round 5): 3.25 in (8.3 cm) point to point
- Border depth: about 0.125 in (0.3 cm) per edge
Materials
Yarn: Use mercerized cotton crochet thread in size 3. Mercerized cotton has a slight sheen and crisp stitch definition, and it holds a blocked point well. Avoid acrylic, which relaxes and lets the tips droop.
- White: 8 g, about 35 m (38 yd)
The snowflake itself uses roughly 6 g (25 m). The quantity above includes a margin for your gauge swatch, the tails, and one restart.
Tools:
– 2.25 mm (US B-1) crochet hook
– Tapestry needle with a small eye
– Rust-proof pins and a foam blocking mat
– Spray starch or a 1:1 mix of white craft glue and water (optional, for stiffening)
– Spray bottle with water
– Optional for display: folded navy cardstock card, 5 × 7 in (12.7 × 17.8 cm), and clear-drying craft glue
Abbreviations (US Terms)
- ch – chain
- sl st – slip stitch
- sc – single crochet
- dc – double crochet
- sp(s) – space(s)
- st(s) – stitch(es)
- rep – repeat
Special stitches:
– Picot: ch 3, sl st in the 3rd ch from hook.
– Tip picot: ch 4, sl st in the 4th ch from hook. It is slightly larger and marks the very point of each snowflake arm.
Gauge and Checkpoints
This is a single small piece, so the motif is its own gauge swatch. Work Rounds 1 and 2 first and measure before going on.
Checkpoints (measured flat, lightly pressed, before blocking):
– After Round 1: 0.75 in (1.9 cm) across
– After Round 3: about 2 in (5.1 cm) across the hexagon
– After Round 4: about 2.25 in (5.7 cm) across the hexagon
– After Round 5: 3.25 in (8.3 cm) point to point
– After Round 6 and blocking: 3.5 in (8.9 cm) point to point
If too big: go down to a 2 mm hook, or tighten your chains. Loose chains are the most common cause of oversize lace.
If too small: go up to a 2.5 mm hook. Size matters more for card display, because the snowflake should leave at least 0.5 in (1.3 cm) of card showing on each side of a 5 × 7 in (12.7 × 17.8 cm) card.
Pattern
Round 1 – Center Ring
Ch 6, sl st in the first ch to form a ring.
Ch 3 (counts as dc), work 17 dc in the ring, then sl st in the top of the beginning ch-3.
Stitch count: 18 dc.
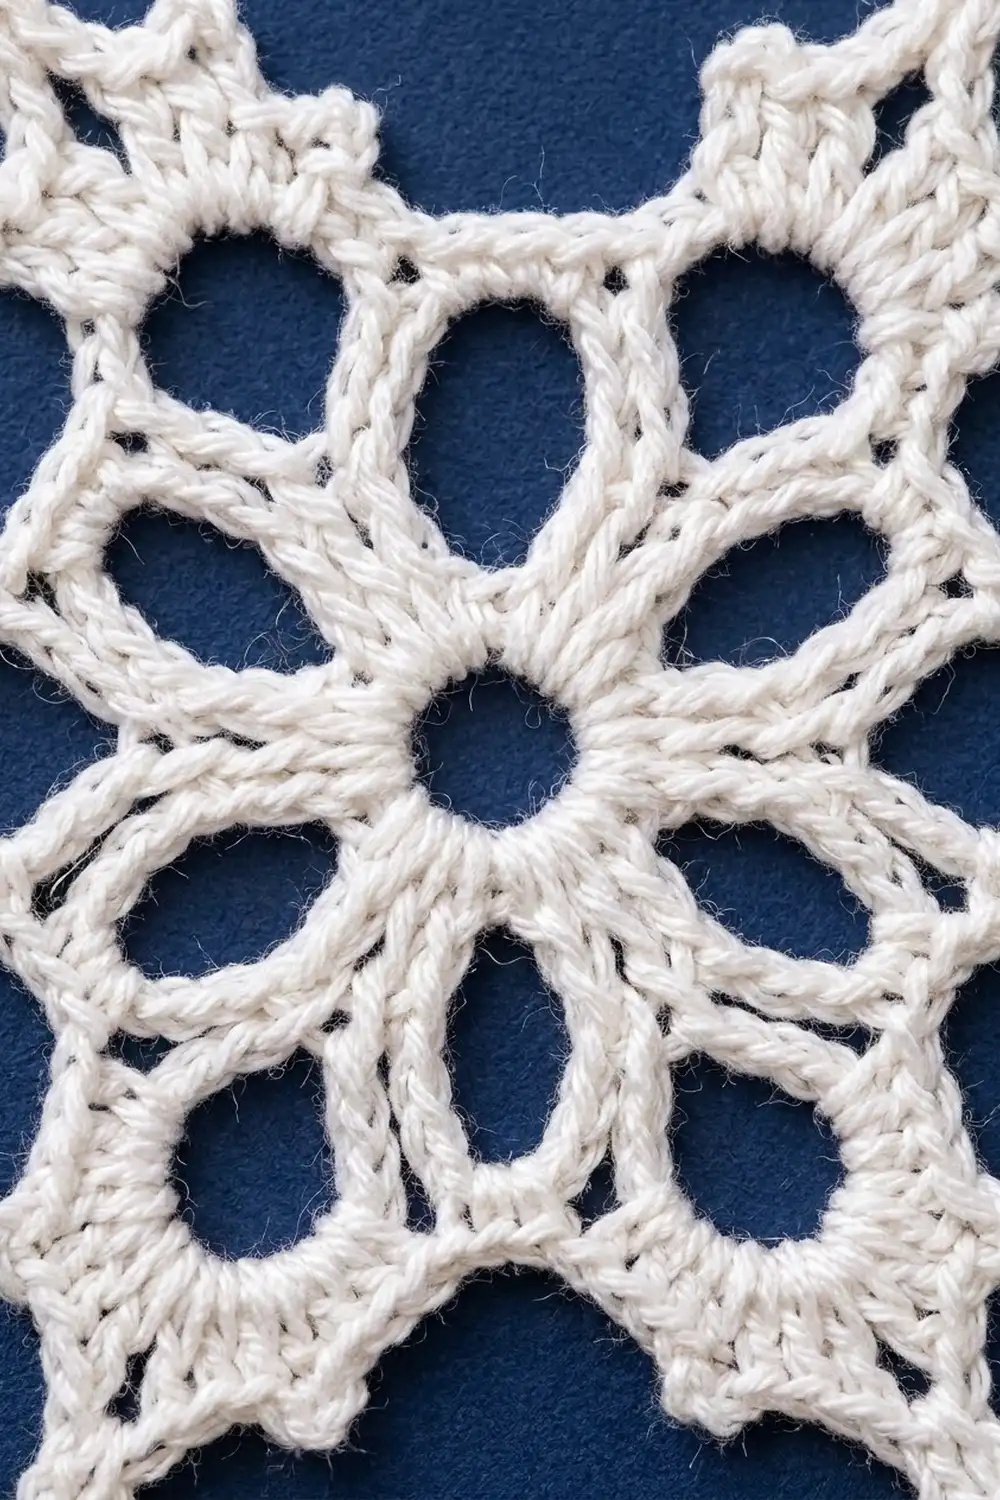
The ring should stay open in the middle, about 0.25 in (0.6 cm) across. This is the small round hole at the center of the snowflake.
Round 2 – Open Petals
Ch 1, sc in the same st as the join, ch 8, skip 2 dc, sc in next dc; rep from * 4 more times, ch 8, skip 2 dc, sl st in the first sc.
Stitch count: 6 sc and 6 ch-8 loops (54 sts total: 6 + 48).
Each ch-8 loop is one open teardrop petal. Neighboring petals share a base sc, so their sides run side by side out from the center and look like six spokes.
Check: 6 sc × 3-st spacing (1 sc + 2 skipped) = 18 sts, which uses every stitch of Round 1.
Round 3 – Hexagon Ring
Sl st in each of the next 4 ch so you are at the center of the first petal loop.
Ch 1, sc in the same ch-8 loop, ch 7, sc in the next ch-8 loop; rep from * 4 more times, ch 7, sl st in the first sc.
Stitch count: 6 sc and 6 ch-7 spaces (48 sts total: 6 + 42).
Each sc anchors a petal tip. The chains stretch across between the petals and form a hexagonal ring. Every petal now points straight out toward where one of the snowflake tips will be.
Round 4 – Solid Hexagon Round (Conversion Round)
Ch 1, sc in the same sc as the join, 7 sc in the next ch-7 sp, sc in the next sc, 7 sc in the next ch-7 sp; rep from * 4 more times, sl st in the first sc.
Stitch count: 6 (1 sc in each existing sc) + 42 (7 sc in each of the 6 ch-7 spaces) = 48 sc.
Think of the round as six sections of 8 sc each. In every section, the first sc sits directly above a petal tip, and this is the point stitch. Counting from the point stitch as position 1, position 5 is the valley stitch.
Round 5 – Points and Valleys
Ch 1. Work the following in each of the six 8-sc sections:
(Sc, ch 9, sc) in the point stitch (position 1), ch 4, skip 3 sc (positions 2–4), sc in the valley stitch (position 5), ch 4, skip 3 sc (positions 6–8); rep from * 5 more times, sl st in the first sc.
Stitch count: 18 sc (3 per section), 6 ch-9 point loops, and 12 ch-4 spaces.
Check per section: 1 point stitch + 3 skipped + 1 valley stitch + 3 skipped = 8 sts, which matches Round 4 exactly.
Each ch-9 loop is anchored at a single stitch, so it hangs out as a narrow loop. You’ll pin it into a sharp point when you block. The ch-4 spaces form the gently scalloped valleys between the points.
Checkpoint: 3.25 in (8.3 cm) point to point when the loops are gently pulled straight.
Border – Picot Edging (Round 6)
Border gauge: With size 3 thread and a 2.25 mm hook, 4 sc fill a ch-4 space snugly and 10 sc fill a ch-9 loop snugly. That works out to roughly 1 sc per chain, plus 1 extra sc in the long loop so its point can turn. If your sc bunch up, use one fewer sc per space; if the chain shows through, add one.
Round 6: Sl st in the first ch-9 loop.
Ch 1. Work the following in each of the six sections:
In the ch-9 point loop work: 4 sc, picot, 1 sc, tip picot, 1 sc, picot, 4 sc. Skip the next sc. In the ch-4 sp work: 2 sc, picot, 2 sc. Sl st in the valley sc. In the next ch-4 sp work: 2 sc, picot, 2 sc. Skip the next sc (the first sc of the next point); rep from * 5 more times, sl st in the first sc. Fasten off, leaving a 6 in (15.2 cm) tail.
Exact counts per section:
– Point loop: 10 sc + 2 picots + 1 tip picot
– Each valley ch-4 space: 4 sc + 1 picot (× 2 = 8 sc + 2 picots)
– Valley: 1 sl st
– Section total: 18 sc, 4 picots, 1 tip picot, 1 sl st
Round total: 108 sc, 24 picots, 6 tip picots, 6 sl sts.
Why the math works: Each point loop has 9 chains, and placing 10 sc on it gives the loop just enough extra length to turn a sharp corner without cupping. The tip picot sits exactly in the middle (5 sc on each side), so the point blocks symmetrically. Each ch-4 space gets 4 sc, a one-to-one fill that keeps the valleys flat. The 2 skipped sc at the base of each point make that point stand slightly proud of the valley, which gives the arms their crisp shape. All six sections are identical, so the motif can’t drift out of symmetry.
The edging adds about 0.125 in (0.3 cm) of depth on every edge, which brings the motif from 3.25 in (8.3 cm) to 3.5 in (8.9 cm) point to point.
Final Blocking
- Weave in the tails. Run the beginning tail through the back of Round 1 and the final tail along the back of the Round 6 sc. Don’t trim them yet.
- Wet the motif. Dip it in cool water and press out the excess in a towel. Don’t wring it.
- Stiffen (optional). For a card motif, soak it briefly in a 1:1 mix of craft glue and water, or spray it with starch after pinning.
- Pin the center. Put one pin through the center ring into the mat.
- Pin the six tips. Pin each tip picot outward so that opposite tips are 3.5 in (8.9 cm) apart. Use a printed or drawn hexagon guide if you have one.
- Pin the valleys. Pin each valley sl st inward so that opposite valleys are 3 in (7.6 cm) apart.
- Open the petals. Slide a pin into each of the six Round 2 petal loops and ease it into a teardrop shape.
- Pin the picots. If you want extra crispness, pin each small picot outward.
- Dry fully. Allow 6–12 hours, then unpin and trim the tails close.
- Mount (optional). Put small dots of clear-drying craft glue on the back of the Round 4 hexagon and the six points. Center the motif on the card front and press it down for 1 minute.
Final Quality-Control Checklist
- Center ring is open and round, about 0.25 in (0.6 cm) across
- All 6 petal loops are open and equal in size
- Round 4 has exactly 48 sc
- Round 5 has 6 point loops and 12 ch-4 spaces
- Every point loop has 10 sc with the tip picot centered
- 30 picots in total (24 small + 6 tip)
- Point to point: 3.5 in (8.9 cm)
- Valley to valley: 3 in (7.6 cm)
- Motif lies completely flat with no ruffling or cupping
- Tails are secure and invisible from the front
Troubleshooting
The motif cups like a bowl. Your chains are too tight compared with your sc. Loosen the Round 2 and Round 3 chains, or go up half a hook size for the chain rounds only.
The motif ruffles. The chains are too loose, or you added extra sc. Recount Round 4 (48) and Round 6 (18 sc per section).
The points are rounded, not sharp. Pin the tip picots harder while the motif is damp, and use starch. Also check that you skipped the sc on both sides of each point loop in Round 6.
The center hole closed up. The ch-6 ring was pulled too tight. Restart and keep Round 1 dc relaxed.
The points are uneven. Count the sc on each side of every tip picot. You should have 5 on each side (4 sc, picot, 1 sc).
The petals look twisted. Make sure each ch-8 is not twisted before you work the sc. Lay the chain flat as you go.
Care
Hand wash in cool water and lay flat to dry, re-pinning the tips if you need to. If the snowflake is glued to a card, dust it gently and keep it away from moisture.
Final Notes
Here is the measurement chain from center to edge. Round 1 is 0.75 in (1.9 cm). The Round 3 hexagon is about 2 in (5.1 cm), and Round 4 is 2.25 in (5.7 cm) with 48 sc. Round 5 reaches 3.25 in (8.3 cm) point to point. The Round 6 picot border adds 0.125 in (0.3 cm) per edge, for a finished snowflake of 3.5 in (8.9 cm) from tip to tip.
Keep the six sections identical and block firmly, and you’ll have a snowflake that sits crisply on the front of any holiday card.
Happy crocheting!