

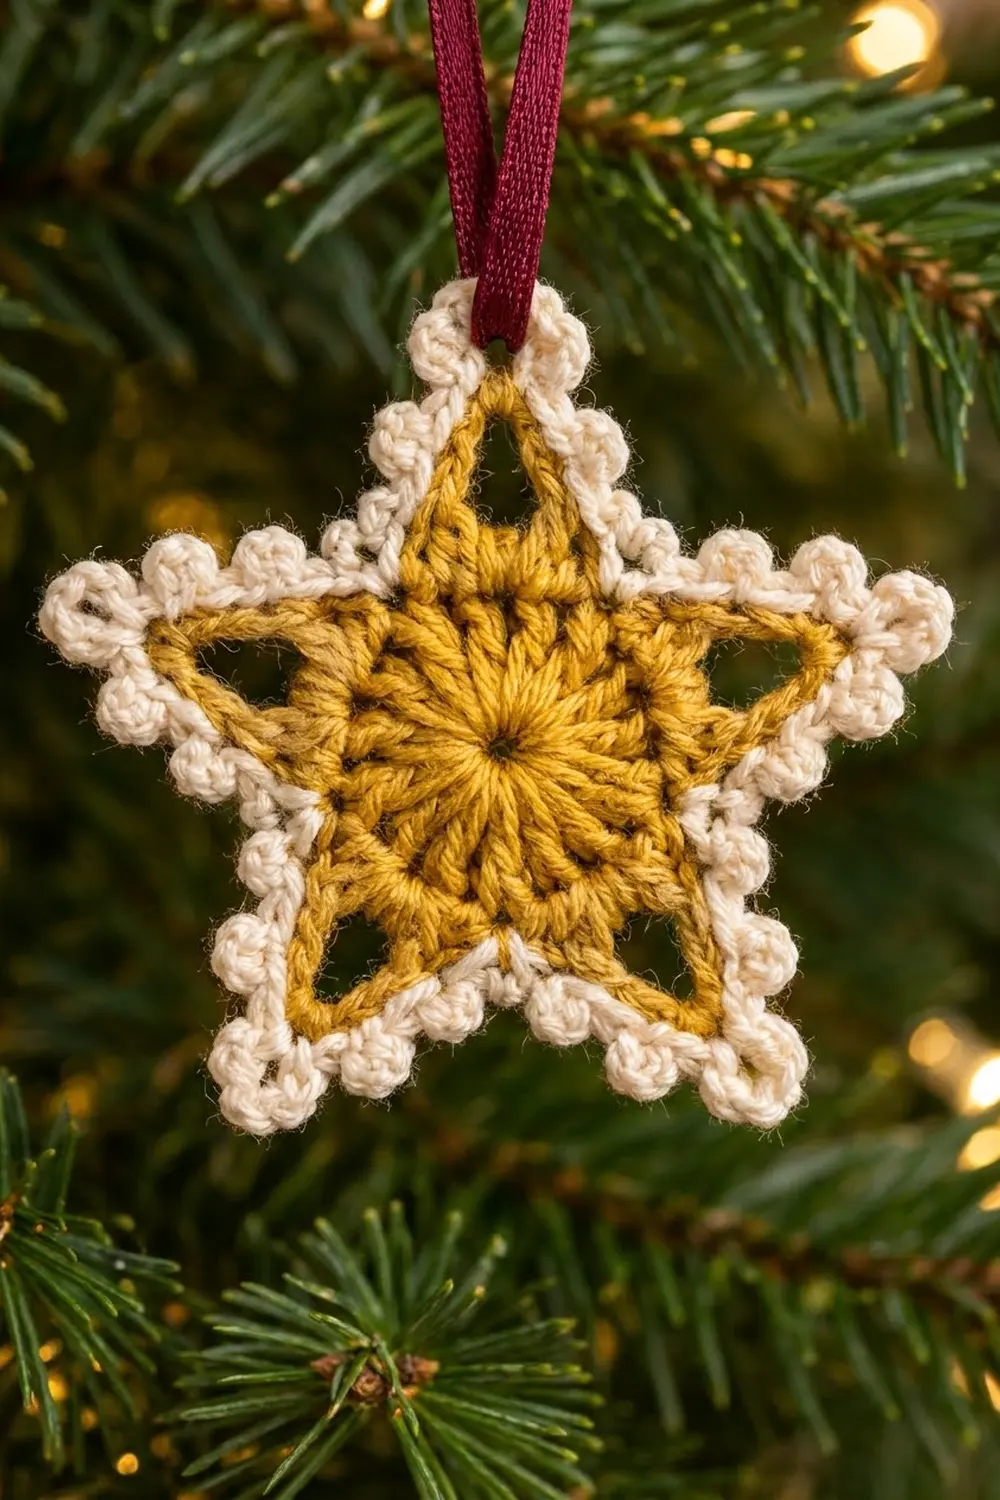
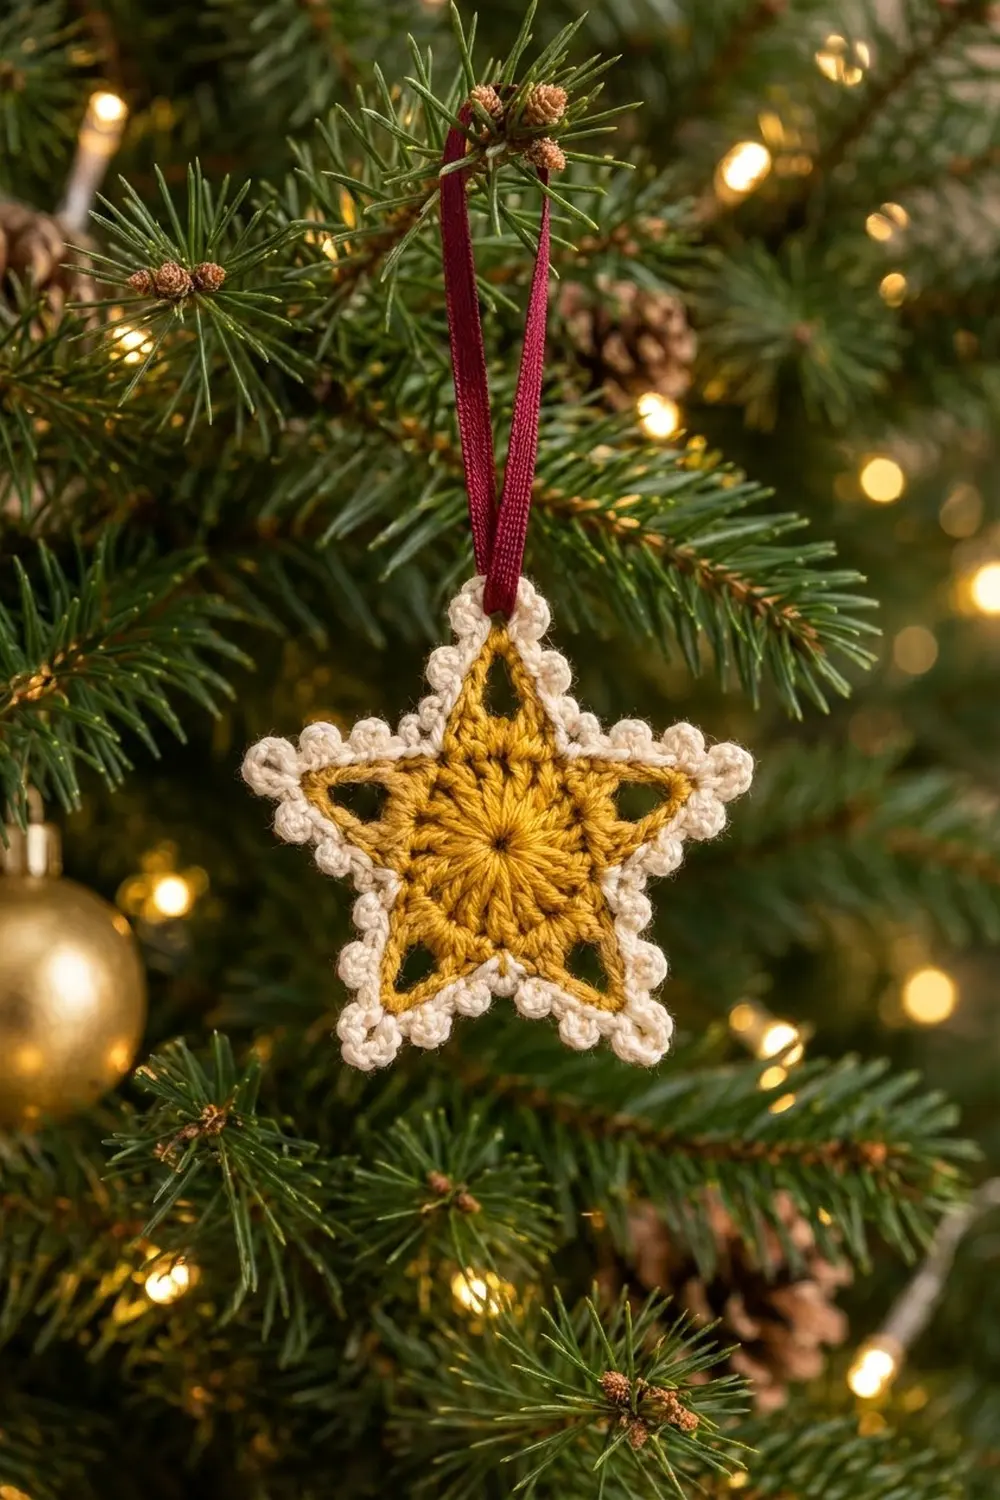
The Golden Glow Star is a small, lacy Christmas ornament. It has a solid gold center, five open triangle windows and a cream picot edge, so it looks a bit like a cookie. When it hangs on the tree, light shows through the windows and the picot edge catches the light.
It uses two colors: mustard gold for the star and cream for the border. A short burgundy satin ribbon makes the hanger. The style is classic and cozy and suits a traditional tree, gift tags or a window display.
The pattern uses US crochet terms. The finished star is about 3.5 in (8.9 cm) from tip to tip.
You work the whole ornament in the round as one piece. First you make a double crochet circle. Next you add chain loops that become the points and windows, then firm the points with a round of gold single crochet. Last, you add two cream rounds: a single crochet round, then a picot round. There is no sewing or joining.
Finished Size and Construction
- Finished size: 3.5 in (8.9 cm) tip to tip
- Skill level: Easy-intermediate
- Terminology: US terms
- Yarn weight: Sport weight (#2), mercerized cotton recommended
- Hook: 2.75 mm (US C-2)
- Number of pieces: 1
- Layout: Single five-pointed star motif
- Piece size: 3.5 in (8.9 cm) tip to tip
- Size before border: 2.75 in (7.0 cm) tip to tip after Round 4
- Border depth: about 3/8 in (1.0 cm), picots included
Materials
Use mercerized cotton or a cotton blend in sport weight. Cotton holds the sharp points and crisp picots much better than acrylic, and it blocks flat. Pick a warm mustard gold and a soft ivory or cream rather than bright white.
- Color A, mustard gold: 5 g, about 15 m
- Color B, cream: 4 g, about 12 m
- Burgundy satin ribbon: 10 in (25.4 cm), 3/8 in (1.0 cm) wide
Tools:
- 2.75 mm (US C-2) crochet hook
- Tapestry needle
- Scissors
- Stitch marker
- Blocking mat and rust-proof pins
- Spray bottle with water
These quantities include a margin for a gauge swatch and weaving in ends. One star uses noticeably less than the amounts listed.
Abbreviations (US Terms)
- ch: chain
- sl st: slip stitch
- sc: single crochet
- dc: double crochet
- sc2tog: single crochet 2 together
- sk: skip
- st(s): stitch(es)
- sp: space
- rep: repeat
Special stitch: picot. Ch 3, then sl st in the 3rd ch from the hook (the first ch made). This makes a small round bump that sits on top of the edge.
Gauge and Checkpoints
The ornament is small, so the finished star is your gauge swatch. Make one star and measure it before you make a set.
Base gauge: Rounds 1–2 measure 1.75 in (4.4 cm) across.
Border gauge: 13 sc = 2 in (5.1 cm) along a straight edge.
Checkpoints:
- After Round 1: the circle is 1 in (2.5 cm) across.
- After Round 2: the circle is 1.75 in (4.4 cm) across and lies flat.
- After Round 3: don’t measure yet. Instead, check that all 5 loops are the same length.
- After Round 4: the star is 2.75 in (7.0 cm) tip to tip.
- After Round 6 and blocking: the star is 3.5 in (8.9 cm) tip to tip.
If the star is too big: go down one hook size to 2.5 mm, or tighten your chains.
If it’s too small: go up to 3.0 mm.
For a few ornaments, a difference of 1/8 in (0.3 cm) doesn’t matter. A difference of 1/4 in (0.6 cm) or more is worth fixing so the points keep their shape.
Pattern
Center Circle (Color A)
Round 1: Make a magic ring. Ch 3 (counts as dc), then work 14 dc into the ring. Pull the ring closed and sl st to the top of the beginning ch-3. (15 dc)
Round 2: Ch 3 (counts as dc) and work 1 dc in the same st. Work 2 dc in each of the next 14 sts. Sl st to the top of the beginning ch-3. (30 dc)
This is a growth round: 15 stitches become 30. The circle should be flat, with clear spoke lines running out from the center. If it cups, check that every stitch got 2 dc.
Star Points (Color A)
Round 3: Ch 1. Sc in the same st as the join and in the next dc. Ch 13, then sk the next 4 dc. Sc in each of the next 2 dc, ch 13, sk the next 4 dc. Rep from * 3 more times. Sl st to the first sc. (10 sc and 5 ch-13 loops)
Check the math: each repeat uses 6 stitches of Round 2 (2 worked and 4 skipped), and 5 × 6 = 30. Each ch-13 loop has 6 chains on each side and 1 center chain that becomes the tip. The 4 skipped dc form the base of each triangle window.
Round 4: Ch 1. Sc2tog over the first 2 sc; this is a valley. Sc in each of the next 6 ch. Work (sc, ch 2, sc) in the next ch, which is the 7th, center chain. Sc in each of the next 6 ch. Then sc2tog over the next 2 sc. Rep from * 4 times total, but at the end of the 5th repeat sl st to the first sc2tog instead of working another sc2tog. (5 sc2tog + 70 sc = 75 sts, plus 5 ch-2 tip sps)
Work into the chains themselves, not around them. That keeps the triangle windows open and the arms straight.
Per repeat, you have 1 sc2tog + 6 sc + 2 tip sc + 6 sc = 15 sts, and 15 × 5 = 75. The sc2tog pulls each valley inward, and the ch-2 at each tip makes it pointed.
Measure now: the star should be 2.75 in (7.0 cm) tip to tip. Fasten off Color A and weave in the ends.
Border
Border gauge: 13 sc = 2 in (5.1 cm). Each arm of the star (tip to valley) carries 8 sc in Round 5. At this gauge, that is about 1.25 in (3.2 cm), which matches the arm length of a 3.5 in (8.9 cm) star.
Round 5 (Color B): Join Color B with a sc in the ch-2 sp at the top point. Ch 2 and work 1 sc in the same sp. Sc in each of the next 7 sts. Sk the next st, which is the valley sc2tog. Sc in each of the next 7 sts. Work (sc, ch 2, sc) in the next ch-2 sp. Rep from * 4 more times, leaving out the last (sc, ch 2, sc) on the final repeat. Sl st to the first sc. (80 sc and 5 ch-2 tip sps)
Count logic: 70 sts are worked 1 per stitch, and 10 sc are added at the tips (2 per tip). The 5 valley sc2tog stitches are skipped and not worked. That gives 70 + 10 = 80 sc.
Between two tip spaces you have 1 tip sc + 7 sc + 7 sc + 1 tip sc = 16 sc, which is 8 per arm. Skipping the valley stitch keeps each inside angle sharp.
Round 6 (Color B): Sl st into the first ch-2 tip sp. Ch 1 and work (sc, picot, sc) in the same sp. Sc in each of the next 2 sts. Then [picot, sc in each of the next 2 sts] 7 times. Work (sc, picot, sc) in the next ch-2 sp. Rep from * 4 more times, leaving out the last tip group on the final repeat. Sl st to the first sc. (90 sc and 40 picots)
Count logic: 80 sts are worked 1 per stitch, and 10 sc are added at the tips, which gives 80 + 10 = 90 sc.
Each 16-stitch segment gets 7 picots. The 4th picot falls after the 8th stitch, which is exactly at the valley. Add 1 tip picot per point: (7 × 5) + 5 = 40 picots.
Fasten off and weave in the ends through the back of the border.
Why the math works: Round 4 has 15 stitches per point. Round 5 keeps 14 of them, skips the valley and adds 2 at the tip, for 16. Round 6 splits those 16 into eight pairs, with 7 picots set between the pairs plus 1 picot at the tip. Every point is the same, so the star stays symmetrical.
Final Blocking
- Lightly spray the star with water until it’s damp but not soaked.
- Lay it right side up on the blocking mat.
- Pin each of the 5 tips so the star measures 3.5 in (8.9 cm) tip to tip. Spacing should be equal; a paper template drawn with a protractor at 72° intervals helps.
- Pin each valley inward so the inner angles stay sharp.
- Push a pin through each triangle window and gently open it into a clean triangle.
- Pinch each picot so it stands out from the edge.
- Leave it to dry completely, at least 4–6 hours.
- Unpin, then thread the ribbon through the top window. Loop it over the top point and knot the ends about 3 in (7.6 cm) above the star.
Final Quality-Control Checklist
- Round 2 has exactly 30 dc and lies flat.
- All 5 chain loops in Round 3 have 13 chains.
- Round 4 has 75 sts plus 5 ch-2 tips.
- Round 5 has 80 sc, which is 16 between each pair of tips.
- Round 6 has 90 sc and 40 picots.
- All 5 windows are open, triangular and the same size.
- The star measures 3.5 in (8.9 cm) tip to tip after blocking.
- No tails show on the front.
- The ribbon is centered on the top point.
Troubleshooting
Points are rounded or floppy: Check that you worked (sc, ch 2, sc) into the center chain in Round 4. Then block with the pins placed right at the tips.
Windows close up: You probably worked around the chain loop instead of into the chains. Rip back Round 4 and work into each chain.
Star ruffles: The chains are too loose or your hook is too big. Remake Round 3 with tighter chains.
Valleys look blunt: Make sure you skipped the sc2tog in Round 5, then pin the valleys inward when blocking.
Picots lean or flatten: Sl st into the 1st chain made, not into the edge stitch. After blocking, pinch each picot into shape.
Stitch count is off in Round 6: Count each 16-stitch segment between tips separately. That makes it easy to find the extra or missing stitch.
Care
Hand wash in cool water with mild soap, press out the water in a towel, and dry flat. Re-pin the points if they relax after a season of storage.
Final Notes
The measurement chain is simple:
- A 1.75 in (4.4 cm) circle after Round 2.
- A 2.75 in (7.0 cm) star after Round 4.
- About 3/8 in (1.0 cm) of cream border on each side.
- A blocked star of 3.5 in (8.9 cm) tip to tip.
If the counts match at 30, 75, 80 and 90 stitches, the star will come out symmetrical. Once your first star measures correctly, make as many as you like for your tree or gift wrapping.
Happy crocheting!