
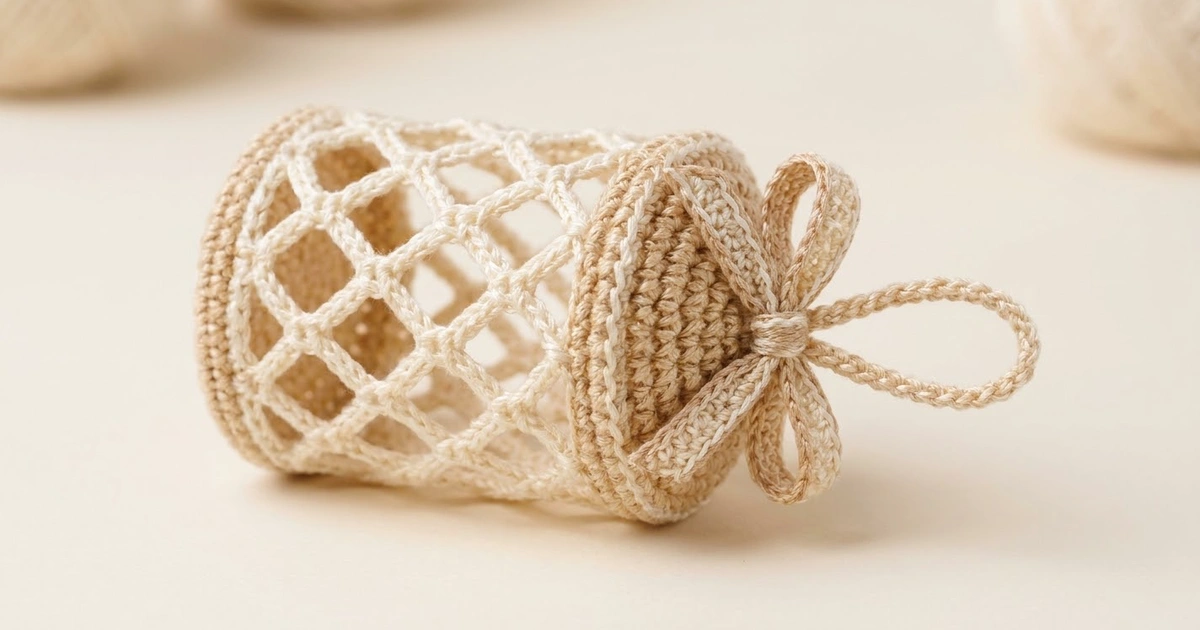
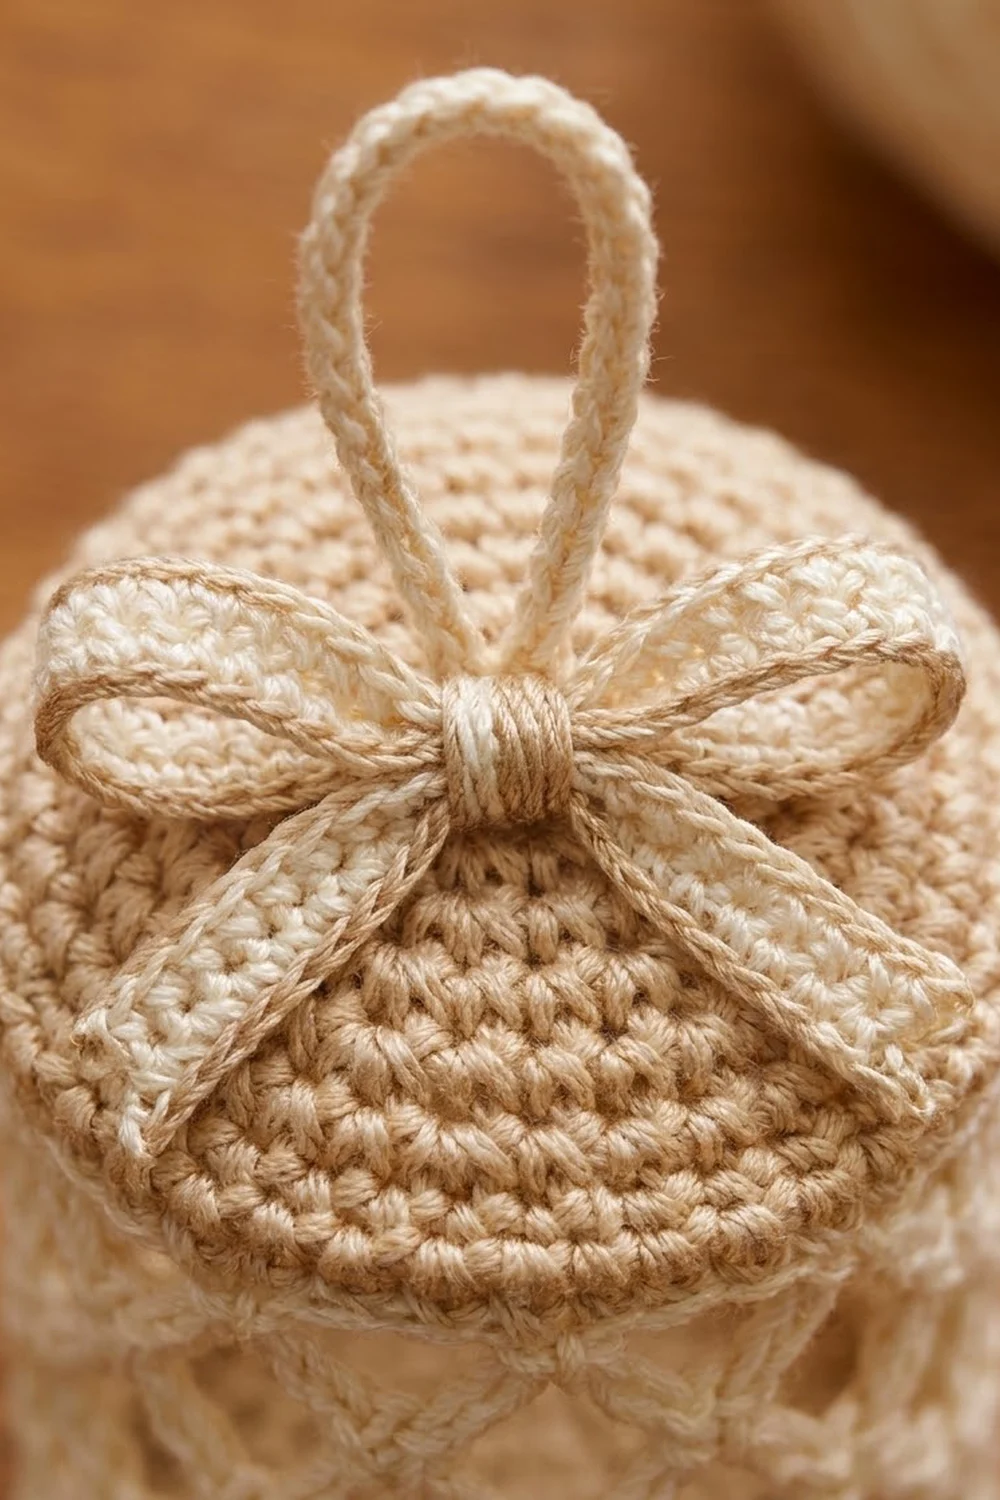
The Frosted Lattice Canister is a small lidded cylinder ornament that looks like a vintage lace lantern. A solid beige base and domed lid frame open ivory walls of diamond mesh. A tiny knot sits at every crossing point, catching the light much like frost on a window.
Two soft neutrals keep the look classic: ivory (Color A) for the lattice, bow and hanging loop, and light beige (Color B) for the base, lid and bow edging. The style is quiet and heirloom-like, so it suits both rustic and elegant trees.
This pattern uses US crochet terms. The finished canister measures 2 in (5.1 cm) across and 3 in (7.6 cm) tall. The hanging loop adds about 2 in (5.1 cm), for a total hanging length of about 5 in (12.7 cm).
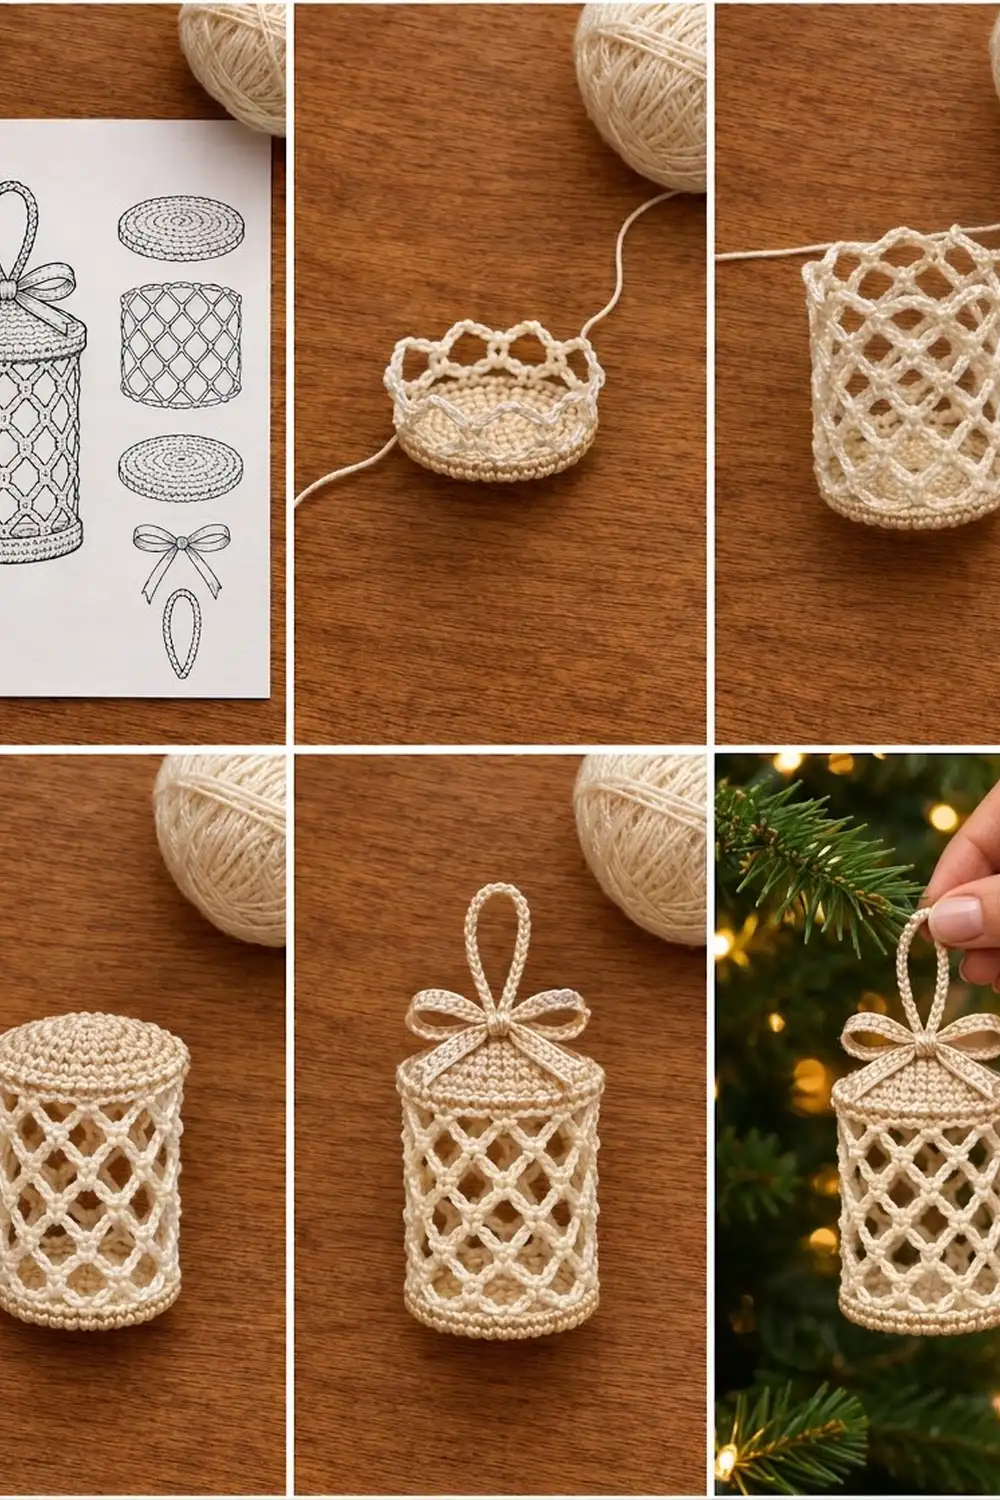
Construction is simple and seamless where it matters. You work the base, bottom band, lattice walls and top rim as one continuous piece in the round. Then you make a separate domed lid and slip-stitch it on. Finally, you sew a small bow and a single-crochet hanging loop to the center of the lid.
Finished Size and Construction
- Finished size: 2 in (5.1 cm) diameter × 3 in (7.6 cm) tall, plus a 2 in (5.1 cm) loop
- Skill level: Intermediate (small-scale work in thread)
- Terminology: US
- Yarn weight: Size 3 mercerized cotton thread (super fine)
- Hook: 2.25 mm (US B-1)
- Number of pieces: 1 ornament made from 6 components: body, lid, bow loop strip, bow tail strip, bow center band and hanging loop
- Layout: Stacked vertically. The lid sits on the body, and the bow and loop sit on the lid.
- Body size before rim: 2 in (5.1 cm) diameter × 2.4 in (6.1 cm) tall
- Top rim depth: 0.25 in (0.6 cm), bringing the body to 2.65 in (6.7 cm)
- Lid height added: 0.35 in (0.9 cm), for a total of 3 in (7.6 cm)
Materials
Choose a smooth, tightly twisted mercerized cotton. It shows the knots clearly and holds its shape after light starching. Avoid fuzzy or very soft cotton, because the lattice will look blurred and sag.
- Color A, ivory: 10 g, about 30 m (33 yd)
- Color B, light beige: 6 g, about 18 m (20 yd)
Tools:
- 2.25 mm (US B-1) crochet hook
- Tapestry needle with a small eye
- Stitch marker
- Scissors
- A cylinder form about 2 in (5.1 cm) across for blocking, such as a spice jar or rolled cardstock
- Fabric stiffener or spray starch
- Rust-proof pins
All quantities include a margin of roughly 25% for swatching and weaving in ends.
Abbreviations (US Terms)
- ch: chain
- sl st: slip stitch
- sc: single crochet
- inc: 2 sc in the same stitch
- BLO: back loop only
- MR: magic ring
- sk: skip
- st(s): stitch(es)
- rep: repeat
Special stitch: Knot (kn). Work (sc, ch 1, sc) into the center of the same ch-5 loop. This makes the small raised nub at each lattice crossing. It counts as 1 knot, not 3 stitches.
Gauge and Checkpoints
Gauge: 8 sc and 9 rounds = 1 in (2.5 cm) in sc worked in the round.
Make the base first (Rounds 1–8) as your test piece. Then check these measurements as you go:
- After Round 8: the base is a flat disc, 1.9 in (4.8 cm) across.
- After Round 11: the bottom band stands 0.4 in (1.0 cm) tall.
- After Round 18, stretched gently over your form: the lattice adds 2 in (5.1 cm), so the body is 2.4 in (6.1 cm) tall.
- After Round 20: the body is 2.65 in (6.7 cm) tall.
- The lid measures 2 in (5.1 cm) across at its skirt.
If your base is larger than 1.9 in (4.8 cm), go down to a 2.0 mm hook. If it is smaller, go up to a 2.5 mm hook. Work in a spiral or with joins, but be consistent. The patterns below use joined rounds so that the lattice stays even.
Body (Base, Band, Lattice and Rim)
Base
Start with Color B.
Round 1: Make a MR. Ch 1, then work 6 sc in the ring and sl st to the first sc. (6 sts)
Round 2: Ch 1, then inc in each st around and sl st to the first sc. (12 sts)
Round 3: Ch 1, then sc in next st, inc; rep from * 5 more times and sl st to join. (18 sts)
Round 4: Ch 1, then sc in next 2 sts, inc; rep 5 more times and join. (24 sts)
Round 5: Ch 1, then sc in next 3 sts, inc; rep 5 more times and join. (30 sts)
Round 6: Ch 1, then sc in next 4 sts, inc; rep 5 more times and join. (36 sts)
Round 7: Ch 1, then sc in next 5 sts, inc; rep 5 more times and join. (42 sts)
Round 8: Ch 1, then sc in next 6 sts, inc; rep 5 more times and join. (48 sts)
Checkpoint: the disc should be flat and 1.9 in (4.8 cm) across.
Bottom Band
Round 9: Ch 1, then work sc in the BLO of each st around and join. (48 sts) This BLO round turns the edge upward.
Rounds 10–11: Ch 1, then sc in each st around and join. (48 sts each round)
Fasten off Color B. The band should stand 0.4 in (1.0 cm) tall.
Lattice Walls
Join Color A in any st of Round 11.
Round 12 (foundation loops): Ch 1, sc in the same st. Ch 5, sk 3 sts, sc in next st; rep from * 10 more times. Ch 5, sk the last 3 sts and sl st to the first sc. (12 sc, 12 ch-5 loops)
Each loop spans 4 stitches of the band: 12 × 4 = 48. That accounts for every stitch.
Round 13: Sl st in each of the next 3 ch to reach the center of the first loop. Ch 1 and work a kn in this loop. Ch 5, kn in the next ch-5 loop; rep from * 10 more times. Ch 5 and sl st to the first sc of the first kn. (12 knots, 12 ch-5 loops)
Rounds 14–18: Repeat Round 13. (12 knots and 12 ch-5 loops each round)
Each knot sits at the center of a loop from the round below. This shifts the loops by half a loop on every round, which creates the diamond pattern.
Checkpoint: slide the piece over your 2 in (5.1 cm) form and stretch it gently upward. The seven lattice rounds (12–18) should measure 2 in (5.1 cm), and the body should be 2.4 in (6.1 cm) tall.
Border: Top Rim
The rim closes the lattice into a firm solid edge so that the lid has stitches to join to.
Border gauge: the same as the base, 8 sc = 1 in (2.5 cm).
Round 19 (conversion round): Continue with Color A. Sl st in each of the next 3 ch to reach the center of the first loop. Ch 1, then work 4 sc into each ch-5 loop around, working over the loops and passing behind the knots. Sl st to the first sc. Count: 12 loops × 4 sc + 0 extra stitches = 48 sts.
Round 20: Ch 1, then sc in each st around and join. (48 sts)
Fasten off and leave a 6 in (15.2 cm) tail.
Why the math works: The band has 48 stitches. Round 12 divides them into 12 loops of 4 stitches each. Every lattice round keeps exactly 12 loops, and Round 19 puts 4 sc back into each loop. That returns the count to 48, so the rim matches the base and the walls stay straight instead of flaring or pulling in. The rim adds 0.25 in (0.6 cm), making the body 2.65 in (6.7 cm) tall.
Lid
Use Color B.
Rounds 1–6: Work as for Body Rounds 1–6. (36 sts)
Round 7: Ch 1, then sc in each st around and join. (36 sts) This round has no increases, which raises the gentle dome.
Round 8: Ch 1, then sc in next 5 sts, inc; rep 5 more times and join. (42 sts)
Round 9: Ch 1, then sc in next 6 sts, inc; rep 5 more times and join. (48 sts)
Round 10: Ch 1, then sc in the BLO of each st and join. (48 sts) This turns the skirt downward.
Round 11: Ch 1, then sc in each st and join. (48 sts)
Do not fasten off. The lid should measure 2 in (5.1 cm) across at the skirt and rise about 0.35 in (0.9 cm) at the center.
Make All Components
| Component | Color | Quantity |
|---|---|---|
| Body (base, band, lattice, rim) | B, then A | 1 |
| Lid | B | 1 |
| Bow loop strip | A, edged in B | 1 |
| Bow tail strip | A, edged in B | 1 |
| Bow center band | A | 1 |
| Hanging loop | A | 1 |
Bow loop strip: With A, ch 36.
– Row 1: Sc in the 2nd ch from the hook and in each ch across. (35 sts)
– Row 2: Ch 1, turn, sc across. (35 sts) Fasten off A.
– Row 3: Join B. Ch 1 and sl st loosely in each st across. (35 sl sts)
– Then sl st in each free loop of the foundation chain along the other long edge. (35 sl sts)
The finished strip is 4.4 in (11.2 cm) long.
Bow tail strip: Work as for the loop strip, but start with ch 22. (21 sts per row, 21 sl sts on each long edge) The strip is 2.6 in (6.6 cm) long.
Bow center band: With A, ch 7.
– Row 1: Sc in the 2nd ch from the hook and across. (6 sts)
– Rows 2–5: Ch 1, turn, sc across. (6 sts each row)
Leave a 6 in (15.2 cm) tail.
Hanging loop: With A, ch 36. Sc in the 2nd ch from the hook and across. (35 sts) The cord is 4.4 in (11.2 cm) long. Leave tails at both ends.
Layout (side view):
      [ hanging loop ]
   [ bow + wrapped center ]
  [ domed lid, B, 48 sts ]
  [ top rim, A, 48 sts    ]
  [ lattice, A, 12 loops  ]
  [ bottom band, B, 48 sts]
  [ flat base, B          ]
Joining
Lid to body: Place the lid on top of the body so that the lid skirt sits around the rim, with wrong sides facing. With the lid’s live loop, insert the hook through both loops of the next lid stitch and then through both loops of the matching body Round 20 stitch. Sl st.
Continue around, 1 sl st per stitch pair: 48 lid stitches to 48 body stitches, so 48 sl sts in total. Do not skip or add stitches. Join to the first sl st and fasten off.
Tension: Keep the slip stitches as loose as your normal sc. A tight join will pucker the lid edge and make the top narrower than 2 in (5.1 cm).
Bow:
1. Fold both ends of the loop strip to its center and overlap them by 0.25 in (0.6 cm). This makes two loops, and the bow is about 2.25 in (5.7 cm) wide.
2. Fold the tail strip into an upside-down V and place it behind the loops.
3. Wrap the center band around both strips and sew its short ends together at the back.
Hanging loop: Fold the cord in half and sew both ends to the center of the lid. Then sew the bow directly over the cord ends so that they are hidden.
Size checkpoint: The canister is 3 in (7.6 cm) tall, and the loop stands about 2 in (5.1 cm) above the bow.
Final Blocking
- Weave in all ends except the ones you used for sewing, which you have already secured.
- Wrap your cylinder form in plastic wrap and slide the body over it. Use a form that is 2 in (5.1 cm) across.
- Gently pull the lattice upward until the walls measure 2 in (5.1 cm) between the band and the rim.
- Move each knot so that it lines up with the knots above and below it in a diagonal line.
- Spray or dab the lattice with stiffener. Keep stiffener off the lid if you want it to stay soft.
- Shape the bow loops with your fingers. You can pin them over small rolls of paper.
- Let everything dry completely, usually 12–24 hours, then slide the form out.
Final Quality-Control Checklist
- The base sits flat and the canister stands upright without rocking.
- All 7 lattice rounds show 12 knots, and the knots line up diagonally.
- No ch-5 loop is twisted or noticeably longer than the others.
- The rim and lid each have 48 sts, joined with 48 sl sts and no gaps.
- The canister is 2 in (5.1 cm) across and 3 in (7.6 cm) tall.
- The bow is centered and the hanging loop is secure.
- No yarn ends are visible through the lattice.
Troubleshooting
The lattice spirals or leans. Your starting point is drifting. Always sl st exactly 3 ch to reach the center of the loop before you work the first knot.
The walls flare at the top. Your chains are looser than your stitches. Make your ch-5 loops slightly tighter, or work ch 4 throughout if your chains are naturally large.
The base cups upward. Your tension is too tight on the increase rounds. Relax your grip or go up half a hook size for Rounds 1–8.
The lid won’t cover the rim. Check that both pieces have 48 stitches, and redo the join more loosely.
The bow droops. Apply stiffener to the bow loops and let them dry over paper rolls.
Care
Hand wash gently in cool water only if needed. Reshape the ornament over the form and re-stiffen it while it is damp, then store it in a box so the lattice isn’t crushed.
Final Notes
The measurement chain is short and reliable:
- The 1.9 in (4.8 cm) base sets the 48-stitch circumference.
- Those 48 stitches become 12 loops of 4 stitches each.
- Seven lattice rounds give 2 in (5.1 cm) of height.
- The rim converts back to 48 stitches, which match the 48-stitch lid exactly.
Check the base, the lattice height and the stitch counts on the rim and lid, and the ornament will finish at 2 in (5.1 cm) across and 3 in (7.6 cm) tall every time.
Happy crocheting!