

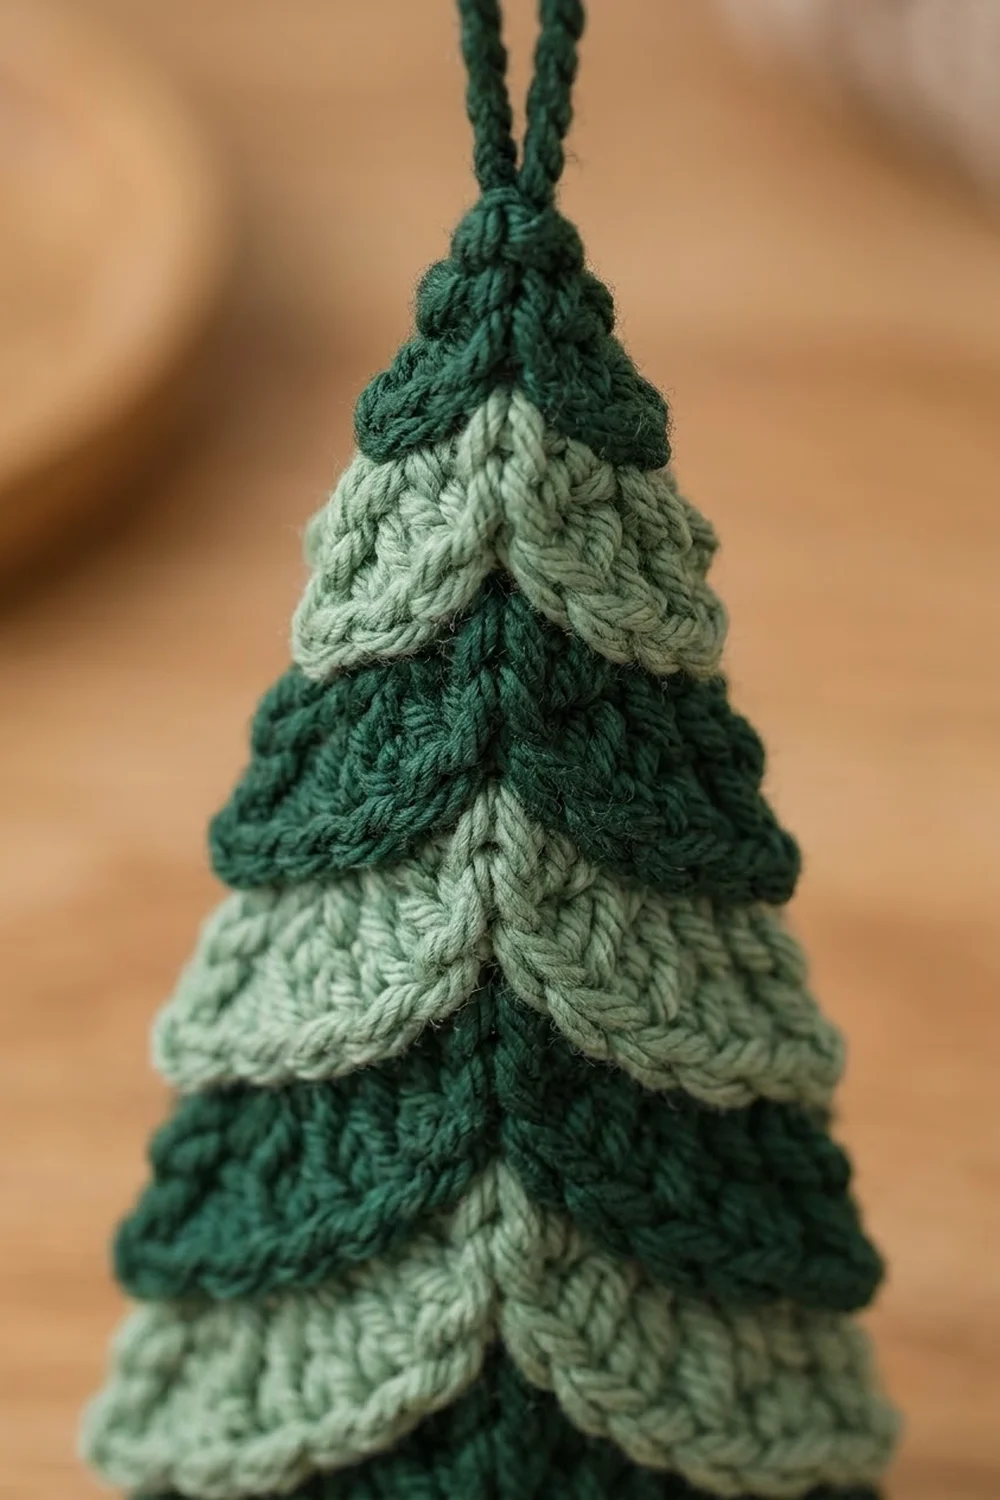
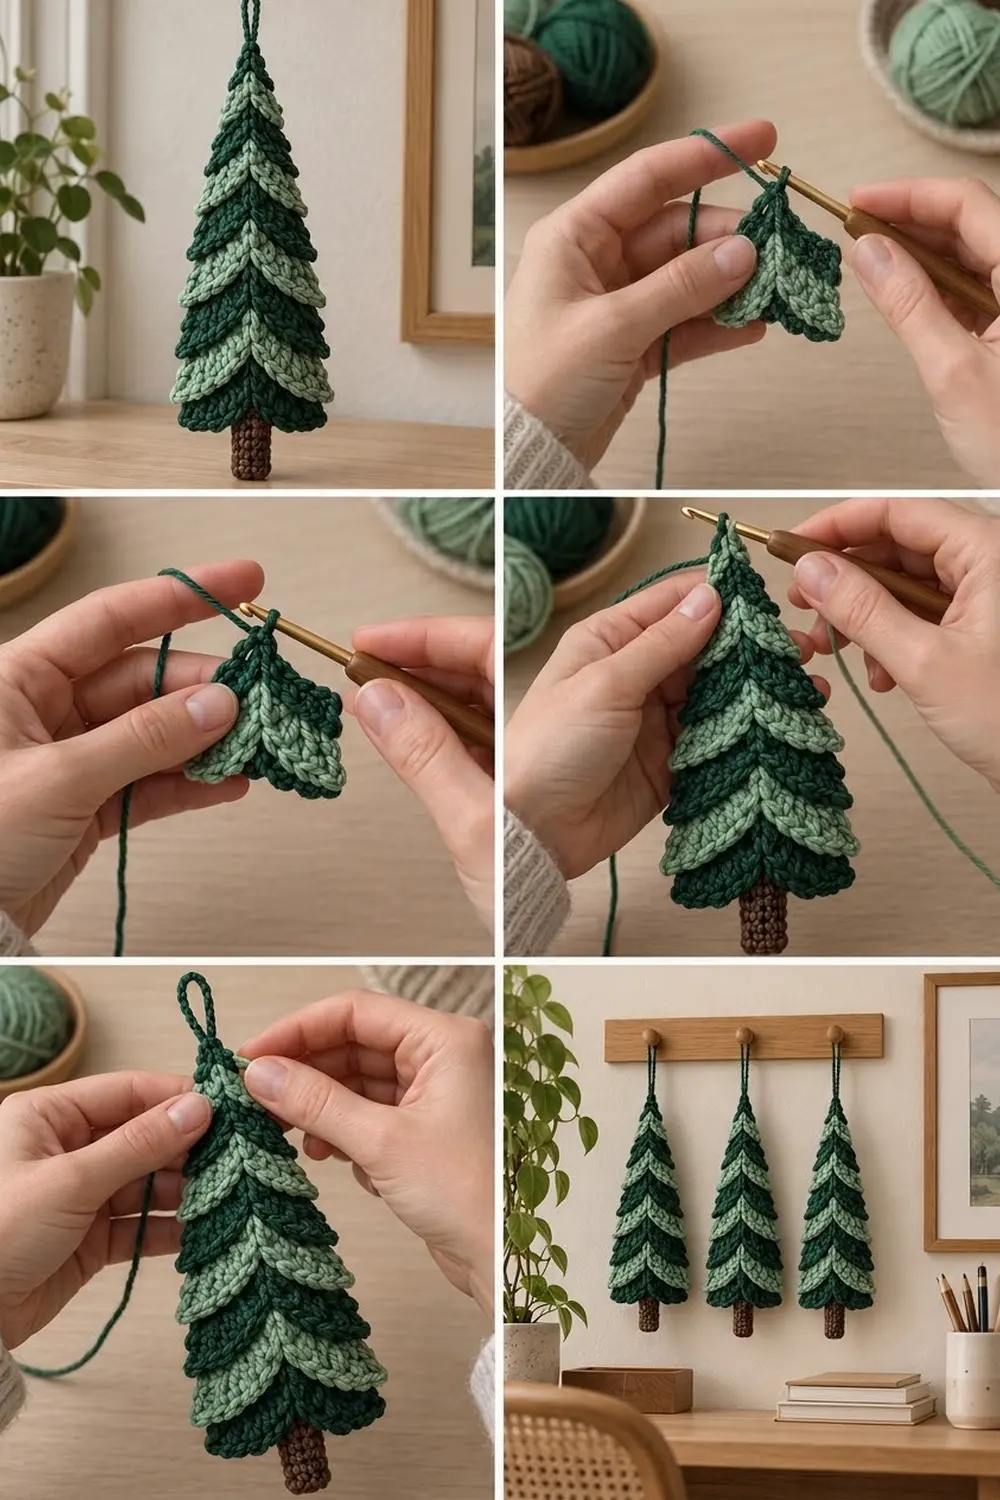
The Sage Ridge Pine is a slim, layered tree ornament with a hand-carved look. Eight tiers of leafy lips overlap like the boughs of a real fir. Each lip splits at the center into two drooping leaves, so every tier forms a soft chevron down a center spine.
The palette is simple and calm: deep forest green alternating with sage green, a ridged chocolate brown trunk, and a dark green hanging loop. It looks good on a tree, a peg rail, a gift package, or a doorknob.
This pattern uses US crochet terms. The finished ornament measures 6.2 in (15.7 cm) from tip to trunk and 3.0 in (7.6 cm) across the widest tier. The hanging loop adds about 1.2 in (3.0 cm).
The tree is worked in one piece from the top down, in flat rows. Each tier has three body rows, then a lip row worked into the front loops only. The next tier starts in the remaining back loops, so the lip hangs free over it. The trunk is worked directly off the last tier, then edged, and the loop is added at the tip.
Finished Size and Construction
- Finished size: 6.2 in (15.7 cm) tall × 3.0 in (7.6 cm) wide, plus a 1.2 in (3.0 cm) loop
- Skill level: Easy-intermediate
- Terminology: US crochet terms
- Yarn weight: DK (light worsted, #3)
- Hook: 3.5 mm (E-4)
- Number of pieces: 1 (the trunk and loop are worked directly onto the tree)
- Layout: Tip plus 8 tiers, with colors alternating dark green and sage
- Foliage size: 4.9 in (12.4 cm) of body rows, or 5.25 in (13.3 cm) including the bottom lip
- Trunk size before border: 0.6 in (1.5 cm) wide × 1.3 in (3.3 cm) long
- Border depth: about 0.05 in (0.1 cm) per side, so the trunk is 0.7 in (1.8 cm) wide after edging
Materials
Choose a smooth DK yarn of about 225 m per 100 g. Mercerized cotton gives the crispest lips. Acrylic or a cotton blend is softer and still holds the leaf shape after blocking. Avoid fuzzy yarns because they hide the center spine.
- Color A (dark forest green): 6 g (14 m). Used for the tip, tiers 2, 4, 6, 8, and the loop.
- Color B (sage green): 4 g (9 m). Used for tiers 1, 3, 5, 7.
- Color C (chocolate brown): 2 g (5 m). Used for the trunk and trunk edging.
Tools:
– 3.5 mm (E-4) crochet hook
– Tapestry needle
– Scissors
– 2 stitch markers
– Rustproof pins and a blocking mat
– Spray bottle
– Optional: light fabric stiffener or spray starch
The quantities include a margin of roughly 30–40% for tails, a gauge test, and small tension differences.
Abbreviations (US Terms)
- ch – chain
- sl st – slip stitch
- sc – single crochet
- hdc – half double crochet
- dc – double crochet
- st(s) – stitch(es)
- FLO – front loop only
- BLO – back loop only
- RS / WS – right side / wrong side
- inc – 2 sc in the same stitch
Special stitch – standing sc: Start with a slip knot on the hook. Insert the hook into the stitch, yarn over, pull up a loop, yarn over, and draw through both loops. It counts as 1 sc.
Lip row: This row is always worked in FLO into the last body row of the tier, in the same color. The side facing you as you work it is the RS, and the lip folds down over the RS. The center stitch is always a sl st, which forms the spine and splits the lip into two leaves.
Gauge and Checkpoints
Gauge: 20 sc and 22 rows = 4 in (10.2 cm) in sc rows. That works out to 5 sts and 5.5 rows per inch.
Test the pattern on the ornament itself: work the tip and Tiers 1–2, then measure.
- After Row 3 (tip): 3 sts = 0.6 in (1.5 cm) wide, about 0.5 in (1.3 cm) tall.
- After Row 9 (Tier 2): 7 sts = 1.4 in (3.6 cm) wide, 1.6 in (4.1 cm) of body rows.
- After Row 18 (Tier 5): 9 sts = 1.8 in (4.6 cm) wide, 3.3 in (8.4 cm) tall.
- After Row 27 (Tier 8): 13 sts = 2.6 in (6.6 cm) wide, 4.9 in (12.4 cm) tall.
If your tree is too big: go down to a 3.25 mm hook. Loose lips will droop and gape.
If it is too small or stiff: go up to a 3.75 mm hook. Lips that are too tight curl upward instead of lying flat.
Pattern
Each new tier is worked into the loops left over behind the previous lip. Before starting a tier, turn the work so the lip you just made is on the far side.
Tip (Color A)
Row 1: Ch 4, sc in 2nd ch from hook and in each of the next 2 ch. (3 sts)
Row 2: Ch 1, turn, sc in each st across. (3 sts)
Row 3: Ch 1, turn, sc in each st across. (3 sts)
Lip 1: Ch 2 (does not count), turn. Working in FLO of Row 3: 2 dc in first st, sl st in center st, 2 dc in last st. (5 sts) Fasten off A.
Tier 1 (Color B)
Row 4: Turn the work so the lip is away from you. Join B with a standing sc in the remaining loop of the first st of Row 3, then sc in the same st, sc in the next st, and 2 sc in the last st. (5 sts)
Rows 5–6: Ch 1, turn, sc across. (5 sts)
Lip 2: Ch 2, turn. In FLO: 2 dc in first st, hdc in next st, sl st in center st, hdc in next st, 2 dc in last st. (7 sts) Fasten off B.
Tier 2 (Color A)
Row 7: Join A with a standing sc in the remaining loop of the first st, sc in the same st, sc in the next 3 sts, 2 sc in the last st. (7 sts)
Rows 8–9: Ch 1, turn, sc across. (7 sts)
Lip 3: Ch 2, turn. In FLO: 2 dc in first st, hdc, sc, sl st in center st, sc, hdc, 2 dc in last st. (9 sts) Fasten off A.
Tier 3 (Color B)
Row 10: Join B with a standing sc in the remaining loop of the first st, then sc in the remaining loops of each st across. This row has no increase. (7 sts)
Rows 11–12: Ch 1, turn, sc across. (7 sts)
Lip 4: Work as Lip 3. (9 sts) Fasten off B.
Tier 4 (Color A)
Row 13: Join A with a standing sc, sc in the same st, sc in the next 5 sts, 2 sc in the last st. (9 sts)
Rows 14–15: Ch 1, turn, sc across. (9 sts)
Lip 5: Ch 2, turn. In FLO: 2 dc in first st, hdc, sc in next 2 sts, sl st in center st, sc in next 2 sts, hdc, 2 dc in last st. (11 sts) Fasten off A.
Tier 5 (Color B)
Row 16: Join B with a standing sc, then sc in the remaining loops across. This row has no increase. (9 sts)
Rows 17–18: Ch 1, turn, sc across. (9 sts)
Lip 6: Work as Lip 5. (11 sts) Fasten off B.
Tier 6 (Color A)
Row 19: Join A with a standing sc, sc in the same st, sc in the next 7 sts, 2 sc in the last st. (11 sts)
Rows 20–21: Ch 1, turn, sc across. (11 sts)
Lip 7: Ch 2, turn. In FLO: 2 dc in first st, hdc, sc in next 3 sts, sl st in center st, sc in next 3 sts, hdc, 2 dc in last st. (13 sts) Fasten off A.
Tier 7 (Color B)
Row 22: Join B with a standing sc, then sc in the remaining loops across. This row has no increase. (11 sts)
Rows 23–24: Ch 1, turn, sc across. (11 sts)
Lip 8: Work as Lip 7. (13 sts) Fasten off B.
Tier 8 (Color A)
Row 25: Join A with a standing sc, sc in the same st, sc in the next 9 sts, 2 sc in the last st. (13 sts)
Rows 26–27: Ch 1, turn, sc across. (13 sts)
Lip 9: Ch 2, turn. In FLO: 2 dc in first st, hdc, sc in next 4 sts, sl st in center st, sc in next 4 sts, hdc, 2 dc in last st. (15 sts) Fasten off A.
Lip math check: Each lip has 2 sts more than its body row (body count + 2). That is because each half of the lip has one extra dc in the edge stitch, and the sl st takes the center stitch exactly. With a body count of n, each side of center has (n − 1) ÷ 2 sts. For example, Tier 8 has 13 sts, so 6 sts each side: 1 edge + 1 hdc + 4 sc = 6.
Trunk (Color C)
Turn the work so the bottom lip (Lip 9) is away from you. Count the remaining loops of Row 27 and place markers in st 6 and st 8, which are the center 3 of 13.
Row 1: Join C with a standing sc in the remaining loop of st 6, then sc in st 7 and st 8. (3 sts)
Rows 2–7: Ch 1, turn, sc in BLO across. (3 sts) Working in BLO makes the horizontal ridges on the trunk.
Fasten off, leaving a 4 in (10.2 cm) tail. The trunk measures 0.6 in (1.5 cm) × 1.3 in (3.3 cm).
Hanging Loop (Color A)
Join A with a sl st at the top of the tip, in the base of the center st of Row 1.
Ch 12, then sl st in the same st to make a ring.
Work 18 sc into the ring, covering the chain, and sl st in the base st. Fasten off, leaving a 6 in (15.2 cm) tail. Thread the tail back through the base of the loop twice to secure it. The loop stands about 1.2 in (3.0 cm) tall.
Border: Trunk Edging
Border gauge: 1 sl st per row end. This matches the 5.5 rows per inch row gauge, so the edge stays flat without ruffling or pulling in.
Edging round:
1. Join C with a sl st in the top row end of one trunk side, right under the foliage.
2. Side 1: sl st loosely in each of the 7 row ends. (7 sl sts)
3. Corner: ch 1.
4. Bottom: sl st in each of the 3 sts of Row 7. (3 sl sts)
5. Corner: ch 1.
6. Side 2: sl st in each of the 7 row ends up the other side. (7 sl sts)
That gives 17 sl sts plus 2 corner ch. Fasten off and weave in.
Why the math works: The trunk has 7 rows, so each side has exactly 7 row ends. The bottom has exactly the 3 stitches from Row 7. The corner ch-1s are separate from the side counts, so no corner is counted twice. The edging adds only about 0.05 in (0.1 cm) per side, which brings the trunk to 0.7 in (1.8 cm) wide.
Final Blocking
- Weave in all tails first. Hide each one behind the lip directly above it, inside a row of the same color.
- Lay the tree RS up on the blocking mat with every lip folded down over the tier below.
- Pin the tip, then pin the bottom corners of Row 27 so the body measures 2.6 in (6.6 cm) wide and 4.9 in (12.4 cm) tall.
- Pin each lip’s 2-dc edge clusters down and slightly outward so the two halves slope like a chevron. Lip 9 should span 3.0 in (7.6 cm).
- Press each center sl st down with a fingertip to sharpen the spine.
- Mist evenly until the yarn is damp, not wet. If you want firmer leaves, use light starch.
- Straighten the trunk to 1.3 in (3.3 cm) long and lay the loop flat above the tip.
- Let it dry completely, about 6–8 hours, before unpinning.
Final Quality-Control Checklist
- The tip plus 8 tiers alternate correctly: A, B, A, B, A, B, A, B, A.
- Body counts are 3, 5, 7, 7, 9, 9, 11, 11, 13.
- Lip counts are 5, 7, 9, 9, 11, 11, 13, 13, 15.
- Every lip has a sl st exactly at center, with equal leaves on each side.
- All lips fall to the RS and overlap the next tier.
- The trunk is centered under sts 6–8 and has 7 rows.
- The edging has 7 + 3 + 7 sl sts plus 2 corner ch.
- Overall size is 6.2 in (15.7 cm) tall × 3.0 in (7.6 cm) wide.
- No tails show on the RS, and the loop is secure.
Troubleshooting
The lips flip upward. You worked the lip in the back loops, or turned the wrong way before the next tier. Lips must be in FLO and must hang toward you.
The spine is off-center. Recount the body row. Each side of the sl st must have (n − 1) ÷ 2 sts.
The tree is leaning. One increase was skipped on an inc row. Check that Rows 4, 7, 13, 19, and 25 each grow by exactly 2.
There are gaps at the color joins. Tighten the standing sc, and weave the old tail across the join.
The trunk is crooked. Recount the markers. The trunk must start in st 6 of 13.
The trunk edging flares. Your sl sts are too loose for the row ends. Use a 3.25 mm hook for the edging only.
Care
Hand wash in cool water with mild soap, press out the water in a towel, and reshape the lips while damp. Dry flat, then store flat or hanging so the lips keep their drape.
Final Notes
The measurement chain is short. Gauge of 20 sc × 22 rows = 4 in (10.2 cm) gives a 3-stitch tip of 0.6 in (1.5 cm). That grows to a 13-stitch base of 2.6 in (6.6 cm) over 27 rows, or 4.9 in (12.4 cm). The 15-stitch bottom lip reaches 3.0 in (7.6 cm) wide. The 7-row trunk adds 1.3 in (3.3 cm), for a total of 6.2 in (15.7 cm). Check those numbers at Rows 3, 9, 18, and 27, and the ornament will finish true to size.
Happy crocheting!