

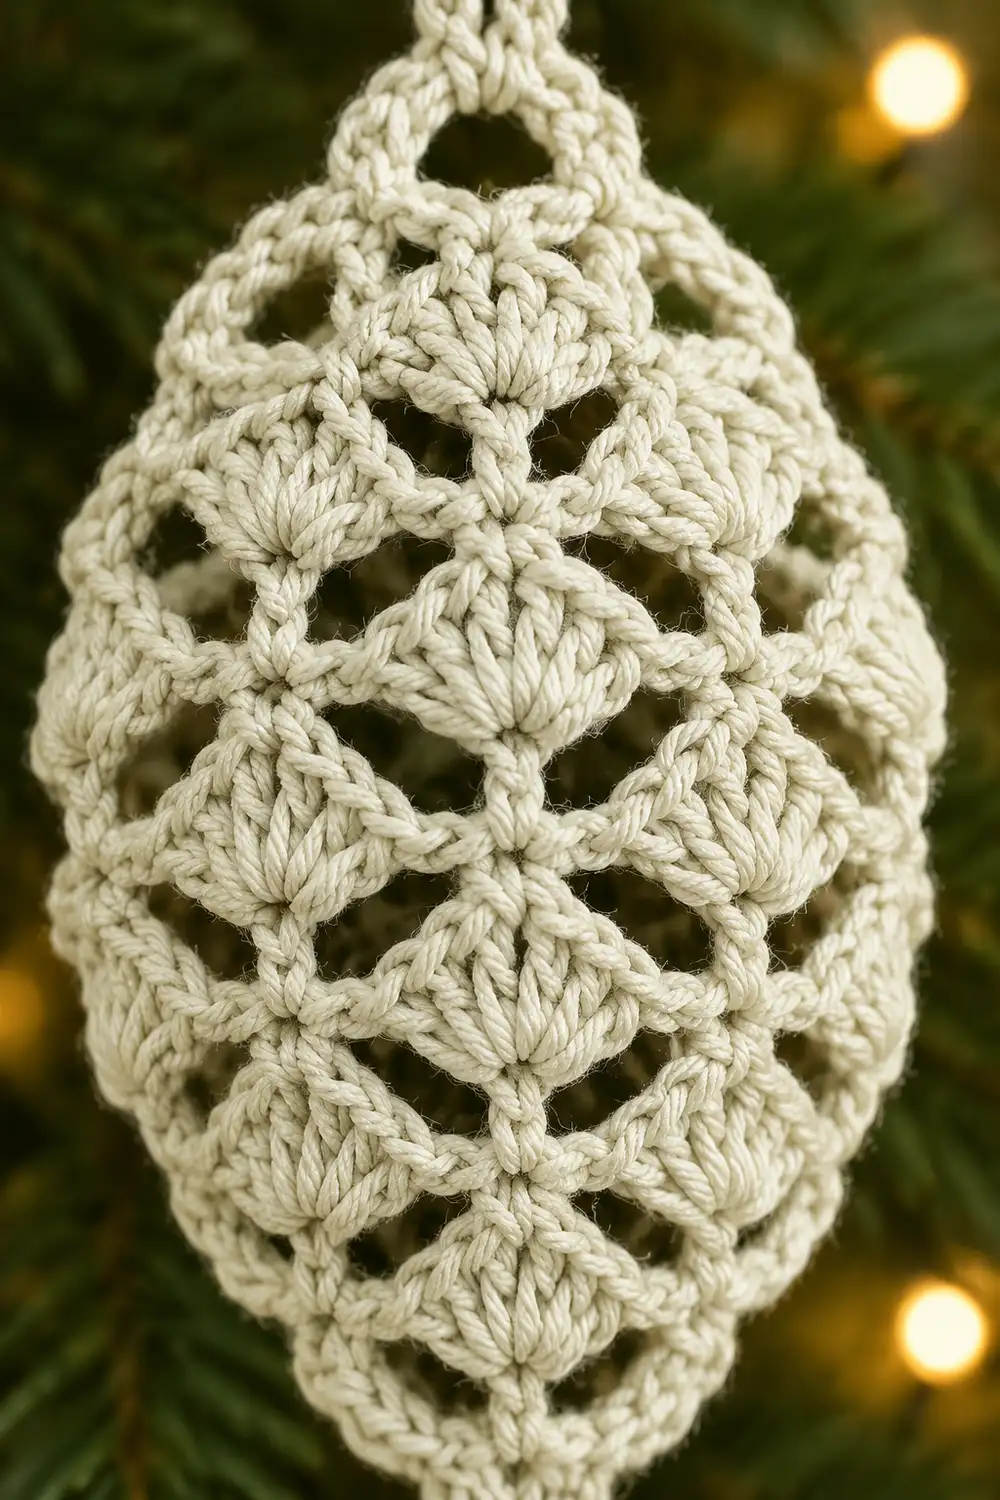
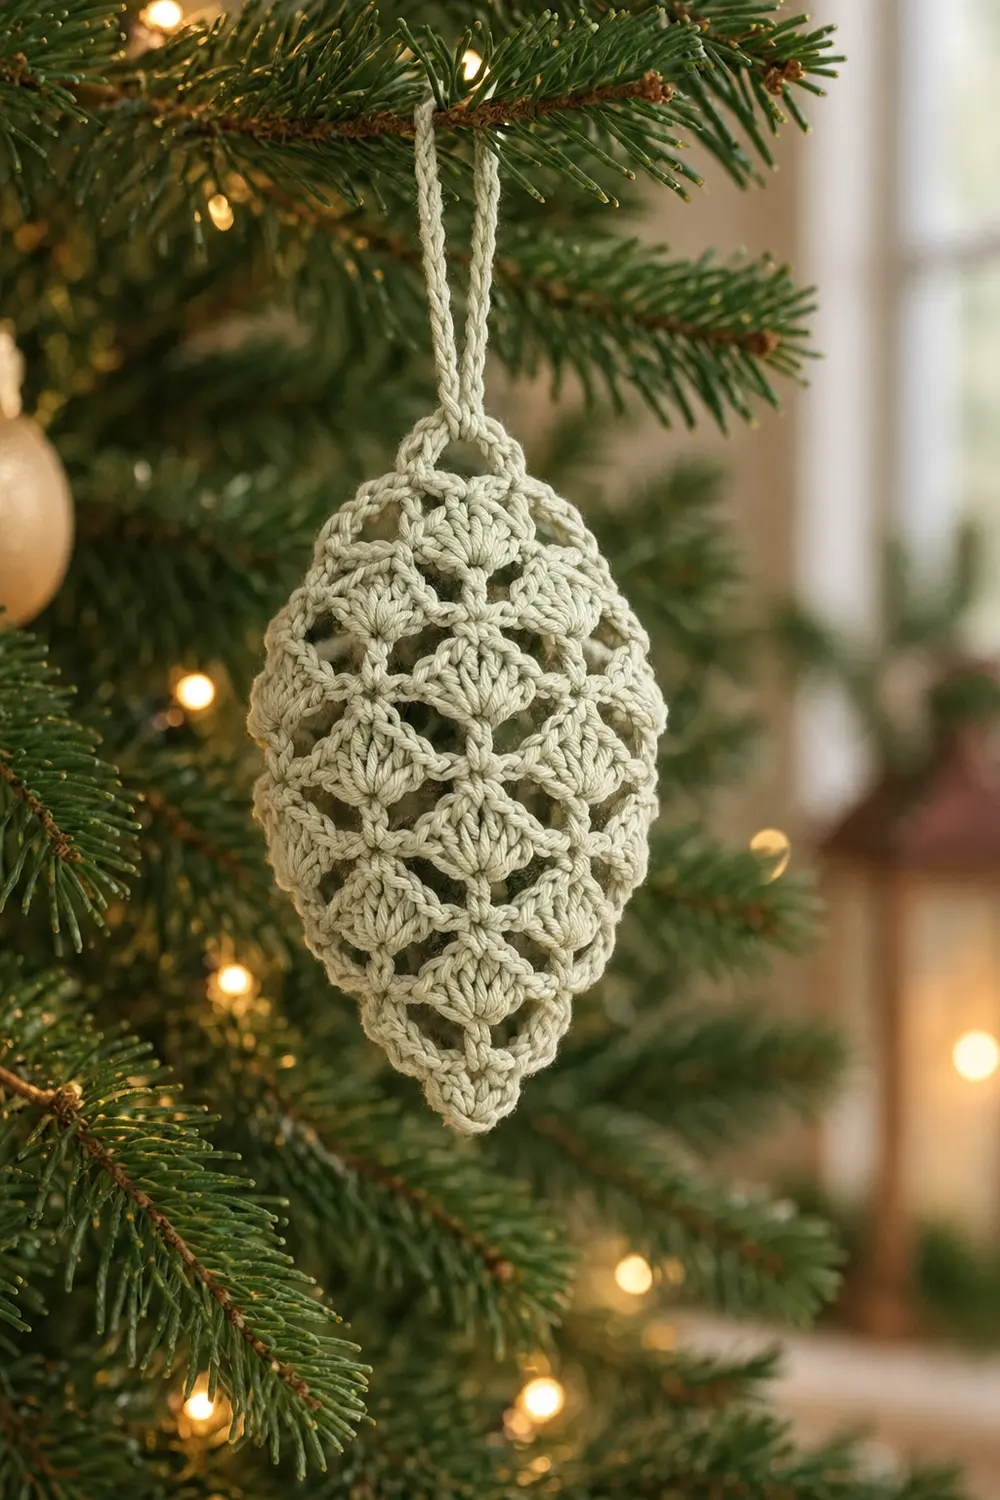
This little ornament is a single, hollow lace pine cone worked in cream yarn. Plump fan shells sit in a staggered diamond lattice, with small open windows between every fan. On a tree, the warm string lights glow through the openings.
The look is soft, vintage, and quietly festive. One neutral color lets the texture do all the work, so the ornament suits a rustic, Scandinavian, or classic tree.
The pattern is written in US crochet terms. The finished ornament measures about 3.5 in (8.9 cm) tall and about 2 in (5.1 cm) across at its widest point when shaped. A twisted yarn loop at the top lets it hang.
You work the ornament in joined rounds, starting from the pointed bottom tip. You build a lattice of shells and increase once to reach full width, then work straight. Smaller shells and a short single crochet band round off the top. A starch blocking step sets the pine-cone shape, and a twisted cord finishes it.
Finished Size and Construction
- Finished size: 3.5 in (8.9 cm) tall x about 2 in (5.1 cm) wide when shaped
- Circumference at widest: 6 in (15.2 cm), which is 3 in (7.6 cm) wide when laid flat
- Skill level: Easy-intermediate (joined rounds, shells, sc2tog)
- Terminology: US crochet terms
- Yarn weight: #2 fine / sport weight
- Hook: 3.25 mm (US D/3)
- Number of pieces: 1, worked as a single hollow piece in the round
- Layout: Single 3D ornament with a twisted hanging loop
- Piece size: 3.5 in (8.9 cm) tall including the top band
- Size before border: 3.2 in (8.1 cm) tall after Round 9
- Border depth: 0.3 in (0.8 cm), which is the 3-round single crochet top band
Materials
Yarn: Use a smooth, tightly plied sport-weight yarn. Mercerized cotton or a cotton blend works best because it gives crisp stitch definition and holds starch well. Avoid fuzzy or brushed yarns, which blur the lattice openings.
- Cream / off-white: 10 g (about 30 m) of sport-weight yarn
This amount covers the ornament, the twisted cord, and a margin for a gauge test. The ornament alone uses about 6 g.
Tools:
- 3.25 mm (US D/3) crochet hook
- Tapestry needle
- Scissors
- Stitch marker
- Spray starch or fabric stiffener
- A small water balloon for blocking
- Rust-proof pins and a towel
Abbreviations (US Terms)
- ch = chain
- sl st = slip stitch
- sc = single crochet
- dc = double crochet
- sc2tog = single crochet 2 together
- sp = space
- MR = magic ring
- st(s) = stitch(es)
Special stitches:
- Shell: 5 dc worked into the same stitch. The 3rd dc is the center dc.
- Mini shell: 3 dc worked into the same stitch. The 2nd dc is the center dc.
Lattice logic: In each pattern round, every shell is worked into an sc from the round below. Every sc is worked into the center dc of a shell from the round below. Ch-2 bridges link them. This offset is what creates the staggered diamond lattice and its open windows.
Gauge and Checkpoints
Gauge:
- 1 pattern repeat (sc, ch 2, shell, ch 2) = 1 in (2.5 cm) wide
- 5 pattern rounds = 2 in (5.1 cm) tall, which is about 0.4 in (1.0 cm) per round
- 6 sc = 1 in (2.5 cm), used for the top band
Test first: Work Rounds 1 to 4 and measure before continuing. These rounds are your gauge swatch. If they are correct, keep going.
Checkpoints (measured unstretched, before blocking):
- After Round 2: tip is about 0.5 in (1.3 cm) tall
- After Round 4: about 1.3 in (3.3 cm) from the tip, with a circumference of 6 in (15.2 cm)
- After Round 8: about 2.9 in (7.4 cm) tall
- After Round 9: about 3.2 in (8.1 cm) tall
- After Round 12: about 3.5 in (8.9 cm) tall
If too big: Go down to a 3.0 mm hook (US C/2 to D/3 range) and restart.
If too small: Go up to a 3.5 mm hook (US E/4) and restart.
A difference of 0.25 in (0.6 cm) in circumference at Round 4 changes the final width noticeably, so fix gauge here rather than later.
Pattern
Join every round with a sl st to the first sc. Do not turn. Place a marker in the first sc of each round if it helps.
Bottom Tip
Round 1: MR, ch 1, 6 sc in ring, join. Pull the ring tight. (6 sc)
Round 2: Ch 1, sc in next sc, ch 2, mini shell in next sc, ch 2. Repeat from * 2 more times, join.
(3 sc, 9 dc, 12 ch = 24 sts; 3 repeats)
The tip is now set up with 3 small fans.
Lattice Rounds
Round 3: Sl st in each of next 2 ch and next 2 dc to reach the center dc of the first mini shell. Ch 1, sc in same dc, ch 2, shell in next sc, ch 2. Sc in center dc of next mini shell, ch 2, shell in next sc, ch 2. Repeat from * 1 more time, join.
(3 sc, 15 dc, 12 ch = 30 sts; 3 repeats)
Each repeat is 10 sts: 1 sc + 2 ch + 5 dc + 2 ch.
Round 4 (increase round, 3 repeats to 6 repeats): Sl st in next ch-2 sp. Ch 1, sc in same sp, ch 2, shell in center dc of next shell, ch 2, sc in next ch-2 sp, ch 2, shell in next sc, ch 2.
Then sc in next ch-2 sp, ch 2, shell in center dc of next shell, ch 2, sc in next ch-2 sp, ch 2, shell in next sc, ch 2. Repeat from * 1 more time. The final shell lands in the first sc of Round 3. Join.
(6 sc, 30 dc, 24 ch = 60 sts; 6 repeats)
Every previous repeat now holds 2 shells, so the repeat count doubles from 3 to 6. Check the 1.3 in (3.3 cm) height and 6 in (15.2 cm) circumference now.
Round 5: Sl st in each of next 2 ch and next 3 dc to reach the center dc of the first shell. Ch 1, sc in same dc, ch 2, shell in next sc, ch 2. Sc in center dc of next shell, ch 2, shell in next sc, ch 2. Repeat from * 4 more times. The final shell lands in the first sc of the previous round. Join.
(6 sc, 30 dc, 24 ch = 60 sts; 6 repeats)
Rounds 6 to 8: Repeat Round 5 three more times.
(60 sts each round; 6 repeats)
You now have the full-width body. The shells stack in an offset diamond lattice. Check the 2.9 in (7.4 cm) height.
Top Shaping
Round 9 (mini shell round): Sl st in each of next 2 ch and next 3 dc to reach the center dc of the first shell. Ch 1, sc in same dc, ch 1, mini shell in next sc, ch 1. Sc in center dc of next shell, ch 1, mini shell in next sc, ch 1. Repeat from * 4 more times, join.
(6 sc, 18 dc, 12 ch = 36 sts; 6 repeats)
The smaller fans and shorter chains pull the top in, which begins the rounded crown. Check the 3.2 in (8.1 cm) height. This is your size before the border.
Border (Top Band)
The border is a short sc band that closes the top of the ornament.
Border gauge: 6 sc = 1 in (2.5 cm). The band is denser than the lattice on purpose, so it draws the top closed smoothly.
For a round piece, “per side” means per repeat. There are 6 repeats around.
Round 10 (conversion round): Ch 1, sc in same st as join. Skip the ch-1 sp, sc in each of next 3 dc, skip the ch-1 sp, sc in next sc, skip ch-1 sp, sc in each of next 3 dc, skip ch-1 sp. Repeat from * 4 more times, join.
- Per repeat: 4 sc (1 into the sc + 1 into each of the 3 dc)
- Total: 24 sc worked 1-per-existing-stitch + 0 extra = 24 sc
- Chains are skipped, not worked.
At 6 sc per inch, 24 sc is a 4 in (10.2 cm) circumference. That sits slightly inside the Round 9 lattice, which starts the dome.
Round 11: Ch 1, sc2tog 12 times, join.
(12 sc; 2 per repeat)
Round 12: Ch 1, sc2tog 6 times, join.
(6 sc; 1 per repeat)
Fasten off, leaving an 8 in (20.3 cm) tail. Do not cinch yet. The small opening is needed for blocking.
Why the math works:
- 24 = 6 repeats x 4 sts, so every repeat gets the same 4 sc and the band stays symmetrical.
- 24 halves evenly to 12 and then to 6, so each decrease round removes exactly 1 stitch per repeat pair and keeps the decreases centered over the lattice columns.
- The 6 final sc mirror the 6 sc of Round 1, so the top and bottom close the same way.
Final Blocking
Starch makes the lace crisp and holds the pine-cone shape on the tree.
- Weave in the bottom tail through the Round 1 stitches. Leave the top tail free.
- Wet the ornament in cool water and gently squeeze it in a towel until damp.
- Push a deflated water balloon through the top opening.
- Inflate the balloon slowly until the ornament reaches 2 in (5.1 cm) wide and 3.5 in (8.9 cm) tall. Tie off the balloon.
- Shape by hand. Center each shell over its sc, open every lattice window, and pinch the bottom into a neat point.
- Spray evenly with starch or brush on fabric stiffener. Rotate so every side is coated.
- Hang or rest the ornament on a glass to dry for 12 to 24 hours.
- When fully dry, pop the balloon and pull it out through the top.
- Thread the top tail through the front loops of the 6 sc of Round 12. Pull tight to close, then secure and weave in.
- Twisted loop: Cut a 24 in (61.0 cm) strand. Fold it in half to 12 in (30.5 cm) and twist until it kinks. Fold it again and let it twist on itself into a cord about 6 in (15.2 cm) long. Knot the ends.
- Thread the knotted end through the cinched top. Fold the cord into a 3 in (7.6 cm) loop and stitch it securely in place.
Final Quality-Control Checklist
- Rounds 5 to 9 each show exactly 6 shells.
- Every shell sits directly above an sc, and every sc sits above a shell center.
- Lattice openings are evenly sized all the way around.
- The bottom tip is a closed, neat point with no gap.
- The top is cinched closed with no hole.
- Height is about 3.5 in (8.9 cm) and width is about 2 in (5.1 cm).
- The twisted loop is secure and about 3 in (7.6 cm) long.
- The starch has dried fully, with no sticky spots.
- All tails are woven in and trimmed.
Troubleshooting
Lattice is twisting around the ornament. Your round start is shifting. Count the sl sts exactly (2 ch + 3 dc) so each round begins at the shell center.
Too few or too many shells. Recount Round 4. It must end with 6 sc and 6 shells. Rip back to Round 4 if needed.
Bottom tip is ruffled. Round 2 is too loose. Tighten your mini shells, or go down a hook size for Rounds 1 and 2 only.
Openings are closed up. Your chains are too tight. Relax tension on the ch-2 bridges, or open them with your fingers during blocking.
Top looks pointed, not rounded. Round 9 is too tight. Keep the mini shells relaxed and inflate the balloon a little more when blocking.
Ornament leans to one side. Re-wet it and reshape it on the balloon, centering every shell column.
Care
Spot clean only, with cool water. Store flat in tissue paper. If the ornament softens, re-starch it on a balloon.
Final Notes
The measurement chain starts with gauge: 1 repeat = 1 in (2.5 cm) and 5 rounds = 2 in (5.1 cm). The tip reaches 0.5 in (1.3 cm). Round 4 doubles the repeats to 6, which gives a 6 in (15.2 cm) circumference at 1.3 in (3.3 cm) tall. Four straight rounds bring the body to 2.9 in (7.4 cm). Round 9 adds height and narrows the top to 3.2 in (8.1 cm). The 0.3 in (0.8 cm) sc band closes it at 3.5 in (8.9 cm).
Check each stage as you go, and your pine cone will come out the right size with an even lattice.
Optional: make a few in different yarns for a matching set.
Happy crocheting!