

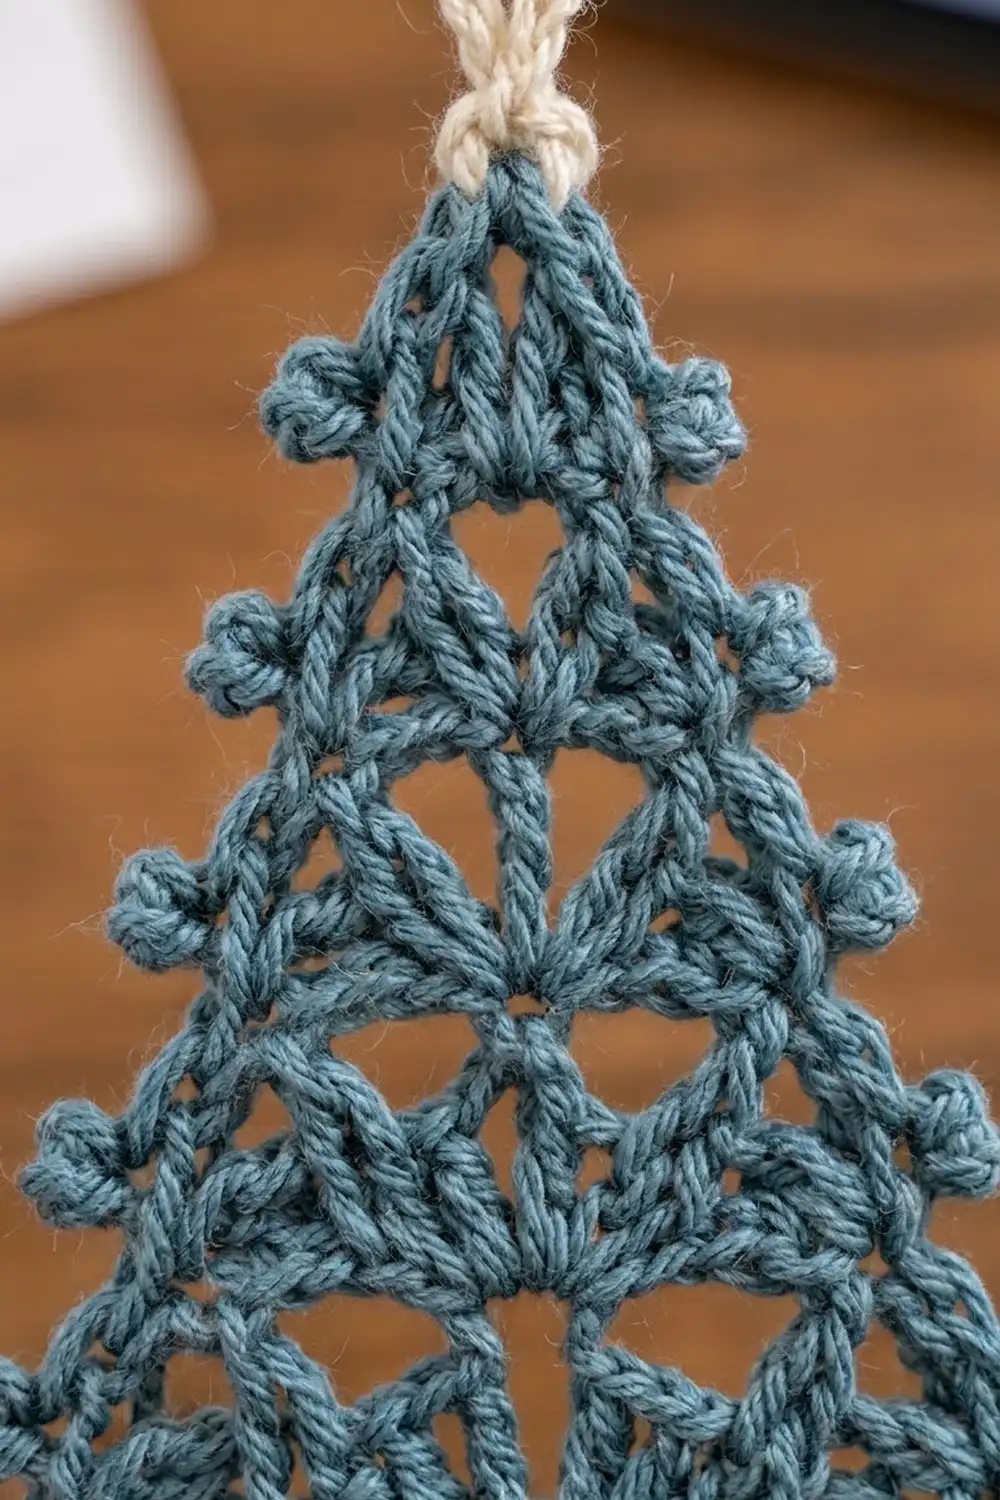
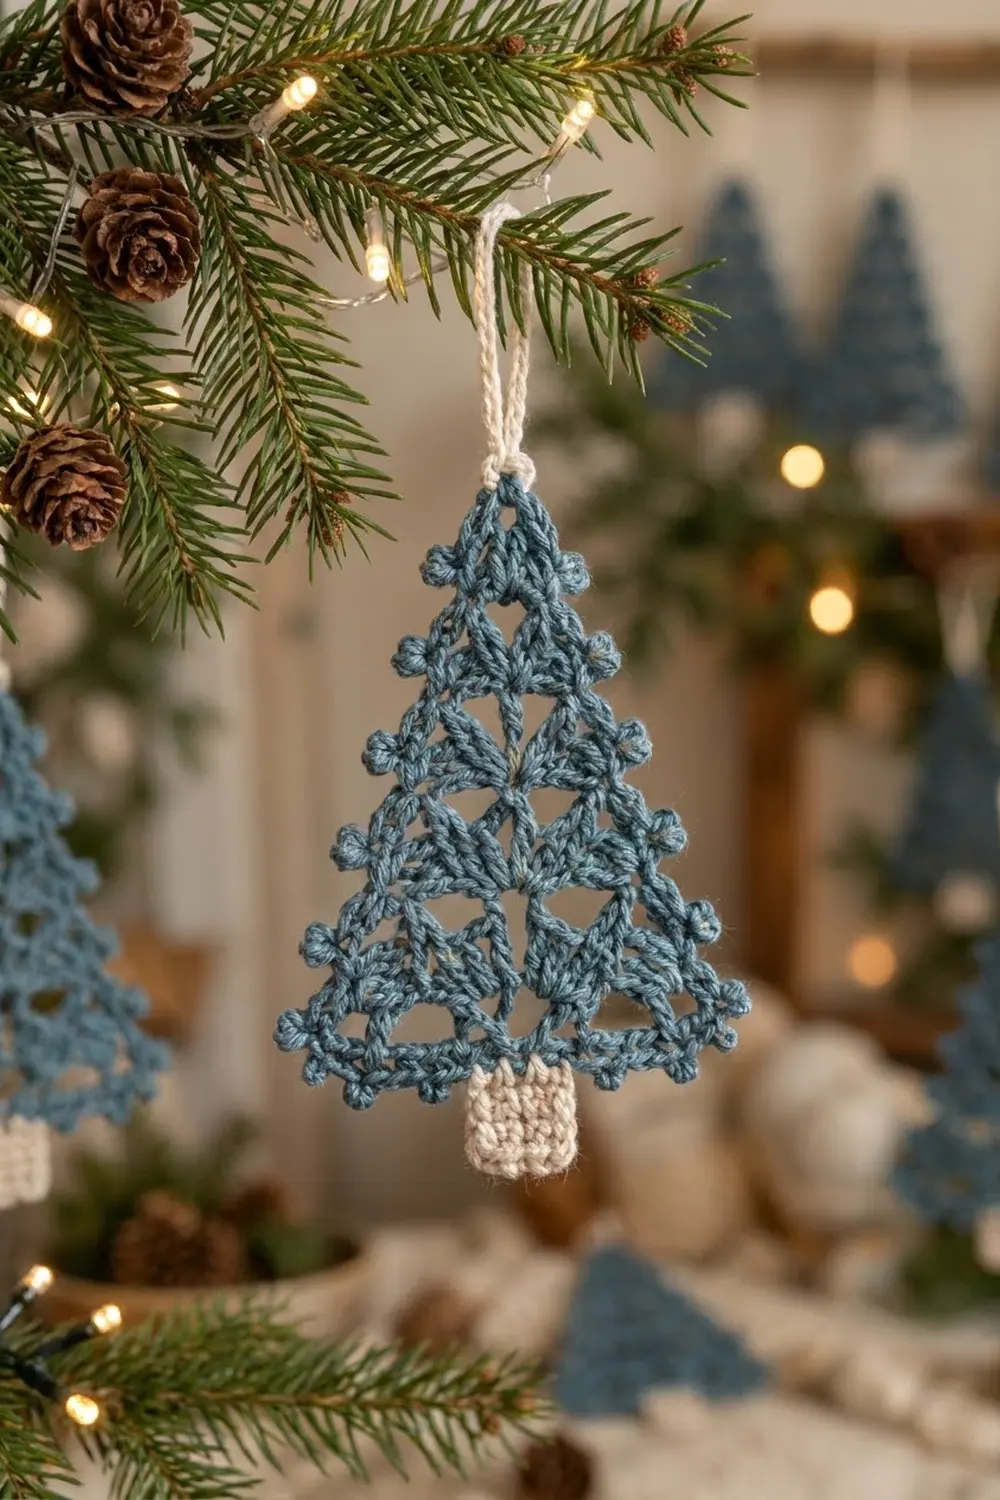
This little lace tree is a quick holiday make with a vintage, frosted look. Tall treble shells stack in tiers that narrow toward the top. Tiny picots line the edges like snow on pine needles, and a cream trunk and hanging loop finish it off.
The sample is a dusty teal-blue with soft cream accents. The style is calm and Scandinavian-inspired, so it works on a tree, a gift package, or a branch hanging. Any medium color works, but mid-tones show off the lace best.
The pattern uses US crochet terms. The finished ornament is about 4.7 in (11.9 cm) wide and about 5.65 in (14.4 cm) tall from tip to trunk. The hanging loop adds another 1.25 in (3.2 cm).
You work the cream trunk first. Next you chain the teal base straight across the top of the trunk, so trunk and tree are one piece from the start. The tree then grows upward in alternating shell rows and chain-bridge rows. One picot border round goes around the outside, and a cream chain loop goes at the tip.
Finished Size and Construction
- Finished size: about 4.7 in (11.9 cm) wide x 5.65 in (14.4 cm) tall, not counting the loop
- Skill level: Easy+ (advanced beginner)
- Terminology: US crochet terms
- Yarn weight: DK (weight 3), cotton or cotton blend
- Hook: 4.0 mm (US G-6)
- Number of pieces: 1 (the trunk is joined as you go)
- Layout: single standalone ornament, no assembly
- Tree size before border: 4.2 in (10.7 cm) wide x about 4.5 in (11.4 cm) tall
- Trunk size: 1 in (2.5 cm) wide x about 0.9 in (2.3 cm) tall
- Border depth: about 0.25 in (0.6 cm), including picots
Materials
Yarn: Use a smooth DK cotton or cotton-acrylic blend. Cotton gives crisp stitch definition and holds its shape after blocking. Fuzzy yarns hide the lace, so avoid them.
- Color A, dusty teal-blue (tree and border): 8 g, about 19 m (21 yd)
- Color B, cream (trunk and hanging loop): 3 g, about 7 m (8 yd)
These quantities include a margin for your gauge swatch and weaving in ends. One standard 50 g ball of each color makes several ornaments.
Tools:
- 4.0 mm (US G-6) crochet hook
- Tapestry needle
- Scissors
- 2 locking stitch markers
- Ruler or tape measure
- Blocking mat, rustproof pins, and a spray bottle
Abbreviations (US Terms)
- ch – chain
- sl st – slip stitch
- sc – single crochet
- tr – treble crochet (yarn over twice)
- sk – skip
- sp – space
- st(s) – stitch(es)
- RS – right side
Special stitches:
- Shell: (2 tr, ch 2, 2 tr) in the same stitch or space. The ch-2 sp at its center is the shell’s tip.
- Picot: ch 3, sl st in 3rd ch from hook (the first chain of the three).
Gauge and Checkpoints
Base gauge: 20 sc and 22 rows = 4 in (10.2 cm) with a 4.0 mm hook.
The ornament is small, so the ornament can be your gauge test. Make the trunk and Row 1, then measure:
- Trunk checkpoint: 5 sc = 1 in (2.5 cm) wide, and 5 rows = about 0.9 in (2.3 cm) tall.
- Row 1 checkpoint: 21 sc = 4.2 in (10.7 cm) wide.
- Row 2 checkpoint: about 1 in (2.5 cm) tall, measured from the trunk join to the top of the shells.
- Row 6 checkpoint: about 2.6 in (6.6 cm) tall from the trunk join.
- Row 11 checkpoint: about 4.5 in (11.4 cm) tall from the trunk join.
If Row 1 is wider than 4.4 in (11.2 cm): go down to a 3.75 mm hook.
If Row 1 is narrower than 4 in (10.2 cm): go up to a 4.5 mm hook.
If the width is right but the tree is too short, your trebles are tight. Pull up the first loop of each tr a little taller.
Trunk
With Color B:
Row 1: Ch 6, sc in 2nd ch from hook and in each ch across, turn. (5 sc)
Rows 2–5: Ch 1, sc in each st across, turn. (5 sc)
Fasten off and leave a 6 in (15.2 cm) tail. The trunk should be a neat 1 in (2.5 cm) x 0.9 in (2.3 cm) rectangle. Turn it so the last row is at the top and the RS faces you.
Tree
With Color A:
Setup chain: Make a slipknot. Ch 8, then sc in each of the 5 sts along the top of the trunk. Ch 9 and turn.
The chain sticks out the same distance on each side, and the trunk hangs in the middle.
Row 1 (base): Sc in 2nd ch from hook and in each of the next 7 ch (8 sc). Sc in each of the 5 sc over the trunk (5 sc). Sc in each of the 8 ch of the first chain (8 sc). Turn. (21 sc)
Check: 8 + 5 + 8 = 21, with the trunk exactly centered.
Row 2 (shell row, 5 shells): Ch 1, sc in first st. Sk 1, shell in next st, sk 1, sc in next st. Repeat from * 4 more times. Turn. (5 shells, 6 sc)
Each repeat uses 4 sts, so 1 + (5 x 4) = 21 sts used.
Row 3 (bridge row): Sl st in first sc, in each of the next 2 tr, and in the first ch-2 sp. Ch 1, sc in the same sp. Ch 4, sc in ch-2 sp of next shell. Repeat from * 3 more times. Turn. (5 sc, 4 ch-4 loops)
The sl sts move you in by half a shell, so the edge steps inward.
Row 4 (shell row, 4 shells): Ch 1, sc in first sc. Shell in next ch-4 loop, sc in next sc. Repeat from * 3 more times. Turn. (4 shells, 5 sc)
Row 5 (bridge row): Work as for Row 3, repeating from * 2 more times. (4 sc, 3 ch-4 loops)
Row 6 (shell row, 3 shells): Work as for Row 4, repeating from * 2 more times. (3 shells, 4 sc)
Row 7 (bridge row): Work as for Row 3, repeating from * 1 more time. (3 sc, 2 ch-4 loops)
Row 8 (shell row, 2 shells): Work as for Row 4, repeating from * 1 more time. (2 shells, 3 sc)
Row 9 (bridge row): Sl st in first sc, next 2 tr, and first ch-2 sp. Ch 1, sc in same sp, ch 4, sc in ch-2 sp of next shell. Turn. (2 sc, 1 ch-4 loop)
Row 10 (shell row, 1 shell): Ch 1, sc in first sc, shell in ch-4 loop, sc in last sc. Turn. (1 shell, 2 sc)
Row 11 (tip): Sl st in first sc, next 2 tr, and the ch-2 sp. Ch 1, sc in the same sp. (1 sc)
Fasten off. The shell count goes 5, 4, 3, 2, 1, so each tier is one shell narrower than the one below. That keeps the triangle even. The tree should now measure 4.2 in (10.7 cm) across Row 1 and about 4.5 in (11.4 cm) from the trunk join to the tip.
Border
Border gauge: 5 sc per 1 in (2.5 cm) along the edges, the same as the base gauge. A picot takes up about the width of 1 sc.
Choose the neater face as the RS. The border is worked in one round, starting at the tip and moving down the right side.
Border Round: With RS facing, join Color A with a sl st in the Row 11 sc.
- Tip: Ch 1, (sc, picot, sc) in the same st. (2 sc, 1 picot)
- Right slanted side: Work down the row ends in this order: Row 10, 9, 8, 7, 6, 5, 4, 3, 2.
- On each shell row (Rows 10, 8, 6, 4, 2), work 2 sc along the outer tr post, a picot, then 1 sc at the base of that row.
- On each bridge row (Rows 9, 7, 5, 3), work 1 sc into the sl-st edge.
- Side total: (5 x 3 sc) + (4 x 1 sc) = 19 sc and 5 picots
- Bottom-right corner: (Sc, picot, sc) in the end of Row 1. (2 sc, 1 picot)
- Bottom edge, right half: Work into the free loops of the setup chain, moving toward the trunk. Sc in each of the 8 free loops, with a picot after the 2nd, 4th, and 6th sc. (8 sc, 3 picots)
- Skip the trunk: The trunk is attached under the center 5 sts, so there are no free loops there. Carry the yarn behind the trunk top and go straight to the first free loop on the other side.
- Bottom edge, left half: Sc in each of the 8 free loops, with a picot after the 2nd, 4th, and 6th sc. (8 sc, 3 picots)
- Bottom-left corner: (Sc, picot, sc) in the end of Row 1. (2 sc, 1 picot)
- Left slanted side: Work up the row ends, Rows 2 to 10, using the same method as the right side, so the picots sit at the shell-row tips. (19 sc, 5 picots)
- Sl st in the first sc of the round. Fasten off.
Round total: 2 + 19 + 2 + 8 + 8 + 2 + 19 = 60 sc, and 1 + 5 + 1 + 3 + 3 + 1 + 5 = 19 picots.
Why the math works: Each slanted side is about 5 in (12.7 cm) long. At 5 sts per inch, it needs about 25 stitch widths. The side has 19 sc plus 5 picots (about 24 widths), plus half of the tip and corner units, which brings it to 25. The bottom edge is worked 1 sc per chain loop, so it stays exactly as wide as Row 1.
The border adds about 0.25 in (0.6 cm) on every edge. The tree becomes about 4.7 in (11.9 cm) wide, and the full height from tip to trunk becomes about 5.65 in (14.4 cm).
Hanging loop: Join Color B with a sl st in the tip picot. Ch 18, then sl st in the same picot. Fasten off, leaving an 8 in (20.3 cm) tail. Wrap the tail twice around the base of the loop to secure it, then weave it in. The loop is about 1.25 in (3.2 cm) tall.
Final Blocking
- Weave in all ends along stitches of the same color. Keep the cream tails inside the trunk.
- Spray the ornament until it’s evenly damp. You can also dip it in cool water and roll it in a towel.
- Lay it RS up on the blocking mat.
- Pin the bottom corners 4.7 in (11.9 cm) apart, then pin the tip centered above them.
- Pin out each picot along both sides, so the edges are straight lines from the corners to the tip.
- Open each shell with your fingertips so the ch-2 tips point straight up.
- Pin the trunk square and centered, 1 in (2.5 cm) wide.
- Let it dry completely, usually 6 to 12 hours. For a stiffer ornament, use a light spray starch.
Final Quality-Control Checklist
- Row 1 has 21 sc and the trunk is centered under sts 9–13.
- The shell rows have 5, 4, 3, 2, and 1 shells, in that order.
- Each bridge row has one fewer ch-4 loop than it has sc.
- Both slanted sides have 19 sc and 5 picots.
- The bottom edge has 16 sc and 6 picots, split evenly on each side of the trunk.
- The tip and both bottom corners each have a (sc, picot, sc) unit.
- The finished ornament measures about 4.7 in (11.9 cm) x 5.65 in (14.4 cm).
- The loop is secure and centered over the tip.
Troubleshooting
Tree leans to one side: You probably missed the “sk 1” in Row 2 or started a bridge row in the wrong space. Recount Row 2: 5 shells and 6 sc, using all 21 sts.
Edges ruffle: The border is too loose or has too many sc. Keep to 19 sc per side, or go down a hook size for the border only.
Edges pull inward: The border is too tight. Use a hook 0.5 mm larger for the border round only.
Shells look squashed: Your ch-4 loops are too short or too tight. Make the chains loosely, or use ch 5 for the bridge loops.
Trunk sits off-center: Count the setup chains again. You need 8 before the trunk and 9 after it, one of which is the turning chain.
Ornament flops when hung: Block it again with a starch spray, or use 100% cotton yarn.
Care
Hand wash in cool water with mild soap, press out the water in a towel, and lay flat to dry. Reshape and repin if needed.
Final Notes
The measurement chain is short and easy to check. The trunk is 5 sc = 1 in (2.5 cm). Row 1 is 21 sc = 4.2 in (10.7 cm). The shells taper over 11 rows to about 4.5 in (11.4 cm) tall. The picot border brings the ornament to about 4.7 in (11.9 cm) x 5.65 in (14.4 cm). If each checkpoint matches, your tree will match.
Make one in every color you like and hang them anywhere that needs a bit of frost. Happy crocheting!