

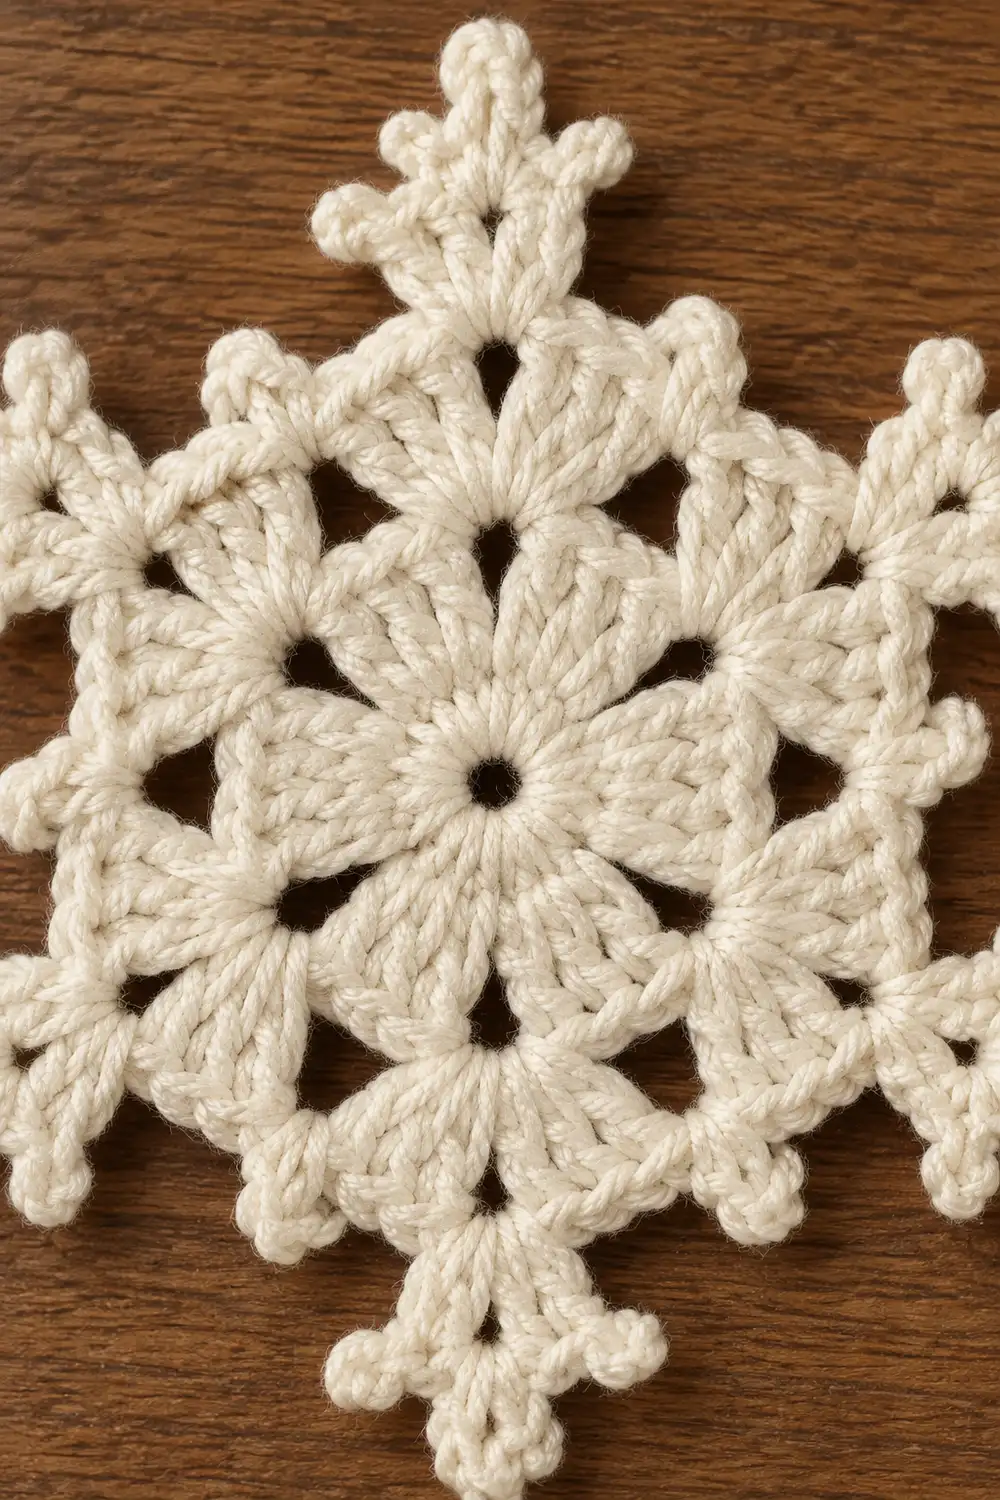
This snowflake is a single six-pointed motif worked in cream cotton. It has a solid circular center, six identical arms built from layered clusters, small picot points along each arm, and open lace between the arms. When blocked flat, the clusters stand out against the open spaces and give it the look of a frost crystal.
The style is classic and simple. One color, no sewing, and no separate pieces. The texture comes from 3-double-crochet clusters stacked over three rounds, so each arm looks raised and dimensional even when the snowflake lies flat.
This pattern uses US crochet terms. The finished snowflake measures 4.5 in (11.4 cm) from point to point. The description range is 4–5 in (10.2–12.7 cm), and blocking puts yours anywhere in that range.
Construction overview: you start with a magic ring and a solid round of double crochet. Then you work three rounds of clusters that divide the circle into six arms. You finish with one round of single crochet edging that adds picot points to each arm. There are five rounds in all.
Finished Size and Construction
- Finished size: 4.5 in (11.4 cm) point to point, after blocking
- Skill level: Easy-intermediate (clusters and picots)
- Terminology: US crochet terms
- Yarn weight: Worsted (#4) cotton
- Hook: 4.0 mm (G-6)
- Number of pieces: 1
- Layout: Single motif, worked in the round
- Piece size: 4.5 in (11.4 cm) point to point; 3.5 in (8.9 cm) valley to valley
- Size before border (after Round 4): 4 in (10.2 cm) point to point
- Border depth: 0.25 in (0.6 cm) on each side, adding 0.5 in (1.3 cm) to the total width
Materials
Yarn advice: Use a smooth, tightly plied worsted-weight cotton. Cotton holds the shape of clusters and picots better than acrylic and takes starch well. Avoid fuzzy or brushed yarns because they hide the lace.
- Cream / off-white: 10 g (about 16 m / 17.5 yd)
The quantity includes a margin for a gauge swatch, a 6 in (15.2 cm) starting tail, and a 6 in (15.2 cm) finishing tail. The snowflake uses about 6 g (about 10 m / 11 yd).
Tools:
– 4.0 mm (G-6) crochet hook
– Tapestry needle
– Scissors
– Rust-proof pins
– Blocking mat or folded towel
– Spray bottle with water
– Optional: spray starch or a diluted glue-and-water stiffener
Abbreviations (US Terms)
- ch – chain
- sl st – slip stitch
- sc – single crochet
- dc – double crochet
- st(s) – stitch(es)
- sp – space
- beg – beginning
- cl – 3-dc cluster
- beg cl – beginning cluster
- p – picot
- lp – large picot
Special stitches:
- 3-dc cluster (cl): Yarn over, insert hook into the stitch or space, pull up a loop, yarn over, pull through 2 loops. Repeat from * 2 more times in the same place (4 loops on hook). Yarn over and pull through all 4 loops.
- Beginning cluster (beg cl): Ch 2, then work a 2-dc cluster in the same place (2 partial dc closed together). The ch 2 plus the 2-dc cluster counts as one cl.
- Picot (p): Ch 3, sl st in the 3rd ch from hook.
- Large picot (lp): Ch 4, sl st in the 4th ch from hook.
Gauge and Checkpoints
The whole project is one small motif, so it is its own gauge test. Work Round 1 and measure before continuing. If Round 1 is off, everything after it will be off by more.
Measurement checkpoints (unblocked, lightly flattened by hand):
- After Round 1: 1.25 in (3.2 cm) diameter
- After Round 2: 2 in (5.1 cm) diameter
- After Round 3: 3 in (7.6 cm) diameter
- After Round 4: 4 in (10.2 cm) point to point
- After Round 5: 4.5 in (11.4 cm) point to point (after blocking)
A tolerance of ±0.25 in (0.6 cm) at any checkpoint is fine.
If your piece is too big: go down to a 3.75 mm (F-5) hook, or close the magic ring tighter and keep the ch 3 sections snug.
If your piece is too small: go up to a 4.5 mm (7) hook. Small snowflakes are usually caused by tight clusters, so pull up each cluster loop to the full height of a dc.
Pattern
Round 1 – Solid Center
Make a magic ring.
Ch 3 (counts as first dc). Work 17 dc into the ring. Pull the tail to close the ring completely. Sl st to the top of the beginning ch 3.
Count: 18 dc.
This round forms the solid circular center. It should lie flat with no visible hole. Checkpoint: 1.25 in (3.2 cm).
Round 2 – First Cluster Layer
Beg cl in the same st as the join. Ch 3, skip 2 sts. Cl in the next st, ch 3, skip 2 sts. Repeat from * 4 more times. Sl st to the top of the beg cl.
Count: 6 cl and 6 ch-3 sps.
Check the spacing: 6 repeats × 3 sts used each (1 cl st + 2 skipped) = 18 sts. This uses every stitch of Round 1 exactly once. Checkpoint: 2 in (5.1 cm).
Round 3 – Splitting the Arms
Sl st into the next ch-3 sp.
(Beg cl, ch 3, cl) in the same sp. Ch 3, (cl, ch 3, cl) in the next ch-3 sp. Repeat from * 4 more times. Ch 3, sl st to the top of the beg cl.
Count: 12 cl, 6 arm sps (the ch-3 inside each cluster pair), and 6 gap sps (the ch-3 between pairs).
Each cluster pair is the base of one arm. Each gap sp sits over a Round 2 cluster and forms the open lace between arms. Checkpoint: 3 in (7.6 cm).
Round 4 – Layered Arm Clusters
Sl st into the next cl, then sl st into the next arm sp.
(Beg cl, ch 2, cl, ch 2, cl) in the same arm sp. Ch 2, sc in the next gap sp, ch 2.
(Cl, ch 2, cl, ch 2, cl) in the next arm sp. Ch 2, sc in the next gap sp, ch 2. Repeat from * 4 more times. Sl st to the top of the beg cl.
Count: 18 cl (3 per arm), 12 ch-2 sps inside the arms (2 per arm), 6 sc (1 per valley), and 12 ch-2 sps beside the sc (2 per valley).
The three clusters fan out from one space, which builds the layered, raised arm. The single sc in each gap anchors the valley between arms and pulls it toward the center. This creates the star shape.
Checkpoint: 4 in (10.2 cm) point to point. The arms should already be visible as six separate points.
Border (Round 5 – Picot Edging)
The edging is one round of single crochet with picots. It sharpens each arm into a point and adds the small loop details at the tips and sides.
Border gauge: about 5 sc per 1 in (2.5 cm) along the arm edges. This is the natural sc gauge of worsted cotton on a 4.0 mm hook, so the edging lies flat without stretching.
Round 5
Do not turn. Ch 1. The first arm begins at the top of the beg cl, where you joined.
Each arm (work this sequence on all 6 arms):
- Sc in the top of the first cl of the arm.
- (Sc, p, sc) in the next ch-2 sp.
- (Sc, lp, sc) in the top of the middle cl. This forms the arm tip.
- (Sc, p, sc) in the next ch-2 sp.
- Sc in the top of the third cl of the arm.
Each valley (between arms):
- 2 sc in the next ch-2 sp. Skip the sc. 2 sc in the next ch-2 sp.
Repeat steps 1–6 for all 6 arms, starting each new arm in the first cl after the valley. Sl st to the first sc. Fasten off, leaving a 6 in (15.2 cm) tail.
Counts Per Arm
- Arm: 1 + 2 + 2 + 2 + 1 = 8 sc, plus 2 p and 1 lp
- Valley: 2 + 2 = 4 sc
- Per repeat: 12 sc, 3 picots
Round total: 6 × 12 = 72 sc, 12 p, and 6 lp (18 picots in all).
Why the Math Works
Every stitch in Round 5 is worked into a stitch or space from Round 4. There are no extra stitches. Each cl top gets 1 or 2 sc, which matches the width of one cluster. Each ch-2 sp gets 2 sc, which matches the width of 2 chains. This keeps the arms flat.
The middle cluster gets the large picot because it is the outermost point of the arm. The side picots in the ch-2 sps give the small branch details.
In the valleys, skipping the Round 4 sc means 4 sc cover two ch-2 sps plus one skipped stitch. This pulls the edge in slightly and keeps the valleys sharp. The arms reach 4.5 in (11.4 cm), and the valleys stay near 3.5 in (8.9 cm).
Final Blocking
- Weave in both tails along the back of the clusters. Do not trim them closer than 0.5 in (1.3 cm) until after blocking.
- Mist the snowflake with water until it is evenly damp, but not dripping. If you want a stiff ornament, use spray starch or diluted stiffener instead.
- Draw or imagine a 4.5 in (11.4 cm) circle on your blocking surface. Mark the center.
- Place the snowflake face up with the center of Round 1 on the center mark.
- Pin each large picot tip 2.25 in (5.7 cm) from the center, spacing the six tips evenly around the circle.
- Pin each valley so it sits about 1.75 in (4.4 cm) from the center.
- Open each side picot with a pin so the loops are round and point outward.
- Gently press the clusters flat with your fingertips so each arm is level.
- Let it dry completely, at least 6 hours, or overnight if starched.
- Unpin and trim the tails.
Final Quality-Control Checklist
- Round 1 has 18 dc and the center has no visible hole.
- Round 2 has 6 clusters and 6 ch-3 sps.
- Round 3 has 12 clusters in 6 pairs.
- Round 4 has 18 clusters, 3 per arm, with one sc in each valley.
- Round 5 has 72 sc, 12 small picots, and 6 large picots.
- All six arms are the same length within 0.25 in (0.6 cm).
- Point-to-point size is 4.5 in (11.4 cm), within the 4–5 in (10.2–12.7 cm) range.
- The motif lies flat with no cupping or ruffling.
- The tails are secure and hidden.
Troubleshooting
The center cups or bowls up. The magic ring is too loose, or the Round 1 dc are too short. Redo Round 1 and pull each dc to full height.
The edges ruffle. Check your stitch counts. Extra sc in Round 5 or extra chains in Round 3 make the outer edge too long. Go down a hook size if the counts are correct.
One arm is shorter than the others. You may have worked fewer clusters in one arm sp in Round 4. Each arm needs exactly 3 cl.
Clusters look flat or loose. Pull up each partial dc to full height before closing the cluster, and keep the final pull-through snug.
Picots are floppy or uneven. Make the chains the same size every time. Starch the finished piece to hold the picots in place.
Valleys look rounded instead of sharp. Make sure you skip the Round 4 sc in each valley during Round 5.
The open lace is closed up. Your ch-3 sps are too tight. Loosen the chains or go up half a hook size.
Care
Hand wash in cool water and lay flat to dry. If the snowflake is starched, wash it gently, then reshape and re-starch it.
Final Notes
The measurement chain for this snowflake is simple. Round 1 sets the center at 1.25 in (3.2 cm). Round 2 grows it to 2 in (5.1 cm). Round 3 splits the arms at 3 in (7.6 cm). Round 4 builds the layered arms to 4 in (10.2 cm). The picot edging adds 0.25 in (0.6 cm) per side for a blocked size of 4.5 in (11.4 cm).
The stitch counts follow the same chain: 18 dc, then 6 clusters, then 12 clusters, then 18 clusters, then 72 sc with 18 picots. If each checkpoint matches, the finished snowflake will too.
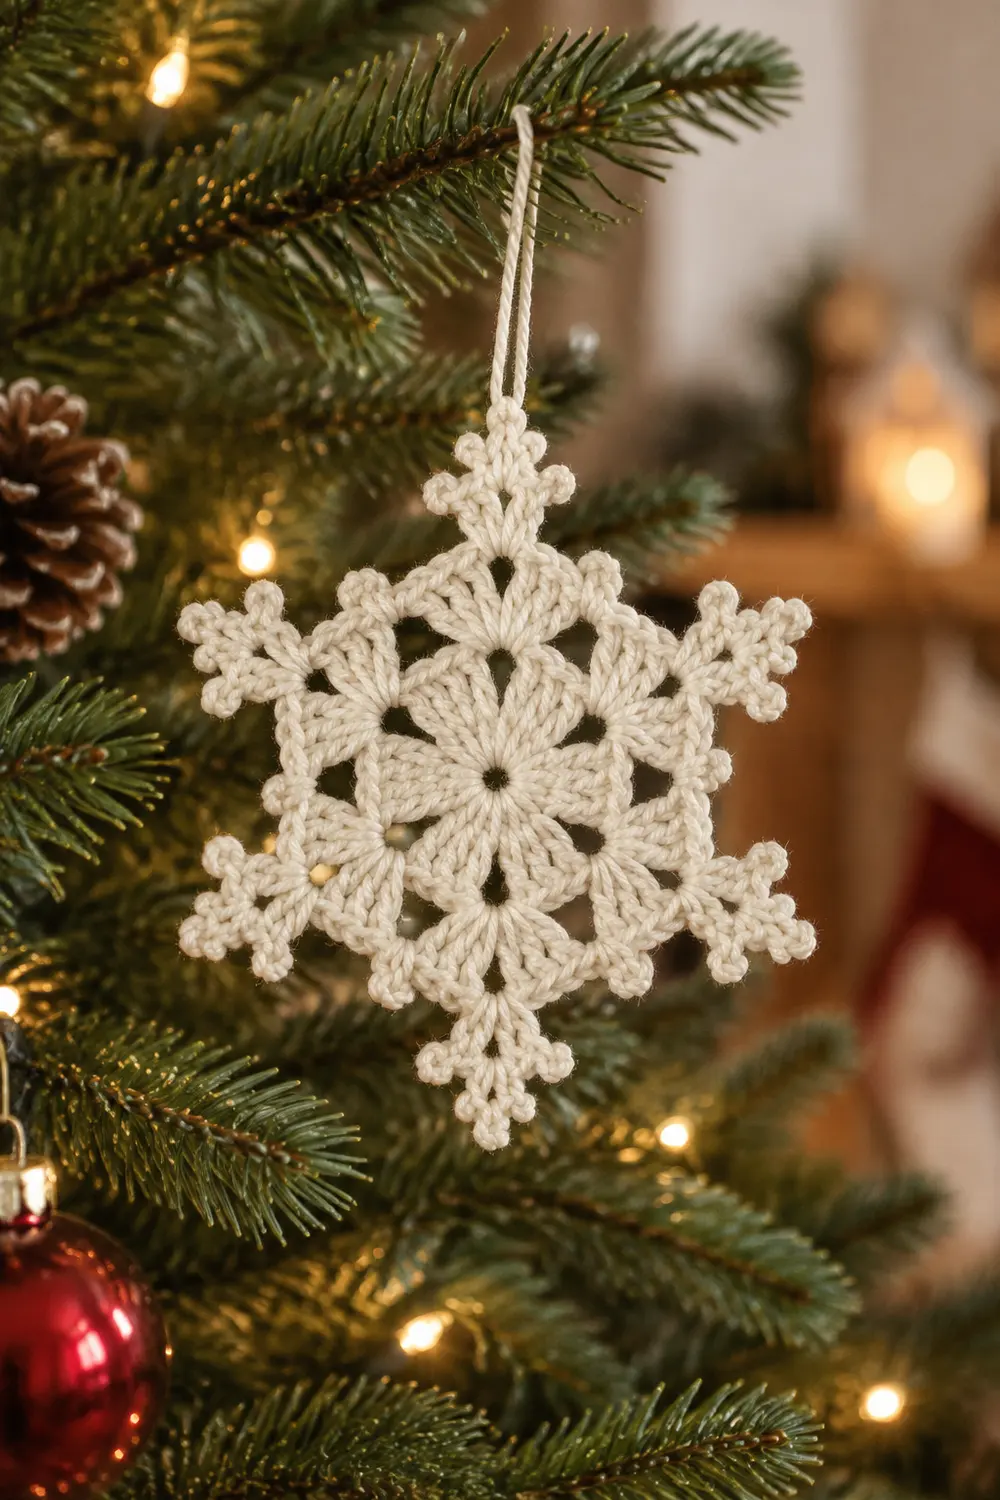
Optional: if you would like more, you can make several of these snowflakes as tree ornaments or gift toppers. The pattern itself is for one motif.
Happy crocheting!