

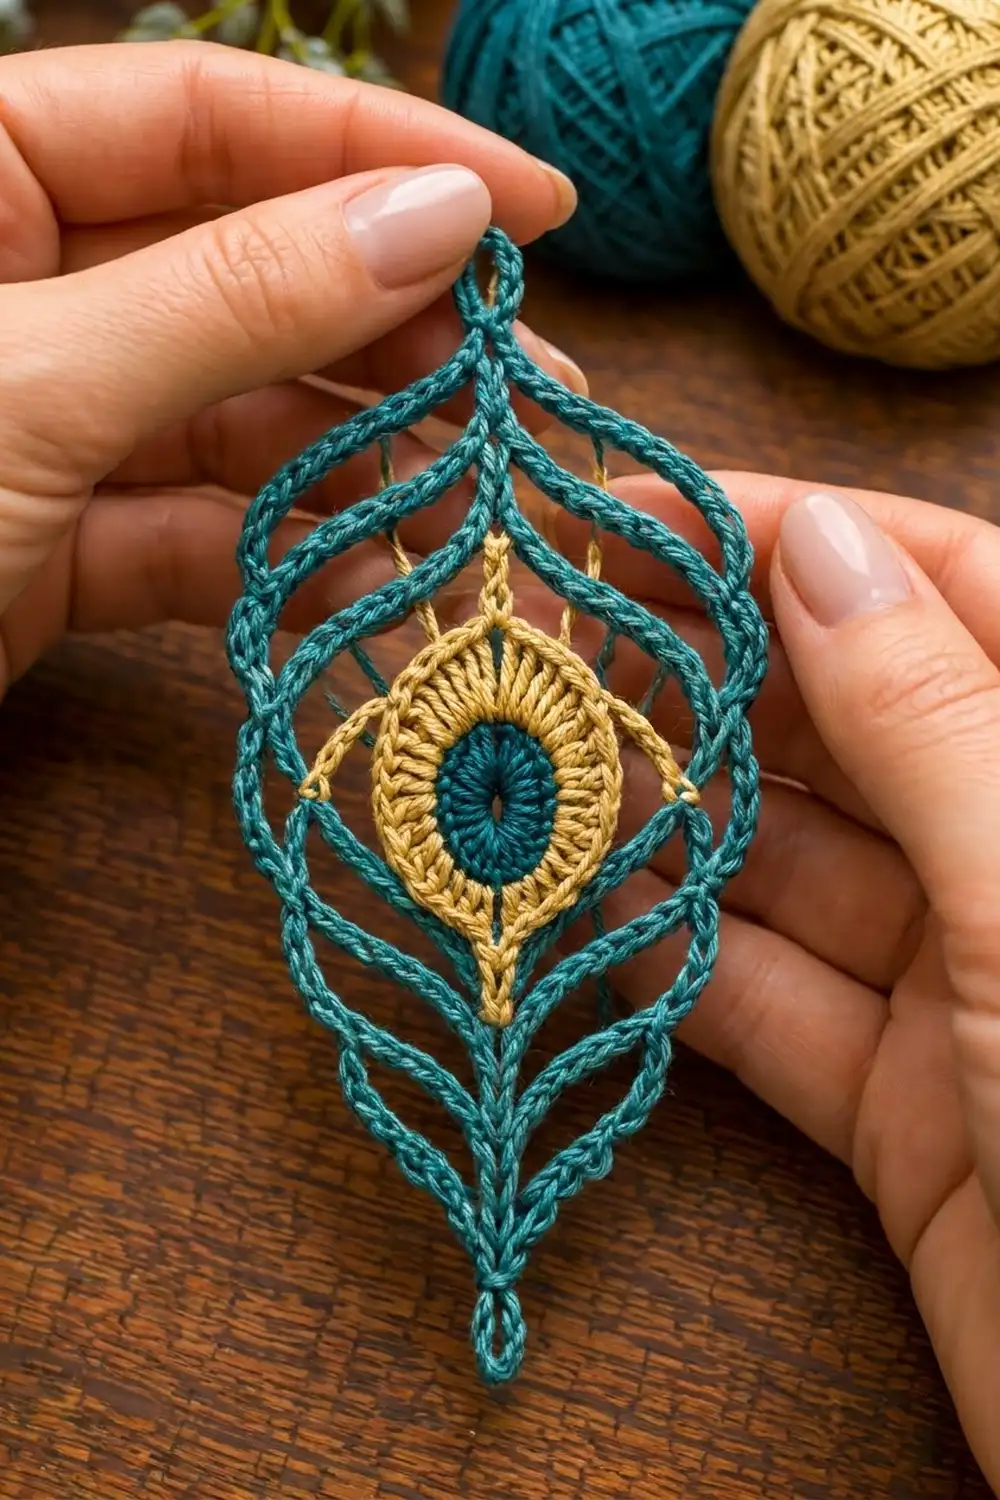
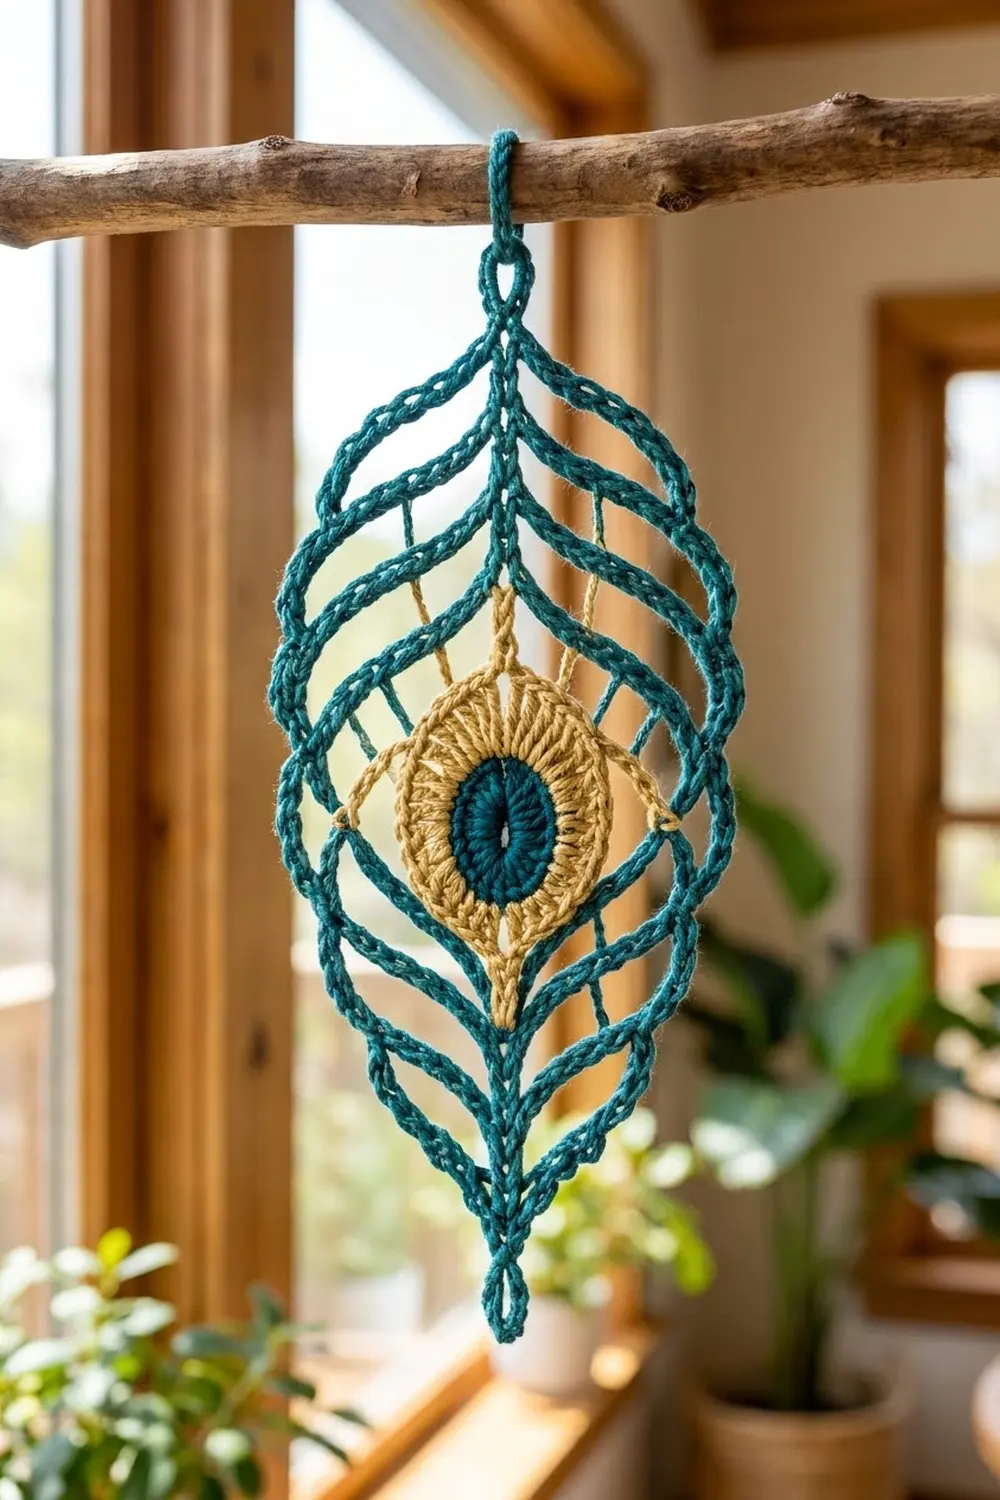
The Teal Plume is a single peacock-feather motif with a lacy, airy shape. A solid teal eye sits inside a gold double-crochet ring. Three teal outlines curve around it, each one a firm rope-like cord, and they meet at a pointed tip and a slim stem.
The palette is deep teal and soft antique gold, which reads as both vintage and modern. The style is open and graphic, so the motif looks good hung in a window, used as a bookmark-style ornament, tied onto a gift, or pinned flat as wall décor.
This pattern uses US crochet terms. The finished motif measures 3 in (7.6 cm) wide and 7 in (17.8 cm) long, including the hanging loop and stem. The feather body alone is 5 in (12.7 cm) tall.
You work the motif in the round from the center out. First comes the teal eye, then the gold ring with its rays. After that you add three teal outlines. Each outline is a chain arch anchored at the top and bottom points and tacked once at the middle of each side. A second round then covers the arch with single crochet. The last outline is the border and adds the hanging loop and stem.
Finished Size and Construction
- Finished size: 3 in (7.6 cm) wide × 7 in (17.8 cm) long overall
- Feather body: 3 in (7.6 cm) × 5 in (12.7 cm)
- Skill level: Intermediate
- Terminology: US
- Yarn weight: Sport weight (#2) mercerized cotton
- Hook: 3.0 mm
- Number of pieces: 1 (a single motif)
- Layout: One vertical feather, top point up
- Size before border (after Rnd 9): 2.75 in (7.0 cm) × 4.25 in (10.8 cm)
- Border depth: about 0.125 in (0.3 cm) per side and about 0.375 in (1.0 cm) at each point, plus the loop and stem
Materials
Mercerized cotton works best. It holds a crisp edge, keeps the points sharp, and shows each single crochet clearly. Choose a sport-weight thread with about 150 m per 50 g.
- Color A, Deep Teal: 10 g, about 30 m
- Color B, Antique Gold: 5 g, about 15 m
These quantities include a generous margin for the swatch and the weaving in.
Tools:
– 3.0 mm crochet hook
– Tapestry needle
– 4 locking stitch markers
– Scissors
– Blocking mat and rustproof pins
– Spray bottle with water
Abbreviations (US Terms)
- ch: chain
- sl st: slip stitch
- sc: single crochet
- dc: double crochet
- sp: space
- st(s): stitch(es)
- MR: magic ring
- Rnd: round
Special stitch: Ray-sc. Sc in the indicated st, ch 4, then sc in the 2nd ch from the hook and in each of the next 2 ch. This makes a short 3-sc stalk that stands out from the base sc. The ray-sc counts as 1 sc of the round. Do not work into the stalk on later rounds.
Tack. In the chain rounds, “tack” means sl st into the named sc of the previous round. A tack is never worked into on the cover round that follows.
Gauge and Checkpoints
Gauge: 11 sc = 2 in (5.1 cm) along a covered cord, and Rnds 1–3 = 1.75 in (4.4 cm) across.
Make one test motif up to Rnd 3 before you commit. Measure it at each of these stages:
- After Rnd 2: 1 in (2.5 cm) across
- After Rnd 3: 1.75 in (4.4 cm) across
- After Rnd 5: 2.25 in (5.7 cm) wide
- After Rnd 7: 2.5 in (6.4 cm) wide × 3.5 in (8.9 cm) tall
- After Rnd 9: 2.75 in (7.0 cm) wide × 4.25 in (10.8 cm) tall
- After Rnd 11: 3 in (7.6 cm) wide × 5 in (12.7 cm) body; 7 in (17.8 cm) overall
Too big: go down to a 2.75 mm hook, or chain more firmly.
Too small: go up to a 3.25 mm hook.
Chain tension matters most here. Every outline starts as a chain, so tight chains make the outlines pull and pucker the gold ring.
Pattern
The Eye (Color A)
Rnd 1: MR, ch 3 (counts as dc), 11 dc in the ring. Pull the ring closed. Sl st to the top of the ch-3. (12 dc)
Rnd 2: Ch 1, 2 sc in each st around. Sl st to the first sc. (24 sc)
Fasten off A. The eye measures 1 in (2.5 cm) across.
The Gold Ring (Color B)
Rnd 3: Join B in any st. Ch 3 (counts as dc), dc in the same st, dc in the next st, 2 dc in the next st, dc in the next st. Repeat from * around. Sl st to the top of the ch-3. (36 dc)
Number the sts 1–36, with st 1 at the top center. Place a marker in st 1 (top) and in st 19 (bottom).
Rnd 4 (points and rays): Ch 1. Work the round in this order:
- (Sc, ch 3, sc) in st 1. This is the top point.
- Sc in sts 2–3, ray-sc in st 4, sc in sts 5–6, ray-sc in st 7, sc in sts 8–18.
- (Sc, ch 3, sc) in st 19. This is the bottom point.
- Sc in sts 20–30, ray-sc in st 31, sc in sts 32–33, ray-sc in st 34, sc in sts 35–36.
- Sl st to the first sc.
(38 sc, including 4 ray-sc, + 2 ch-3 sps)
Count check: the 2 point sts take 2 sc each (4), and the two sides take 17 each (34). Together that is 38. Between the two ch-3 points, each side has 19 sc.
Fasten off B. The 4 rays sit on the upper half of the ring, two on each side of the top point, which matches the gold rays in the finished feather.
Inner Outline (Color A)
Rnd 5: Join A in the top ch-3 sp. Ch 1. Work the round in this order:
- (Sc, ch 2, sc) in the top ch-3 sp.
- Sc in each of the 19 sc down the side. When you reach a ray-sc, work into its base sc and fold the stalk toward you.
- (Sc, ch 2, sc) in the bottom ch-3 sp.
- Sc in each of the 19 sc up the other side.
- Sl st to the first sc.
(42 sc + 2 ch-2 sps)
Each side has 19 sc between the point pairs. The middle sc of each side is the 10th sc from either point.
First Open Outline (Color A)
Rnd 6 (chain arch): Sl st into the top ch-2 sp. Ch 1. Work in this order:
- Sc in the top ch-2 sp.
- Ch 13, tack in the 10th sc of the side, ch 13.
- Sc in the bottom ch-2 sp.
- Ch 13, tack in the 10th sc of the second side, ch 13.
- Sl st to the first sc.
(2 sc + 52 ch, 26 per side + 2 tacks)
Rnd 7 (cover): Ch 1. Work in this order:
- (Sc, ch 2, sc) in the top sc.
- Sc in each of the 26 ch, skipping the tack.
- (Sc, ch 2, sc) in the bottom sc.
- Sc in each of the 26 ch.
- Sl st to the first sc.
(56 sc + 2 ch-2 sps)
Each side has 26 sc between point pairs, or 28 counting the point sc. The open gap between this cord and Rnd 5 is what makes the lacy layering.
Second Open Outline (Color A)
Rnd 8 (chain arch): Sl st into the top ch-2 sp. Ch 1. Work in this order:
- Sc in the top ch-2 sp.
- Ch 16, tack in the 13th sc of the side, ch 16.
- Sc in the bottom ch-2 sp.
- Ch 16, tack in the 13th sc of the second side, ch 16.
- Sl st to the first sc.
(2 sc + 64 ch, 32 per side)
Rnd 9 (cover): Ch 1. Work in this order:
- (Sc, ch 2, sc) in the top sc.
- Sc in each of the 32 ch.
- (Sc, ch 2, sc) in the bottom sc.
- Sc in each of the 32 ch.
- Sl st to the first sc.
(68 sc + 2 ch-2 sps)
Each side has 32 sc between the point pairs. Check your size now: 2.75 in (7.0 cm) × 4.25 in (10.8 cm).
Border: Outer Outline, Hanging Loop and Stem (Color A)
Border gauge: 11 sc = 2 in (5.1 cm) along the cord, the same as the inner outlines.
Rnd 10 (chain arch): Sl st into the top ch-2 sp. Ch 1. Work in this order:
- Sc in the top ch-2 sp.
- Ch 19, tack in the 16th sc of the side, ch 19.
- Sc in the bottom ch-2 sp.
- Ch 19, tack in the 16th sc of the second side, ch 19.
- Sl st to the first sc.
(2 sc + 76 ch, 38 per side)
Rnd 11 (cover, loop and stem): Ch 1. Work in this order:
- In the top sc, work (sc, ch 10, sc). The ch-10 is the hanging loop.
- Sc in each of the 38 ch down the side.
- In the bottom sc, work sc, then ch 12. Sl st in the 2nd ch from the hook and in each of the remaining 10 ch, for an 11-st stem. Then work 1 more sc in the same bottom sc.
- Sc in each of the 38 ch up the second side.
- Sl st to the first sc.
(80 sc + ch-10 loop + 11-st stem)
Fasten off and weave in all ends along the cords.
Per-side counts: Each side of the border has 38 sc on the chains plus its 2 point sc, so 40 sc per side. Two sides of 40 make 80. The point sc are counted once, at the ends of each side, and are not added again.
Why the math works: Each outline grows by 6 ch per side: 26, then 32, then 38. At this gauge, 6 extra sc make each arch about 1.1 in (2.8 cm) longer. That extra length makes each arch bow outward about 0.125 in (0.3 cm) per side and adds about 0.375 in (1.0 cm) at each point. That opens a gap that is always about the same width, so the outlines look evenly nested.
The tack sits at the middle of each side, so each arch is pinned at its widest place. That keeps the feather symmetrical without filling in the open gaps.
Final Blocking
- Wet the motif and press out the water gently in a towel. Do not wring it.
- Lay it flat on the blocking mat with the top point up.
- Pin the top and bottom points first so the body measures 5 in (12.7 cm) from tip to tip.
- Pin the widest point of the outer cord to 3 in (7.6 cm) across, an even 1.5 in (3.8 cm) from the centerline on each side.
- Ease each inner cord into a smooth curve so the gaps between cords are even.
- Straighten the stem to 1.4 in (3.6 cm), and shape the hanging loop into an open teardrop.
- Fan the 4 gold rays outward evenly.
- Mist the motif and let it dry completely before unpinning.
Final Quality-Control Checklist
- The eye is flat and round, with no gap at the magic ring.
- The gold ring has a slight point at the top and at the bottom.
- All 4 rays stand free on the upper half of the ring.
- The three teal outlines are evenly spaced and meet in sharp points.
- Each side has the right count: 19, 26, 32 and 38 sc between the points.
- The body is 3 in (7.6 cm) × 5 in (12.7 cm).
- Overall length is 7 in (17.8 cm), including the loop and stem.
- All ends are hidden inside the cords.
Troubleshooting
- The ring cups up: your Rnd 3 tension is too tight. Redo it with a slightly looser dc.
- The outlines pucker: your chains are too tight. Rework the chain round, or go up one hook size just for the chain rounds.
- The outlines sag or flop: your chains are too loose. Go down one hook size for the chain rounds.
- The feather leans to one side: a tack is in the wrong sc. Recount from the point, then pull it out and re-tack.
- The points look rounded: tighten the ch-2 at the points and pin those points firmly when blocking.
- The rays curl under: steam-block them flat, or put a drop of fabric stiffener on each one.
Care
Hand wash in cool water with mild soap and dry flat in shape. Re-pin the points if they soften over time.
Final Notes
The measurement chain starts small. The eye is 1 in (2.5 cm) after Rnd 2, and the gold ring is 1.75 in (4.4 cm) after Rnd 3. Next, the inner outline is 2.25 in (5.7 cm) after Rnd 5, the first open outline is 2.5 in × 3.5 in (6.4 cm × 8.9 cm) after Rnd 7, and the second is 2.75 in × 4.25 in (7.0 cm × 10.8 cm) after Rnd 9.
The border brings the body to 3 in × 5 in (7.6 cm × 12.7 cm), and the loop and stem bring the whole motif to 7 in (17.8 cm). Check your size at each stage and the finished feather will come out as planned.
Happy crocheting!