

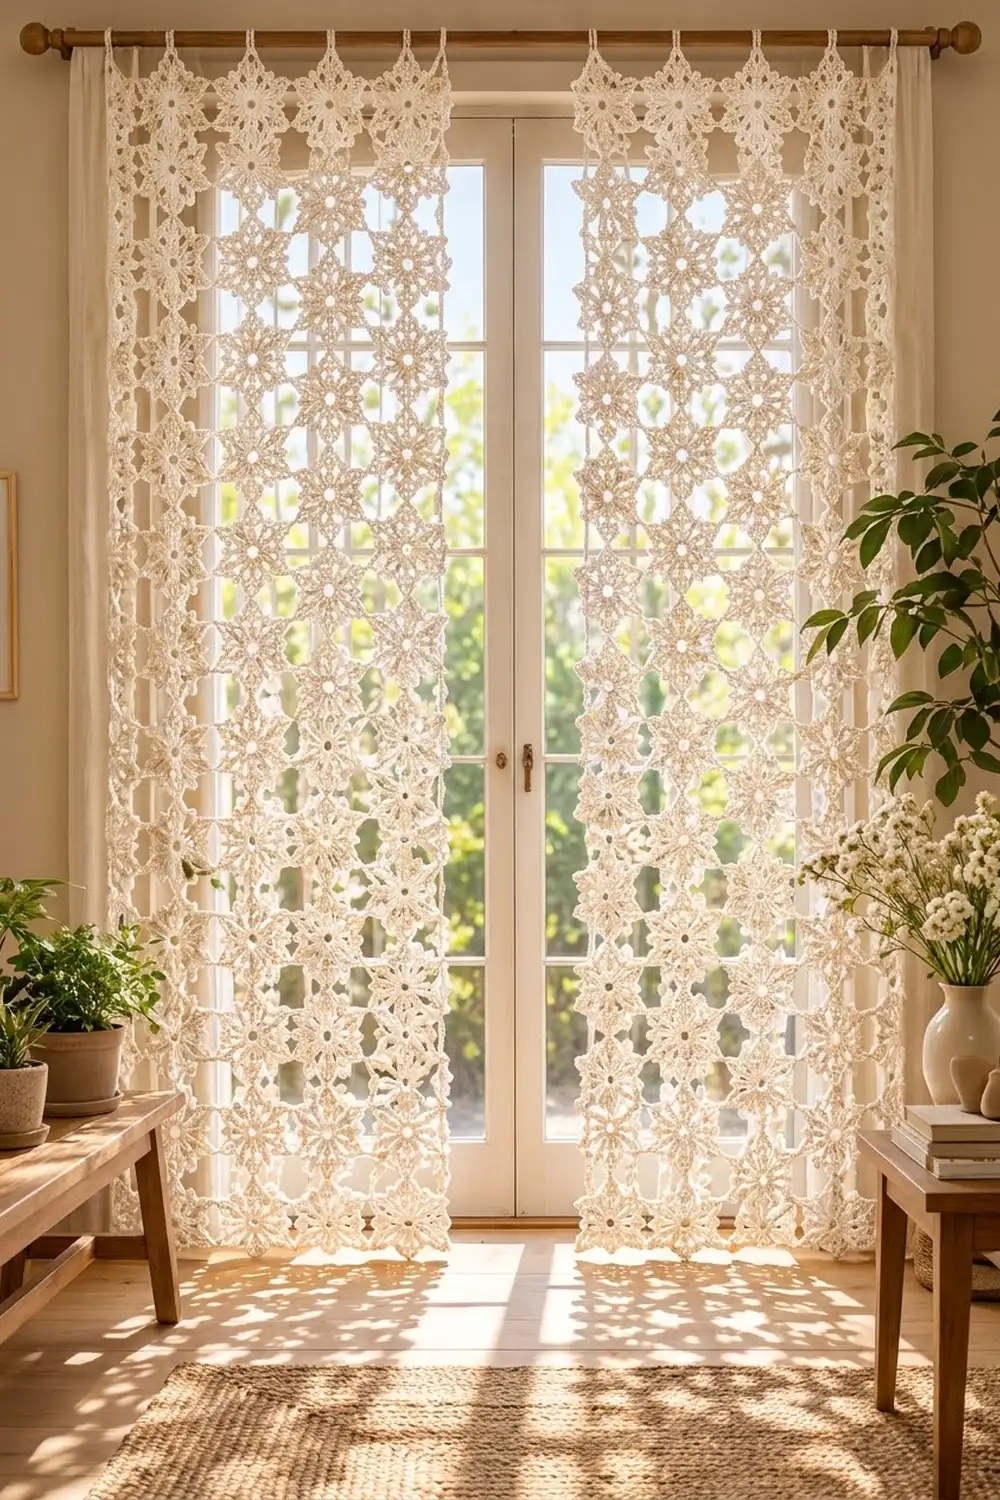
The Frostlight Star Lace Curtain is a pair of airy cream panels made from six-pointed lace stars. Each star has a small open center, a ring of petal shells, and six sharp points with a leafy V texture and picot edges. When the curtains hang in a sunny window, the open diamonds between the stars throw lace shadows across the floor.
The whole project uses one color: a soft cream or ivory mercerized cotton. The style is classic heirloom lace, but the motifs are bold enough to read clearly from across a room.
This pattern uses US crochet terms. Each finished panel measures 26.5 in (67.3 cm) wide by 84.5 in (214.6 cm) long, not counting the hanging loops. Together, the two panels cover 53 in (134.6 cm) of rod.
You will make 140 identical star motifs, 70 per panel. Each motif is worked in 5 rounds and joined to its neighbors with joining picots in the last round, so there is no sewing. A two-round border frames each panel, and a final row of loops is worked along the top edge.
Finished Size and Construction
- Finished panel size: 26.5 x 84.5 in (67.3 x 214.6 cm), plus loops
- Skill level: Intermediate
- Terminology: US
- Yarn weight: Sport (2), mercerized cotton
- Hook: 3.25 mm (US D-3)
- Number of pieces: 140 star motifs (2 panels of 70)
- Layout per panel: 5 motifs wide x 14 motifs long
- Motif size: 6 in (15.2 cm) from top tip to bottom tip; 5.2 in (13.2 cm) between side tips
- Size before border: 26 x 84 in (66.0 x 213.4 cm)
- Border depth: 0.25 in (0.6 cm) on each edge
Materials
Choose a smooth, mercerized sport-weight cotton of about 165 m per 50 g. Cotton holds the star points crisply and washes well, which matters for a curtain that gets sun and dust. Avoid fuzzy yarns, which blur the lace.
- Cream: 650 g / 2,145 m (13 balls of 50 g / 165 m). That is about 325 g / 1,073 m per panel.
Each motif uses about 4 g / 13 m. Each panel’s border and loops use about 12 g / 40 m.
Tools:
– 3.25 mm (US D-3) hook
– Tapestry needle
– Locking stitch markers
– Rust-proof pins and blocking mats or a large padded surface
– Spray bottle and optional light spray starch
– Measuring tape
Yarn amounts include about a 10% margin for swatching and a few spare motifs.
Abbreviations (US Terms)
- ch – chain
- sl st – slip stitch
- sc – single crochet
- dc – double crochet
- tr – treble crochet
- sk – skip
- sp(s) – space(s)
- st(s) – stitch(es)
- rep – repeat
- RS – right side
Special stitches:
– Picot: Ch 3, sl st in 3rd ch from hook.
– Joining picot: Ch 1, sl st in the matching picot of the finished motif, ch 1, sl st in first ch made.
– Shell: (2 dc, ch 2, 2 dc) in the same st or sp.
Gauge and Checkpoints
Make one full motif first and block it before you go further. A 6 in (15.2 cm) motif is the base for every measurement in this pattern.
Checkpoints (measured flat, lightly blocked):
– After Round 1: 1.25 in (3.2 cm) across
– After Round 2: 2.25 in (5.7 cm) across
– After Round 3: 3.25 in (8.3 cm) from tip to tip
– After Round 4: 4.25 in (10.8 cm) from tip to tip
– After Round 5: 6 in (15.2 cm) from top tip to bottom tip; 5.2 in (13.2 cm) between side tips
Border gauge: 16 sc = 4 in (10.2 cm).
If your motif is too big, go down one hook size. If it is too small, go up one hook size. An error of 0.25 in (0.6 cm) per motif adds up to 3.5 in (8.9 cm) over 14 motifs, so take the swatch seriously.
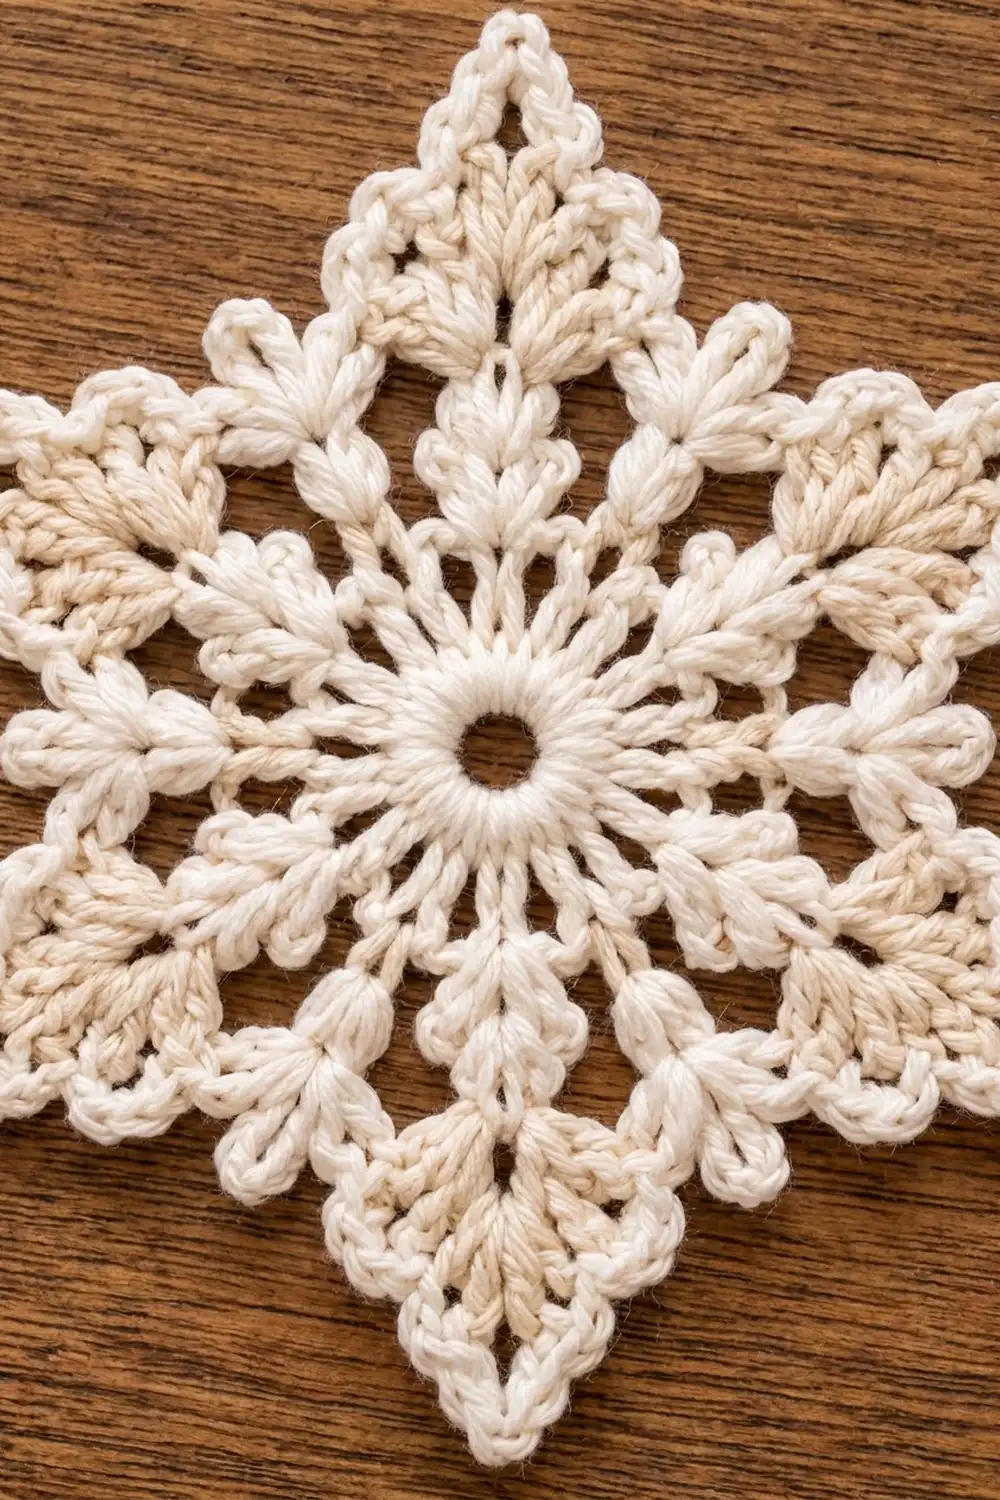
Star Motif
Ch 6, sl st in first ch to form a ring.
Round 1: Ch 3 (counts as dc here and throughout), 23 dc in ring, sl st in top of beginning ch-3. (24 dc)
Round 2 (petals): Ch 3, (dc, ch 2, 2 dc) in same st as join, sk next dc, shell in next dc, sk next dc; rep from * 10 more times, sl st in top of beginning ch-3. (12 shells: 48 dc, 12 ch-2 sps)*
Round 3 (point bases): Sl st in next dc and in first ch-2 sp. Ch 3, (dc, ch 3, 2 dc) in same sp, ch 3, sc in next ch-2 sp, ch 3, (2 dc, ch 3, 2 dc) in next ch-2 sp, ch 3, sc in next ch-2 sp, ch 3; rep from * 4 more times, sl st in top of beginning ch-3. (24 dc, 6 sc, 6 ch-3 tips, 12 ch-3 sps)*
Each shell now starts a star point, and each sc becomes the bottom of a valley.
Round 4 (growing the points): Sl st in next dc and in the ch-3 tip. Ch 3, (2 dc, ch 3, 3 dc) in same tip, ch 3, sc in next ch-3 sp, ch 3, sc in next ch-3 sp, ch 3, (3 dc, ch 3, 3 dc) in next tip, ch 3, sc in next ch-3 sp, ch 3, sc in next ch-3 sp, ch 3; rep from * 4 more times, sl st in top of beginning ch-3. (36 dc, 12 sc, 6 ch-3 tips, 18 ch-3 sps)*
Each valley now has 3 ch-3 sps. The dc groups stack straight up from Round 3, which makes the V texture.
Round 5 (points and picots): Sl st in next 2 dc and in the ch-3 tip. Ch 4 (counts as tr), (2 tr, ch 2, picot, ch 2, 3 tr) in same tip, [ch 2, sc in next ch-3 sp, ch 2, picot, ch 2, sc in next ch-3 sp (valley center sc), ch 2, picot, ch 2, sc in next ch-3 sp, ch 2], (3 tr, ch 2, picot, ch 2, 3 tr) in next tip; rep from * 4 more times, then work the bracketed section once more, sl st in top of beginning ch-4. Fasten off. (36 tr, 18 sc, 6 tip picots, 12 valley picots)*
Mark the first tip you worked as the top tip. Because you work counterclockwise with the RS facing, the tips come in this order: top, upper left, lower left, bottom, lower right, upper right.
Make All Pieces
- Panel 1: 70 motifs in cream
- Panel 2: 70 motifs in cream
- Total: 140 motifs, all in one color
The first motif of each panel is worked completely. Every other motif is worked through Round 4, then joined during Round 5 (see Joining).
Layout per panel (5 wide x 14 long), with A1 at top left:
Row 1:  A1  A2  A3  A4  A5
Row 2:  B1  B2  B3  B4  B5
Row 3:  C1  C2  C3  C4  C5
 ...    (rows continue the same way)
Row 14: N1  N2  N3  N4  N5
Every motif sits with its top tip pointing straight up.
Joining
Method: Join-as-you-go in Round 5. Where a tip picot touches a neighbor, work a joining picot in its place. Everything else in Round 5 stays the same.
Stitch-to-stitch logic: Each tip joins one tip on one neighbor only:
– Side by side: The new motif’s upper-left tip joins the left motif’s upper-right tip. Its lower-left tip joins the left motif’s lower-right tip.
– Above and below: The new motif’s top tip joins the bottom tip of the motif directly above.
Because the top, upper-left, and lower-left tips are the first three tips of Round 5, every join happens early in the round:
– Row 1 motifs 2–5: 2 joining picots (upper left, lower left)
– Column 1 motifs in rows 2–14: 1 joining picot (top)
– All other motifs: 3 joining picots (top, upper left, lower left)
Each panel has 112 side joins (14 rows x 4 pairs x 2) and 65 vertical joins (13 x 5), for 177 joins in total.
Tension: Keep the joining ch-1s the same size as a normal picot. If they are tight, the tips pucker. If they are loose, the stars droop out of line.
Size checkpoint: After Row 1, the strip should be 26 in (66.0 cm) wide: 5 x 5.2 in. After every 4 rows, check that the length is 24 in (61.0 cm) per 4 rows, or 6 in (15.2 cm) per row. The joined panel should measure 26 x 84 in (66.0 x 213.4 cm).
Border
The border has two rounds that frame the zigzag edge. A third row adds hanging loops to the top edge only.
Border gauge: 16 sc = 4 in (10.2 cm), so 6 sc = 1.5 in (3.8 cm) and 12 sc = 3 in (7.6 cm).
Corners: The four corners are the upper-left tip of A1, the upper-right tip of A5, the lower-right tip of N5, and the lower-left tip of N1.
Round 1 (chain frame): With the RS facing, join yarn with sc in the A1 upper-left tip picot (corner).
- Top edge: For each motif A1 to A5: ch 6, sc in valley center sc, ch 6, sc in top tip picot, ch 6, sc in valley center sc, ch 6, sc around both joined picots (or the corner picot after A5). (20 ch-6 sps, 19 sc between corners)
- Right edge: For each motif from A5 down to N5: ch 6, sc in valley center sc, ch 6, sc in lower-right tip picot. Between motifs, ch 12 (bridge), then sc in the upper-right tip picot of the next motif. (28 ch-6 sps, 13 ch-12 bridges, 40 sc between corners)
- Bottom edge: Work like the top edge, using the bottom tips and lower valleys from N5 to N1. (20 ch-6 sps, 19 sc)
- Left edge: Work like the right edge, going up from N1 to A1. (28 ch-6 sps, 13 bridges, 40 sc)
Sl st in the first sc. Round 1 total: 122 sc and 122 spaces (96 ch-6 sps + 26 ch-12 bridges).
Round 2 (solid sc): Ch 1. Work 3 sc in each corner sc, 1 sc in each other sc, 6 sc in each ch-6 sp, and 12 sc in each ch-12 bridge. Sl st in the first sc.
- Top and bottom, each: 19 + (20 x 6) = 139 sc between corner groups. Per motif, that is 3 anchor sc + 4 spaces x 6 = 27, and 5 x 27 + 4 joint sc = 139.
- Left and right, each: 40 + (28 x 6) + (13 x 12) = 364 sc between corner groups.
- Corners: 4 x 3 = 12 sc.
- Round 2 total: 2 x 139 + 2 x 364 + 12 = 1,018 sc.
Why the math works: On a 6 in (15.2 cm) star, each tip is about 1.5 in (3.8 cm) from the next valley center. At 4 sc per inch, that distance needs 6 sc. Down the sides, the gap from one motif’s lower side tip to the next motif’s upper side tip is exactly 3 in (7.6 cm), so it needs 12 sc. Every space is filled to its true length, so the edge lies flat without ruffling or pulling.
Row 3 (hanging loops, top edge only): With the RS facing, join with sl st in the center sc of the upper-left corner group.
- Corner and joint loops (6 per panel): Center the loop on the corner or joint sc. Sl st to 2 sts before it, ch 32, sk 5 sts, sl st in next st, then work 36 sc over the ch-32 and sl st in the same st.
- Tip loops (5 per panel): Center the loop on each top tip sc the same way, but ch 20 and work 24 sc over it.
Sl st in every other st along the top edge. Fasten off at the upper-right corner. (11 loops)
The tip loops hang about 2.5 in (6.4 cm) tall. The longer loops hang about 4 in (10.2 cm) tall. That extra 1.5 in (3.8 cm) matches the drop from a tip down to a joint, so all 11 loops reach the rod at the same height.
Final Blocking
- Weave in all ends along the dc and tr columns. Never weave them through picots.
- Soak the panel in cool water with a little wool wash, then press out the water in a towel without wringing.
- Block in sections on a large padded surface. Pin out 4 rows at a time, then move the panel along.
- Pin each tip and each joint first, setting rows 6 in (15.2 cm) apart and side tips 5.2 in (13.2 cm) apart.
- Pin the border straight between the tips, then pin out each picot.
- Spray lightly with starch if you want crisp points. Leave it pinned until completely dry.
- Check that the panel measures 26.5 x 84.5 in (67.3 x 214.6 cm).
Final Quality-Control Checklist
- 70 motifs per panel, all with 36 tr and 18 picots
- All 177 joins per panel worked, with no loose tips
- All top tips point straight up
- Border Round 2 has 139 / 364 / 139 / 364 sc plus 12 corner sc
- 11 loops on each panel, with tops level
- Panel measures 26.5 x 84.5 in (67.3 x 214.6 cm)
- All ends woven in and trimmed
Troubleshooting
- Points curl or cup: Round 4 is too tight. Go up a hook size for Rounds 4–5 only.
- Center ruffles: Round 2 shells are too loose. Check that you skip 1 dc between shells.
- Joined panel slants: A motif was joined with the wrong tip at the top. Undo Round 5 and rejoin it.
- Border waves: You put too many sc in the spaces. Count exactly 6 and 12.
- Border pulls: The ch-12 bridges are too tight. Chain more loosely or use a hook one size larger for the chains.
- Loops uneven: Recount the ch-20 and ch-32 loops and the sc worked over them.
Care
Hand wash or machine wash on a gentle cycle in a mesh bag, then lay flat and re-pin the tips while damp. Keep the curtains out of harsh all-day sun to prevent yellowing.
Final Notes
The measurement chain is simple. A 6 in (15.2 cm) star motif with side tips 5.2 in (13.2 cm) apart, set in 5 columns and 14 rows, makes a 26 x 84 in (66.0 x 213.4 cm) panel. The 0.25 in (0.6 cm) border brings it to 26.5 x 84.5 in (67.3 x 214.6 cm), and the loops hang it level. Get the first motif right and the rest will follow.
Happy crocheting!