

The Frostwing Lace Dragonfly is a delicate thread-crochet ornament. It has four openwork wings, a small round head with two bead-like eyes, a plump thorax, and a slim segmented abdomen that tapers to a fine point. A corded loop rises from the head so the dragonfly hangs straight on a branch.
The whole ornament uses a single color: soft ecru (cream) size 10 cotton thread. Each wing has a fine mesh of chain loops, a small dc fan near the tip that looks like a radiating vein, and a firm single crochet edge that keeps the outline crisp after stiffening. The style is vintage, airy, and wintry.
This pattern uses US crochet terms. The finished ornament measures about 5.75 in (14.6 cm) across the wings and 4 in (10.2 cm) from the top of the head to the tail tip. The 1.5 in (3.8 cm) hanging loop brings the total height to 5.5 in (14.0 cm).
First you work the body in one continuous spiral from head to tail. Then you make two tiny eyes and four identical lace wings worked in rounds around a foundation chain. Last, you stiffen the wings and sew everything on.
Finished Size and Construction
- Finished size: 5.75 in (14.6 cm) wingspan x 4 in (10.2 cm) body length; 5.5 in (14.0 cm) tall including loop
- Skill level: Intermediate (fine thread, small hook, lace rounds)
- Terminology: US crochet terms
- Yarn weight: Lace (0), size 10 crochet thread
- Hook: 1.5 mm (US steel size 8)
- Number of pieces: 7 (1 body with loop, 2 eyes, 4 wings), assembled into one ornament
- Layout: 2 forewings and 2 hindwings, one pair on each side of the thorax
- Piece size (one wing): 2.75 in (7.0 cm) long x 1 in (2.5 cm) wide
- Wing size before border: 2.625 in (6.7 cm) x 0.875 in (2.2 cm)
- Border depth: 1 round of sc, about 0.0625 in (0.2 cm)
Materials
Use mercerized cotton thread in size 10. It has a slight sheen, shows lace detail clearly, and takes stiffener well. A thread of about 260 m per 50 g ball matches this gauge.
- Ecru (cream): 10 g, about 52 m (57 yd)
This amount covers the body, eyes, wings, loop, and sewing tails. It includes a margin of about 25 percent for swatching and ripping back.
Tools:
– 1.5 mm (US steel size 8) crochet hook
– Fine tapestry needle that fits size 10 thread
– Stitch marker
– Small pinch of polyester fiberfill
– Optional: white chenille stem, cut to 3.5 in (8.9 cm), to keep the body straight
– Fabric stiffener (or a 1:1 mix of white craft glue and water)
– Blocking board, plastic wrap, and rustproof pins
– Small sharp scissors
Abbreviations (US Terms)
- ch chain
- sl st slip stitch
- sc single crochet
- dc double crochet
- sc2tog single crochet 2 together
- sp(s) space(s)
- st(s) stitch(es)
- MR magic ring
- Rnd(s) round(s)
- ( ) x N repeat the steps in parentheses N times
Special stitches:
- sc2tog: (Insert hook in next st, yarn over, pull up a loop) twice, yarn over, pull through all 3 loops.
- Fan: Work 7 dc into the same ch-3 loop. The dc spread into a small radiating shell.
Gauge and Checkpoints
Gauge controls whether the wings fit the body. Make one wing first and check it before you make the rest.
- Body gauge: about 11 sc rounds = 1 in (2.5 cm) in spiral.
- Edge gauge: about 14 sc = 1 in (2.5 cm) along a wing edge.
Wing checkpoints (length x width, laid flat):
- After Rnd 1: 1.625 in (4.1 cm) x 0.25 in (0.6 cm)
- After Rnd 2: 2 in (5.1 cm) x 0.5 in (1.3 cm)
- After Rnd 3: 2.375 in (6.0 cm) x 0.75 in (1.9 cm)
- After Rnd 4: 2.625 in (6.7 cm) x 0.875 in (2.2 cm)
- After Rnd 5 (border): 2.75 in (7.0 cm) x 1 in (2.5 cm)
Body checkpoints:
- After Rnd 12: 1.125 in (2.9 cm) from top of head
- After Rnd 24: 2.25 in (5.7 cm)
- After Rnd 42: 4 in (10.2 cm)
If Rnd 1 of your wing is longer than 1.75 in (4.4 cm), switch to a 1.25 mm hook. If it is shorter than 1.5 in (3.8 cm), switch to a 1.75 mm hook. Change the hook, not the stitch counts.
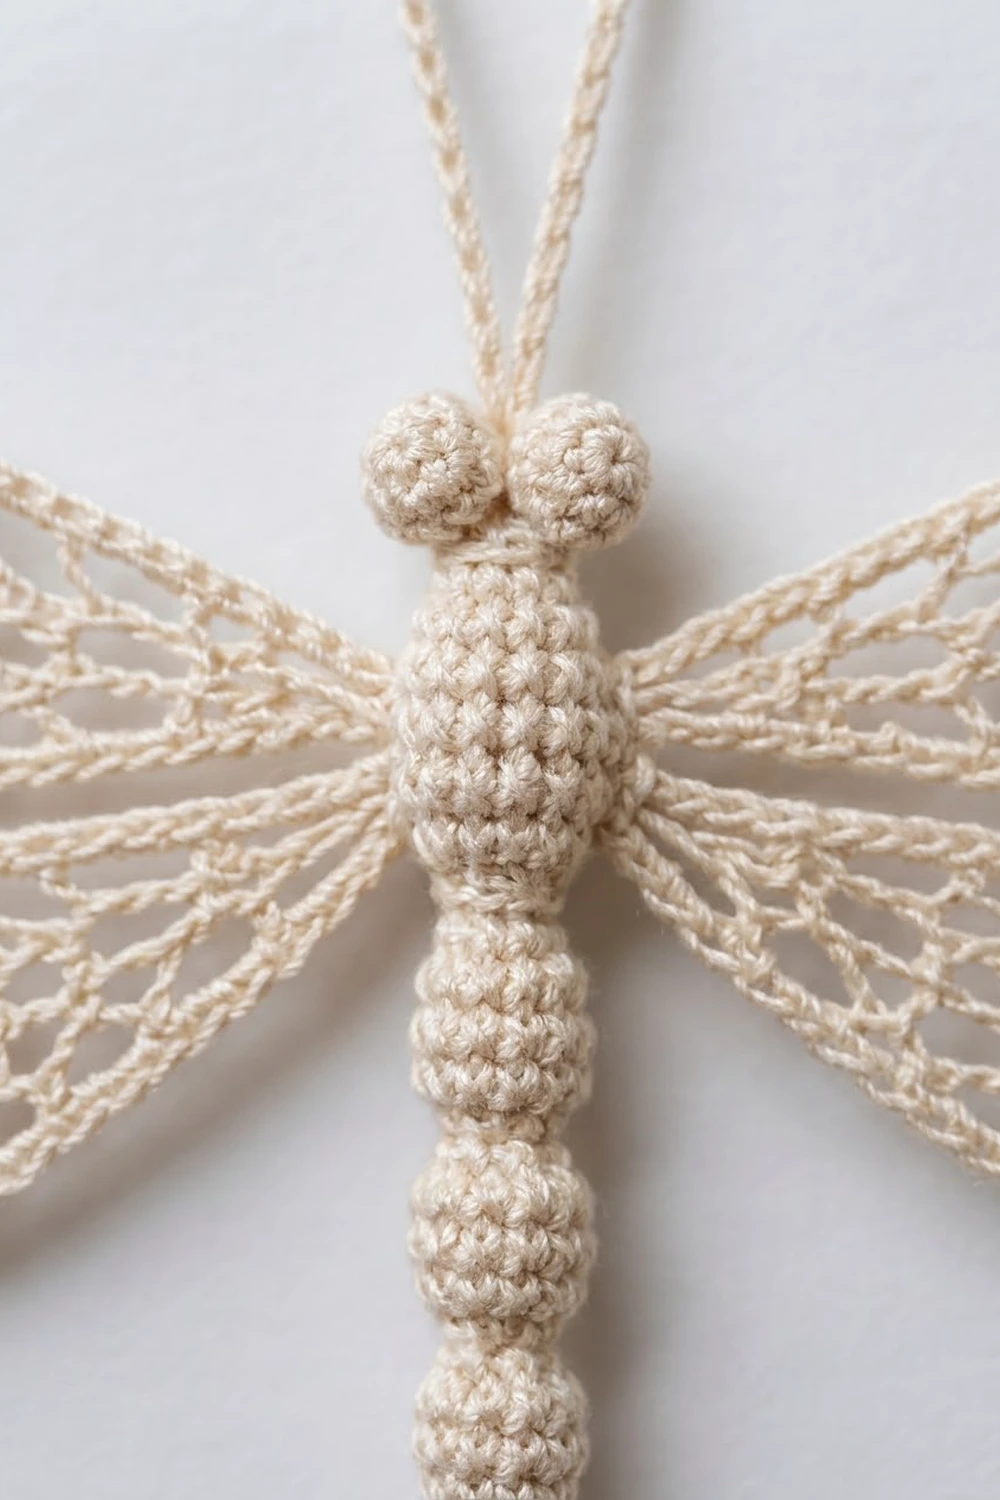
Body
Work in a continuous spiral without joining. Mark the first st of each round.
Head
Rnd 1: 6 sc in MR. (6 sts)
Rnd 2: 2 sc in each st around. (12 sts)
Rnd 3: Sc in each st around. (12 sts)
Stuff the head with a tiny pinch of fiberfill.
Rnd 4: (Sc2tog) x 6. (6 sts) This forms the neck.
Thorax
Rnd 5: 2 sc in each st around. (12 sts)
Rnd 6: (Sc in next st, 2 sc in next st) x 6. (18 sts)
Rnds 7-10: Sc in each st around. (18 sts) The wings attach here.
Rnd 11: (Sc in next st, sc2tog) x 6. (12 sts)
Stuff the thorax firmly. If using the chenille stem, insert it now with one end up in the thorax.
Rnd 12: (Sc in next 2 sts, sc2tog) x 3. (9 sts) This is the waist.
Abdomen
Each segment bulges out and draws back in to create the bead-like look.
Segment 1:
Rnd 13: (Sc in next 2 sts, 2 sc in next st) x 3. (12 sts)
Rnds 14-15: Sc in each st around. (12 sts)
Rnd 16: (Sc in next 2 sts, sc2tog) x 3. (9 sts)
Segment 2: Rnds 17-20: Repeat Rnds 13-16. (9 sts at end)
Segment 3:
Rnd 21: (Sc in next 2 sts, 2 sc in next st) x 3. (12 sts)
Rnd 22: Sc in each st around. (12 sts)
Rnd 23: (Sc in next 2 sts, sc2tog) x 3. (9 sts)
Rnd 24: (Sc in next st, sc2tog) x 3. (6 sts)
Add a little fiberfill around the stem as you go.
Segment 4:
Rnd 25: (Sc in next st, 2 sc in next st) x 3. (9 sts)
Rnds 26-27: Sc in each st around. (9 sts)
Rnd 28: (Sc in next st, sc2tog) x 3. (6 sts)
Segment 5: Rnds 29-32: Repeat Rnds 25-28. (6 sts at end)
Segment 6:
Rnd 33: (Sc in next st, 2 sc in next st) x 3. (9 sts)
Rnd 34: Sc in each st around. (9 sts)
Rnd 35: (Sc in next st, sc2tog) x 3. (6 sts)
Tail
Rnds 36-39: Sc in each st around. (6 sts) Trim the chenille stem so it ends inside Rnd 38.
Rnd 40: (Sc in next st, sc2tog) x 2. (4 sts)
Rnd 41: Sc in each st around. (4 sts)
Rnd 42: (Sc2tog) x 2. (2 sts)
Fasten off. Pull the tail through the last 2 sts to make a point, and weave it inside.
Hanging loop
Join thread with a sl st at the center of Rnd 1. Ch 40, then sl st in the same st. Sl st in the back bump of each of the 40 ch to make a firm cord. Fasten off. The loop stands about 1.5 in (3.8 cm) tall.
Eyes (make 2)
Rnd 1: 6 sc in MR. (6 sts)
Rnd 2: Sc in each st around. (6 sts)
Tuck the starting tail inside as stuffing.
Rnd 3: (Sc2tog) x 3. (3 sts)
Fasten off and leave a 6 in (15.2 cm) tail. Each eye is about 0.1875 in (0.5 cm) across.
Wings (make 4)
Each wing is worked in joined rounds around both sides of a foundation chain. All four wings are identical.
Ch 22.
Rnd 1: Sc in 2nd ch from hook (base end), sc in next 19 ch, 3 sc in last ch (tip). Rotate and work along the opposite side: sc in next 19 ch, 2 sc in the same ch as the first sc. Join with sl st to first sc. (44 sc: 1 + 19 + 3 + 19 + 2)
The middle sc of the 3-sc tip group is the tip center.
Rnd 2: Ch 1, sc in same st as join, ch 3, skip next st, (sc in next st, ch 3, skip next st) x 21. Join with sl st to first sc. (22 sc, 22 ch-3 loops)
Loop 11 sits over the tip center, and loop 22 sits over the base center.
Rnd 3: Sl st in next 2 ch, ch 1, sc in same loop (loop 1). (Ch 4, sc in next loop) x 9, ending in loop 10. Ch 2, work a Fan in loop 11, ch 2, sc in loop 12. (Ch 4, sc in next loop) x 10, ending in loop 22. Ch 4, join with sl st to first sc. (21 sc, 7 dc, 20 ch-4 sps, 2 ch-2 sps)
The fan sits at the tip with 10 loops on each side and loop 22 alone at the base, so the wing stays symmetrical.
Rnd 4: Sl st in next 2 ch, ch 1, sc in same ch-4 sp (sp 1). (Ch 5, sc in next ch-4 sp) x 8, ending in sp 9. Ch 3, skip the ch-2 sp, sc in first dc of the Fan, (ch 2, sc in next dc) x 6. Ch 3, skip the ch-2 sp, sc in next ch-4 sp (sp 10). (Ch 5, sc in next ch-4 sp) x 10, ending in sp 20. Ch 5, join with sl st to first sc. (27 sc, 19 ch-5 sps, 2 ch-3 sps, 6 ch-2 sps)
The ch-2 arc wraps around the fan, so the shell looks set inside the lace. Do not fasten off. Continue with the Border.
Make All Pieces
All pieces use Ecru.
- Body with loop: 1
- Eyes: 2
- Wings: 4, each finished through the Border (Rnd 5) and blocked before joining
Layout (front view):
               (loop)
             [eye][eye]
               (head)
[forewing L]==(thorax Rnds 7-8)==[forewing R]
[hindwing L]==(thorax Rnds 9-10)==[hindwing R]
              (abdomen)
               (tail)
Joining
Block and stiffen all four wings first (Final Blocking, Steps 1-6).
Eyes: Sew the eyes over Rnds 2-3 of the head, one on each side of the loop, so they touch at the center. Use 4 small whipstitches per eye.
Wing base logic: Each wing’s base section has 11 sts (see Border). Thread a needle with 12 in (30.5 cm) of thread, weave it through the 11 base sts, and pull to gather the base to about 0.25 in (0.6 cm).
Forewings: Place the gathered base against the side of the thorax over Rnds 7-8. Whipstitch through the base and 2 thorax sts on each of those rounds, for 6 stitches total. Angle each forewing slightly above horizontal.
Hindwings: Attach them the same way over Rnds 9-10, angled about 30 degrees downward, directly below the forewing bases.
Tension: Pull the stitches snug enough to keep the wings from flopping, but not so tight that the thorax dents.
Size checkpoint: The forewing tips should be 5.75 in (14.6 cm) apart, and the two sides should match within 0.125 in (0.3 cm).
Border
This is Rnd 5 of each wing. Work it directly after Rnd 4.
Border gauge: about 14 sc = 1 in (2.5 cm) along the edge.
Rnd 5: Ch 1, then work each section in order:
- Upper edge: Sc in first sc, (3 sc in next ch-5 sp, sc in next sc) x 8. (33 sts: 1 + 8 x 4)
- Tip: 2 sc in ch-3 sp, sc in next sc, (sc in next ch-2 sp, sc in next sc) x 6, 2 sc in ch-3 sp. (17 sts: 2 + 1 + 6 x 2 + 2)
- Lower edge: Sc in next sc (sp 10), (3 sc in next ch-5 sp, sc in next sc) x 8. (33 sts: 1 + 8 x 4)
- Base: 3 sc in next ch-5 sp, sc in next sc, 3 sc in next ch-5 sp, sc in next sc, 3 sc in last ch-5 sp. (11 sts)
Join with sl st to first sc. (94 sts: 33 + 17 + 33 + 11) Fasten off and weave in ends.
Why the math works: Rnd 4 has 27 sc and 19 ch-5 sps. The border uses every sc (9 upper, 7 tip, 9 lower, 2 base) and every ch-5 sp (8 upper, 8 lower, 3 base). A ch-5 loop is about as wide as 4 sc, so 3 sc in the loop plus 1 sc on top of the sc keeps the edge flat. Over the fan, 1 sc per ch-2 keeps the tip snug. The edge measures about 6.75 in (17.1 cm) around, which fits a 2.75 in x 1 in (7.0 cm x 2.5 cm) oval.
Final Blocking
- Cover the blocking board with plastic wrap.
- Dampen the wings, dip them in stiffener, and squeeze out the excess.
- Pin each wing to 2.75 in (7.0 cm) x 1 in (2.5 cm), with pins at the tip, the base, and every few ch-5 loops.
- Use a pin to spread the Fan so the 7 dc radiate evenly.
- Clear stiffener out of any filled mesh holes with a pin tip.
- Let the wings dry for about 24 hours, then unpin.
- After joining, lightly mist the body and loop with stiffener. Roll the abdomen straight between your fingers and hang the ornament by its loop to dry.
Final Quality-Control Checklist
- 6 clear abdomen segments plus a pointed tail
- Body is 4 in (10.2 cm) long and the loop stands 1.5 in (3.8 cm)
- Each wing has 94 border sts and measures 2.75 in (7.0 cm) x 1 in (2.5 cm)
- Each Fan is centered at its wing tip
- All four wings match in size and stiffness
- Wingspan is 5.75 in (14.6 cm)
- Eyes sit level and touch at the center
- Ornament hangs straight
- All tails are woven in
Troubleshooting
Wing edge ruffles: Your border is too loose. Redo Rnd 5 with tighter tension, or use a hook 0.25 mm smaller for that round.
Wing edge cups: Your border is too tight. Redo Rnd 5 with looser tension.
Fan is off-center: Recount Rnd 2. It needs exactly 22 loops, with loop 11 over the tip center.
Abdomen bends: Add the chenille stem, or stiffen the body and let it dry hanging.
Segments look flat: Add a little more fiberfill to Segments 1-3, and pull the sc2tog rounds firmly.
Ornament tilts: Re-sew the wings so both sides sit over the same thorax rounds.
Care
Dust gently with a soft brush and store flat between sheets of tissue. If the wings go soft in humid weather, stiffen them again and let them dry pinned.
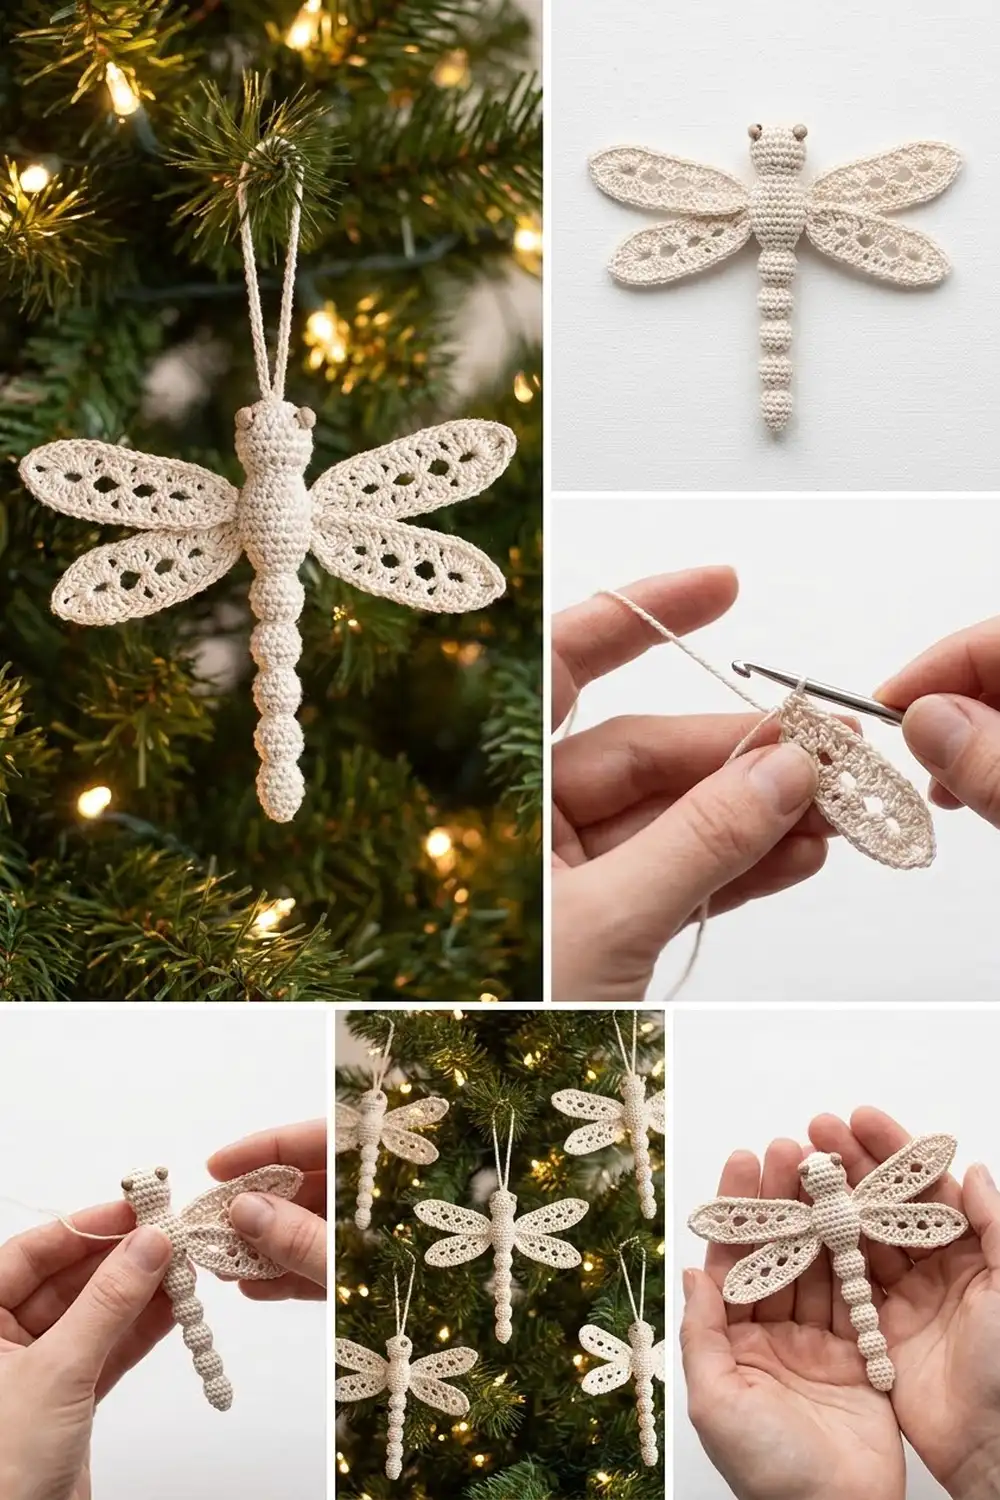
Final Notes
Here is how the measurements build. Wing Rnd 1 measures 1.625 in (4.1 cm), grows to 2.625 in (6.7 cm) after Rnd 4, and reaches 2.75 in (7.0 cm) after the 94-st border. Two wings on the 18-st thorax give a 5.75 in (14.6 cm) wingspan. The 42-round body is 4 in (10.2 cm) long, and the 1.5 in (3.8 cm) loop brings the hanging height to 5.5 in (14.0 cm).
Happy crocheting!