

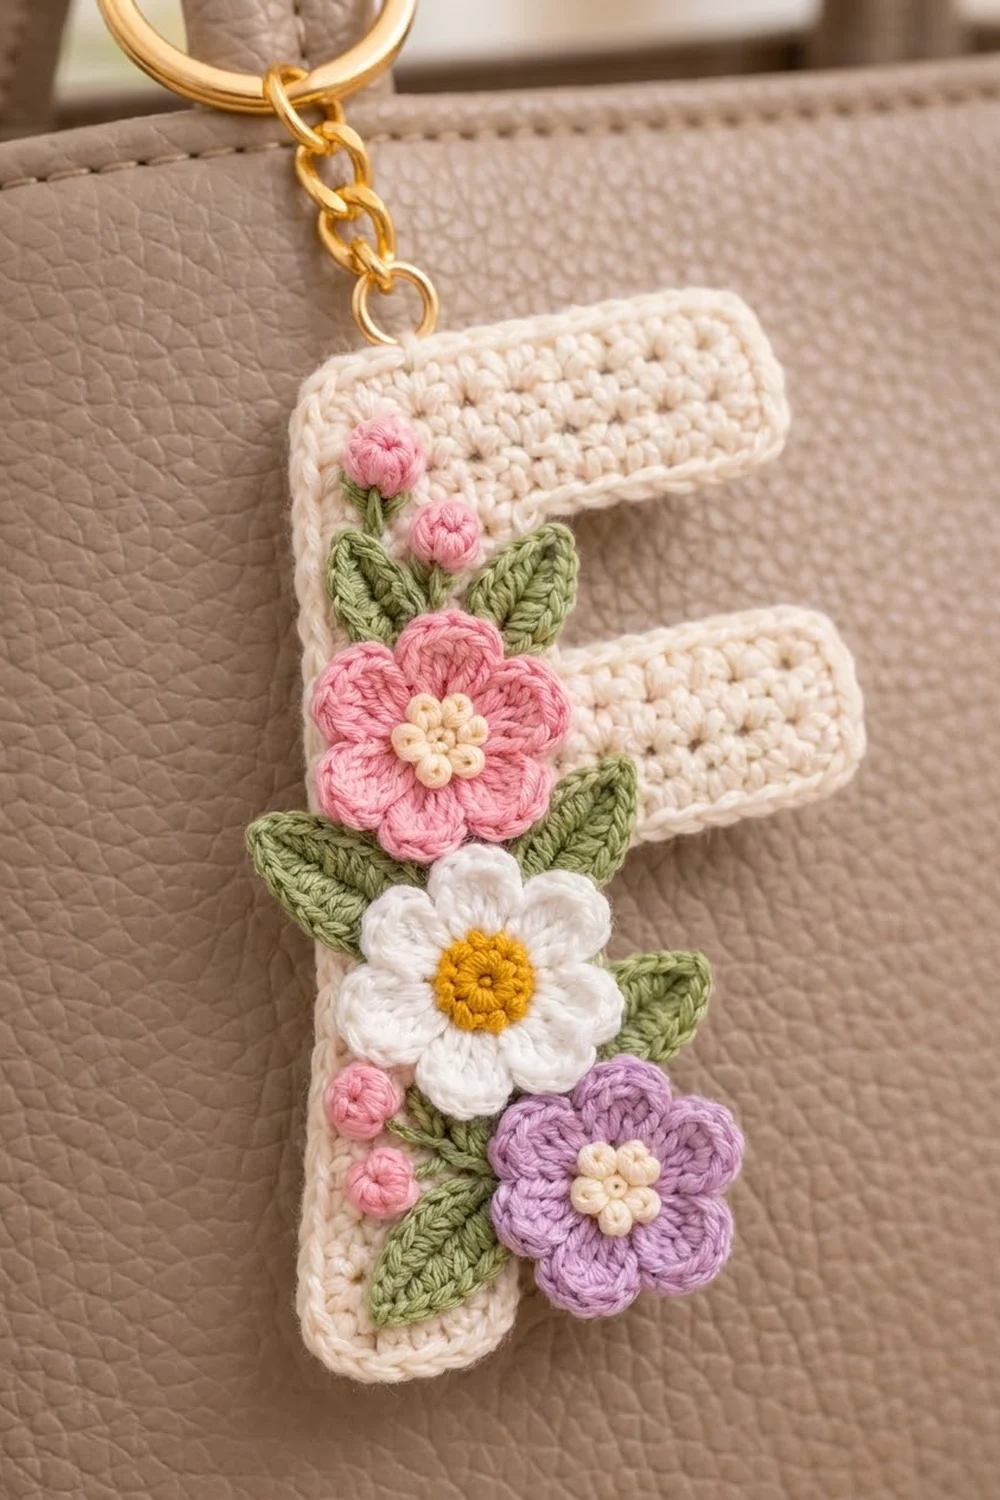
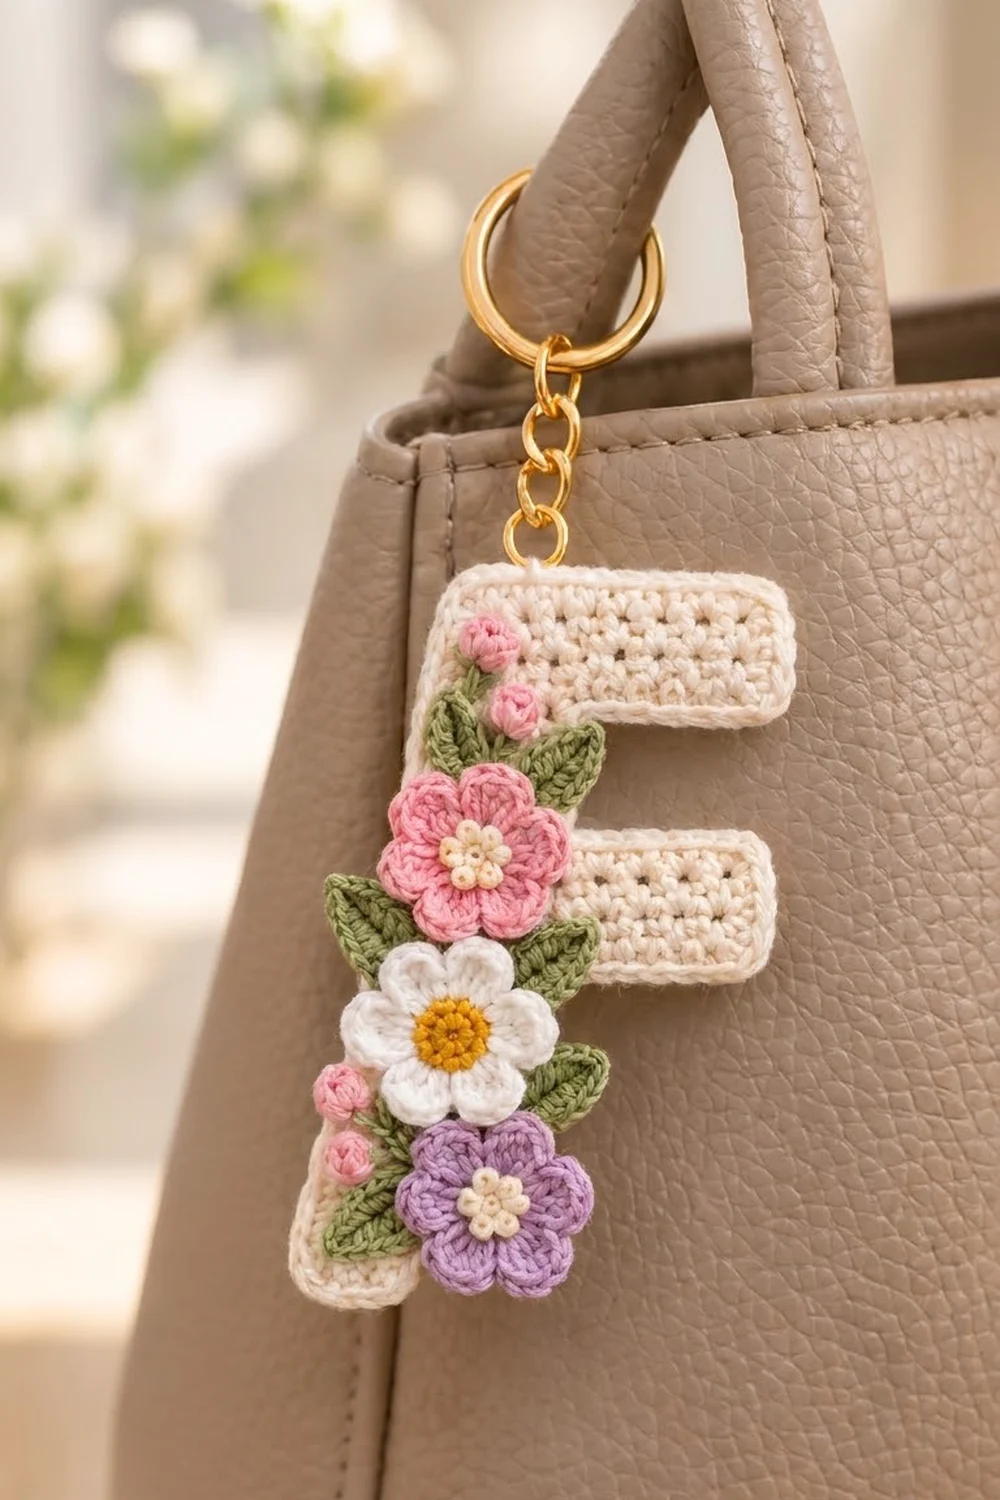
This little initial keychain combines a crisp, cream letter F with a cascade of tiny flowers. A pink bloom, a white daisy and a lilac flower run down the stem of the letter, with sage-green leaves and pink bobble buds tucked in between. A gold split ring and short chain finish it off, so it’s ready for a bag, keys or a gift.
The style is soft and cottage-garden, but the construction is structured. The letter is solid single crochet with a single-crochet border that gives it a clean raised outline. The flowers are small, slightly three-dimensional appliqués, and the cream centers get tiny French knots for a beaded look.
The pattern uses US crochet terms throughout. The finished keychain body measures 2.4 in (6.1 cm) wide by 3.6 in (9.1 cm) tall, not counting the hardware.
Construction is simple. You work the F in rows from the bottom up, adding chains for the middle and top bars, then crochet one border round around the whole outline. You then block the letter, make the appliqués separately, sew them along the stem and attach the hardware.
Finished Size and Construction
- Finished size: 2.4 in (6.1 cm) wide x 3.6 in (9.1 cm) tall
- Skill level: Easy (advanced beginner)
- Terminology: US crochet terms
- Yarn weight: DK / light worsted (3), cotton
- Hook: 3.5 mm (E-4)
- Number of pieces: 1 letter body plus 3 flowers, 7 leaves and 4 buds sewn on as appliqués
- Layout: single letter F, with the appliqués stacked down the stem
- Letter size before border: 2 in (5.1 cm) wide x 3.2 in (8.1 cm) tall
- Border depth: 1 round of sc, about 0.2 in (0.5 cm) on every side
Materials
Yarn: Use a smooth, mercerized or matte DK cotton. Cotton holds the letter’s sharp corners and resists stretching on a keychain. Avoid fuzzy or very soft acrylics, because they blur the stitch texture and let the bars droop.
- Cream (body): 8 g, about 18 m
- Pink (flower, buds): 3 g, about 7 m
- White (daisy petals): 2 g, about 5 m
- Lilac (flower): 2 g, about 5 m
- Sage green (leaves): 3 g, about 7 m
- Mustard (daisy center): 1 g, about 2 m
All quantities include a generous margin for gauge swatching and sewing tails.
Tools:
– 3.5 mm (E-4) crochet hook
– Tapestry needle
– Stitch marker
– 1 in (2.5 cm) gold split key ring
– 1.25 in (3.2 cm) length of gold curb chain
– 2 gold jump rings, 6 mm
– 2 pairs of flat-nose pliers
– Blocking board, rust-proof pins and a spray bottle
– Scissors
Abbreviations (US Terms)
- ch: chain
- sl st: slip stitch
- sc: single crochet
- hdc: half double crochet
- dc: double crochet
- sc2tog: single crochet 2 together
- MR: magic ring
- st(s): stitch(es)
- RS: right side (front)
Special stitch, sc2tog across a corner: Insert hook in the first indicated place and pull up a loop. Insert hook in the second indicated place and pull up a loop. Yarn over and pull through all 3 loops on the hook. In the border, the two places are a row-end and a stitch on either side of an inner corner.
Gauge and Checkpoints
Gauge: 5 sc and 5 rows = 1 in (2.5 cm) in sc worked in rows.
Rather than making a separate swatch, test with the letter itself. Work Rows 1–7 and measure before continuing.
Checkpoints:
– After Row 7: stem is 1 in (2.5 cm) wide x 1.4 in (3.6 cm) tall
– After Row 10: middle bar reaches 1.6 in (4.1 cm) wide, total height 2 in (5.1 cm)
– After Row 13: height 2.6 in (6.6 cm)
– After Row 16: 2 in (5.1 cm) wide x 3.2 in (8.1 cm) tall
– After the border: 2.4 in (6.1 cm) x 3.6 in (9.1 cm)
Too big? If the stem is wider than 1 in (2.5 cm) by more than 0.1 in (0.3 cm), go down to a 3.25 mm or 3 mm hook.
Too small? If it’s narrower by more than 0.1 in (0.3 cm), go up to a 3.75 mm hook.
If the width is right but the rows are short (common with sc), keep the hook and work a little taller by pulling up a slightly longer loop before finishing each sc. The border relies on 1 sc per row-end, so near-square stitches keep it flat.
Letter Body
The body is worked in turned rows. Ch 1 at the start of each row is a turning chain and does not count as a stitch.
Setting the orientation: The edge where Row 1 ends is the inner edge of the stem, where the bars will grow. The face on which the bars point to the right is the front (RS).
Stem
Row 1: Ch 6, sc in 2nd ch from hook and in each ch across. (5 sc)
Rows 2–7: Ch 1, turn, sc in each st across. (5 sc)
Row 7 ends at the inner edge. Check the first checkpoint now: 1 in x 1.4 in (2.5 cm x 3.6 cm).
Middle bar
End of Row 7: Do not turn. Ch 4.
Row 8: Sc in 2nd ch from hook and in the next 2 ch (3 sc), then sc in each of the 5 stem sts. (8 sc)
Rows 9–10: Ch 1, turn, sc in each st across. (8 sc)
Row 10 ends at the outer edge of the stem.
Stem gap
Row 11: Ch 1, turn, sc in the first 5 sts. Leave the remaining 3 sts unworked; these 3 sts form the top of the middle bar. (5 sc)
Rows 12–13: Ch 1, turn, sc in each st across. (5 sc)
Row 13 ends at the inner edge, ready for the top bar. Check the height: 2.6 in (6.6 cm).
Top bar
End of Row 13: Do not turn. Ch 6.
Row 14: Sc in 2nd ch from hook and in the next 4 ch (5 sc), then sc in each of the 5 stem sts. (10 sc)
Rows 15–16: Ch 1, turn, sc in each st across. (10 sc)
Row 16 is worked with the RS facing you and ends at the top-left corner. Don’t fasten off. Check that the letter measures 2 in x 3.2 in (5.1 cm x 8.1 cm).
Border
Border gauge: 1 sc per stitch along stitch edges and 1 sc per row-end along side edges, at the same 5 sts per 1 in (2.5 cm) as the body.
The F has 7 outer corners, each worked as 3 sc in one corner stitch. It also has 3 inner corners, each closed with one sc2tog. The row-end that sits beside a corner stitch is covered by that corner group, so it is not worked separately.
Rnd 1 (RS facing): Ch 1, do not turn, rotate to work down the outer left edge. Work each segment in order:
- Left edge: sc in row-ends of Rows 15 down to 2. (14 sc)
- Bottom-left corner: 3 sc in the first foundation ch loop. (3 sc)
- Bottom edge: sc in the next 3 foundation loops. (3 sc)
- Bottom-right corner: 3 sc in the last foundation loop. (3 sc)
- Inner stem edge: sc in row-ends of Rows 2–6. (5 sc)
- Inner corner: sc2tog over the row-end of Row 7 and the first underside ch loop of the middle bar. (1 st)
- Middle bar underside: sc in the next ch loop (1 sc), then 3 sc in the tip ch loop. (4 sc)
- Middle bar end: sc in the row-end of Row 9. (1 sc)
- Middle bar top corner: 3 sc in the tip st of Row 10. (3 sc)
- Middle bar top: sc in the next unworked st. (1 sc)
- Inner corner: sc2tog over the last unworked st of Row 10 and the row-end of Row 11. (1 st)
- Gap edge: sc in the row-end of Row 12. (1 sc)
- Inner corner: sc2tog over the row-end of Row 13 and the first underside ch loop of the top bar. (1 st)
- Top bar underside: sc in the next 3 ch loops (3 sc), then 3 sc in the tip ch loop. (6 sc)
- Top bar end: sc in the row-end of Row 15. (1 sc)
- Top-right corner: 3 sc in the first st of Row 16. (3 sc)
- Top edge: sc in the next 8 sts. (8 sc)
- Top-left corner: 3 sc in the last st of Row 16. (3 sc)
Join with a sl st to the first sc. (62 sts) Fasten off, leaving a 6 in (15.2 cm) tail, and weave in the ends.
Why the math works: The round has 38 single edge stitches (14 + 3 + 5 + 1 + 1 + 1 + 1 + 3 + 1 + 8). Add 7 corners x 3 sc = 21 and 3 sc2tog = 3, and you get 38 + 21 + 3 = 62. The stem’s outer edge has 16 rows: 14 row-ends plus 2 corner stitches. That matches the 16 rows in the body, so the edge lies flat. Each 3-sc corner adds about 0.2 in (0.5 cm) outward, so the width grows from 2 in to 2.4 in (5.1 cm to 6.1 cm) and the height from 3.2 in to 3.6 in (8.1 cm to 9.1 cm).
Appliqués
Leave an 8 in (20.3 cm) tail on each appliqué for sewing.
Pink Flower (make 1)
Rnd 1 (cream): MR, ch 1, 10 sc in ring, pull tight, sl st to first sc. Fasten off. (10 sc)
Rnd 2 (pink): Join pink in any st. (hdc, 2 dc, hdc) in the next st, sl st in the next st. Repeat from * to * 4 more times. (5 petals, 25 sts)
Fasten off. The flower measures about 1.1 in (2.8 cm) across.
Center detail: With cream, work 5 or 6 small French knots (1 wrap each) packed across the center for the beaded look.
Lilac Flower (make 1)
Work exactly as the pink flower, using lilac for Rnd 2 and cream for the center and knots. It measures 1.1 in (2.8 cm) across.
White Daisy (make 1)
Rnd 1 (mustard): MR, ch 1, 10 sc in ring, pull tight, sl st to first sc. Fasten off. (10 sc)
Rnd 2 (white): Join white in any st. (hdc, 3 dc, hdc) in the next st, sl st in the next st. Repeat from * to * 4 more times. (5 petals, 30 sts)
Fasten off. The daisy measures about 1.2 in (3.0 cm). Leave the mustard center plain so it reads smooth and slightly domed.
Leaf (make 7, sage green)
Ch 5. Starting in the 2nd ch from hook, work sc, hdc in the next ch, dc in the next ch, hdc in the last ch. Ch 1 and rotate to work along the other side of the foundation chain: hdc, dc, hdc, sc. At the tip, ch 2 and sl st in the 2nd ch from hook to make a picot point. (8 sts plus picot)
The foundation chain shows as a center vein. Each leaf is about 0.8 in (2.0 cm) long.
Bud (make 4, pink)
MR, ch 2 (does not count), 4 dc in ring, pull the ring very tight, sl st to the top of the first dc. (4 dc) Fasten off.
Each bud is a round puff about 0.3 in (0.8 cm) across.
Attaching the Appliqués and Hardware
Block the letter first (see below), then lay out all the pieces before sewing anything. Work from top to bottom along the stem:
- Top buds: Place 2 buds just below the top bar, one slightly above and to the left of the other. Add 1 leaf on each side, angled upward.
- Pink flower: Center it on the stem, level with the gap between the bars. Its left petals should overlap the outer border by about 0.1 in (0.3 cm).
- Leaves around the pink flower: Tuck 1 leaf to its left and 1 leaf below it on the right.
- White daisy: Center it level with the middle bar, with 1 leaf to its right.
- Lilac flower: Place it in the lower stem, overlapping the bottom-right area.
- Lower buds and leaf: Set 2 buds on the left between the daisy and the lilac flower, and add the last leaf at the lower left.
Sew each piece with its own tail. Use small stitches through the back loops of the appliqué and just the surface strands of the letter, so very little shows on the back. Tack each leaf at its base and tip. Tack each flower at its center and between the petals so the petals stay slightly raised.
Hardware: Open a jump ring with two pliers (twist sideways, never pull apart). Pass it through the top-left corner stitch of the border, add one end of the chain, and close it. Use the second jump ring to connect the other end of the chain to the split ring.
Final Blocking
- Pin the bare letter (before appliqués) face up on the blocking board to 2.4 in x 3.6 in (6.1 cm x 9.1 cm).
- Put one pin at each of the 7 outer corners and line the stem up with the board grid.
- Mist it until damp, but not soaked.
- Leave it to dry completely, about 2–4 hours.
- Unpin and check the measurements, then sew on the appliqués.
- After sewing, lightly mist the finished piece face down on a towel. Shape the petals with your fingers and let it dry flat.
Final Quality-Control Checklist
- Body measures 2.4 in x 3.6 in (6.1 cm x 9.1 cm)
- Border count is 62 sts, with no puckers at the 3 inner corners
- All 7 outer corners are square and sharp
- Middle bar is shorter than the top bar by 0.4 in (1.0 cm)
- Flowers are evenly spaced, with the daisy in the middle
- French knots in the pink and lilac centers are tight and clustered
- Leaves point outward and their picot tips are visible
- All ends are woven in and the back is tidy
- Jump rings are fully closed, with no gaps to snag yarn
Troubleshooting
- Bars point the wrong way: Flip the piece over. Whichever face shows the bars on the right is the front.
- Inner corners bunch up: Make sure you worked sc2tog there, not 2 separate sc.
- Outer corners curl: Your border tension is tight. Loosen up or block more firmly.
- Border ruffles along the left edge: You probably worked into the Row 16 or Row 1 row-ends. Those are covered by the corners, so the left edge should have only 14 sc.
- Flower petals flop flat: Pull the magic ring tighter and tack between the petals.
- Bars sag on the keychain: Use firmer cotton or a smaller hook.
Care
Hand wash in cool water with mild soap, then press out the water in a towel and dry flat. Remove the metal hardware first if you’re washing it often.
Final Notes
The measurement chain is simple. At 5 sc and 5 rows per 1 in (2.5 cm), the 5-stitch stem is 1 in (2.5 cm) wide. The 16 rows make 3.2 in (8.1 cm) of height, and the 10-stitch top bar makes 2 in (5.1 cm) of width. One 62-stitch border round adds 0.2 in (0.5 cm) on each side, for a finished 2.4 in x 3.6 in (6.1 cm x 9.1 cm). If you check each stage as you go, the flowers will sit neatly down the stem every time.
Happy crocheting!