

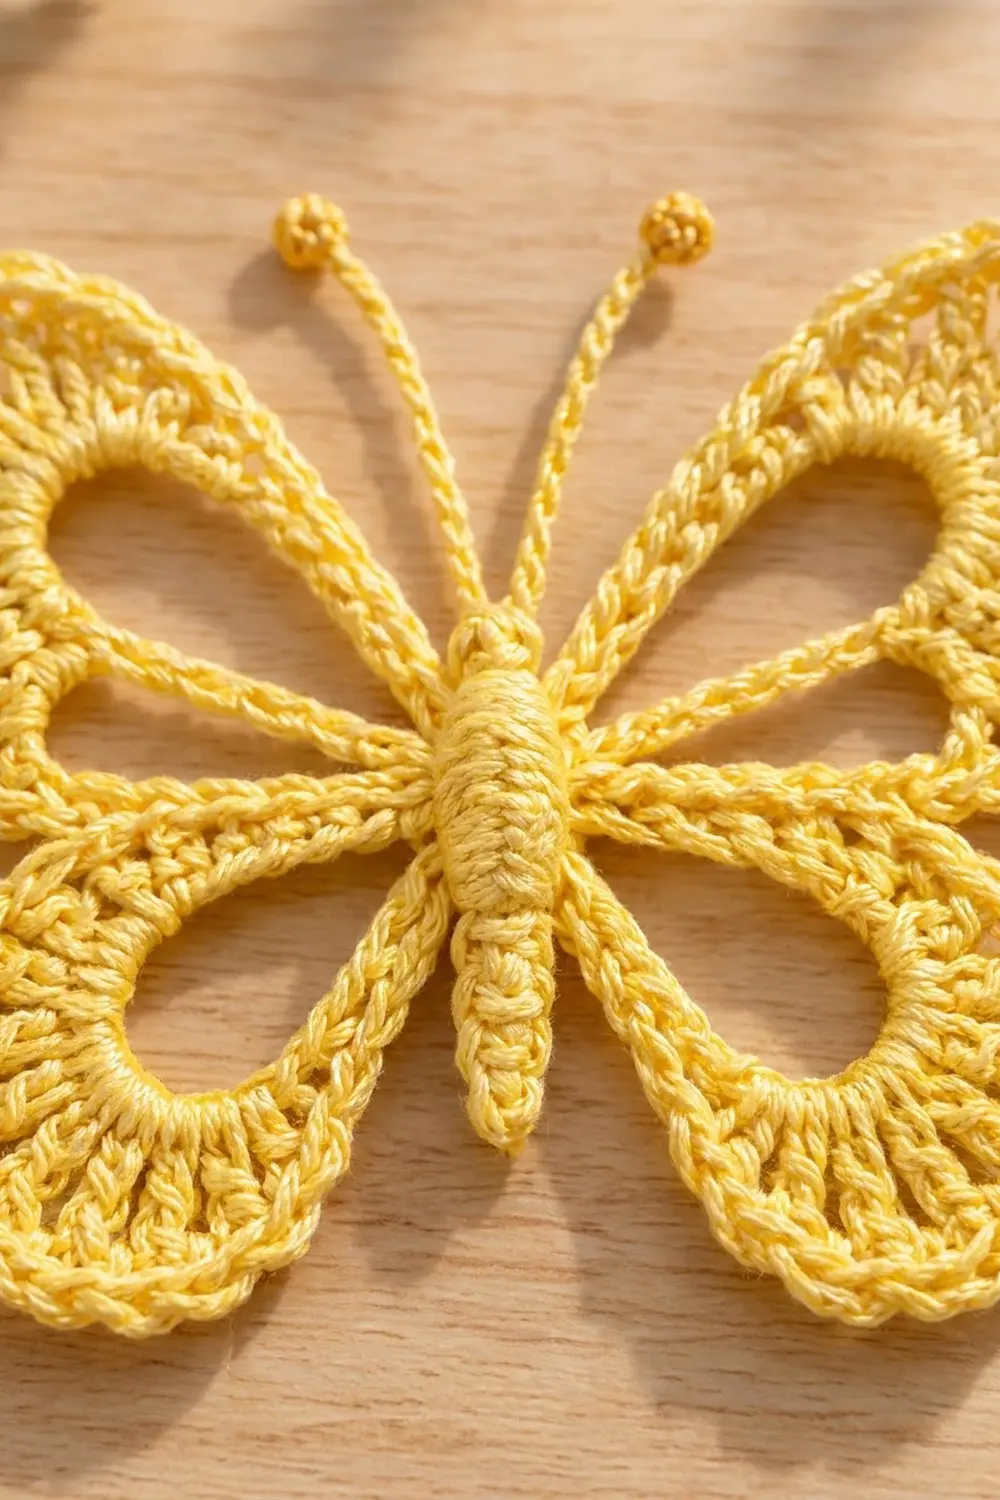
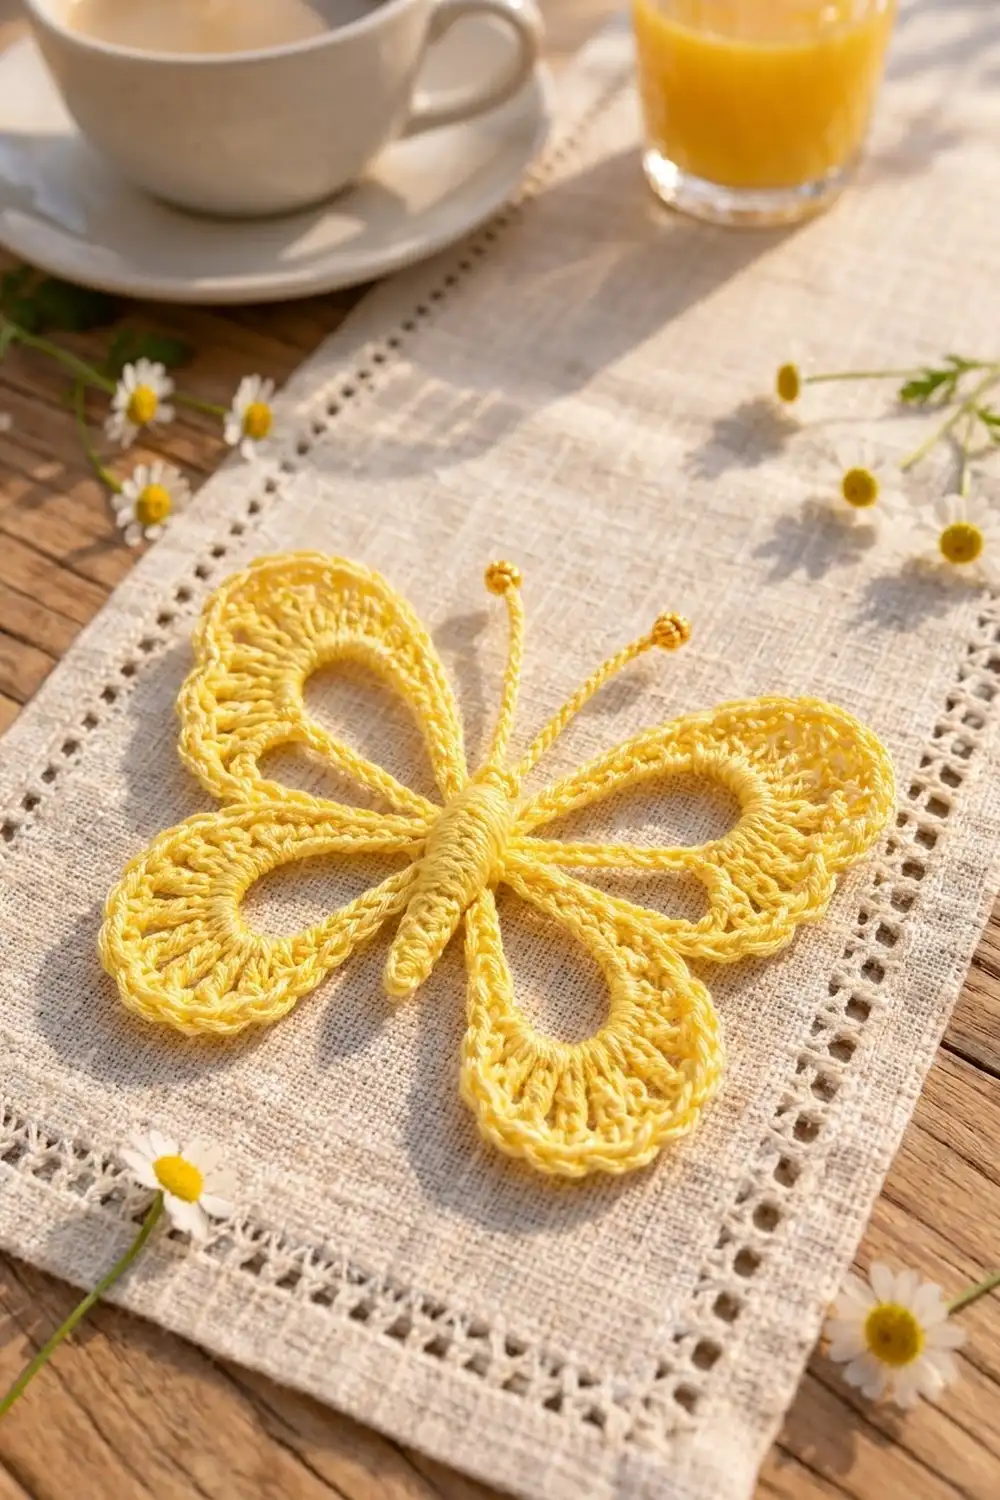
The Lemon Sorbet Butterfly is a light, lacy appliqué with four open teardrop wings, a padded wrapped body and two antennae with bobble tips. Its outline is clear and graphic, so it reads well whether you scatter it on a table, stitch it onto a tote, or pin it to a gift.
The sample is worked in one soft lemon-yellow mercerized cotton. Using a single color lets the texture carry the design: the solid single crochet rings, the lacy treble fans and the corded edge all stand out without competing shades.
The pattern uses US crochet terms. The finished butterfly measures 6 in (15.2 cm) wide and 4.5 in (11.4 cm) tall across the wings. The antennae add about 1 in (2.5 cm), so the overall height is 5.5 in (14.0 cm).
How it’s built: all four wings are worked in one continuous piece. Each wing starts from a chain ring anchored at a shared center point. Next, a two-round border runs around the whole outline in one pass. Finally, you make the body as a small strip, roll it, wrap it, and sew it over the center with the two antennae.
Finished Size and Construction
- Finished size: 6 in (15.2 cm) wide × 4.5 in (11.4 cm) tall across the wings; 5.5 in (14.0 cm) tall including antennae
- Skill level: Intermediate
- Terminology: US
- Yarn weight: Fingering (#1), mercerized cotton
- Hook: 2.5 mm
- Number of pieces: 1 butterfly motif. The four-wing frame is one continuous piece, and the body and 2 antennae are sewn on.
- Layout: Single butterfly, with 2 upper wings and 2 lower wings around a central body
- Upper wing size (bordered): 2.6 in (6.6 cm) long × 2.1 in (5.3 cm) wide
- Lower wing size (bordered): 1.8 in (4.6 cm) long × 1.6 in (4.1 cm) wide
- Size before border: 5.5 in (14.0 cm) wide × 4 in (10.2 cm) tall
- Border depth: 0.25 in (0.6 cm) on every edge
Materials
Yarn: Use a fingering-weight mercerized cotton of about 170 m per 50 g. Mercerized cotton gives crisp stitch definition and holds the open wing shapes after blocking. Avoid fuzzy or very stretchy fibers, because the lace fans will lose their shape.
- Lemon yellow: 10 g, 34 m (37 yd)
This quantity covers the wings, border, body, wrapping and antennae, and includes a margin of about 20%.
Tools:
- 2.5 mm crochet hook
- Tapestry needle
- Small pinch of fiberfill or yarn scraps (for the body)
- Scissors
- Rustproof pins and a blocking board or foam mat
- Spray bottle with water
- Stitch marker
Abbreviations (US Terms)
- ch – chain
- sl st – slip stitch
- sc – single crochet
- hdc – half double crochet
- dc – double crochet
- tr – treble crochet
- sp – space
- rev sc – reverse single crochet (crab stitch): work sc from left to right (right-handed). Insert the hook into the next stitch to the right, yo, pull up a loop, yo, draw through both loops.
- st(s) – stitch(es)
- yo – yarn over
Bobble (special stitch): [Yo, insert hook in the indicated st, pull up a loop, yo, draw through 2 loops] 4 times (5 loops on hook). Yo, draw through all 5 loops, then ch 1 to close.
Gauge and Checkpoints
Gauge: 24 sc × 28 rows = 4 in (10.2 cm), which is 6 sc per 1 in (2.5 cm).
Before committing to the full butterfly, make one upper wing (Rnds 1–3) as a test and measure it.
Checkpoints:
- After upper wing Rnd 1: the opening measures about 1.4 in (3.6 cm) long × 0.9 in (2.3 cm) wide.
- After upper wing Rnd 3: the wing measures 2.4 in (6.1 cm) long × 1.9 in (4.8 cm) wide.
- After all four wings: the frame measures 5.5 in (14.0 cm) wide × 4 in (10.2 cm) tall when lightly pressed flat.
- After the border: the butterfly measures 6 in (15.2 cm) × 4.5 in (11.4 cm).
If your test wing is too big, go down to a 2.25 mm hook. If it is too small, go up to a 2.75 mm hook. If the wing cups even though its size is right, your tr are probably too tight; loosen your yarn overs on the fan.
Wing Frame (One Continuous Piece)
All four wings share one center point. Work them in this order: upper right, lower right, lower left, upper left. Do not fasten off between wings.
Upper Right Wing
Foundation: Leaving a 6 in (15.2 cm) tail, ch 24. Sl st in the first ch to form a ring. This sl st is the center point; place a marker in it.
Rnd 1: Ch 1, work 26 sc into the ring (over the chain, not into it). Sl st to the first sc. (26 sts)
Working over the chain lets you slide the stitches evenly so the opening stays smooth.
Rnd 2 (growth round): Ch 1, sc in the same st and next 3 sts, hdc in next 3, dc in next 3, 2 tr in each of next 6, dc in next 3, hdc in next 3, sc in last 4. Sl st to the first sc. (32 sts: 4 sc, 3 hdc, 3 dc, 12 tr, 3 dc, 3 hdc, 4 sc)
The rising stitch heights turn the ring into a teardrop: the short sc stay at the narrow base, and the tall tr make the wide outer end.
Rnd 3 (fan round): Ch 1, sc in the same st and next 3 sts, hdc in next 3, dc in next 3, [tr in next st, ch 1] 11 times, tr in next st, dc in next 3, hdc in next 3, sc in last 4. Sl st to the first sc. (32 sts + 11 ch-1 sps)
Each flank now has 10 sts, and the fan has 12 tr separated by ch-1 spaces. Those spaces create the lacy spoke texture.
Lower Right Wing
Foundation: Ch 18, then sl st into the center point to form the ring.
Rnd 1: Ch 1, work 20 sc into the ring. Sl st to the first sc. (20 sts)
Rnd 2 (growth round): Ch 1, sc in the same st and next 2 sts, hdc in next 2, dc in next 3, 2 tr in each of next 4, dc in next 3, hdc in next 2, sc in last 3. Sl st to the first sc. (24 sts: 3 sc, 2 hdc, 3 dc, 8 tr, 3 dc, 2 hdc, 3 sc)
Rnd 3 (fan round): Ch 1, sc in the same st and next 2 sts, hdc in next 2, dc in next 3, [tr in next st, ch 1] 7 times, tr in next st, dc in next 3, hdc in next 2, sc in last 3. Sl st to the first sc. (24 sts + 7 ch-1 sps)
Each flank has 8 sts, and the fan has 8 tr with 7 spaces between them.
Lower Left Wing
Repeat the Lower Right Wing, starting with ch 18 and a sl st into the center point. (Rnd 3: 24 sts + 7 ch-1 sps)
Upper Left Wing
Repeat the Upper Right Wing, starting with ch 24 and a sl st into the center point. (Rnd 3: 32 sts + 11 ch-1 sps)
To close the frame, sl st into the first sc of Upper Right Wing Rnd 3. Do not fasten off.
Frame checkpoint: 5.5 in (14.0 cm) × 4 in (10.2 cm). Use the starting tail to make 3 small stitches through all four wing bases so the center is firm.
Border
Border gauge: 6 sts per 1 in (2.5 cm), the same as the main gauge. The border is 2 rounds and adds 0.25 in (0.6 cm) on each edge.
The border runs once around the whole butterfly. When you finish one wing’s second flank, insert your hook directly into the first st of the next wing’s first flank. Do not add or skip any stitches at the junctions; the body will cover them.
Border Rnd 1 (trim round): Ch 1. On each wing, sc in each flank st, sc in each tr, and sc in each ch-1 sp. Sl st to the first sc.
- Upper right wing: 10 (flank) + 23 (fan: 12 tr + 11 sps) + 10 (flank) = 43 sc
- Lower right wing: 8 + 15 (fan: 8 tr + 7 sps) + 8 = 31 sc
- Lower left wing: 8 + 15 + 8 = 31 sc
- Upper left wing: 10 + 23 + 10 = 43 sc
- Total: 148 sc
Upper wings: 32 sts worked 1 per st + 11 sc added in spaces = 43. Lower wings: 24 + 7 = 31.
Border Rnd 2: Ch 1. Rev sc in each st around, keeping the same per-wing counts (43, 31, 31, 43). Sl st to the first st. (148 rev sc) Fasten off and weave in the end.
Why the math works: The flanks are short and almost straight, so 1 sc per st keeps them flat. The fan arc is much longer than the base of the tr, so working 1 sc into each ch-1 space adds exactly the length the curve needs. The upper fan’s 23 sc at 6 sts per inch cover 3.8 in (9.7 cm). The lower fan’s 15 sc cover about 2.5 in (6.4 cm). Both match the measured arcs, so the edge does not ruffle or cup. Reverse sc adds no stitches; it only rolls the edge into the corded rim.
Body
Strip: Ch 15.
Row 1: Sc in the 2nd ch from the hook and in each ch across. (14 sc)
Rows 2–4: Ch 1, turn, sc in each st across. (14 sc)
The strip measures 2.3 in (5.8 cm) × 0.6 in (1.5 cm). Fasten off, leaving a 12 in (30.5 cm) tail.
Shape: Lay a thin line of fiberfill along the strip. Roll the strip lengthwise around it and whipstitch the long edges together. The finished tube is about 0.4 in (1.0 cm) across.
Wrap: Thread 54 in (137.2 cm) of yarn onto a tapestry needle and secure it at the top end.
- Neck: 0.3 in (0.8 cm) below the top, wrap 5 times firmly. This forms the rounded head.
- Thorax: Wrap closely side by side over the next 0.6 in (1.5 cm).
- Abdomen: Make 4 bands of 4 wraps each, leaving a small gap between bands to create the segments.
- Taper: Wrap the last 0.5 in (1.3 cm) more and more tightly so it narrows to a point.
Anchor the yarn, but keep the tail for sewing.
Antennae (Make 2)
Leaving a 6 in (15.2 cm) tail, ch 11. Work a bobble in the 3rd ch from the hook. Sl st in the back bump of each of the remaining 8 ch. Fasten off.
Each antenna is a firm cord about 1.3 in (3.3 cm) long with a round tip.
Assembly
- Center the body over the wing junction, with the head between the upper wings.
- Using the body tail, sew the body down along its full length, stitching through the frame only.
- Sew the base of each antenna under the head, angling them into a V.
Final Blocking
- Spray the butterfly evenly until it is damp, but not dripping.
- Lay it right side up on the blocking mat.
- Pin the center first, then pin the tip of each upper wing out to a total width of 6 in (15.2 cm).
- Pin the lower wings so the total height is 4.5 in (11.4 cm).
- Pin each wing opening into a smooth teardrop, using 3–4 pins inside each opening.
- Ease the fans open so the ch-1 spaces look even.
- Position the antennae and pin the bobble tips.
- Let it dry completely before you unpin it.
Final Quality-Control Checklist
- [ ] Rnd 3 counts: upper wings 32 sts + 11 sps, lower wings 24 sts + 7 sps
- [ ] Border counts: 43 / 31 / 31 / 43, totaling 148
- [ ] Wing openings are smooth and symmetrical
- [ ] No gaps at the junctions, and the center is firm
- [ ] Body is centered, with even segments and a neat taper
- [ ] Antennae are equal length and symmetrically placed
- [ ] Finished size is 6 in (15.2 cm) × 4.5 in (11.4 cm)
- [ ] All ends are woven in and hidden
Troubleshooting
Fan ruffles: Your tr are too loose. Shorten your yarn overs, or work the fan with a hook 0.25 mm smaller.
Wing cups: The fan is too tight. Check that you worked 1 sc into each ch-1 space in Border Rnd 1.
Opening looks puckered: Slide the Rnd 1 sc evenly along the chain ring before you join.
Wings sit unevenly: Re-block, pinning symmetrical points first.
Body leans to one side: Restitch the body down along both sides of the tube.
Rev sc edge twists: Work it a little more loosely, and keep the right side facing you.
Care
Hand wash in cool water with mild soap, press out the water in a towel, and re-pin to dry flat. Press with a warm iron through a cloth if needed, avoiding the body.
Final Notes
The measurement chain is simple to follow:
- At 6 sts per 1 in (2.5 cm), the upper wing reaches 2.4 in (6.1 cm) after Rnd 3.
- The four-wing frame measures 5.5 in (14.0 cm) × 4 in (10.2 cm).
- The 148-stitch border adds 0.25 in (0.6 cm) on every edge, bringing the butterfly to 6 in (15.2 cm) × 4.5 in (11.4 cm).
- The antennae add about 1 in (2.5 cm) on top.
Check your test wing first, and every later stage will fall into place.
Happy crocheting!