

The Garden Flutter curtain is a pair of airy lace panels made entirely of white butterflies. Each butterfly has large upper wings and smaller lower wings, with an open teardrop window in every wing, fanned stitches around it and a picot edge. A ridged body with knobbed antennae is sewn down the center.
Every panel is 2 butterflies wide and 9 butterflies tall. The butterflies touch only at their wing edges, so sunlight comes through in butterfly shapes. A slim rod pocket across the top is the only solid part.
This pattern uses US crochet terms. Each finished panel measures 16 in (40.6 cm) wide by 64.5 in (163.8 cm) long, including the 1.5 in (3.8 cm) rod-pocket header.
Here is the construction in brief. You work each butterfly in the round from a small center ring, crochet a separate body and sew it on, and join the butterflies as you go at set picots. The header goes on last.
Finished Size and Construction
- Panel size: 16 in × 64.5 in (40.6 cm × 163.8 cm)
- Skill level: Intermediate
- Terminology: US
- Yarn weight: Sport (2), mercerized cotton
- Hook: 3.25 mm (US D-3)
- Number of pieces: 2 panels; 18 butterflies plus 18 bodies per panel (36 of each in total)
- Layout per panel: 2 columns × 9 rows
- Single butterfly: 8 in wide × 7 in tall (20.3 cm × 17.8 cm)
- Panel before header: 16 in × 63 in (40.6 cm × 160.0 cm)
- Header depth: 1.5 in (3.8 cm), on the top edge only
Materials
Use a smooth mercerized cotton in sport weight. Mercerized cotton shows the corded rings clearly, takes starch well and doesn’t fade much in sunlight. Avoid fuzzy blends, because they blur the picots.
- White: 550 g (approx. 1,650 m / 1,805 yd) for the pair. That’s 275 g (approx. 825 m / 902 yd) per panel.
Tools:
– 3.25 mm (US D-3) crochet hook
– Tapestry needle
– 4 locking stitch markers
– Rust-proof pins and blocking mats
– Spray starch (optional)
– Curtain rod up to 0.6 in (1.5 cm) in diameter
All quantities include roughly a 15% margin for swatching and blocking tests.
Abbreviations (US Terms)
- ch: chain
- sl st: slip stitch
- sc: single crochet
- hdc: half double crochet
- dc: double crochet
- tr: treble crochet
- sc2tog: single crochet 2 together
- BLO: back loop only
- sp: space
- MR: magic ring
- RS / WS: right side / wrong side
Special stitches
– Picot: ch 3, then sl st in the 3rd ch from the hook.
– Joining picot: ch 1, sl st into the matching picot of the finished butterfly, ch 1, then sl st in the first ch.
– 3-dc cluster: [yarn over, insert hook, pull up a loop, yarn over, pull through 2 loops] 3 times in the same stitch, then yarn over and pull through all 4 loops.
Gauge and Checkpoints
Make one complete butterfly and block it before you start anything else. Measure it at each of these checkpoints:
- Rnd 1: about 0.6 in (1.5 cm) across
- After Rnd 3: 5 in wide × 4.25 in tall (12.7 cm × 10.8 cm)
- After Rnd 4: 6.5 in × 5.5 in (16.5 cm × 14.0 cm)
- After Rnd 6, blocked: 8 in × 7 in (20.3 cm × 17.8 cm)
- Body: 3 in (7.6 cm) long
- Header gauge: 26 dc = 4 in (10.2 cm), and 8 dc rows = 2.5 in (6.4 cm)
If your blocked butterfly is more than 0.25 in (0.6 cm) too big, go down half a hook size. If it’s too small, go up half a size. Every error is multiplied 9 times down the length of the panel, so fix it now.
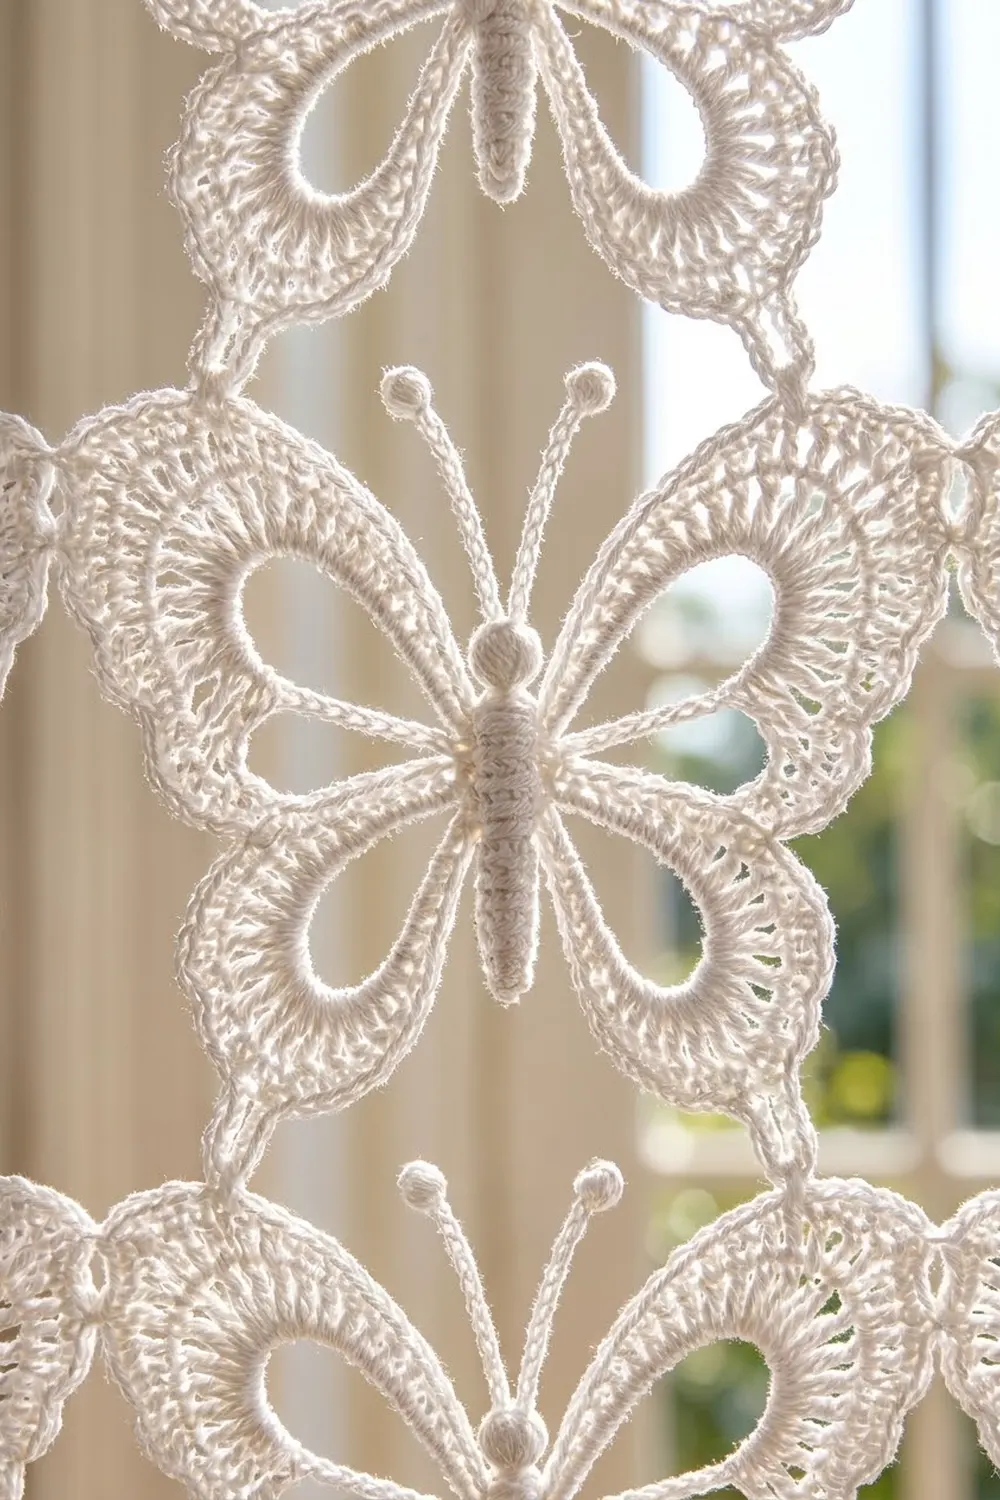
Butterfly (make 18 per panel)
Center ring: Ch 4 and sl st to the first ch to form a ring.
Rnd 1: Ch 1, then work 12 sc in the ring. Join with a sl st to the first sc. (12 sc)
Number these stitches 1–12. Stitch 1 sits at the head end (top). Stitches 1–2 are the top of the body, 3–5 are the right side, 6–9 are the bottom and 10–12 are the left side.
Rnd 2: Ch 1. Then:
– sc in sts 1–2, ch 30 for the upper-right wing loop
– sc in sts 3–5, ch 22 for the lower-right wing loop
– sc in sts 6–9, ch 22 for the lower-left wing loop
– sc in sts 10–12, ch 30 for the upper-left wing loop
Join to the first sc. (12 sc, 2 ch-30 loops, 2 ch-22 loops)
Rnd 3 (corded outlines): Ch 1. Then:
– sc in the next 2 sc, 40 sc in the ch-30 loop
– sc in the next 3 sc, 30 sc in the ch-22 loop
– sc in the next 4 sc, 30 sc in the ch-22 loop
– sc in the next 3 sc, 40 sc in the ch-30 loop
Join to the first sc. (152 sc: 12 body + 40 + 30 + 30 + 40)
Pack the stitches firmly around each chain so the openings form smooth teardrops. Place a marker at the start of each wing group.
Rnd 4 (fanned band): Ch 1. Work the stitch groups in this order:
– sl st in the next 2 sts, then the Upper Wing sequence
– sl st in the next 3 sts, then the Lower Wing sequence
– sl st in the next 4 sts, then the Lower Wing sequence
– sl st in the next 3 sts, then the Upper Wing sequence
Join to the first sl st.
- Upper Wing sequence (worked over 40 sts): sc in the next 2 sts, hdc in the next 2, dc in the next 4. Then [2 tr in the next st, tr in the next st] 12 times. Finish with dc in the next 4, hdc in the next 2 and sc in the next 2. That makes 52 sts.
- Lower Wing sequence (worked over 30 sts): sc in the next 2 sts, hdc in the next 2, dc in the next 2. Then [2 dc in the next st, dc in the next st] 9 times. Finish with dc in the next 2, hdc in the next 2 and sc in the next 2. That makes 39 sts.
Rnd 4 total: 194 sts (52 + 52 + 39 + 39 wing sts + 12 sl st)
The tallest stitches land at the outer curve of each wing, which gives the upper wings their wide rounded tips.
Rnd 5 (lace loops): Ch 1. Sl st across each body group exactly as in Rnd 4, and work the wings like this:
– Upper wing: sc in the first st, [ch 3, skip 1 st, sc in the next st] 25 times, then sc in the last st. That’s 27 sc and 25 ch-3 sps.
– Lower wing: sc in the first st, then [ch 3, skip 1 st, sc in the next st] 19 times. That’s 20 sc and 19 ch-3 sps.
Join to the first sl st. (94 sc, 88 ch-3 sps, 12 sl st)
Rnd 6 (picot edge): Ch 1. Sl st across each body group as before. On each wing, work (2 sc, picot, 2 sc) in each ch-3 sp, and skip the sc between the spaces. Join and fasten off.
(Upper wings: 100 sc and 25 picots each. Lower wings: 76 sc and 19 picots each. Total: 352 sc, 88 picots, 12 sl st)
Picot numbering: On each wing, number the picots in the order you work them.
– Upper-right: picot 1 is next to the head, then the picots run over the top and out to the tip.
– Lower-right: picot 1 is next to the upper wing, then the picots run around the bottom.
– Left wings: these are worked in mirror order, so their numbering is mirrored too.
Body (make 18 per panel)
Rnd 1: Work 6 sc in a MR. (6)
Rnd 2: 2 sc in each st. (12)
Rnds 3–4: sc in each st. (12)
Rnd 5: sc2tog 6 times. (6) Stuff the head lightly with yarn scraps.
Rnds 6–16: sc in the BLO of each st. (6) The BLO rounds make the ridged segments.
Rnd 17: sc2tog 3 times. (3) Fasten off and close the end.
Antennae: Join the yarn at the top of the head.
1. Ch 14, then work a 3-dc cluster in the 4th ch from the hook.
2. Sl st in each of the remaining 10 ch, then sl st into the head.
3. Move 1 st over on the head and repeat steps 1–2.
Each antenna measures about 1.75 in (4.4 cm).
Sew the body down the center over Rnds 1–3, with the head at stitches 1–2. Keep the antennae pointing up between the upper wings, and tack each one down near its base.
Make All Pieces
Each panel needs 18 butterflies and 18 bodies, all in White. That’s 36 of each for the pair.
The layout for one panel (top row first):
Row A:  A1  A2
Row B:  B1  B2
Row C:  C1  C2
Row D:  D1  D2
Row E:  E1  E2
Row F:  F1  F2
Row G:  G1  G2
Row H:  H1  H2
Row I:  I1  I2
Make A1 complete. Join every other butterfly as you go during its Rnd 6, working left to right and top to bottom.
Joining
You join butterflies picot to picot during Rnd 6 of the new butterfly. Where the table says to join, replace a regular picot with a joining picot.
Joining to the butterfly above:
– Upper-right picot 6 → picot 12 of the lower-right wing above
– Upper-right picot 8 → picot 10 of the lower-right wing above
– Upper-left picot 18 → picot 10 of the lower-left wing above
– Upper-left picot 20 → picot 8 of the lower-left wing above
Joining to the butterfly on the left:
– Upper-left picot 10 → upper-right picot 16 of the butterfly on the left
– Upper-left picot 12 → upper-right picot 14 of the butterfly on the left
– Lower-left picot 15 → lower-right picot 5 of the butterfly on the left
Each row has 3 side joins, and each column has 4 joins between vertical neighbors. In total, one panel has 27 side joins plus 64 vertical joins.
Every join lands picot to picot, so no stitches are added and the butterflies keep their own size. Lay both butterflies flat before each joining picot, and keep the ch 1 on either side relaxed. Joins that are too tight make the panel pucker.
Checkpoint: After Row C, the panel should measure 16 in × 21 in (40.6 cm × 53.3 cm) with the pieces laid flat. When all rows are joined, the panel measures 16 in × 63 in (40.6 cm × 160.0 cm).
Border (Rod-Pocket Header)
The sides and bottom keep their picot scallops on purpose, so only the top edge gets a border. Header gauge is 26 dc = 4 in (10.2 cm).
Row 1 (RS), across A1 then A2. For each butterfly:
1. Ch 2, then sc in upper-left picot 18.
2. [Ch 2, sc in the next picot] 7 times, ending at picot 25.
3. Ch 4 across the head.
4. Sc in upper-right picot 1, then [ch 2, sc in the next picot] 7 times, ending at picot 8.
5. Ch 2.
That makes 52 sts per butterfly (16 sc + 36 ch). For 2 butterflies the row has 104 sts (32 sc + 72 ch). The two ch-2 ends between A1 and A2 add up to the 4-ch bridge between them. They are already part of each butterfly’s count of 52, so nothing is added at the seam.
Row 2: Ch 3 (counts as a dc), turn. Dc in each st and each ch across. (104 dc)
Rows 3–9: Ch 3, turn. Dc in each st across. (104 dc)
Rod pocket: Fold Rows 6–9 down to the WS. Whipstitch the top of Row 9 to the back loops at the top of Row 1, matching one stitch to one stitch (104 to 104). This gives a pocket 1.25 in (3.2 cm) deep. The finished header is 1.5 in (3.8 cm) deep.
Why the math works: 104 dc ÷ 6.5 dc per in = 16 in (40.6 cm), which is exactly the joined width of 2 butterflies × 8 in. Because of that, the header lies flat without gathering or flaring.
Final Blocking
- Soak the panel in cool water for 15 minutes, then press the water out in a towel. Don’t wring it.
- Pin it to mats in sections, making it 16 in (40.6 cm) wide.
- Pin the open center of every wing into a smooth teardrop.
- Pin each picot point, working out from the body.
- Check that each butterfly measures 8 in × 7 in (20.3 cm × 17.8 cm).
- Pull the antennae straight and pin the knobs.
- Starch lightly if you like, then let the panel dry completely before moving the pins along.
- Steam the header flat, keeping the iron off the surface.
Final Quality-Control Checklist
- [ ] Each panel is 2 × 9 butterflies, 18 per panel
- [ ] Each butterfly measures 8 in × 7 in (20.3 cm × 17.8 cm)
- [ ] Rnd 6 has 25 picots on each upper wing and 19 on each lower wing
- [ ] All 27 side joins and 64 vertical joins are made, with no twisted wings
- [ ] Every body is centered, head up, with 2 knobbed antennae
- [ ] Header Row 1 has 104 sts and Rows 2–9 have 104 dc each
- [ ] The rod slides through freely
- [ ] Each panel measures 16 in × 64.5 in (40.6 cm × 163.8 cm)
- [ ] All ends are woven in along the corded rings
Troubleshooting
- Wing openings ruffle: You’ve worked too many sc in Rnd 3, or the chains are too tight. Keep exactly 40 and 30 sc, and chain loosely.
- Upper wings cup: Your tension on the Rnd 4 trebles is too tight. Go up half a hook size for Rnd 4 only.
- Picots don’t line up for joining: Recount the ch-3 spaces in Rnd 5 (25 and 19).
- Panel leans: You’ve mixed up mirrored picot numbers on the left wings. Check against the joining table.
- Header flares: Your dc gauge is loose. Rework the header with a smaller hook, keeping 104 dc.
- Body sags: Tack it down at the head and the tail as well as through the center.
Care
Hand wash in cool water with mild soap, then lay the panel flat or pin it to block. Re-starch lightly after washing if you want the wings crisp.
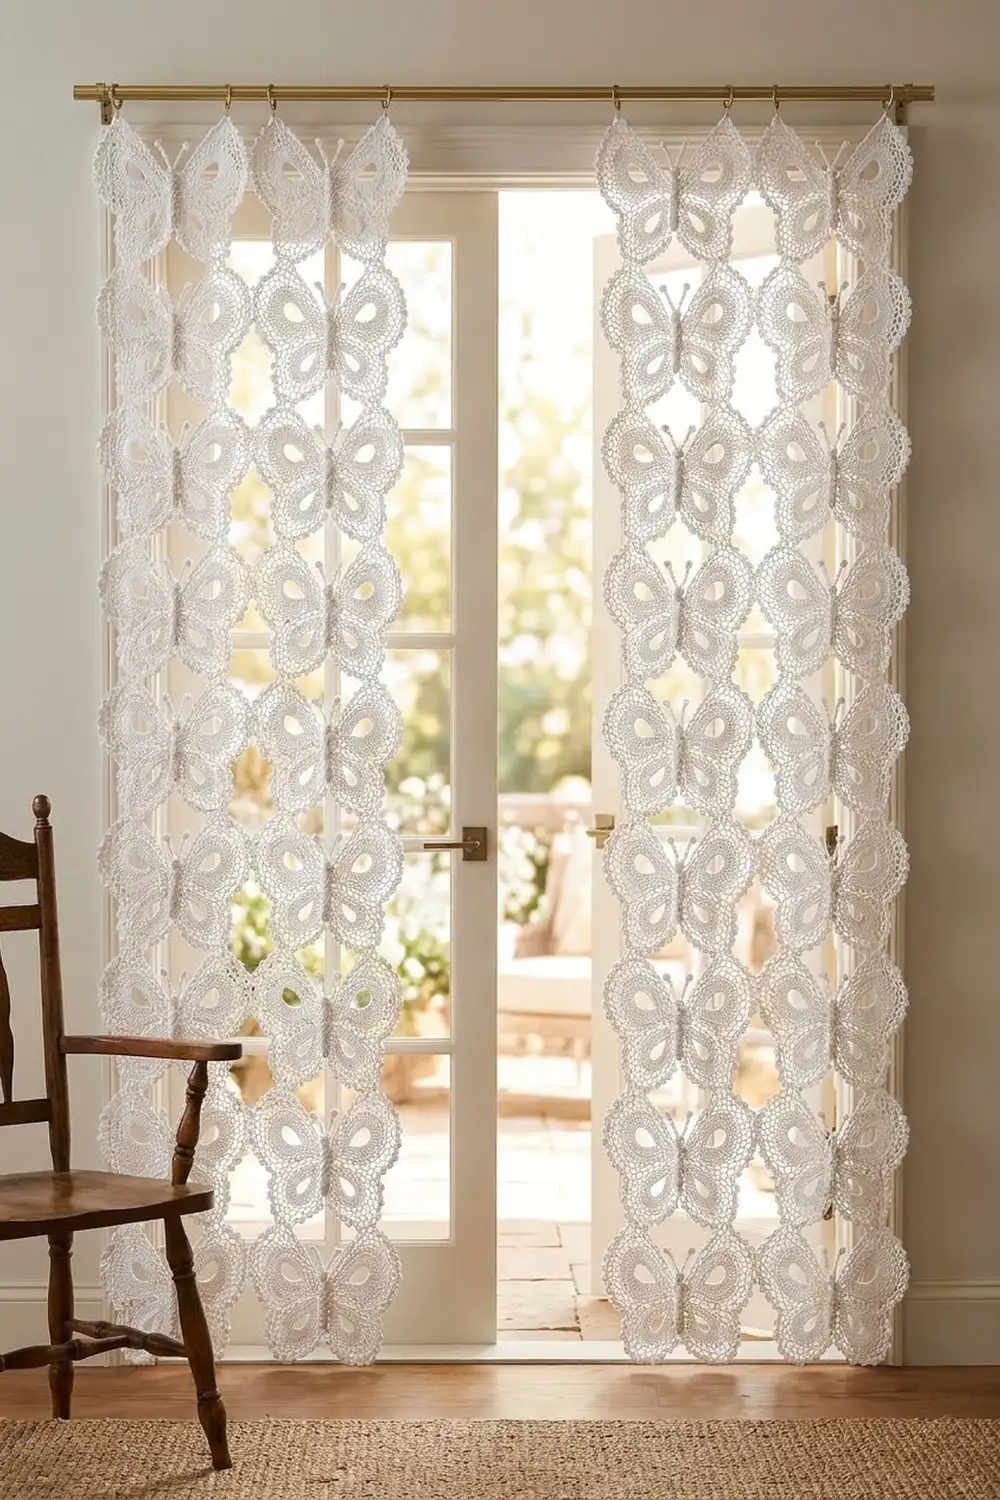
Final Notes
The measurements build on each other:
– Each butterfly blocks to 8 in × 7 in (20.3 cm × 17.8 cm).
– 2 across gives 16 in (40.6 cm) and 9 down gives 63 in (160.0 cm).
– The 104-dc header matches that 16 in (40.6 cm) width and adds 1.5 in (3.8 cm), for 64.5 in (163.8 cm) in total.
Check your first butterfly and every row will fall into place. Happy crocheting!