

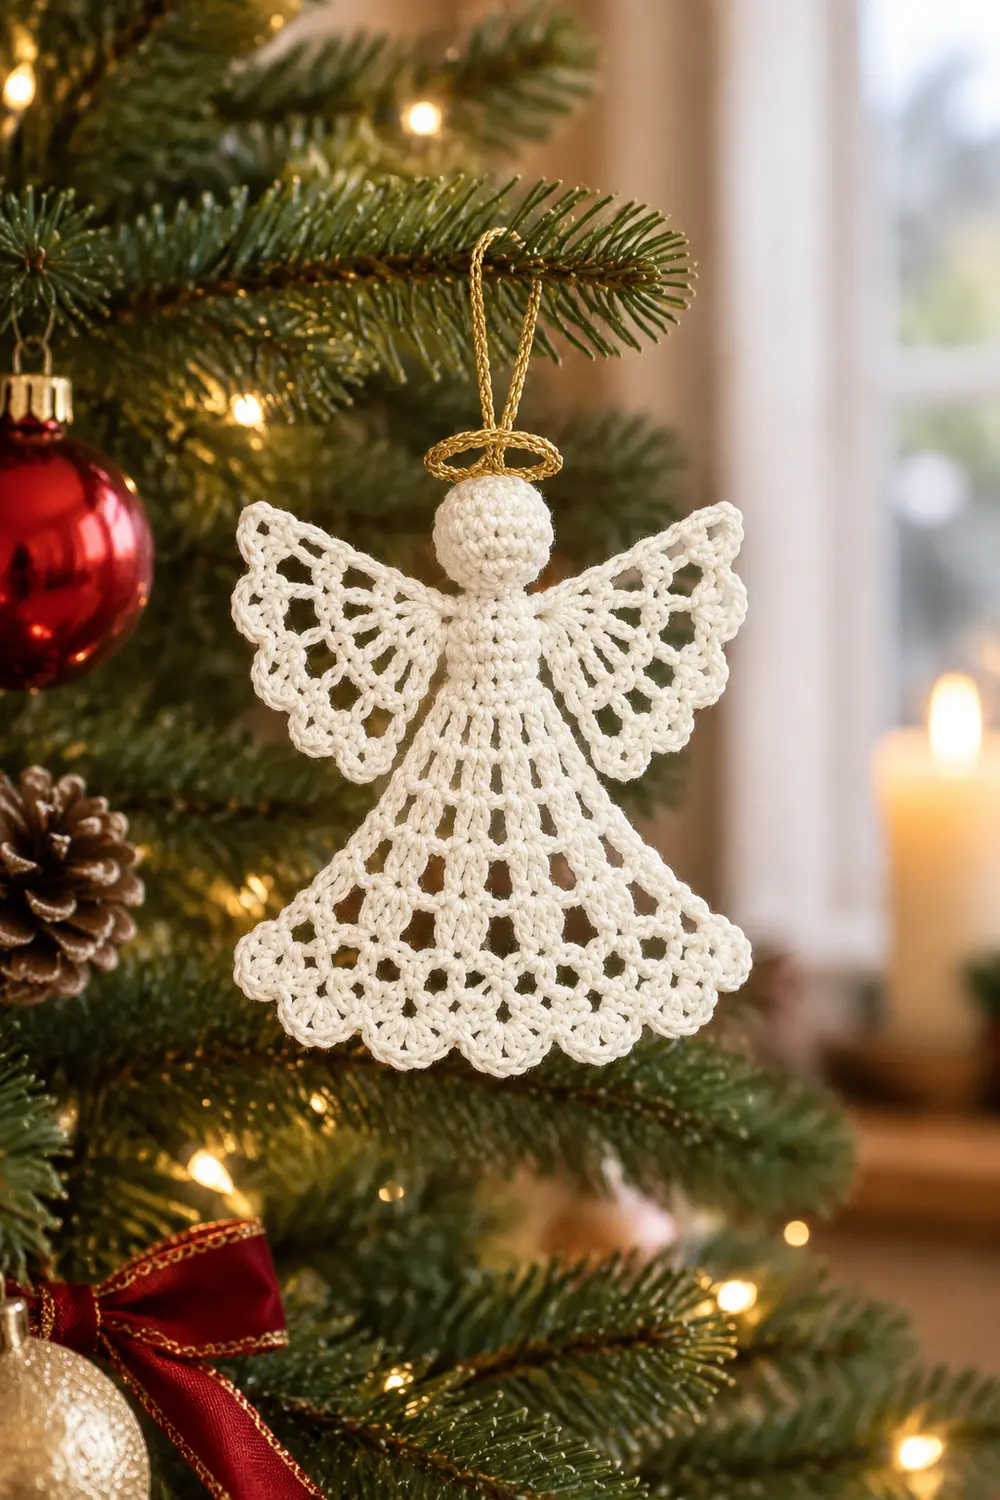
This little angel is a classic heirloom-style Christmas ornament. She has a round, softly stuffed head, a slim dense bodice, a bell-shaped lace skirt, and two large open-work wings edged with shell fans. A gold metallic halo sits on her head, and a gold loop rises above it for hanging.
The angel is worked entirely in cream or off-white cotton thread, with gold metallic thread only for the halo and hanging loop. The head and bodice use solid single crochet. The skirt and wings use open double crochet lace with plenty of negative space, so the ornament looks airy against a tree or window.
The pattern uses US crochet terms. The finished angel measures 4.5 in (11.4 cm) tall from the top of the head to the hem, and 3.75 in (9.5 cm) wide across the wings. The hanging loop adds about 1 in (2.5 cm).
Construction is continuous and seamless. You work the head as a small amigurumi ball in the round, continue down into the neck and a closed bodice tube, then flatten the tube and work the skirt flat in rows. The scalloped picot hem is worked as the border. The wings are worked directly into the sides of the bodice, and the gold halo and loop are crocheted onto the top of the head.
Finished Size and Construction
- Finished size: 4.5 in (11.4 cm) tall × 3.75 in (9.5 cm) wide, excluding the hanging loop
- Skill level: Intermediate
- Terminology: US crochet terms
- Yarn weight: Size 3 cotton crochet thread (Lace, CYC 0)
- Hook: 2.25 mm (US B-1)
- Number of pieces: 1 continuous cream piece, plus a gold halo and loop worked onto the head (no sewing)
- Layout: Head on top, bodice below, skirt flaring to the hem, and one wing on each side of the bodice
- Piece size: Head about 1 in (2.5 cm) tall. Head plus bodice 2 in (5.1 cm). Skirt 2.1 in (5.3 cm) before the border. Each wing 1.4 in (3.6 cm) long.
- Size before border: 4.1 in (10.4 cm) tall, with a hem width of 3.4 in (8.6 cm)
- Border depth: 0.4 in (1.0 cm) scalloped picot hem
Materials
Choose a mercerized cotton thread in size 3. It gives crisp stitch definition and holds its shape after starching. Avoid fuzzy or very stretchy fibers, because the lace will lose its sharp openings.
- Cream or off-white cotton, size 3: 10 g (about 28 m)
- Gold metallic thread, size 3 or similar weight: 2 g (about 6 m)
Tools:
- 2.25 mm (US B-1) crochet hook
- Tapestry needle
- 2 stitch markers
- Small pinch of polyester fiberfill
- Scissors
- Blocking mat and rust-proof pins
- Spray starch or fabric stiffener
Quantities include a margin of roughly 25% for gauge swatching and weaving in ends.
Abbreviations (US Terms)
- ch – chain
- sl st – slip stitch
- sc – single crochet
- dc – double crochet
- inc – 2 sc in the same stitch
- dec – sc2tog (single crochet 2 together)
- st(s) – stitch(es)
- sp – space
- tch – turning chain
- MR – magic ring
- RS – right side
Special stitches:
- Picot: Ch 3, then sl st in the 3rd ch from the hook.
- Scallop: (3 dc, picot, 3 dc) all in the same stitch.
- Shell: 5 dc in the same stitch.
Gauge and Checkpoints
The gauge is 7 sc and 8 sc rounds = 1 in (2.5 cm), and 3 dc rows = 1 in (2.5 cm).
Because this is a single piece, your test is the angel itself. Work the head and bodice first, measure, and adjust before you start the lace.
Checkpoints:
- After head Rnd 9: The head is about 1 in (2.5 cm) tall and round.
- After bodice Rnd 17: The tube flattens to 0.9 in (2.3 cm) wide. The distance from the top of the head is 2 in (5.1 cm).
- After skirt Row 4: The skirt measures 1.1 in (2.8 cm) from the waist.
- After skirt Row 7: The total height is 4.1 in (10.4 cm), and the hem is 3.4 in (8.6 cm) wide.
- After each wing: Each wing is 1.4 in (3.6 cm) long from body to shell tips.
If your angel is too big: Change to a 2.0 mm hook. If it is too small: Change to a 2.5 mm hook. Restart from the head, because gauge changes partway through will distort the proportions.
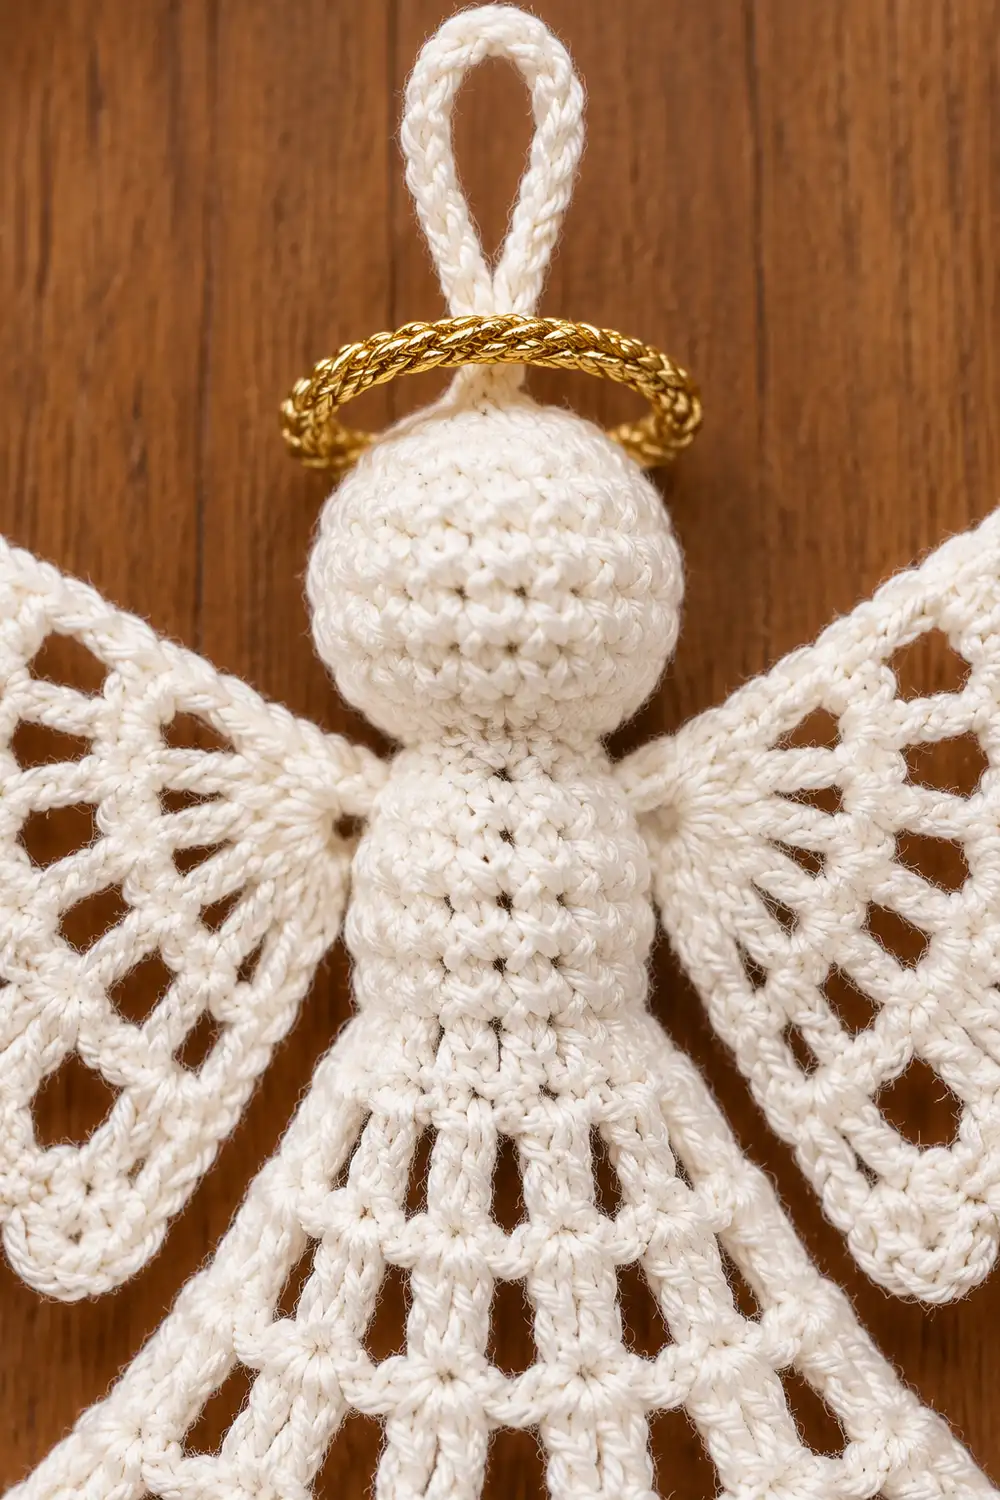
Head (Worked in the Round)
Work in a continuous spiral without joining. Mark the first stitch of each round.
- Rnd 1: 6 sc in MR. (6)
- Rnd 2: Inc in each st around. (12)
- Rnd 3: (Sc in next st, inc) 6 times. (18)
- Rnds 4–7: Sc in each st around. (18 per round)
- Rnd 8: (Sc in next st, dec) 6 times. (12)
Stuff the head firmly with a small pinch of fiberfill. It should feel round, not lumpy.
- Rnd 9: Dec 6 times. (6)
Checkpoint 1: the head should be about 1 in (2.5 cm) tall. Do not fasten off.
Neck and Bodice (Worked in the Round)
- Rnd 10 (neck): Sc in each st around. (6)
- Rnd 11 (shoulders): Inc in each st around. (12)
- Rnds 12–17: Sc in each st around. (12 per round)
Leave the bodice unstuffed so it lies flat. Flatten the tube with the face forward. The two side creases are the side folds. Place one marker on each side fold at Rnd 12 and leave them in place, because you will attach the wings there later.
Checkpoint 2: the bodice is 0.9 in (2.3 cm) wide, and the angel measures 2 in (5.1 cm) from the top of the head. If the round ends short of a side fold, sc 1–2 more stitches to reach it. These extra stitches do not change the count.
Skirt (Worked Flat in Rows)
- Row 1 (conversion row): Working through both layers of the flattened tube, sc in each pair of stacked stitches across. That is 12 bodice stitches worked as 6 pairs, giving 6 sc. Turn.
- Row 2: Ch 3 (counts as dc), dc in the same st, then work 2 dc in each of the next 5 sts. (12 dc) Turn.
- Row 3: Ch 3, dc in next dc, [ch 1, dc in each of next 2 dc] 5 times. (12 dc, 5 ch-1 sps) Turn.
- Row 4: Ch 3, dc in next dc, [ch 2, skip ch-1 sp, dc in each of next 2 dc] 5 times. (12 dc, 5 ch-2 sps) Turn.
Checkpoint 3: the skirt measures 1.1 in (2.8 cm) from the waist.
- Row 5 (growth row): Ch 3, dc in next dc, [ch 1, dc in ch-2 sp, ch 1, dc in each of next 2 dc] 5 times. (17 dc, 10 ch-1 sps) Turn.
Row 5 has 6 pairs of dc with a single center dc between each pair. The 5 new center dc bring the row’s own total to 17 dc.
- Row 6: Ch 3, dc in next dc, [ch 1, skip ch-1 sp, dc in center dc, ch 1, skip ch-1 sp, dc in each of next 2 dc] 5 times. (17 dc, 10 ch-1 sps) Turn.
- Row 7: Repeat Row 6. (17 dc, 10 ch-1 sps) Turn. Do not fasten off.
Checkpoint 4: the total height is 4.1 in (10.4 cm), and the hem is 3.4 in (8.6 cm) wide. The flare from 6 stitches to 17 dc plus chain spaces creates the bell shape.
Border (Scalloped Picot Hem)
The border gauge is 1 scallop = 0.75 in (1.9 cm) wide and 0.4 in (1.0 cm) deep.
The hem is the only bordered edge. The skirt sides are row ends, and they are left plain to keep the silhouette clean.
Border Row: Ch 1, then sc in the first dc and skip the next dc. Next, work [skip ch-1 sp, scallop in next center dc, skip ch-1 sp, sc in the sp between the 2 dc of the next pair] 4 times. To finish the row, skip the ch-1 sp, work a scallop in the next center dc, skip the ch-1 sp and the next dc, then sc in the top of the tch. Fasten off.
Count across the hem: 6 sc anchors, 5 scallops, 30 dc, and 5 picots.
Why the math works: Row 7 contains exactly 6 dc pairs and 5 center dc. Each pair takes one sc anchor. The two end pairs anchor in their outer dc, and the 4 middle pairs anchor between their two dc. Each center dc holds one scallop. Six anchors with five scallops between them fit evenly, with no leftover stitches.
Five scallops × 0.75 in (1.9 cm) = 3.75 in (9.5 cm). The shells fan the 3.4 in (8.6 cm) hem out to the finished 3.75 in (9.5 cm) width. Adding the 0.4 in (1.0 cm) border depth to the 4.1 in (10.4 cm) body gives the finished height of 4.5 in (11.4 cm).
Wings (Make 2, Worked onto the Bodice)
Work one wing on each side fold.
- Setup: With the RS facing, join cream with a sl st in the side fold at Rnd 12, at the marker. Ch 5, then sl st in the same side fold at Rnd 16. This forms an arch spanning 0.5 in (1.3 cm). Turn.
- Row 1: Ch 3 (counts as dc), work 10 dc in the ch-5 arch, then sl st in the side fold at Rnd 12. (11 dc) Turn.
- Row 2: Ch 4 (counts as dc + ch 1), dc in next dc, [ch 1, dc in next dc] 9 times, ending in the top of the tch. (11 dc, 10 ch-1 sps) Turn.
- Row 3: Ch 5 (counts as dc + ch 2), dc in next dc, [ch 2, dc in next dc] 9 times. (11 dc, 10 ch-2 sps) Turn.
- Row 4 (shell edge): Ch 1, sc in the first dc, then work [shell in next dc, sc in next dc] 5 times. Skip all ch-2 sps. (6 sc, 5 shells, 25 dc) Fasten off.
The 11 dc alternate cleanly: sc, shell, sc, shell, and so on, ending with an sc. That gives 6 anchors and 5 shells.
Checkpoint 5: each wing is 1.4 in (3.6 cm) long. Two wings plus the 0.9 in (2.3 cm) bodice measure about 3.75 in (9.5 cm) across.
Gold Halo and Hanging Loop
- Join gold with a sl st through the center top of the head at Rnd 1.
- Halo: Ch 24, then sl st in the first of these 24 ch to form a ring about 0.75 in (1.9 cm) across.
- Loop: Ch 20, then sl st in the same first ch. The loop stands about 1 in (2.5 cm) tall.
- Fasten off and weave the tail down into the head.
- With a gold tail or a sewing needle, tack the halo at the front and back to Rnd 3 so it sits level around the crown.
Final Blocking
- Weave in all cream ends along solid stitches, not through the lace.
- Lightly mist the angel with water.
- Pin the angel face up on the mat with the head centered above the bodice.
- Pin the hem straight across, putting one pin in each picot and each sc anchor. The hem should measure 3.75 in (9.5 cm).
- Angle the wings upward at about 30 degrees, then pin each shell tip and open the chain spaces.
- Confirm the height is 4.5 in (11.4 cm) and the width across the wings is 3.75 in (9.5 cm).
- Spray with starch or stiffener, avoiding the stuffed head.
- Let it dry completely, ideally overnight, before unpinning.
Final Quality-Control Checklist
- [ ] The head is round and evenly stuffed, with no fiberfill showing.
- [ ] The neck has 6 sts and the bodice has 12 sts per round.
- [ ] The skirt Row 7 has 17 dc and 10 ch-1 sps.
- [ ] The hem has 5 scallops, 5 picots, and 6 anchors.
- [ ] Each wing has 5 shells and 6 sc.
- [ ] Both wings are attached at matching rounds (Rnds 12–16).
- [ ] The halo sits level, and the loop is centered.
- [ ] The angel measures 4.5 in (11.4 cm) × 3.75 in (9.5 cm).
- [ ] All ends are hidden and trimmed.
Troubleshooting
The head is pointed or flat. Stuff a little more before Rnd 9, and roll it between your palms to round it out.
The bodice twists. The spiral naturally drifts. Re-flatten along the natural creases before Skirt Row 1.
The skirt ruffles. Your chains are too loose. Use a smaller hook for the chain spaces only, or chain more firmly.
The skirt curls inward. Your tension is tight. Block firmly, or go up a hook size for Rows 5–7.
The wings flop. Starch more heavily and let them dry fully while pinned.
The scallops look crowded. Make sure you skip both ch-1 sps on either side of each center dc.
The wings are uneven. Count the arch anchor rounds on both sides. Each wing must span Rnds 12–16.
The halo tilts. Add a third tack stitch at the side of the head.
Care
Hand wash in cool water with mild soap, press out the water in a towel, and re-block flat with fresh starch. Store flat in tissue paper so the wings keep their shape.
Final Notes
Every measurement builds on the one before it. The head is 1 in (2.5 cm), and the head plus bodice reaches 2 in (5.1 cm). The skirt flares from 6 sc to 17 dc, bringing the angel to 4.1 in (10.4 cm). The 0.4 in (1.0 cm) scallop border finishes her at 4.5 in (11.4 cm) tall, with a 3.75 in (9.5 cm) hem. The wings, 1.4 in (3.6 cm) each, match that 3.75 in (9.5 cm) width.
Check your gauge at the bodice, count at each checkpoint, and the angel will come out balanced every time. Optional: make several in one evening for a matching set of tree ornaments.
Happy crocheting!