

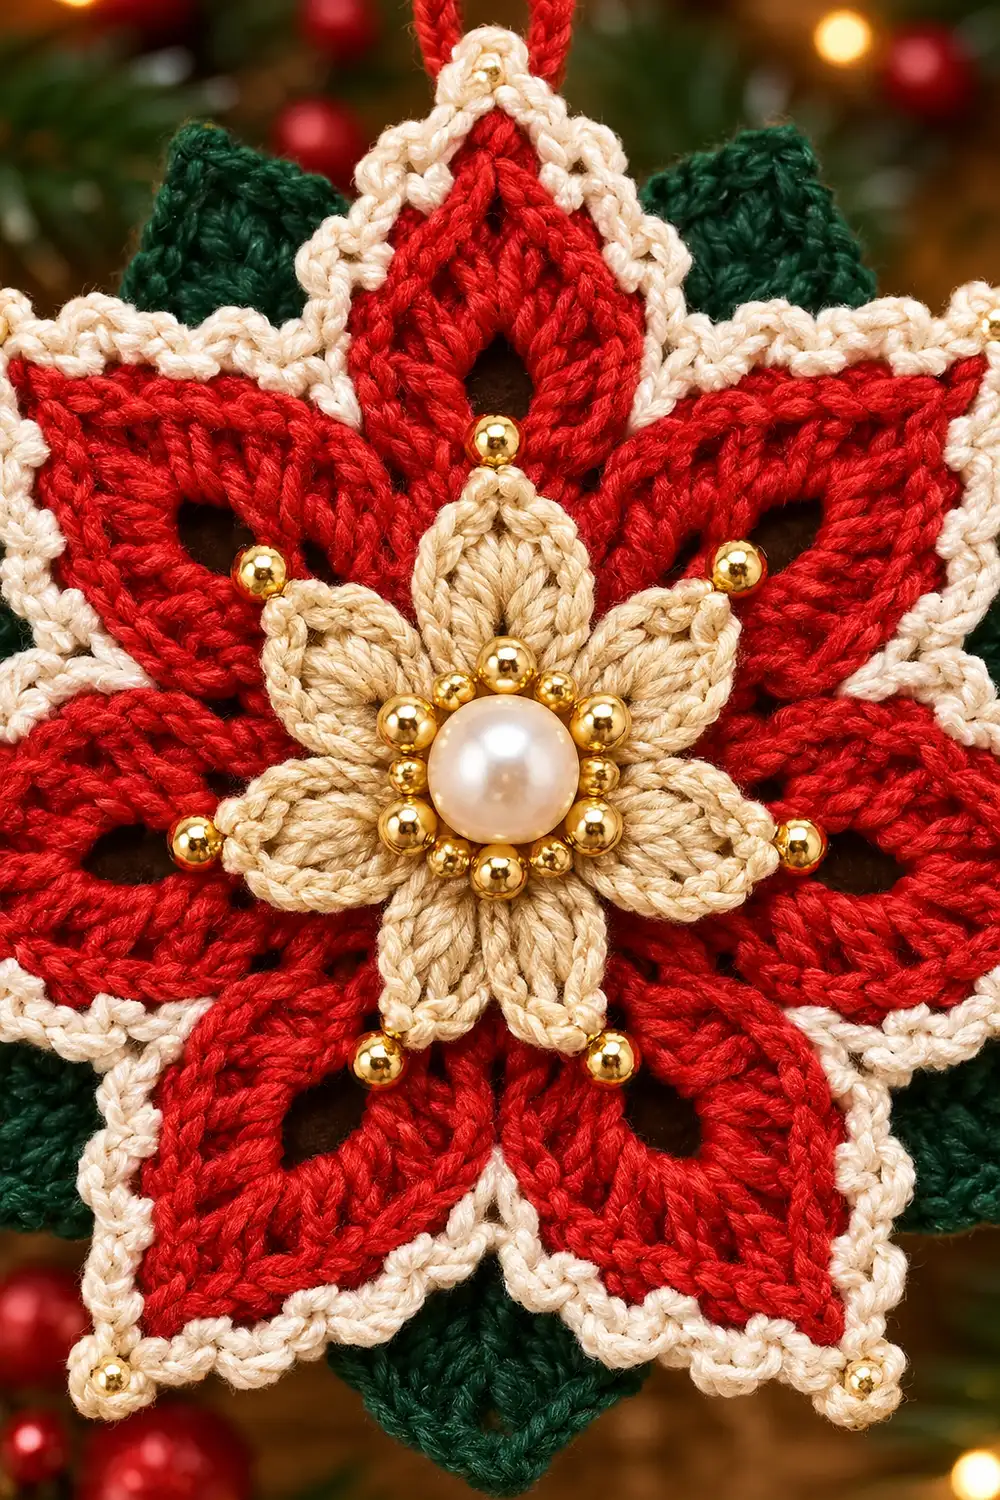
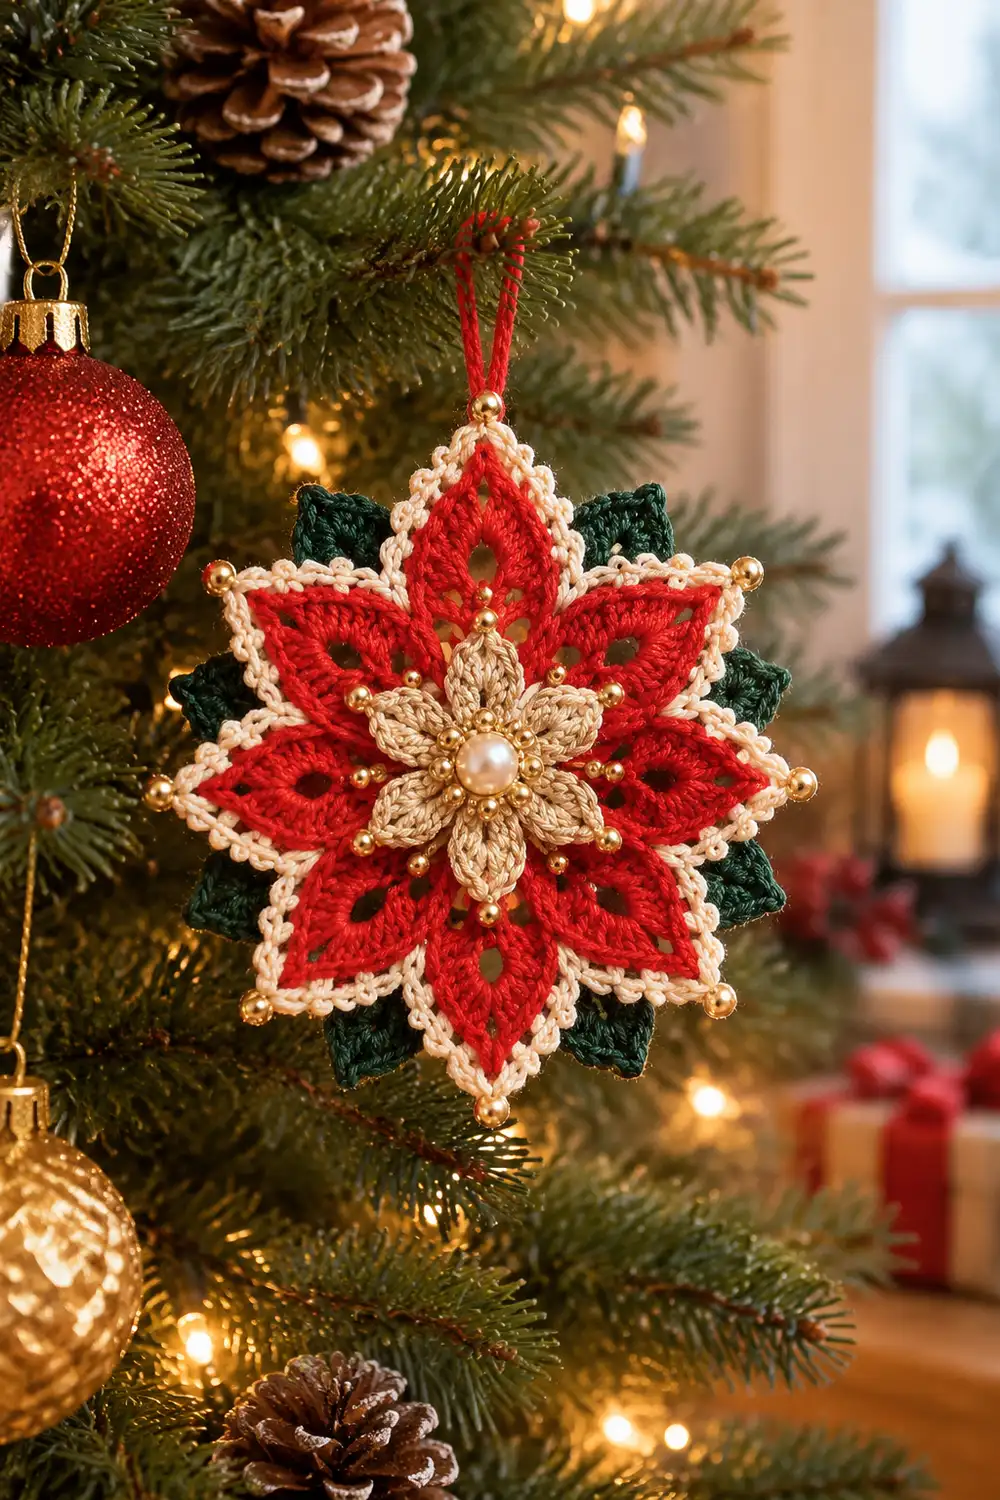
This little ornament layers three simple pieces into one festive motif. A solid red six-pointed star forms the base. Each point has small open windows and eyelets that show off the lacework. A crisp cream picot edge outlines the star.
A golden-beige flower with six rounded petals sits in the center, finished with a pearl bead. Six small dark green leaves peek out from behind the star, one in each valley between the points. It looks lovely on a tree, a gift package, or a wreath.
The pattern uses US crochet terms throughout. The finished ornament measures about 3.5 in (8.9 cm) from point to point, which sits in the 3-4 in range typical for a tree ornament.
Construction is straightforward. You work the red star in the round from a magic ring, then add one cream edging round. Next you make the flower and the six leaves as small separate pieces. Finally you sew the leaves to the back, stack the flower on the front, and add the pearl.
Finished Size and Construction
- Finished size: 3.5 in (8.9 cm) point to point
- Skill level: Advanced beginner
- Terminology: US crochet terms
- Yarn weight: Sport (#2) cotton or cotton blend
- Hook: 2.75 mm (US C-2)
- Number of pieces: One ornament made from three layers: 1 star base, 1 flower, and 6 small leaves
- Layout: Leaves on the back of the star, star in the middle, flower and pearl on top
- Star size before border: 3 in (7.6 cm) point to point
- Border depth: 0.25 in (0.6 cm) on every edge
- Flower size: 1.5 in (3.8 cm) across
- Leaf size: 1 in (2.5 cm) long
Materials
Choose a smooth, mercerized sport-weight cotton. Cotton holds sharp points, blocks well, and shows lace clearly. Avoid fuzzy yarns, because they blur the open windows and the picot edge. The quantities below assume about 2.5 m per gram, which is typical for sport cotton.
Yarn:
- Red (star base): 5 g, about 13 m
- Cream (picot border): 2 g, about 5 m
- Golden-beige (flower): 2 g, about 5 m
- Dark green (leaves): 2 g, about 5 m
All quantities include a margin for swatching, tails, and sewing.
Tools:
- 2.75 mm (US C-2) crochet hook
- Tapestry needle
- Sewing needle and matching thread
- One 8 mm pearl bead
- Optional: 6-12 tiny gold seed beads for the point tips and petals
- Locking stitch marker
- Rust-proof pins, a blocking mat, and a spray bottle
- Ruler and scissors
Abbreviations (US Terms)
- ch – chain
- sl st – slip stitch
- sc – single crochet
- hdc – half double crochet
- dc – double crochet
- tr – treble crochet
- sc2tog – single crochet 2 together
- sp – space
- st(s) – stitch(es)
- MR – magic ring
Special stitch – Picot tip: (2 sc, ch 3, 2 sc) worked into the ch-3 tip space of a star point. The ch-3 forms the small picot loop at the very tip.
Special stitch – sc2tog valley: Insert hook in next st, yarn over, pull up a loop. Insert hook in following st, yarn over, pull up a loop. Yarn over and draw through all 3 loops. This pulls each valley into a sharp inner corner.
Gauge and Checkpoints
Exact gauge matters less here than for a garment, but your size should stay close so the flower and leaves fit the star. Work Rounds 1-2 of the star as your test piece, then measure. Lay each piece flat and measure without stretching.
Star base checkpoints:
- After Round 1: 0.75 in (1.9 cm) across
- After Round 2: 1.25 in (3.2 cm) across
- After Round 3: 1.75 in (4.4 cm) across
- After Round 4: 2.25 in (5.7 cm) point to point
- After Round 5: 3 in (7.6 cm) point to point
- After border: 3.5 in (8.9 cm) point to point
Other pieces:
- Flower: 1.5 in (3.8 cm) across
- Leaf: 1 in (2.5 cm) long
If your piece is too big: go down to a 2.5 mm hook, or tighten your chain spaces.
If your piece is too small: go up to a 3 mm hook.
If Round 2 cups: your dc are too tight. Loosen slightly or go up a hook size for the center rounds only.
Star Base (Red)
The ch-3 at the start of Rounds 1-3 counts as a dc. In Rounds 4-5 the starting chain does not count.
Round 1: With red, make a MR. Ch 3, then work 11 dc into the ring. Pull the ring closed and sl st to the top of the beginning ch-3. (12 dc)
Round 2: Ch 3, then work 1 dc in the same st. Work 2 dc in each remaining st around, and sl st to the top of the ch-3. (24 dc)
This is a growth round. Each of the 12 sts becomes 2, so the count doubles.
Round 3 (eyelet round): Ch 3, dc in next st, ch 2. Dc in next 4 sts, ch 2. Repeat from * 4 more times. Dc in last 2 sts and sl st to the top of the ch-3. (24 dc, 6 ch-2 sps)
No stitches are added in this round. Each ch-2 space marks the center of a future point and becomes a visible eyelet.
Round 4 (point base): Ch 2 (does not count as a st). Hdc in the same st as the join, then dc in next dc. Work (2 tr, ch 3, 2 tr) in the ch-2 sp. Dc in next dc, hdc in next dc.
Hdc in next dc, dc in next dc, (2 tr, ch 3, 2 tr) in next ch-2 sp, dc in next dc, hdc in next dc. Repeat from * 4 more times. Sl st to the first hdc.
(48 sts: 8 per point, plus 6 ch-3 tips)
Check the count per point: hdc + dc + 2 tr + 2 tr + dc + hdc = 8 sts. The valley forms naturally where one point’s last hdc meets the next point’s first hdc.
Round 5 (lace point round): Ch 1 (does not count). Then work this sequence on each point:
Sc in hdc, hdc in dc, dc in next tr, ch 1, dc in next tr. Work (2 dc, ch 3, 2 dc) in ch-3 tip. Dc in next tr, ch 1, dc in next tr, hdc in dc, sc in hdc.
Work the sequence 6 times in total, then sl st to the first sc. Fasten off red and weave in the ends.
(72 sts: 12 per point, plus 12 ch-1 sps and 6 ch-3 tips)
Check the count per point: sc, hdc, dc, dc, 2 dc, 2 dc, dc, dc, hdc, sc = 12 sts. The ch-1 spaces on each side of every point form the open lace windows.
Checkpoint: 3 in (7.6 cm) point to point. Pin out flat now if the points curl, so the border goes on evenly.
Flower (Golden-Beige)
Round 1: With golden-beige, make a MR. Ch 1, then work 12 sc into the ring. Pull the ring tight and sl st to the first sc. (12 sc)
Round 2: Ch 1, sc in the same st, ch 3, skip next st. Sc in next st, ch 3, skip next st. Repeat from * 4 more times, then sl st to the first sc. (6 sc, 6 ch-3 loops)
Round 3 (petals): Work (sc, hdc, 3 dc, hdc, sc) in next ch-3 loop, then sl st in next sc. Repeat from * 5 more times. (6 petals of 7 sts each = 42 sts, plus 6 sl sts)
Fasten off and leave a 12 in (30.5 cm) tail for sewing. The 3-dc crest gives each petal its soft, rounded shape.
Checkpoint: 1.5 in (3.8 cm) across.
Leaves (Dark Green) – Make 6
Ch 6. Then work:
- First side: Sc in 2nd ch from hook, hdc in next ch, dc in next ch, hdc in next ch, sc in last ch. (5 sts)
- Tip: Ch 2.
- Second side: Working into the opposite side of the foundation chain, sc in first ch, hdc in next ch, dc in next ch, hdc in next ch, sc in last ch. (5 sts)
Sl st to the first sc. (10 sts plus ch-2 tip)
Fasten off and leave an 8 in (20.3 cm) tail for sewing.
Checkpoint: 1 in (2.5 cm) long.
Border (Cream)
Border gauge: about 7 sc per 1 in (2.5 cm) along the edge. The border is one round of sc, worked into every stitch and space of Round 5.
Round 6 (picot edge): Join cream with a standing sc in the first hdc of any point. Then work this sequence on each point:
- Left edge: Sc in dc, sc in ch-1 sp, sc in dc, sc in next 2 dc. (including the joining sc: 6 sts)
- Tip: Picot tip (2 sc, ch 3, 2 sc) in ch-3 tip. (4 sts)
- Right edge: Sc in next 2 dc, sc in dc, sc in ch-1 sp, sc in dc, sc in hdc. (6 sts)
- Valley: Sc2tog over the next 2 sc (this point’s last sc and the next point’s first sc). (1 st)
- Next point: Sc in next hdc to begin the next point’s left edge.
Repeat around. The sixth sc2tog uses the last sc of point 6 and the first sc of point 1. Sl st to the first sc.
Count: 6 + 4 + 6 + 1 = 17 sts per point. That gives 6 × 17 = 102 sts, plus 6 picots.
Hanging loop (optional): On point 1 only, work ch 15 instead of ch 3 in the picot tip. This makes a loop about 0.75 in (1.9 cm) tall. The stitch count stays the same.
Fasten off and weave in the ends.
Why the math works: Every one of Round 5’s 12 sts and 2 ch-1 sps per point receives exactly 1 sc, with a few adjustments:
- The 2 valley sc are combined into 1 sc2tog, which sharpens the inner corner.
- The tip space receives 4 sc around the ch-3 picot, so the border can turn the outer corner without cupping.
That gives 10 sts worked one-per-stitch, plus 2 for the ch-1 sps, plus 4 at the tip, plus 1 sc2tog, for 17 per point. The edge stays flat at 7 sc per in. It adds 0.25 in (0.6 cm) on every side, taking the star from 3 in (7.6 cm) to 3.5 in (8.9 cm).
Layer Assembly
- Pin the leaves. Place the star face down. Pin one leaf behind each valley, with the leaf’s base toward the center. Let each leaf tip extend about 0.5 in (1.3 cm) beyond the cream border.
- Sew the leaves. Use the green tails to tack each leaf base to the back of Rounds 2-3 with small, hidden stitches. Keep these stitches out of the lace windows.
- Center the flower. Turn the star face up. Center the flower so that each petal points toward one star point (6 petals, 6 points).
- Sew the flower. Using the golden-beige tail, sew around the flower’s Round 1, catching only the star’s Round 1-2 stitches. Leave the petals free so they lift slightly.
- Add the pearl. Sew the 8 mm pearl into the flower center with sewing thread. Pass through it twice for security.
- Add seed beads (optional). Sew a gold seed bead at each picot tip, or at the base of each petal.
Final Blocking
- Lightly mist the whole ornament until it is damp, not wet.
- Lay it face up on the blocking mat.
- Pin each of the 6 picot tips so the piece measures 3.5 in (8.9 cm) point to point. Check opposite tips with a ruler.
- Pin each valley inward slightly to sharpen the star shape.
- Gently open each lace window and eyelet with a fingertip.
- Shape the flower petals with your fingers so they curve up a little.
- Let it dry completely, ideally overnight, before unpinning.
Final Quality-Control Checklist
- Star measures 3.5 in (8.9 cm) point to point
- All 6 points are the same length
- Border has 102 sts and 6 picots
- Every valley is a crisp sc2tog corner
- Lace windows and eyelets are open and visible
- Flower measures 1.5 in (3.8 cm) and has 6 even, rounded petals
- Petals line up with the star points
- All 6 leaves show evenly behind the valleys
- Pearl is secure and centered
- No loose ends are visible on the front
- Hanging loop, if added, is firm and centered on one tip
Troubleshooting
- Star cups or domes: Round 2 is too tight. Redo it with looser dc, or block firmly.
- Points ruffle: Your tr in Round 4 are too loose. Go down a hook size for that round.
- Border waves: Your sc are too loose. Work the border with a 2.5 mm hook.
- Border pulls the points in: Check that the picot tip has 4 sc, not 2.
- Rounded valleys: Make sure you worked sc2tog, not 2 separate sc.
- Flower too large: Use a 2.5 mm hook for the flower only.
- Leaves hidden: Shift them outward so the tips clear the border by 0.5 in (1.3 cm).
- Pearl wobbles: Add a third pass of thread and knot it on the back.
Care
Hand wash in cool water with mild soap, press out the water in a towel, and lay flat to dry. Reshape the points while damp, and avoid soaking if you added metallic beads.
Final Notes
Here is the full measurement chain to check against your work:
- Round 1: 0.75 in (1.9 cm)
- Round 2: 1.25 in (3.2 cm)
- Round 3: 1.75 in (4.4 cm)
- Round 4: 2.25 in (5.7 cm)
- Round 5: 3 in (7.6 cm)
- Cream border: adds 0.25 in (0.6 cm) per side, for a finished 3.5 in (8.9 cm) star
On top of that sits the 1.5 in (3.8 cm) flower, with six 1 in (2.5 cm) leaves behind. Check each stage as you go, and the layers will fit together neatly every time.
Happy crocheting!