

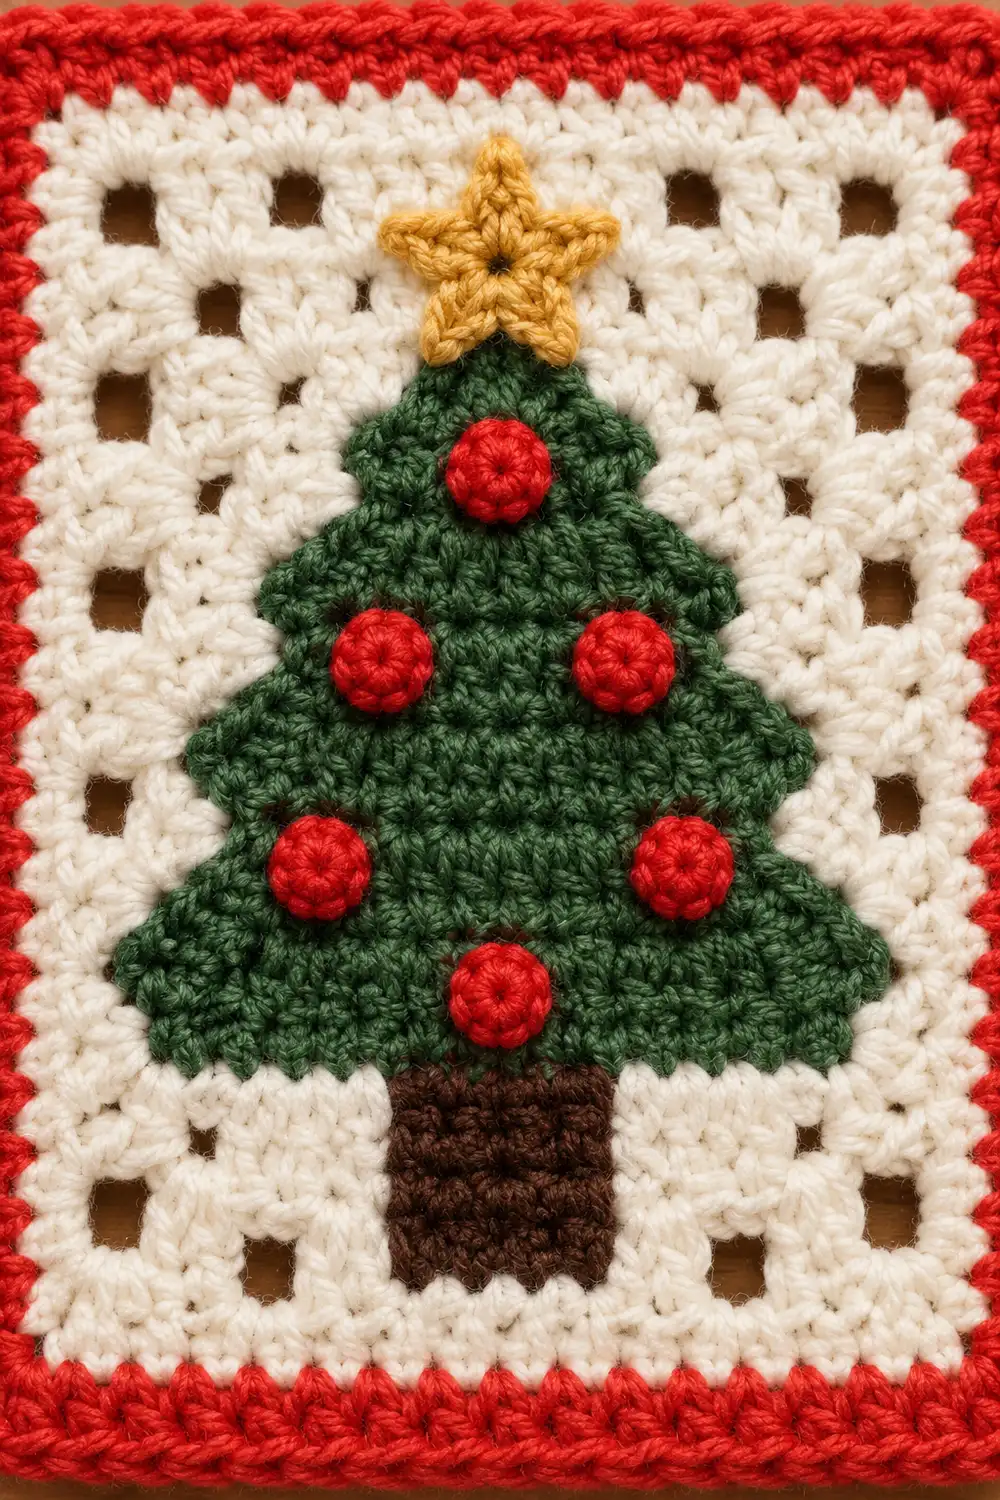
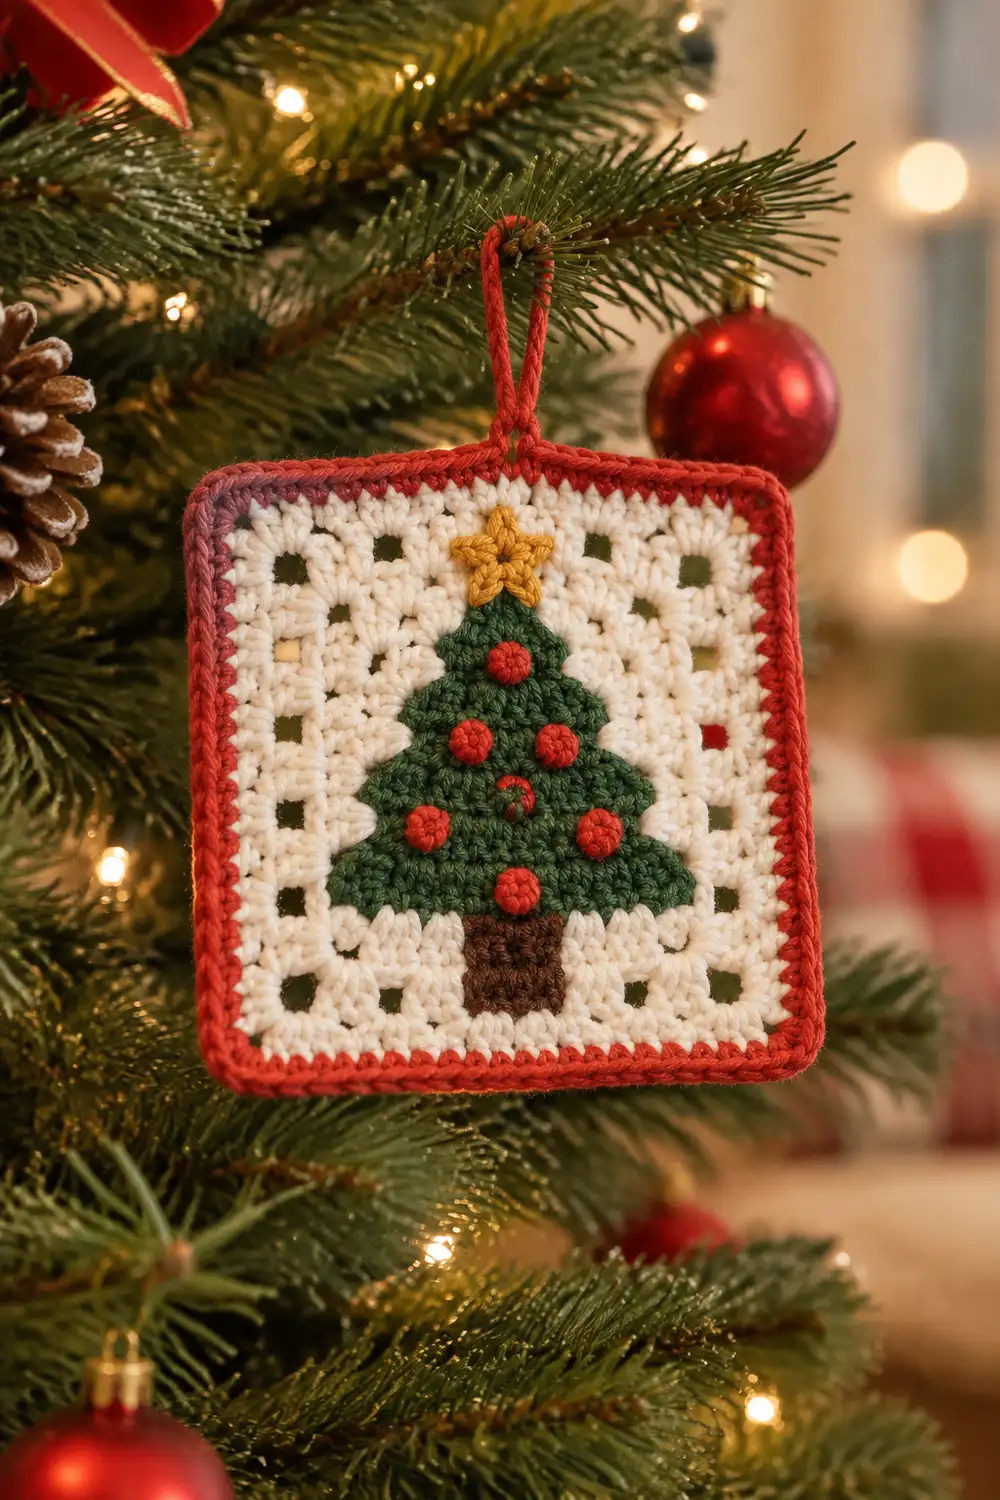
This little square is a cozy holiday classic. A green stepped-triangle Christmas tree sits in the center of a cream background. Six round red ornaments are appliquéd across the branches, and a gold star crowns the top. A brown rectangular trunk anchors the tree at the base.
An open-work frame of small square cutouts surrounds the cream center on all four sides. A smooth red border finishes the outer edge like a picture frame. Use it as a coaster or as a small blanket square.
The pattern uses US crochet terms. The finished square measures 5 in (12.7 cm) per side.
Construction is simple. You work the center panel flat in rows of single crochet with intarsia color changes for the tree and trunk. Then you work cream rounds around it: one single crochet round and one open mesh round. Two red single crochet rounds form the border. Finally, you make the star and ornaments separately and sew them on.
Finished Size and Construction
- Finished size: 5 in x 5 in (12.7 cm x 12.7 cm)
- Skill level: Advanced beginner (intarsia color changes)
- Terminology: US crochet terms
- Yarn weight: DK / light worsted (weight 3)
- Hook: 4.0 mm (G-6)
- Number of pieces: 1 square, plus 7 small appliqués (1 star, 6 ornaments)
- Layout: Single square. No joining.
- Center panel size: 3 in (7.6 cm) square, 15 sts x 17 rows
- Size before border: 4.25 in (10.8 cm) square
- Border depth: 0.375 in (1.0 cm) per side, 2 rounds
Materials
Yarn advice: Choose a smooth DK cotton or cotton blend. Cotton holds its shape, handles warm mugs well, and shows stitch definition clearly. Acrylic DK also works if you will use the piece as a blanket square.
- Cream (C): 10 g / 23 m
- Green (G): 4 g / 9 m
- Red (R): 6 g / 14 m
- Brown (Br): 2 g / 5 m
- Gold/Yellow (Y): 2 g / 5 m
These quantities include a margin for swatching and weaving in ends.
Tools:
- 4.0 mm (G-6) crochet hook
- Tapestry needle
- Scissors
- 4 locking stitch markers
- Ruler or tape measure
- Blocking mat and rust-proof pins
- Small yarn bobbins, or short wound lengths of yarn
Abbreviations (US Terms)
- ch – chain
- sc – single crochet
- hdc – half double crochet
- dc – double crochet
- sl st – slip stitch
- st(s) – stitch(es)
- sp – space
- sk – skip
- MR – magic ring
- RS / WS – right side / wrong side
- C, G, Br, R, Y – cream, green, brown, red, yellow/gold
Special technique, color change: Work the last sc before the change until 2 loops remain on the hook. Yarn over with the new color and pull through. Leave the old color on the WS until you need it again.
Gauge and Checkpoints
Gauge: 20 sc x 22 rows = 4 in (10.2 cm), worked in rows with a 4.0 mm hook. That equals 5 sc and 5.5 rows per 1 in (2.5 cm).
Work the center panel first and treat it as your swatch. Measure it before you add any rounds.
Checkpoints:
- After Row 17 (panel): 3 in x 3.1 in (7.6 cm x 7.9 cm). It blocks to 3 in (7.6 cm) square.
- After Rnd 1: 3.5 in (8.9 cm) square
- After Rnd 2 (mesh): 4.25 in (10.8 cm) square
- After Rnd 3 (red): 4.6 in (11.7 cm) square
- After Rnd 4 (red): 5 in (12.7 cm) square
If the panel is too big: Go down to a 3.75 mm hook and restart.
If the panel is too small: Go up to a 4.5 mm hook.
A difference of 0.125 in (0.3 cm) or less is fine. Blocking will even it out.
Center Panel (Tree and Trunk)
Work in rows. Ch 1 at the start of each row does not count as a stitch. Every row has 15 sc.
Use separate bobbins for each color area. For example, Rows 4–15 need one cream bobbin on the left, one green bobbin, and one cream bobbin on the right. Always drop the old color to the WS.
The chart is symmetrical, so it reads the same in either direction.
Foundation: With C, ch 16.
Row 1: Sc in 2nd ch from hook and in each ch across. Turn. (15 sc)
Row 2: Ch 1, 6 C, 3 Br, 6 C. Turn.
Row 3: Ch 1, 6 C, 3 Br, 6 C. Turn. (Trunk complete: 3 sts wide, 2 rows tall.)
Row 4: Ch 1, 1 C, 13 G, 1 C. Turn.
Row 5: Ch 1, 1 C, 13 G, 1 C. Turn.
Row 6: Ch 1, 2 C, 11 G, 2 C. Turn.
Row 7: Ch 1, 2 C, 11 G, 2 C. Turn.
Row 8: Ch 1, 3 C, 9 G, 3 C. Turn.
Row 9: Ch 1, 3 C, 9 G, 3 C. Turn.
Row 10: Ch 1, 4 C, 7 G, 4 C. Turn.
Row 11: Ch 1, 4 C, 7 G, 4 C. Turn.
Row 12: Ch 1, 5 C, 5 G, 5 C. Turn.
Row 13: Ch 1, 5 C, 5 G, 5 C. Turn.
Row 14: Ch 1, 6 C, 3 G, 6 C. Turn.
Row 15: Ch 1, 7 C, 1 G, 7 C. Turn. (Tree point.)
Rows 16–17: Ch 1, 15 C. Turn after Row 16. Do not turn after Row 17.
Count check: Every row must total 15 sts. For example, Row 4 is 1 + 13 + 1 = 15, and Row 14 is 6 + 3 + 6 = 15.
The tree occupies Rows 4–15. That is 12 rows, about 2.2 in (5.6 cm) tall.
Cut the green and brown yarns. Leave 6 in (15.2 cm) tails. Keep the cream working yarn attached.
Measure now. The panel should be 3 in (7.6 cm) wide.
Open-Work Frame (Cream Rounds)
These rounds create the cream frame with its small square cutouts.
Rnd 1 (sc foundation round): Ch 1. Turn the panel so the RS faces you.
- Work 15 sc across the top of Row 17. Ch 2 for the corner.
- Work 15 sc evenly down the side across the 17 row-ends. Skip the 6th and 12th row-ends. Ch 2.
- Work 15 sc across the free loops of the foundation chain. Ch 2.
- Work 15 sc up the second side the same way, skipping 2 row-ends. Ch 2.
- Sl st to the first sc.
(60 sc: 15 per side, plus 4 corner ch-2 sps.)
The per-side count here excludes the corner ch-2 spaces. Mark each corner space with a stitch marker.
Checkpoint: 3.5 in (8.9 cm) square.
Rnd 2 (mesh round): Sl st into the next corner ch-2 sp. Ch 5. The ch-5 counts as dc + ch 2. Dc in the same sp.
Along each side: [ch 1, sk 1 sc, dc in next sc] 7 times, then ch 1 and sk the last sc.
This places the 7 dc on sc numbers 2, 4, 6, 8, 10, 12, and 14 of that side. The edge is symmetrical, with 8 square openings.
Corner: (dc, ch 2, dc) in the corner ch-2 sp.
Repeat the side and corner sequence around. After the 4th side, sl st to the 3rd ch of the beginning ch-5. Fasten off C.
Per side: 9 dc (7 along the side plus 2 corner dc) and 8 ch-1 sps.
Total: 36 dc, 32 ch-1 sps, and 4 corner ch-2 sps.
Checkpoint: 4.25 in (10.8 cm) square.
Border (Red)
Border gauge: The border uses the same gauge as the panel, 5 sc per 1 in (2.5 cm). Work it with the same 4.0 mm hook.
Rnd 3 (conversion round): Join R in any corner ch-2 sp. Ch 1, then (sc, ch 2, sc) in the same sp.
Along the side, sc in each dc and each ch-1 sp. That is 9 dc + 8 sps = 17 sc. Then work (sc, ch 2, sc) in the next corner sp.
Repeat around. Sl st to the first sc.
Count: 68 sc worked one-per-existing-stitch or space (17 x 4), plus 8 extra corner sc (2 x 4) = 76 sc. That is 19 sc per side between the corner ch-2 sps.
Checkpoint: 4.6 in (11.7 cm) square.
Rnd 4: Sl st into the corner ch-2 sp. Ch 1, then (sc, ch 2, sc) in the same sp.
Sc in each of the 19 sc across the side. Work (sc, ch 2, sc) in each remaining corner sp. Sl st to the first sc. Fasten off.
Count: 76 sc worked one-per-stitch, plus 8 corner sc = 84 sc. That is 21 sc per side.
Why the math works:
- Rnd 1: It keeps the panel’s 15 stitches per side. That number is odd, so the dc/ch-1 mesh starts and ends with a skipped stitch on each side. This gives 8 evenly spaced openings.
- Rnd 3: It converts each mesh stitch and space into exactly one sc, so the side length stays the same.
- Corners: Each red round adds 2 corner sc per side. That matches the extra length a flat square gains at each corner, so the border lies flat without ruffling or cupping.
Final checkpoint: 5 in (12.7 cm) square, with a 0.375 in (1.0 cm) red frame.
Appliqués
Gold Star (make 1, Y)
Rnd 1: 5 sc in MR. Pull the ring closed and sl st to the first sc. (5 sc)
Rnd 2: [Ch 3, sl st in 2nd ch from hook, hdc in next ch, sl st in next sc] 5 times. (5 points)
Fasten off and leave an 8 in (20.3 cm) tail. The star measures about 0.75 in (1.9 cm) across.
Red Ornaments (make 6, R)
Rnd 1: 5 sc in MR. Pull the ring tight and sl st to the first sc. (5 sc)
Fasten off and leave a 6 in (15.2 cm) tail. Each ornament measures about 0.3 in (0.8 cm) across.
Placement
Count stitches 1–15 from the right edge of the panel.
- Star: Center it over Row 16, stitch 8, so its lower point touches the tree tip.
- Ornament 1: Row 13, st 8
- Ornaments 2–3: Row 10, sts 6 and 10
- Ornaments 4–6: Row 7, sts 4, 8, and 12
Pin each piece in place first. Whipstitch around its edge with its own tail, then knot the tail on the WS.
Final Blocking
- Weave in all ends on the WS. Weave intarsia tails into stitches of the same color.
- Lightly mist the square, or wet it and gently press out the water in a towel.
- Pin it to a 5 in (12.7 cm) square on the blocking mat. Start with the four corners.
- Pin the midpoint of each side. Then ease the mesh openings so they look square.
- Check that the panel is 3 in (7.6 cm) and centered.
- Let it dry completely before you unpin it.
Do not steam the appliqués flat. A light mist keeps them rounded.
Final Quality-Control Checklist
- [ ] Each panel row has 15 sts, and the tree is centered.
- [ ] The trunk is 3 sts wide and 2 rows tall, directly below the tree.
- [ ] Each side of Rnd 1 has 15 sc.
- [ ] Each side of Rnd 2 has 8 square openings.
- [ ] Rnd 3 has 19 sc per side, and Rnd 4 has 21 sc per side.
- [ ] All 4 corners have ch-2 spaces.
- [ ] Six ornaments and one star are secured, with no loose tails.
- [ ] The square measures 5 in (12.7 cm) per side and lies flat.
Troubleshooting
Tree edges look jagged: Change colors on the last yarn-over of the previous stitch, not the first.
Holes at color changes: Twist the old and new yarns once on the WS before you continue.
Panel is taller than it is wide: Your rows are loose. Skip one more row-end per side in Rnd 1. Keep the count at 15 sc so the mesh math still works.
Mesh openings look rectangular: Your dc stitches are tall. Pull up a shorter loop, or block the openings square.
Border ruffles: Your tension in the border is looser than in the panel. Work the red rounds slightly tighter, or use a 3.75 mm hook for the border only.
Border cups: Your border tension is too tight. Loosen up, or use a 4.5 mm hook for the red rounds.
Ornaments look flat: Pull the magic ring fully closed and tug the tail firmly before you sew.
Care
Hand wash in cool water and lay flat to dry. If you used cotton, you can press it with a warm iron from the WS. Avoid the appliqués.
Final Notes
The measurement chain is short and easy to check:
- The 15 x 17 panel blocks to 3 in (7.6 cm).
- Rnd 1 brings the square to 3.5 in (8.9 cm).
- The mesh round reaches 4.25 in (10.8 cm).
- The two red border rounds finish at 5 in (12.7 cm).
Check your size at each stage, and the finished square will come out true.
Optional: For a larger project, make several squares and join them. That is outside this pattern.
Happy crocheting!