

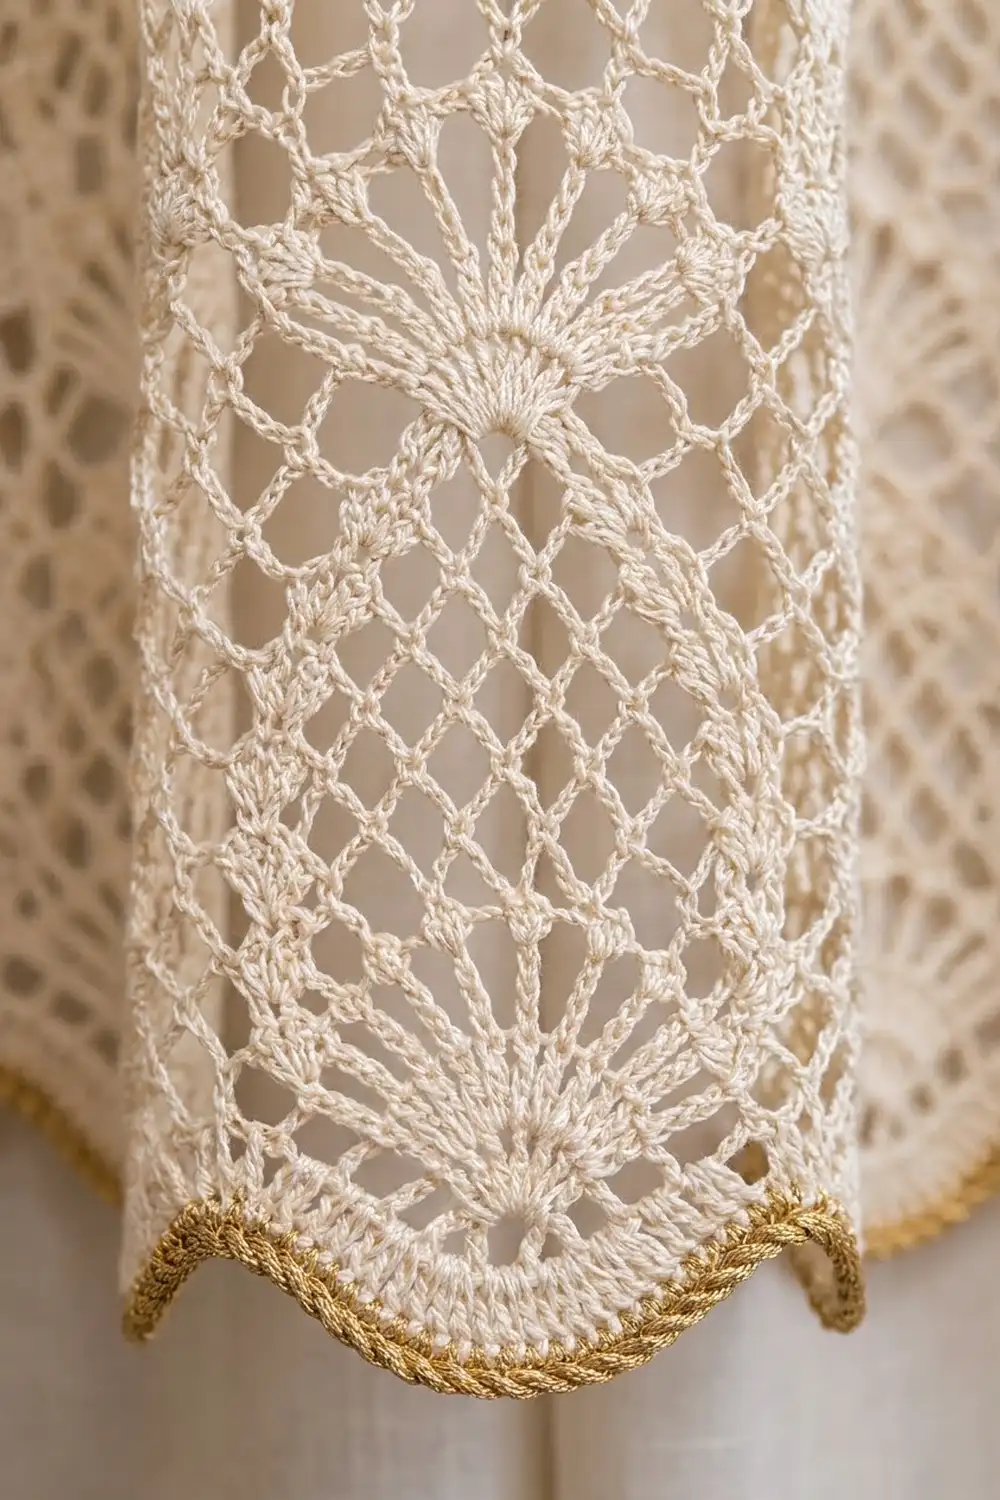
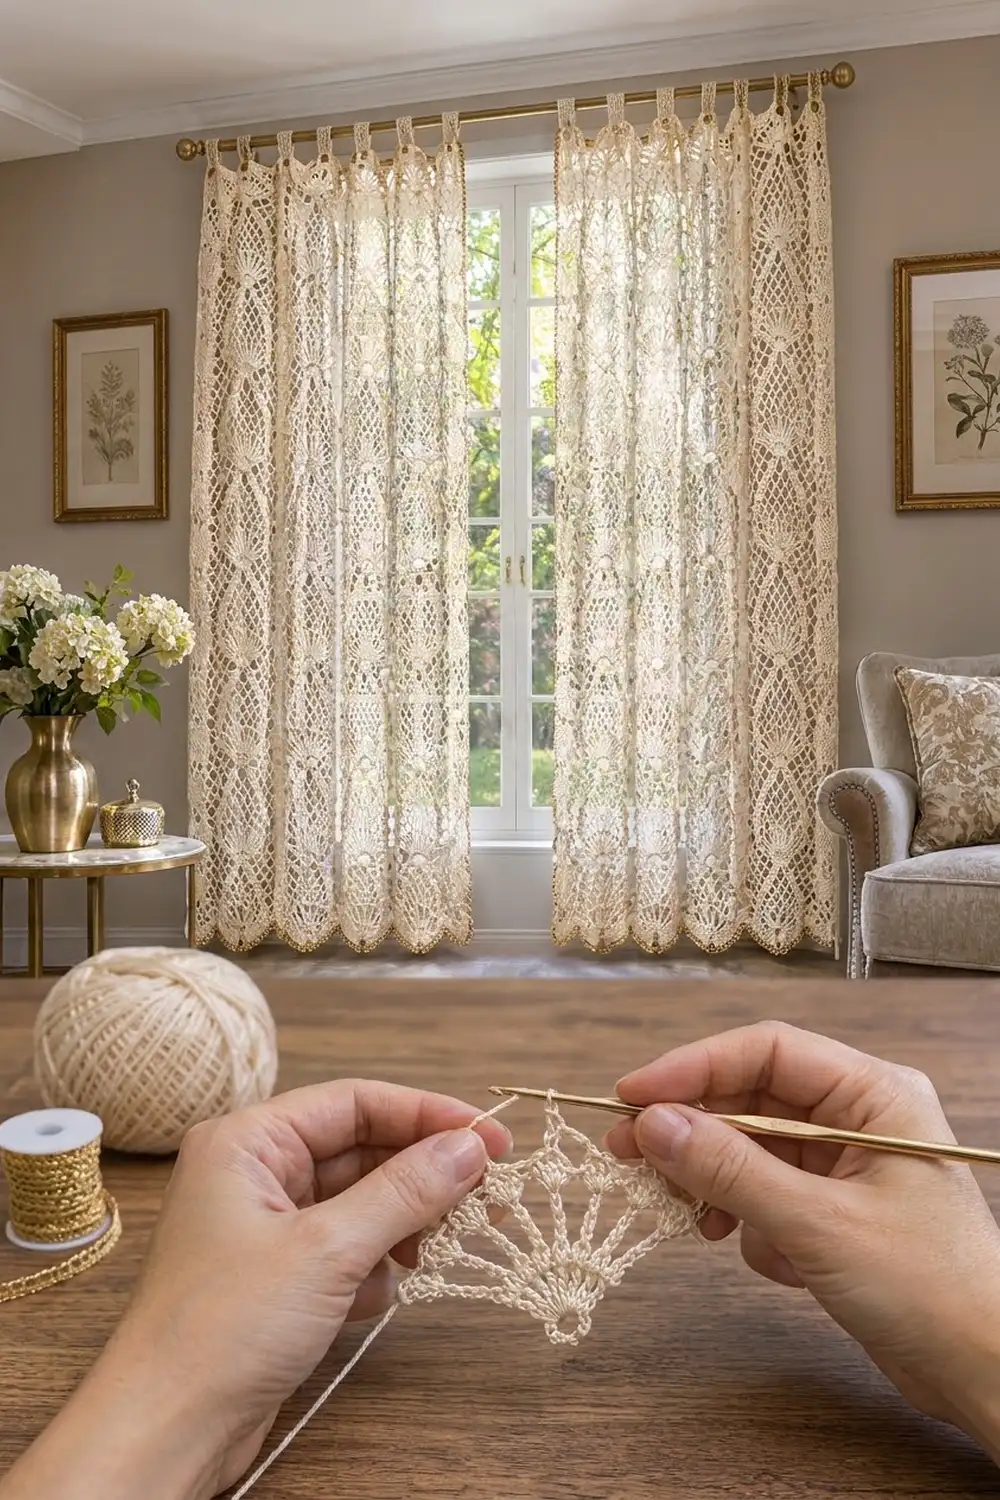
These airy curtain panels bring a classic vintage look to a sunny window. Columns of pineapple motifs run from top to bottom. Each one opens from a fan of tall stitches into a diamond mesh and tapers to a point before the next fan begins.
The panels are worked in soft ivory cotton. A thin twisted gold edge outlines the scalloped hem. The result is light, romantic and timeless. It suits cottage, French country and classic interiors.
This pattern uses US crochet terms. Each finished panel measures 30.5 in (77.5 cm) wide by 59 in (149.9 cm) long, plus 3 in (7.6 cm) tab loops. That is 62 in (157.5 cm) from rod to hem.
Each panel is one piece worked flat in rows from the bottom up. You start with a single-crochet base row, work 8 pineapple repeats in 6 columns, and finish with a solid top band. Then you add tabs, a scalloped bottom border with gold trim, and a simple side edging. Make two panels for a pair.
Finished Size and Construction
- Finished panel size: 30.5 in x 59 in (77.5 cm x 149.9 cm), plus 3 in (7.6 cm) tabs
- Skill level: Intermediate
- Terminology: US
- Yarn weight: Size 3 mercerized cotton thread (Fine, CYC 1–2)
- Hook: 2.75 mm (US C-2)
- Number of pieces: 2 separate panels (not joined to each other)
- Layout: 6 pineapple columns wide x 8 pineapple repeats tall, per panel
- Column size: 5 in (12.7 cm) wide; one pineapple repeat is 7 in (17.8 cm) tall
- Size before border: 30 in x 57 in (76.2 cm x 144.8 cm)
- Border depth: 2 in (5.1 cm) scalloped hem; 0.25 in (0.6 cm) side edging on each side
Materials
Choose a smooth, mercerized cotton thread. It gives crisp stitch definition, holds its blocked shape and does not stretch out of shape on a curtain rod. Use roughly 300 m per 100 g (about 330 yd per 3.5 oz).
Yarn (for two panels):
– Ivory/Cream (main): 1,300 g, about 3,900 m (4,265 yd)
– Gold/Tan (hem trim): 25 g, about 75 m (82 yd)
Quantities include a margin of about 10%.
Tools:
– 2.75 mm (US C-2) hook
– Tapestry needle
– Stitch markers
– Rust-proof pins and blocking mats or a large clean surface
– Spray bottle
– Measuring tape
Abbreviations (US Terms)
- ch – chain
- sl st – slip stitch
- sc – single crochet
- dc – double crochet
- tr – treble crochet
- sp(s) – space(s)
- sk – skip
- rev sc – reverse single crochet (crab stitch)
- RS / WS – right side / wrong side
Special stitches
– V-st: (dc, ch 2, dc) in the same stitch or space.
– V in V: work a V-st into the ch-2 sp of the V-st below.
– Edge V: at the start of a row, ch 5 (counts as dc + ch 2), then dc in the indicated stitch or space.
– Fan: (tr, ch 1) 8 times, then tr, all in the same stitch. This makes 9 tr and 8 ch-1 sps.
Gauge and Checkpoints
Single-crochet gauge: 24 sc and 32 rows = 4 in (10.2 cm).
Pattern gauge (blocked): one column of 30 base stitches = 5 in (12.7 cm) wide. One pineapple repeat (9 rows) = 7 in (17.8 cm) tall.
Test first. Ch 62 and work the Base Row (61 sc). Then work Rows 1–10 of the pattern with 2 columns instead of 6. Block the swatch. It should measure 10 in (25.4 cm) wide, and Rows 1–9 should measure 7 in (17.8 cm) tall.
- Swatch too big: go down 0.25 mm.
- Swatch too small: go up 0.25 mm.
- Width right but height wrong: adjust your tr height by pulling the first loop a little taller or shorter. Don’t change the hook.
Checkpoints (lightly stretched flat):
– Base Row: 30 in (76.2 cm) wide
– After Row 9: 7 in (17.8 cm) tall
– After Row 36: 28 in (71.1 cm)
– After Row 72: 56 in (142.2 cm)
– After the top band: 57 in (144.8 cm)
Panel Pattern
Foundation
Foundation: Ch 182.
Base Row (WS): Sc in 2nd ch from hook and in each ch across. Turn. (181 sc)
The math: 181 = 6 columns x 30 sts + 1. In every column, count the stitches 1–30 from the right. Stitch 30 of one column is shared as stitch 0 of the next.
Row 1 (RS, first fan row)
Edge V in first sc. Ch 4, sk 7 sc, sc in next sc. Ch 4, sk 6 sc, Fan in next sc. Ch 4, sk 6 sc, sc in next sc. Ch 4, sk 7 sc, V-st in next sc. Repeat from * to * 5 more times. Turn.
Count: 7 V-sts, 6 Fans (54 tr), 12 sc, 24 ch-4 sps. Each Fan sits on stitch 15, the exact center of its column.
Row 2 (WS, pineapple base)
Edge V in first V. Ch 4, sc in next ch-4 sp. Ch 4, sk next ch-4 sp, sc in first ch-1 sp of Fan. (Ch 3, sc in next ch-1 sp) 7 times. Ch 4, sk next ch-4 sp, sc in next ch-4 sp. Ch 4, V in V. Repeat from * to * across. Turn.
Count per column: 2 ch-4 sps on each side and a pineapple of 8 sc with 7 ch-3 loops. Panel total: 7 V-sts, 24 ch-4 sps, 42 ch-3 loops.
Rows 3–9: the two working rows
Every row from 3 to 9 begins with Edge V in first V and ends with V in V, worked into the turning space. Between those V-sts, work one of the following for each column.
Add Row (the side mesh gains 1 sp per side):
(Ch 4, sc in next ch-4 sp) across all side sps. Ch 4, sc in first ch-3 loop of the pineapple. (Ch 3, sc in next ch-3 loop) to the last pineapple loop. (Ch 4, sc in next ch-4 sp) across the side sps. Ch 4, V in V.
Keep Row (the side mesh stays the same):
(Ch 4, sc in next ch-4 sp) across all side sps except the last one. Ch 4, sk last side sp, sc in first ch-3 loop of the pineapple. (Ch 3, sc in next ch-3 loop) to the last pineapple loop. Ch 4, sk next side sp, (sc in next ch-4 sp, ch 4) across the remaining side sps. V in V.
In both rows the pineapple loses one loop, because you sc into every loop with ch 3 between. This makes the staggered diamond mesh that tapers to a point.
| Row | Type | Side ch-4 sps (each side) | Pineapple ch-3 loops |
|---|---|---|---|
| 3 (RS) | Keep | 2 | 6 |
| 4 (WS) | Add | 3 | 5 |
| 5 (RS) | Keep | 3 | 4 |
| 6 (WS) | Keep | 3 | 3 |
| 7 (RS) | Add | 4 | 2 |
| 8 (WS) | Keep | 4 | 1 |
| 9 (RS) | Keep (tip) | 4 | 0 (1 tip sc) |
Row 9 note: the pineapple has a single loop. Work 1 sc into it. This is the tip sc.
Count after Row 9, per column: 4 ch-4 sps, 1 tip sc, 4 ch-4 sps. Panel total: 7 V-sts, 48 ch-4 sps, 6 tip sc.
Row 10 (WS, new fan row)
Edge V in first V. Ch 4, sk next ch-4 sp, sc in next ch-4 sp. Ch 4, sk next 2 ch-4 sps, Fan in tip sc. Ch 4, sk next 2 ch-4 sps, sc in next ch-4 sp. Ch 4, sk last ch-4 sp, V in V. Repeat from * to * across. Turn.
This uses all 4 side sps on each side. The layout now matches Row 1 exactly: 7 V-sts, 6 Fans, 12 sc, 24 ch-4 sps. Each new Fan sits right above the previous pineapple’s tip.
Repeats
Rows 2–10 form the repeat, and Row 10 counts as the fan row for the next pineapple.
- Work Rows 2–10 a total of 7 times (through Row 64).
- Work Rows 2–9 once more (Rows 65–72).
This gives 72 pattern rows and 8 complete pineapples per column. Your work should now measure 56 in (142.2 cm). The Base Row adds only about 1/8 in (0.3 cm), which is absorbed in blocking.
Top Band
Row 73 (RS, conversion row): Ch 1. Sc in first dc, 3 sc in ch-2 sp, sc in next dc. (3 sc in next ch-4 sp) 4 times, sc in tip sc, (3 sc in next ch-4 sp) 4 times, sc in next dc, 3 sc in ch-2 sp, sc in next dc. Repeat from * to * across. Turn.
Count: 20 sc worked one per existing stitch (14 dc of the V-sts + 6 tips) + 165 sc added in spaces (21 in V spaces + 144 in ch-4 sps) = 185 sc.
Rows 74–80: Ch 1, sc in each sc across. Turn. (185 sc)
That makes 8 sc rows, so the band is 1 in (2.5 cm) deep. Panel size before border: 30 in x 57 in (76.2 cm x 144.8 cm). Fasten off.
Make Both Panels
Make 2 identical panels.
| Color | Per panel | Total |
|---|---|---|
| Ivory | 650 g | 1,300 g |
| Gold | 12.5 g | 25 g |
Hanging layout (rod view):
[ Panel A: 6 cols x 8 pineapples ] [ window ] [ Panel B: 6 cols x 8 pineapples ]
The panels hang separately and are never sewn together. Make sure both panels match the same checkpoints so the hems line up.
Joining: Tabs to the Top Band
The only joining in this project is attaching the tab loops to each panel.
Tab placement: The top band has 185 sts. Use 9 tabs of 9 sts each, with 8 gaps of 13 sts between them.
Check: 9 x 9 + 8 x 13 = 81 + 104 = 185. The first and last tabs sit flush with the side edges.
Each tab: With RS facing, join ivory in the first stitch of a tab position.
– Row 1: Ch 1, sc in the same st and the next 8 sts. Turn. (9 sc)
– Rows 2–48: Ch 1, sc in each sc. Turn. (9 sc)
The strip measures 6 in (15.2 cm) long and 1.5 in (3.8 cm) wide.
Attach: Fold the strip to the WS so you get a 3 in (7.6 cm) loop. Whipstitch Row 48 to the WS of Row 77 of the band, matching the 9 tab stitches 1-to-1 with the 9 band stitches. Keep the sewing tension even, snug but not puckered.
Checkpoint: all 9 loops are the same length. A finished loop should slide easily over a 1.25 in rod.
Border
Border gauge: each scallop is 5 in (12.7 cm) wide (one per column) and the border is 2 in (5.1 cm) deep.
Bottom Scalloped Border
Work into the free loops of the foundation chain. There are 181 loops (6 x 30 + 1).
B1 (ivory, RS): Join in the first loop. Ch 1, sc in same loop. (Ch 5, sk 4 loops, sc in next loop) 6 times. Repeat from * to * across. Turn.
Count: 37 sc and 36 ch-5 loops (6 per column). The sc between loops 3 and 4 of each column sits on stitch 15, directly under the column’s Fan.
B2 (ivory, WS): Ch 1. Sc in loop 1, ch 4, sc in loop 2, ch 2, sk loop 3, work (tr, ch 2) 6 times, tr, all in the center sc. Ch 2, sk loop 4, sc in loop 5, ch 4, sc in loop 6. Repeat from * to * across. Turn.
Per scallop: 4 sc, 2 ch-4 sps, 7 tr with 6 ch-2 sps. Total: 24 sc, 12 ch-4 sps, 42 tr.
B3 (ivory, RS): Ch 1. Sc in next ch-4 sp, ch 3, 3 dc in each of the 6 ch-2 sps of the fan, ch 3, sc in next ch-4 sp. Repeat from * to * across. Fasten off.
Per scallop: 2 sc, 18 dc, 2 ch-3 sps. Total: 12 sc, 108 dc, 12 ch-3 sps.
B4 (gold, RS): Join gold in the first sc. Working left to right, rev sc in each sc and dc, and 3 rev sc in each ch-3 sp.
Per scallop: 1 + 3 + 18 + 3 + 1 = 26. Total: 156 rev sc. Fasten off.
Why the math works: each 30-stitch column divides into 6 ch-5 loops. The fan lands on stitch 15, the same center as the pineapple Fans, so every scallop lines up under a pineapple column.
Side Edging (ivory)
With RS facing, work along each long side from the hem to the top band:
– 1 sc in the end of the Base Row
– 2 sc around the end of each pattern row (Rows 1–72) = 144
– 1 sc in the end of each band row (Rows 73–80) = 8
Total: 153 sc per side. This adds 0.25 in (0.6 cm) per side, so the finished width is 30.5 in (77.5 cm).
Final Blocking
- Weave in all ends along solid stitches, never across open mesh.
- Soak the panel in cool water with a little wool wash for 15 minutes.
- Press out the water in a towel. Do not wring.
- Lay the panel flat and pin the side edges straight to 30.5 in (77.5 cm) wide.
- Pin the length to 59 in (149.9 cm), not including the tabs.
- Pin each scallop at its lowest point and at each valley so the scallops are even.
- Open every Fan into a smooth half-circle and pin the pineapple tips straight.
- Mist the panel and let it dry completely before unpinning.
Final Quality-Control Checklist
- 6 columns with 8 pineapples each, all tips aligned
- Every Fan has 9 tr
- Top band has 185 sc
- 9 tabs of equal length
- 6 even scallops with continuous gold trim
- Both panels measure 30.5 in x 59 in (77.5 cm x 149.9 cm)
- No ends showing on the RS
Troubleshooting
- Pineapple won’t close at Row 9: you probably dropped a loop. Count the pineapple loops on every row against the table.
- Fans cup: your tr stitches are too tight. Loosen them or add a ch 1 to the ch-4 next to the fan.
- Edges wave: your V-sts are too loose. Make the turning ch 4 instead of ch 5 and hold firmer tension.
- Panel too narrow: block harder or go up 0.25 mm on the second panel. Both panels must match.
- Scallops are uneven: re-pin B2 fans at their centers while damp.
- Gold trim ruffles: work 2 rev sc instead of 3 in the ch-3 sps.
Care
Hand wash cool and dry flat, re-pinning lightly if needed. Avoid hot dryers and prolonged direct sun to protect the gold trim.
Final Notes
The measurement chain is simple:
– 30 sc = 5 in (12.7 cm) per column; 6 columns = 30 in (76.2 cm).
– 9 rows = 7 in (17.8 cm) per pineapple; 8 pineapples = 56 in (142.2 cm).
– The 1 in (2.5 cm) band brings the panel to 57 in (144.8 cm).
– The 2 in (5.1 cm) hem and the side edging finish it at 30.5 in x 59 in (77.5 cm x 149.9 cm).
Check the gauge, count each row against the table, and your pair of panels will hang straight and match.
Happy crocheting!