

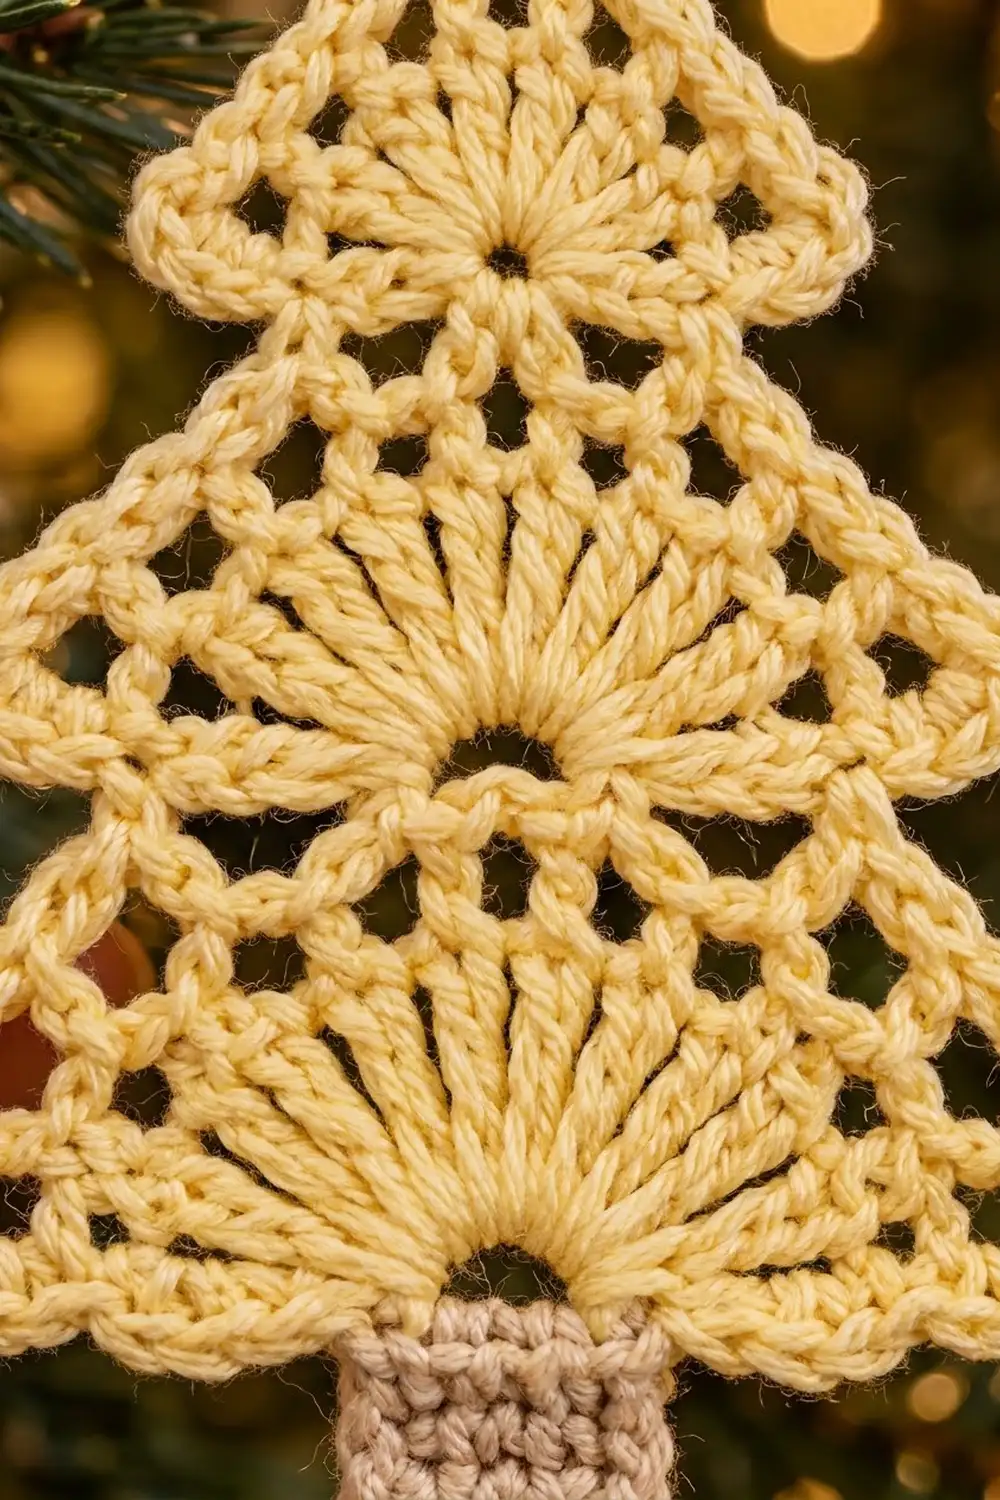
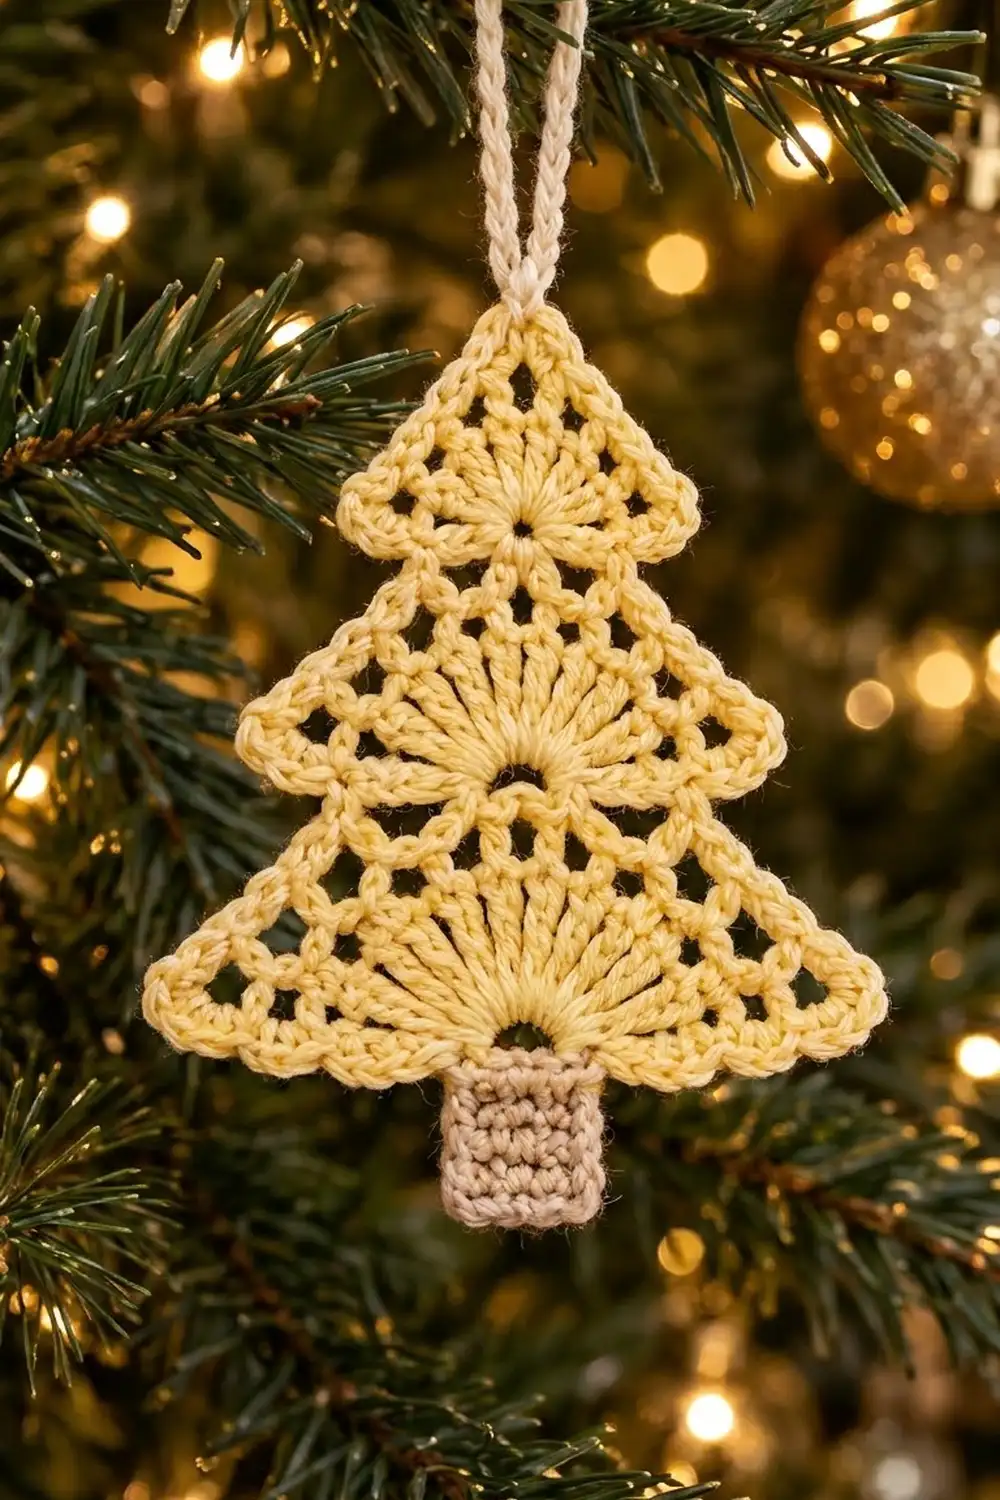
This little tree is a flat, lacy Christmas ornament in soft butter yellow. It has three stacked triangular tiers. Each tier has a dense fan of stitches rising from a small open arch, a band of open mesh holes, and a fine chain-loop edge. A small beige single crochet trunk sits under the bottom tier, and a cream loop at the top is used to hang it.
It looks like classic thread lace, but it’s made with sport weight cotton, so it works up quickly. One ornament takes about an evening. It’s a good use for leftover yarn and makes a nice gift tag.
The pattern uses US crochet terms. The finished ornament is about 3.6 in (9.1 cm) wide and 4.4 in (11.2 cm) tall, not counting the hanging loop.
The construction is simple. You crochet three triangular tiers in turning rows, each starting from a chain ring, and give each tier a picot-loop border. Then you stack the tiers so each upper tier overlaps the one below by 1 in (2.5 cm) and stitch them together. Finally, you sew on a trunk made separately and add the loop. The result is one finished ornament.
Finished Size and Construction
- Finished size: 3.6 in (9.1 cm) wide x 4.4 in (11.2 cm) tall, plus a 1.5 in (3.8 cm) loop
- Skill level: Easy intermediate
- Terminology: US
- Yarn weight: Sport (#2) cotton
- Hook: 2.75 mm (C-2)
- Number of parts: 3 tiers, 1 trunk and 1 loop, assembled into a single ornament
- Layout: Tiers stacked top to bottom, each overlapping the next by 1 in (2.5 cm)
- Tier sizes (bordered): Top 2.4 x 1.5 in (6.1 x 3.8 cm); middle 3 x 1.9 in (7.6 x 4.8 cm); bottom 3.6 x 2.25 in (9.1 x 5.7 cm)
- Bottom tier before border: 3.35 x 2 in (8.5 x 5.1 cm)
- Border depth: about 0.125 in (0.3 cm)
Materials
Choose a smooth, mercerized sport weight cotton. It shows the stitches clearly, holds the fan shape and blocks crisply. Acrylic will work, but the lace will look softer and less defined.
- Butter yellow (tiers): 10 g, about 30 m
- Beige (trunk): 2 g, about 6 m
- Cream (hanging loop): 1 g, about 3 m
Tools:
- 2.75 mm (C-2) crochet hook
- Tapestry needle
- Scissors
- Rustproof pins and a blocking board or folded towel
- Spray bottle with water
- Ruler or tape measure
All quantities include a small extra margin for your test tier and the yarn tails.
Abbreviations (US Terms)
- ch – chain
- sl st – slip stitch
- sc – single crochet
- hdc – half double crochet
- dc – double crochet
- tr – treble crochet
- sp(s) – space(s)
- st(s) – stitch(es)
Apex: (dc, ch 3, dc) worked into the same stitch. This makes the top point of each tier.
Corner: 3 tr worked into the same stitch (the first can be a ch-4). This pushes the bottom corners of each tier outward, turning a half circle into a triangle.
Gauge and Checkpoints
Make the top tier first and use it as your gauge swatch.
- Tier 1 after Row 1: a half circle about 1 in (2.5 cm) across the flat edge
- Tier 1 after Row 2: about 1.75 in (4.4 cm) across
- Tier 1 finished with border: 2.4 in (6.1 cm) wide x 1.5 in (3.8 cm) tall
- Border gauge: 7 sc = 1 in (2.5 cm) along the bottom edge
If your tier is too big, go down to a 2.5 mm hook. If it’s too small, go up to a 3 mm hook. Small differences are fine, as long as you make all three tiers with the same hook and tension.
Tier 1 (Top)
With butter yellow, ch 4, then sl st in the first ch to form a ring.
Row 1 (RS): Ch 3 (counts as dc), 8 dc in ring. (9 dc)
The dc fill only the top half of the ring. The lower half stays open and forms the small arch at the base of the fan.
Row 2: Ch 5, turn (counts as dc + ch 2), dc in next dc, ch 2 7 times, dc in top of turning ch-3. (9 dc, 8 ch-2 sps)
Row 3 (shaping): Ch 4, turn (counts as tr), 2 tr in first dc (corner made). 3 dc in next ch-2 sp, 3 hdc in next sp, 3 sc in next sp, 3 hdc in next sp. Apex in center (5th) dc. 3 hdc in next sp, 3 sc in next sp, 3 hdc in next sp, 3 dc in next sp. 3 tr in 3rd ch of turning ch-5 (corner made).
Stitch count: 16 sts per side (3 tr + 12 sts in spaces + 1 apex dc), 32 sts in total plus the apex ch-3 sp.
The tall tr at the corners and the short sc in the middle of each slope straighten the curved edge into a triangle. Don’t fasten off; go straight to the border.
Tier 2 (Middle)
With butter yellow, ch 5, then sl st in the first ch to form a ring.
Row 1 (RS): Ch 3 (counts as dc), 12 dc in ring. (13 dc)
Row 2: Ch 3, turn (counts as dc), dc in same st, 2 dc in each of next 11 dc, dc in top of turning ch. (25 dc)
This row makes the solid fan of stitches spreading out from the ring.
Row 3: Ch 5, turn (counts as dc + ch 2), skip next dc, dc in next dc, ch 2, skip next dc 11 times, dc in top of turning ch. (13 dc, 12 ch-2 sps)
Row 4 (shaping): Ch 4, turn (counts as tr), 2 tr in first dc. In the next 6 sps work: 3 dc, 3 hdc, 3 sc, 3 sc, 3 hdc, 3 hdc. Apex in center (7th) dc. In the next 6 sps work: 3 hdc, 3 hdc, 3 sc, 3 sc, 3 hdc, 3 dc. 3 tr in 3rd ch of turning ch-5.
Stitch count: 22 sts per side (3 + 18 + 1), 44 sts in total plus the apex ch-3 sp. Continue to the border.
Tier 3 (Bottom)
With butter yellow, ch 5, then sl st in the first ch to form a ring.
Row 1 (RS): Ch 3 (counts as dc), 12 dc in ring. (13 dc)
Row 2: Ch 3, turn (counts as dc), dc in same st, 2 dc in each of next 11 dc, dc in top of turning ch. (25 dc)
Row 3: Ch 3, turn (counts as dc in first st), 2 dc in next dc, dc in each of next 2 sts 8 times. (33 dc)
Row 4: Ch 5, turn (counts as dc + ch 2), skip next dc, dc in next dc, ch 2, skip next dc 15 times, dc in top of turning ch. (17 dc, 16 ch-2 sps)
Row 5 (shaping): Ch 4, turn (counts as tr), 2 tr in first dc. In the next 8 sps work: 3 dc, 3 hdc, 3 hdc, 3 sc, 3 sc, 3 hdc, 3 hdc, 3 hdc. Apex in center (9th) dc. In the next 8 sps work: 3 hdc, 3 hdc, 3 hdc, 3 sc, 3 sc, 3 hdc, 3 hdc, 3 dc. 3 tr in 3rd ch of turning ch-5.
Stitch count: 28 sts per side (3 + 24 + 1), 56 sts in total plus the apex ch-3 sp.
Checkpoint: Before the border, this tier should be about 3.35 in (8.5 cm) wide x 2 in (5.1 cm) tall.
Border (Picot-Loop Edging, All Tiers)
Each tier gets the same two-part border: a chain-loop edge along both slopes, then a plain sc edge along the flat bottom. Work it right after the shaping row.
Border gauge: 7 sc = 1 in (2.5 cm) along the bottom edge.
Slope Edging
Tier 1 (Row 4): Ch 1, turn, sc in first tr, ch 2, skip next st, sc in next st 7 times, ch 2, skip apex dc, (sc, ch 3, sc) in apex ch-3 sp, ch 2, skip next dc, sc in next st, ch 2, skip next st, sc in next st 7 times.
Per side: 8 sc and 8 ch-2 loops.
Tier 2 (Row 5): Work as for Tier 1, but repeat each … section 10 times.
Per side: 11 sc and 11 ch-2 loops.
Tier 3 (Row 6): Work as for Tier 1, but repeat each … section 13 times.
Per side: 14 sc and 14 ch-2 loops.
Bottom Edge
Ch 1 and rotate to work along the flat bottom edge. Work 2 sc in the end of each row down to the ring (skip the border row itself). Work 3 sc in the open lower half of the ring. Then work 2 sc in the end of each row back up to the other corner. Sl st in the first sc of the slope edging. Fasten off. On Tiers 1 and 2, leave a 12 in (30.5 cm) tail for sewing.
Bottom edge counts, including both corner sc:
- Tier 1: 2 + (2 x 3) + 3 + (2 x 3) = 17 sc, about 2.4 in (6.1 cm)
- Tier 2: 2 + (2 x 4) + 3 + (2 x 4) = 21 sc, about 3 in (7.6 cm)
- Tier 3: 2 + (2 x 5) + 3 + (2 x 5) = 25 sc, about 3.6 in (9.1 cm)
Why the Math Works
Each shaping row has an even number of stitches per side (16, 22 and 28). Each edging repeat uses 2 stitches, so each side ends exactly one stitch before the apex dc, and that dc is skipped. The two slopes mirror each other, and the apex loop sits right in the center. The 3 sc in the ring keep the arch open and centered on the bottom edge, with the same number of sc on each side.
Trunk
With beige, ch 7.
Row 1: Sc in 2nd ch from hook and in each ch across. (6 sc)
Rows 2–7: Ch 1, turn, sc in each sc across. (6 sc)
Fasten off, leaving an 8 in (20.3 cm) tail. The trunk measures about 0.9 in (2.3 cm) wide x 0.75 in (1.9 cm) tall.
Hanging Loop
With cream, ch 26. Sl st in 2nd ch from hook and in each ch across. (25 sl st)
Fasten off, leaving a 6 in (15.2 cm) tail. The cord is about 3 in (7.6 cm) long and folds into a 1.5 in (3.8 cm) loop.
Assembly
- Lay Tier 3 flat with the RS facing up. Place Tier 2 on top so its bottom edge sits 1 in (2.5 cm) below the apex of Tier 3. The apex of Tier 3 is hidden behind Tier 2, just above Tier 2’s arch.
- Center Tier 2 so it overhangs Tier 3 equally on both sides. Pin it in place.
- Using the Tier 2 tail, whipstitch through the back loops of the Tier 2 bottom-edge sc and into the Tier 3 fabric behind it. Keep the stitches loose so the lace stays flat.
- Attach Tier 1 to Tier 2 the same way, with the same 1 in (2.5 cm) overlap.
- Center the trunk under the Tier 3 ring. Whipstitch its starting chain edge to the center 6 sc of the Tier 3 bottom edge (sts 10–15 of 25).
- Fold the hanging loop in half and sew both ends to the back of the Tier 1 apex.
Size checkpoint: The visible heights of the tiers add up to 1.5 + 0.9 + 1.25 = 3.65 in (9.3 cm). With the 0.75 in (1.9 cm) trunk, the ornament is 4.4 in (11.2 cm) tall.
Final Blocking
- Weave in all ends along stitches of the same color.
- Mist the ornament with water until it is damp but not soaking.
- Pin it to a blocking board at 3.6 in (9.1 cm) wide x 4.4 in (11.2 cm) tall.
- Pin out each apex loop and each bottom corner to sharpen the triangles.
- Gently open the mesh holes and fan stitches with your fingertips.
- Let it dry completely, at least 4 hours.
- For extra stiffness, spray lightly with fabric stiffener before it dries.
Final Quality-Control Checklist
- Each tier has a visible open arch at the base of its fan.
- The shaping rows have 32, 44 and 56 sts.
- The slope loops are even: 8, 11 and 14 per side.
- Each apex loop sits centered above its tier’s arch.
- The tiers overlap by 1 in (2.5 cm) and are centered.
- The trunk is centered under the bottom arch.
- The overall size is 3.6 in (9.1 cm) x 4.4 in (11.2 cm).
- No ends show on the front.
Troubleshooting
Fan cups or ruffles: Your tension is uneven, or the increase count is off. Recount the fan row and check your hook size.
Tier curls at the corners: The tr corners are too tight. Loosen them slightly, then block firmly.
Edge looks lopsided: You probably missed a skip. Each side must end one stitch before the apex dc.
Arch has closed up: The ring tail was pulled too tight. Leave the lower half of the ring open.
Tiers look crooked: Unpick the whipstitch, measure the overlap from the center and re-pin before sewing again.
Ornament too big: Go down one hook size and remake all three tiers.
Care
Hand wash in cool water with mild soap and lay flat to dry. If the points soften after washing, reshape and pin them again.
Final Notes
The measurements build on each other. Tier 1 should be 2.4 in (6.1 cm) wide, with 17 sc along the bottom edge. Tier 2 should be 3 in (7.6 cm) with 21 sc, and Tier 3 should be 3.6 in (9.1 cm) with 25 sc. Stack them with a 1 in (2.5 cm) overlap and add the 0.75 in (1.9 cm) trunk, and you have a 4.4 in (11.2 cm) tree. Check your gauge on the top tier first, and the other tiers will come out the right size.
Happy crocheting!