

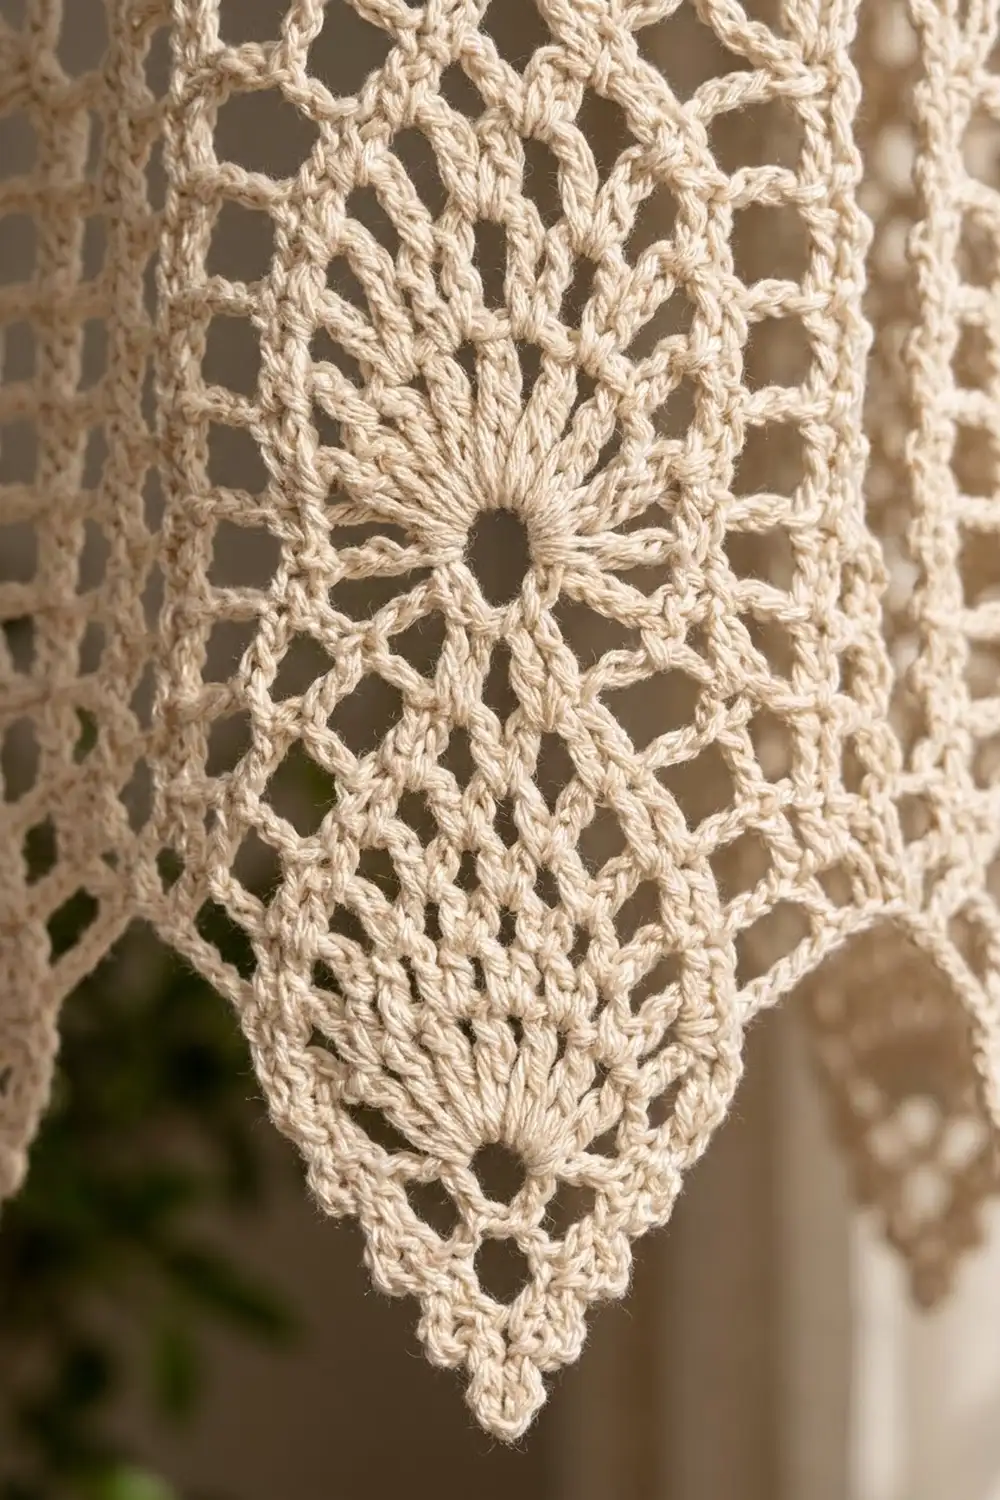
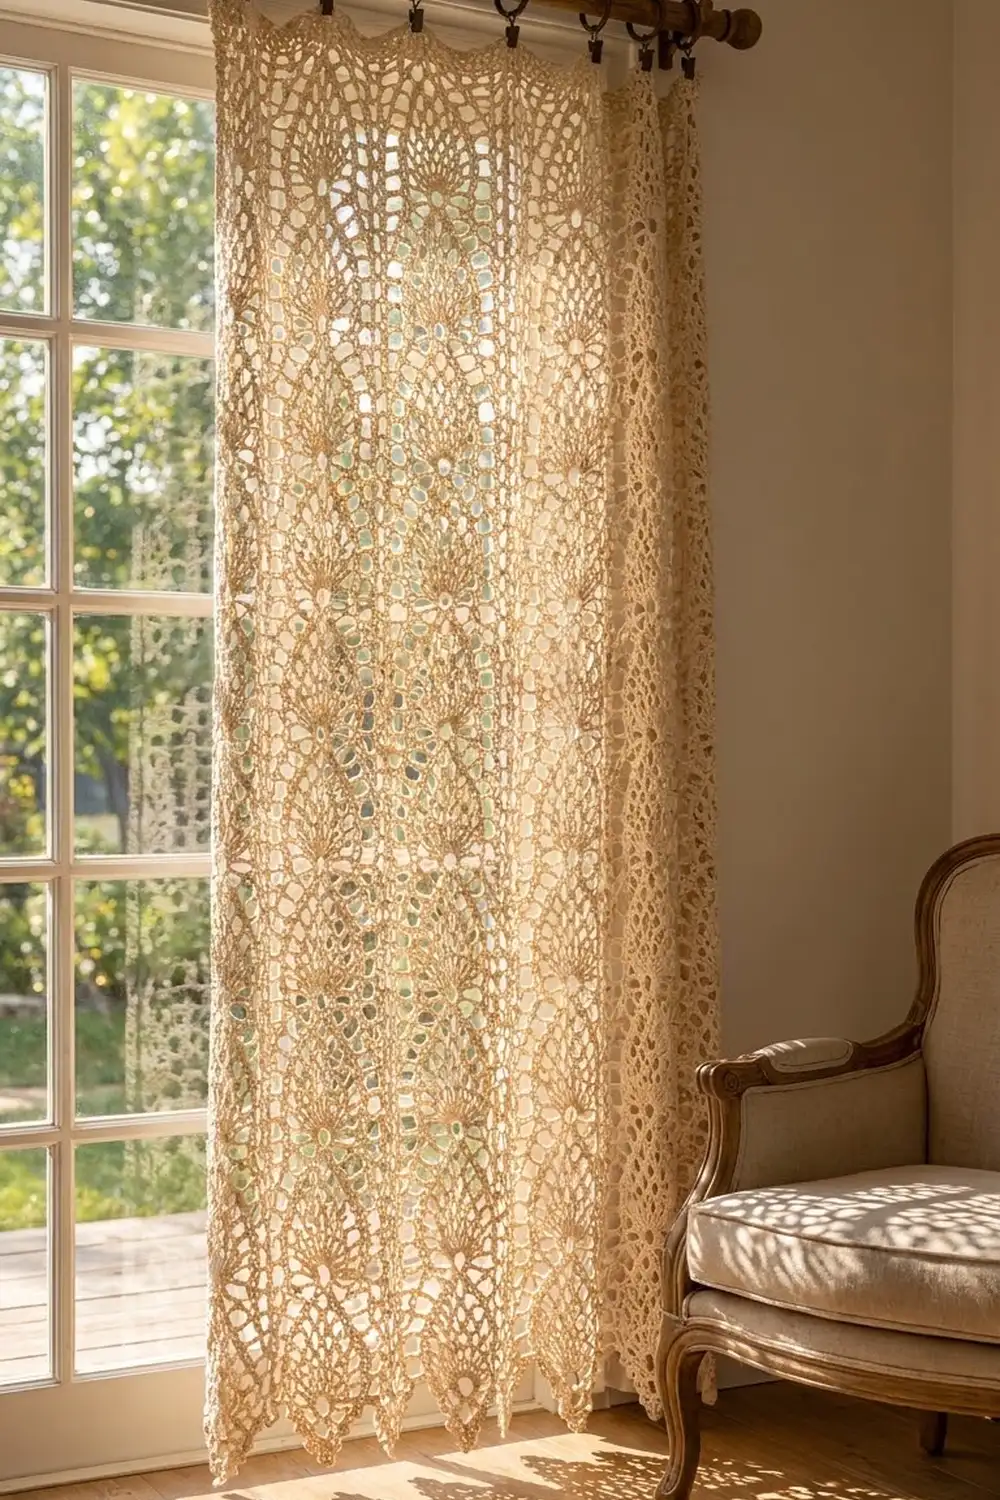
This curtain panel is made for a sunny window. Rows of open filet mesh frame a column of classic pineapples, so light makes a soft pattern on the floor. At the hem, each strip ends in a pointed V tip with a small fan, which gives the panel a scalloped, vintage edge.
The sample uses one color, a natural cream cotton. It suits farmhouse, cottage and boho rooms. Every instruction uses US crochet terms.
The finished panel measures 41 in (104.1 cm) wide and 72.5 in (184.2 cm) long, including the border. If you want a pair like the one shown, make two panels.
You crochet the panel in five identical vertical strips, working each one from the top down. Next, you join the strips along their long edges with a slip-stitch seam. Last, a 3-row single crochet border goes around the top and both long sides, and the pointed hem stays free.
Finished Size and Construction
- Finished size: 41 in x 72.5 in (104.1 cm x 184.2 cm)
- Skill level: Intermediate
- Terminology: US terms
- Yarn weight: Sport (2), cotton
- Hook: 3.5 mm (E-4)
- Number of pieces: 5 strips per panel
- Layout: 5 strips side by side, 1 across x 5 wide
- Strip size: 8 in (20.3 cm) wide x 72 in (182.9 cm) long, including the 4 in (10.2 cm) point
- Size before border: 40 in x 72 in (101.6 cm x 182.9 cm)
- Border depth: 0.5 in (1.3 cm) on the top and both sides
Materials
Yarn: Use a smooth, mercerized or combed sport-weight cotton, about 155 m per 50 g. Cotton holds its shape, and it blocks crisp, open pineapples. Avoid acrylic, because the long panel will stretch over time.
- Natural cream: 1,300 g (about 4,030 m) per panel
Make sure every skein comes from the same dye lot. The quantity includes a margin of about 10% for swatching and weaving in ends.
Tools:
– 3.5 mm (E-4) crochet hook
– Tapestry needle
– Locking stitch markers
– Tape measure
– Rust-proof pins and a large blocking surface
– Spray bottle
– 8–10 curtain clip rings for hanging
Abbreviations (US Terms)
- ch – chain
- sl st – slip stitch
- sc – single crochet
- dc – double crochet
- sp(s) – space(s)
- sk – skip
- rep – repeat
- RS / WS – right side / wrong side
Special terms:
– Mesh square: one dc plus one ch-2 space. A strip is 12 squares wide, which is 13 dc and 12 ch-2 sps.
– Frame dc: the 4th dc from each edge. The pineapple is always worked between the two frame dc.
– Fan: (dc, ch 1) 6 times in one stitch, then dc in the same stitch. That makes 7 dc and 6 ch-1 sps.
Gauge and Checkpoints
Mesh gauge: 6 mesh squares x 6 rows = 4 in x 4 in (10.2 cm x 10.2 cm).
Test one strip first. Work Rows 1–18, which is the top band plus one pineapple repeat, then check these measurements:
- Width: 8 in (20.3 cm)
- After Row 6: 4 in (10.2 cm) long
- After Row 18: 12 in (30.5 cm) long
If your strip comes out more than 0.25 in (0.6 cm) too wide, go down half a hook size. If it is too narrow, go up half a size. Pineapples look slightly gathered before blocking, so take your width measurement on the mesh columns.
Checkpoints for a full strip:
– After Row 102: 68 in (172.7 cm)
– After the hem point: 72 in (182.9 cm)
Strip Pattern (Make 5)
Top Band
Row 1 (RS): Ch 41. Dc in 8th ch from hook. Ch 2, sk 2 ch, dc in next ch; rep from * across. Turn. (13 dc, 12 ch-2 sps)*
Rows 2–6: Ch 5 (counts as dc + ch 2). Dc in next dc. Ch 2, dc in next dc; rep from * across, working the last dc in the 3rd ch of the turning ch. Turn. (13 dc, 12 ch-2 sps)*
Checkpoint: 8 in x 4 in (20.3 cm x 10.2 cm).
Pineapple Repeat (Rows 7–18)
Every row in the repeat starts and ends with the same edge mesh.
- Left edge: Ch 5 (counts as dc + ch 2), (dc in next dc, ch 2) twice, dc in next dc. This last dc is the frame dc, and you now have 4 dc.
- Right edge: (ch 2, dc in next dc) twice, ch 2, dc in 3rd ch of turning ch. This gives 4 dc, counting the frame dc.
Row 7 (Fan): Work the left edge. Ch 4. Sk (ch-2 sp, dc) twice and the next ch-2 sp. Work a fan in the center dc. Ch 4, then sk (ch-2 sp, dc) twice and the next ch-2 sp. Dc in the frame dc and finish the right edge. Turn.
(Edges: 8 dc, 6 ch-2 sps. Center: 2 ch-4 and a fan of 7 dc with 6 ch-1 sps.)
Row 8: Work the left edge. Ch 4, sc in first ch-1 sp of fan. (Ch 3, sc in next ch-1 sp) 5 times. Ch 4, then dc in the frame dc and finish the right edge. Turn. (Center: 6 sc, 5 ch-3 loops)
Row 9: Work the left edge. Ch 5, sc in first ch-3 loop. (Ch 3, sc in next loop) 4 times. Ch 5, then dc in the frame dc and finish the right edge. Turn. (Center: 5 sc, 4 loops)
Row 10: Work the left edge. Ch 5, sc in first loop. (Ch 3, sc in next loop) 3 times. Ch 5, then dc in the frame dc and finish the right edge. Turn. (Center: 4 sc, 3 loops)
Row 11: Work the left edge. Ch 6, sc in first loop. (Ch 3, sc in next loop) twice. Ch 6, then dc in the frame dc and finish the right edge. Turn. (Center: 3 sc, 2 loops)
Row 12: Work the left edge. Ch 6, sc in first loop, ch 3, sc in next loop. Ch 6, then dc in the frame dc and finish the right edge. Turn. (Center: 2 sc, 1 loop)
Row 13 (Point): Work the left edge. Ch 7, sc in the last ch-3 loop. Ch 7, then dc in the frame dc and finish the right edge. Turn. (Center: 1 sc, 2 ch-7)
The flank chains get longer as the loop net narrows. This keeps the frame dc in line, so the pineapple stays inside its 6-square window.
Row 14 (Mesh restore): Work the left edge.
1. Ch 2, dc in 2nd ch of the first ch-7.
2. Ch 2, dc in 5th ch of the same ch-7.
3. Ch 2, dc in the sc.
4. Ch 2, dc in 3rd ch of the next ch-7.
5. Ch 2, dc in 6th ch of the same ch-7.
6. Ch 2, dc in the frame dc, then finish the right edge. Turn.
(13 dc, 12 ch-2 sps)
The new dc divide each ch-7 into thirds, so the center goes back to exactly 6 squares.
Rows 15–18: Work the same as Row 2. (13 dc, 12 ch-2 sps)
Checkpoint after Row 18: 12 in (30.5 cm). One repeat measures 8 in (20.3 cm).
Rows 19–102: Work Rows 7–18 seven more times. That makes 8 pineapple repeats in total.
Checkpoint after Row 102: 8 in x 68 in (20.3 cm x 172.7 cm). Every row ends in a dc, so each long edge has 102 dc row-ends.
Hem Point (Rows 103–108)
Each hem row drops one square at both ends.
Row 103 (RS): Sl st in each of the next 2 ch and in the next dc. Ch 5 (counts as dc + ch 2). Dc in next dc. Ch 2, dc in next dc; rep from * until 1 square remains. Leave it unworked and turn. (11 dc, 10 sps)*
Row 104: Work as Row 103. (9 dc, 8 sps)
Row 105: Work as Row 103. (7 dc, 6 sps)
Row 106: Work as Row 103. (5 dc, 4 sps)
Row 107: Work as Row 103. (3 dc, 2 sps)
Row 108 (Tip fan): Sl st in each of the next 2 ch and in the center dc. Work a fan in the center dc. (7 dc, 6 ch-1 sps) Fasten off.
Checkpoint: the point measures 4 in (10.2 cm) from Row 102 to the tip of the fan. The full strip measures 72 in (182.9 cm).
Weave in the ends along the mesh columns, never through the pineapples.
Make All Pieces
Each panel needs 5 strips in natural cream. For a pair, make 10.
Lightly steam or wet-block each strip to 8 in x 72 in (20.3 cm x 182.9 cm) before you join them. Lay the strips out with their RS facing up and the top band at the top:
TOP (Row 1 edges)
[ S1 ][ S2 ][ S3 ][ S4 ][ S5 ]
[ S1 ][ S2 ][ S3 ][ S4 ][ S5 ]
[ S1 ][ S2 ][ S3 ][ S4 ][ S5 ]
  V     V     V     V     V
HEM (5 free points)
Joining
Method: slip-stitch seam, worked from the RS.
- Hold two neighboring strips with WS together and the top edges matched.
- Join the yarn at the top corner.
- Sl st through both matching edge dc posts, working 3 sl sts per row-end pair.
This works because each row-end is one dc tall, 0.67 in (1.7 cm). Three sl sts per row-end match the 3-sts-per-square spacing used across the top. The seam therefore lies flat, without puckering or flaring.
Seam Rows 1–102 only. That makes 306 sl sts per seam, and the panel has 4 seams. Fasten off at Row 102. The hem points hang free, which creates the V gaps between them.
Tension: Keep the sl sts as loose as your dc. Check every 12 in (30.5 cm) that both strips still match row for row. If the seam gets shorter than the strip, go up a hook size for the seam only.
Size checkpoint: the joined panel measures 40 in x 72 in (101.6 cm x 182.9 cm). The seams add no measurable width.
Border
The border goes around the top and both long sides only. The pointed hem has no border.
Border gauge: 18 sc x 6 rows = 4 in x 1 in (10.2 cm x 2.5 cm). That is 3 sc per mesh square or per dc row-end.
Row 1 (RS): Join the yarn at the right long edge at Row 102.
– Right side: Work 3 sc in each row-end up to the top. That is 102 x 3 = 306 sc.
– Corner: ch 1.
– Top: Work 3 sc in each ch-2 sp, which covers each square. That is 12 x 3 = 36 sc per strip, and 5 x 36 = 180 sc.
– Corner: ch 1.
– Left side: Work 306 sc down the edge.
Turn. (792 sc and 2 corner ch-1 sps)
Row 2: Ch 1. Sc in each sc, and work (sc, ch 1, sc) in each corner sp. Turn.
(792 + 4 extra = 796 sc: 307 on each side, 182 across the top, plus 2 corner ch-1 sps)
Row 3: Ch 1. Sc in each sc, and work (sc, ch 1, sc) in each corner sp. Fasten off.
(796 + 4 extra = 800 sc: 308 on each side, 184 across the top, plus 2 corner ch-1 sps)
Why the math works: the 180 sc across the top are exactly 5 strips x 36 sc, and no stitches are added at the seams. The sides are exactly 102 rows x 3 sc. Both edges run at 4.5 sc per inch, so the border neither gathers nor ruffles. The only extra stitches are the 2 per corner per row. Three border rows add 0.5 in (1.3 cm) to the top and to each side.
Final Blocking
- Soak the panel in cool water for 15 minutes, then press the water out gently. Do not wring.
- Roll it in towels to remove more water.
- Lay it flat on a blocking surface, such as a bed with towels or foam mats.
- Pin the top edge to 41 in (104.1 cm) and straighten the long sides.
- Pin each side to 72.5 in (184.2 cm), measured to the tips of the points.
- Pin every hem point at its fan, so each V is even.
- Open each pineapple by easing the fans into a half circle.
- Let it dry completely, then unpin.
Final Quality-Control Checklist
- Each strip has 13 dc in every straight row and 8 pineapples.
- All 5 points finish with a 7-dc fan.
- Each seam has 306 sl sts and stops at Row 102.
- The border counts are 308 / 184 / 308 sc on Row 3.
- The panel measures 41 in x 72.5 in (104.1 cm x 184.2 cm).
- All ends are woven into the mesh columns.
Troubleshooting
- Pineapples pucker: the flank chains are too tight. Chain more loosely, or go up a hook size for Rows 8–13.
- Mesh columns lean: you missed the 3rd ch of the turning ch. Recount to 13 dc.
- Strips are different lengths: block them before joining, and match them row for row.
- The seam ripples: you worked more or fewer than 3 sl sts per row-end. Count each 12-row section.
- The top border waves: you have more than 36 sc per strip. Recount by square.
- Points twist: pin the tips flat while the panel is damp.
Care
Hand wash in cool water with a mild soap, then dry flat and reshape. Hang the panel only when it is fully dry, so it doesn’t stretch.
Final Notes
All the measurements follow from the gauge, one step at a time:
– 6 squares = 4 in (10.2 cm), so each strip is 8 in (20.3 cm) wide.
– The 6-row top band plus 8 repeats of 8 in (20.3 cm) makes 68 in (172.7 cm).
– The 4 in (10.2 cm) point brings the strip to 72 in (182.9 cm).
– Five strips make 40 in (101.6 cm).
– The 0.5 in (1.3 cm) border finishes the panel at 41 in x 72.5 in (104.1 cm x 184.2 cm).
Check each step as you go, and the panel will hang straight.
Happy crocheting!