
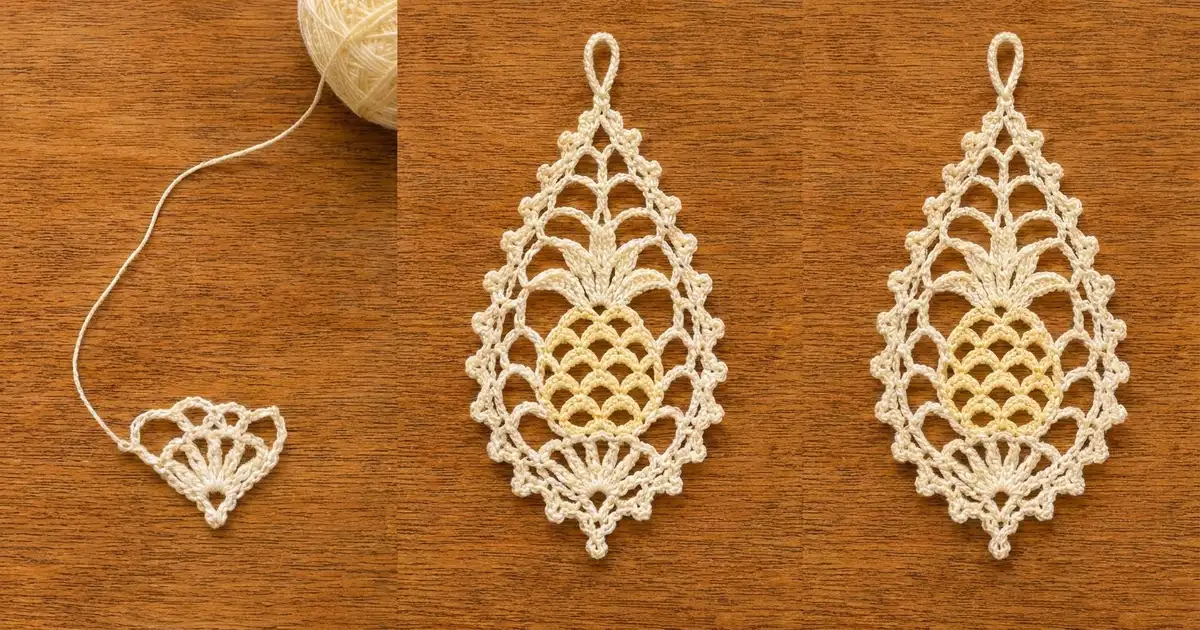
This delicate thread ornament sets a classic lace pineapple inside an airy teardrop frame. A small fan of spokes holds the bottom point. Above it, rows of soft yellow scales form the pineapple body, and a cream crown of five pointed leaves sits on top. Two rounds of open chain arches wrap the whole motif, and a picot-studded edge finishes it neatly.
The palette is quiet and vintage: ivory or cream thread for the fan, crown, frame and edging, and pale butter yellow for the pineapple scales. The result looks like heirloom doily lace, but it is small enough to finish in one evening.
This pattern uses US crochet terms. The finished ornament measures 3.5 in (8.9 cm) wide and 5.5 in (14.0 cm) tall, not counting the hanging loop. The loop adds about 0.75 in (1.9 cm).
The ornament is worked in rows from the bottom point upward. First you make the cream fan, then the yellow pineapple, then the cream crown. Next, two rounds of chain arches build the frame around the whole panel. A final picot border round finishes the edge and adds the hanging loop at the top tip.
Finished Size and Construction
- Finished size: 3.5 in x 5.5 in (8.9 cm x 14.0 cm), plus a 0.75 in (1.9 cm) hanging loop
- Skill level: Intermediate (thread lace, working into row ends)
- Terminology: US crochet terms
- Yarn weight: Size 10 crochet cotton thread (Lace, #0)
- Hook: 1.75 mm steel crochet hook
- Number of pieces: 1
- Layout: Single motif; no assembly needed
- Piece size: 3.5 in x 5.5 in (8.9 cm x 14.0 cm)
- Size before border: 3.25 in x 5.25 in (8.3 cm x 13.3 cm)
- Border depth: 0.125 in (0.3 cm) on each edge
Materials
Use a mercerized cotton thread in size 10. Mercerized thread has a soft sheen, holds starch well and keeps the picots crisp. Avoid fuzzy or very soft threads, because the scale holes and arches will blur.
- Cream / ivory (Color A): 7 g, about 39 m. Used for the fan, crown, frame and border.
- Pale butter yellow (Color B): 2 g, about 11 m. Used for the pineapple scales.
The quantities above include a safety margin for gauge swatching and weaving in ends.
Tools:
– 1.75 mm steel crochet hook
– Fine tapestry needle or small-eye beading needle
– Small sharp scissors
– 1 locking stitch marker
– Blocking board or foam mat, and rustproof pins
– Spray starch or a fabric stiffener
Abbreviations (US Terms)
- ch – chain
- sl st – slip stitch
- sc – single crochet
- hdc – half double crochet
- dc – double crochet
- tr – treble crochet
- sp(s) – space(s)
- RS / WS – right side / wrong side
- [ ] – repeat the instructions inside the brackets as directed
Special stitches:
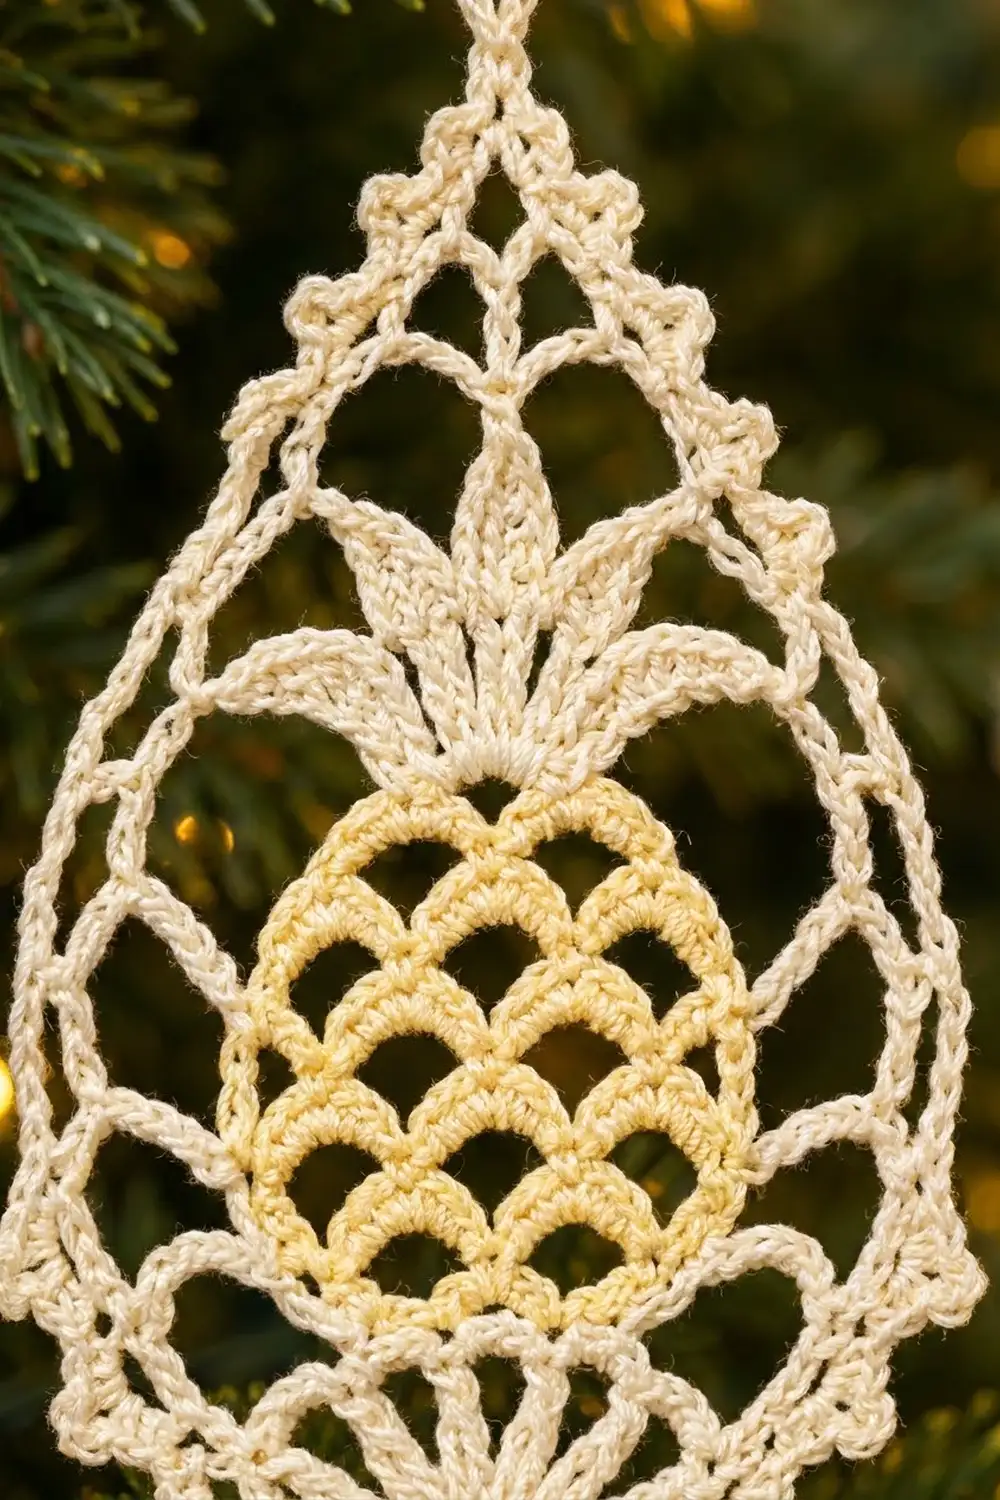
– Scale: 5 dc worked into one ch-4 loop. The center dc of a scale is its 3rd dc.
– Picot: ch 3, then sl st in the 3rd ch from the hook.
– Point picot: ch 5, then sl st in the 5th ch from the hook.
Gauge and Checkpoints
Gauge: 12 dc = 1 in (2.5 cm), and 13 sc = 1 in (2.5 cm), with size 10 thread and a 1.75 mm hook.
Lace gauge is easiest to check on the piece itself. Work the fan (Rows 1–3) and measure it before you continue. That small test tells you whether your whole ornament will come out on size.
Measurement checkpoints (lightly pinned flat):
– After Row 3 (fan): 1.25 in (3.2 cm) wide, 0.75 in (1.9 cm) tall
– After Row 8 (widest scale row): pineapple 2 in (5.1 cm) wide
– After Row 12: fan plus pineapple 2.25 in (5.7 cm) tall
– After crown: panel 3.25 in (8.3 cm) tall
– After Frame Round 1: 2.5 in x 4 in (6.4 cm x 10.2 cm)
– After Frame Round 2: 3.25 in x 5.25 in (8.3 cm x 13.3 cm)
– After border: 3.5 in x 5.5 in (8.9 cm x 14.0 cm)
If your fan is too big, switch to a 1.5 mm hook. If it is too small, try a 2.0 mm hook. A difference of 0.25 in (0.6 cm) at the fan grows to roughly 0.75 in (1.9 cm) across the finished ornament, so it is worth fixing early.
Part 1: Bottom Fan (Color A)
With Color A, ch 4 and sl st in the first ch to form a ring.
Row 1 (RS): Ch 3 (counts as dc), work 6 dc in the ring, then turn. (7 dc)
The dc fan over half the ring. The other half of the ring stays bare and becomes the bottom point.
Row 2 (WS): Ch 4 (counts as dc + ch 1). Dc in the next dc, then [ch 1, dc in the next dc] 4 times. Ch 1, dc in the top of the turning ch-3, then turn. (7 dc, 6 ch-1 sps)
These are the open spokes of the fan.
Row 3 (RS): Ch 1. Sc in the first dc, ch 4, skip the next 2 dc, sc in the next dc (the center dc). Ch 4, skip the next 2 dc, sc in the 3rd ch of the turning ch. (3 sc, 2 ch-4 loops)
Fasten off Color A. Check the fan against the first checkpoint.
Part 2: Pineapple Body (Color B)
The scale rows alternate with loop rows. Each loop row anchors at the center dc of the scales below, which shifts the next row of scales by half a scale. That shift creates the fish-scale pattern with open holes under each arch.
Row 4 (WS): With WS facing, join Color B with a sl st in the first sc. Ch 1 and sc in the same sc. [Work 1 Scale in the next ch-4 loop, sc in the next sc] twice, then turn. (2 scales: 10 dc + 3 sc = 13 sts)
Row 5 (RS, increase loop row): Ch 1, sc in the first sc. [Ch 4, sc in the center dc of the next scale] twice. Ch 4, sc in the last sc, then turn. (3 loops, 4 sc)
Row 6: Ch 1, sc in the first sc. [Scale in the next loop, sc in the next sc] 3 times, then turn. (3 scales: 15 dc + 4 sc = 19 sts)
Row 7 (increase loop row): Ch 1, sc in the first sc. [Ch 4, sc in the center dc of the next scale] 3 times. Ch 4, sc in the last sc, then turn. (4 loops, 5 sc)
Row 8: Ch 1, sc in the first sc. [Scale in the next loop, sc in the next sc] 4 times, then turn. (4 scales: 20 dc + 5 sc = 25 sts)
This is the widest row. It should measure 2 in (5.1 cm) across.
Row 9 (decrease loop row): Sl st in the first sc and in the next 3 dc, which brings you to the center dc of the first scale. Ch 1 and sc in the same dc. [Ch 4, sc in the center dc of the next scale] 3 times, then turn. Leave the rest of the last scale unworked. (3 loops, 4 sc)
Row 10: Ch 1, sc in the first sc. [Scale in the next loop, sc in the next sc] 3 times, then turn. (3 scales: 19 sts)
Row 11 (decrease loop row): Sl st in the first sc and the next 3 dc. Ch 1 and sc in the same dc. [Ch 4, sc in the center dc of the next scale] twice, then turn. (2 loops, 3 sc)
Row 12: Ch 1, sc in the first sc. [Scale in the next loop, sc in the next sc] twice. (2 scales: 13 sts)
Fasten off Color B. The scale tiers read 2, 3, 4, 3, 2, which gives the oval pineapple shape.
Part 3: Leaf Crown (Color A)
The crown has five chain-based leaves that rise from five anchor points along the top of Row 12. Those anchors are the first sc, the center dc of scale 1, the middle sc, the center dc of scale 2, and the last sc. Each leaf is worked back along its own chain, so it lies flat and comes to a sharp tip.
Row 13 (RS): With RS facing, join Color A with a sl st in the first sc of Row 12.
- Outer leaf: Ch 8. Sl st in the 2nd ch from the hook, sc in the next ch, hdc in the next ch, dc in the next 2 ch, hdc in the next ch, sc in the last ch (7 sts). Sl st in the same sc at the base.
- Sl st in the next 3 dc.
- Mid leaf: Ch 11. Sl st in the 2nd ch from the hook, then sc, hdc, 2 dc, 2 tr, dc, hdc, sc along the remaining ch (10 sts). Sl st in the same dc at the base.
- Sl st in the next 2 dc and in the middle sc.
- Center leaf: Ch 13. Sl st in the 2nd ch from the hook, then sc, hdc, 2 dc, 3 tr, 2 dc, hdc, sc (12 sts). Sl st in the same sc at the base.
- Sl st in the next 3 dc.
- Mid leaf: Repeat as above.
- Sl st in the next 2 dc and in the last sc.
- Outer leaf: Repeat as above.
Fasten off and weave in the ends. (5 leaves: 7, 10, 12, 10, 7 sts)
Fan the leaves out by hand. The center leaf stands straight up, the mid leaves tilt about 30 degrees and the outer leaves tilt about 60 degrees. The center leaf measures about 1 in (2.5 cm), and the whole panel should now be 3.25 in (8.3 cm) tall.
Part 4: Openwork Frame (Color A)
Anchor points: Frame Round 1 attaches to 10 points on each side of the panel. Working from the top down, these are: mid leaf tip, outer leaf tip, the edge sc of Rows 12, 10, 8, 6 and 4, the edge sc of Row 3, and the edge dc of Row 2. The bottom point is the bare half of the ring. Loop rows 5, 7, 9 and 11 are skipped on purpose.
Round 1: Join Color A with a sc in the very tip of the center leaf. Working down the first side, [ch 6, sc in the next anchor point] 9 times, ending at the Row 2 edge. Ch 6 and work a sc around the bare ring at its lowest point; this is the bottom tip. Working up the second side, [ch 6, sc in the next anchor point] 9 times, ending at the second mid leaf tip. Ch 6 and sl st in the first sc. (20 ch-6 loops, 10 per side)
Place a marker in the ch-6 loop just right of the center leaf tip. The piece should now measure 2.5 in x 4 in (6.4 cm x 10.2 cm).
Round 2: Sl st in the next 3 ch to reach the center of the first loop. Ch 1 and sc in the same loop. [Ch 7, sc in the next loop] 19 times. Ch 7 and sl st in the first sc. (20 ch-7 arches)
Name the arches in working order, A1 to A20:
– A20 crosses over the top tip. This is the top corner.
– A10 crosses over the bottom tip. This is the bottom corner.
– A1–A9 form Side 1, and A11–A19 form Side 2: 9 arches per side.
Checkpoint: 3.25 in x 5.25 in (8.3 cm x 13.3 cm). The height grows more than the width in this round, because the arches stack at each point and sharpen the teardrop.
Part 5: Picot Border and Hanging Loop
Border gauge: Each ch-7 arch holds 8 sc. At 13 sc per 1 in (2.5 cm), 8 sc cover about 0.6 in (1.5 cm), which is the length of a relaxed ch-7 arch. That way the edge neither ruffles nor cups.
Round 3: Sl st into A1 and ch 1.
– Side 1 (A1–A9): In each arch, work (4 sc, picot, 4 sc). (72 sc + 9 picots)
– Bottom corner (A10): Work (4 sc, point picot, 4 sc). (8 sc + 1 point picot)
– Side 2 (A11–A19): In each arch, work (4 sc, picot, 4 sc). (72 sc + 9 picots)
– Top corner (A20): Work 4 sc. Ch 20 for the hanging loop, then sl st in the 4th sc you just made to close the loop. Work 4 sc more in the same arch. (8 sc + hanging loop)
Sl st in the first sc, fasten off, and weave in all ends.
Round 3 total: 160 sc, 18 picots, 1 point picot and 1 hanging loop.
Why the math works: Each side has 9 arches x 8 sc = 72 sc. The two corner arches add 8 sc each, so 72 + 72 + 8 + 8 = 160. That matches 20 arches x 8 sc = 160 sc. No stitches are added or skipped at the corners, so both sides stay mirror images. The border adds 0.125 in (0.3 cm) on every edge: 3.25 in + 0.25 in = 3.5 in (8.9 cm) wide, and 5.25 in + 0.25 in = 5.5 in (14.0 cm) tall.
Final Blocking
- Wet the ornament in cool water and gently press out the excess in a towel.
- Lay it RS up on your blocking board.
- Pin the top and bottom tips first, 5.5 in (14.0 cm) apart.
- Pin the widest point, across Row 8, to 3.5 in (8.9 cm).
- Pin the center of every border arch outward so each arch is round and even.
- Pin each picot open, and pin the bottom point picot straight down.
- Pin the five leaves into their fan angles, and push each scale hole open with a pin tip.
- Spray generously with starch and let it dry completely, at least 6 hours.
- Unpin, then shape the hanging loop by hand.
Final Quality-Control Checklist
- Scale tiers count 2, 3, 4, 3, 2, and each scale has 5 dc.
- All five leaves have sharp tips, and the two sides mirror each other.
- Frame Round 1 has 20 loops, 10 per side.
- Frame Round 2 has 20 arches: 9 per side plus 2 corners.
- The border has 160 sc and 18 even picots.
- The ornament measures 3.5 in x 5.5 in (8.9 cm x 14.0 cm).
- The hanging loop is about 0.75 in (1.9 cm) tall, and the total height is 6.25 in (15.9 cm).
- All ends are woven in and invisible from both sides.
Troubleshooting
- The scales ruffle: Your ch-4 loops are too short for your tension. Work ch 5 instead.
- The scales look flat with no holes: Make sure each loop row anchors in the center dc of the scale, not in the sc between scales.
- The pineapple leans to one side: On Rows 9 and 11, check that you work exactly 4 sl st (1 sc and 3 dc) before the first sc.
- The leaves curl: Your chains are tighter than your stitches. Chain with a looser hand, or chain with a hook one size up.
- The frame pulls the panel out of shape: You probably anchored into a loop row. Use only the edge sc of the scale rows.
- The border cups: Your sc are too tight. Relax your tension, but keep 8 sc per arch.
- The border waves: Make sure you work 8 sc, not 9, in each arch.
Care
Hand wash in cool water with a mild soap, press dry in a towel, and re-starch and re-pin to restore the shape. Store flat or hanging, away from damp.
Final Notes
Check the measurements in order, starting at the bottom:
– The fan is 1.25 in (3.2 cm) wide.
– The pineapple’s widest row is 2 in (5.1 cm).
– The panel with its crown is 3.25 in (8.3 cm) tall.
– Frame Round 1 brings the piece to 2.5 in x 4 in (6.4 cm x 10.2 cm).
– Frame Round 2 brings it to 3.25 in x 5.25 in (8.3 cm x 13.3 cm).
– The picot border finishes it at 3.5 in x 5.5 in (8.9 cm x 14.0 cm).
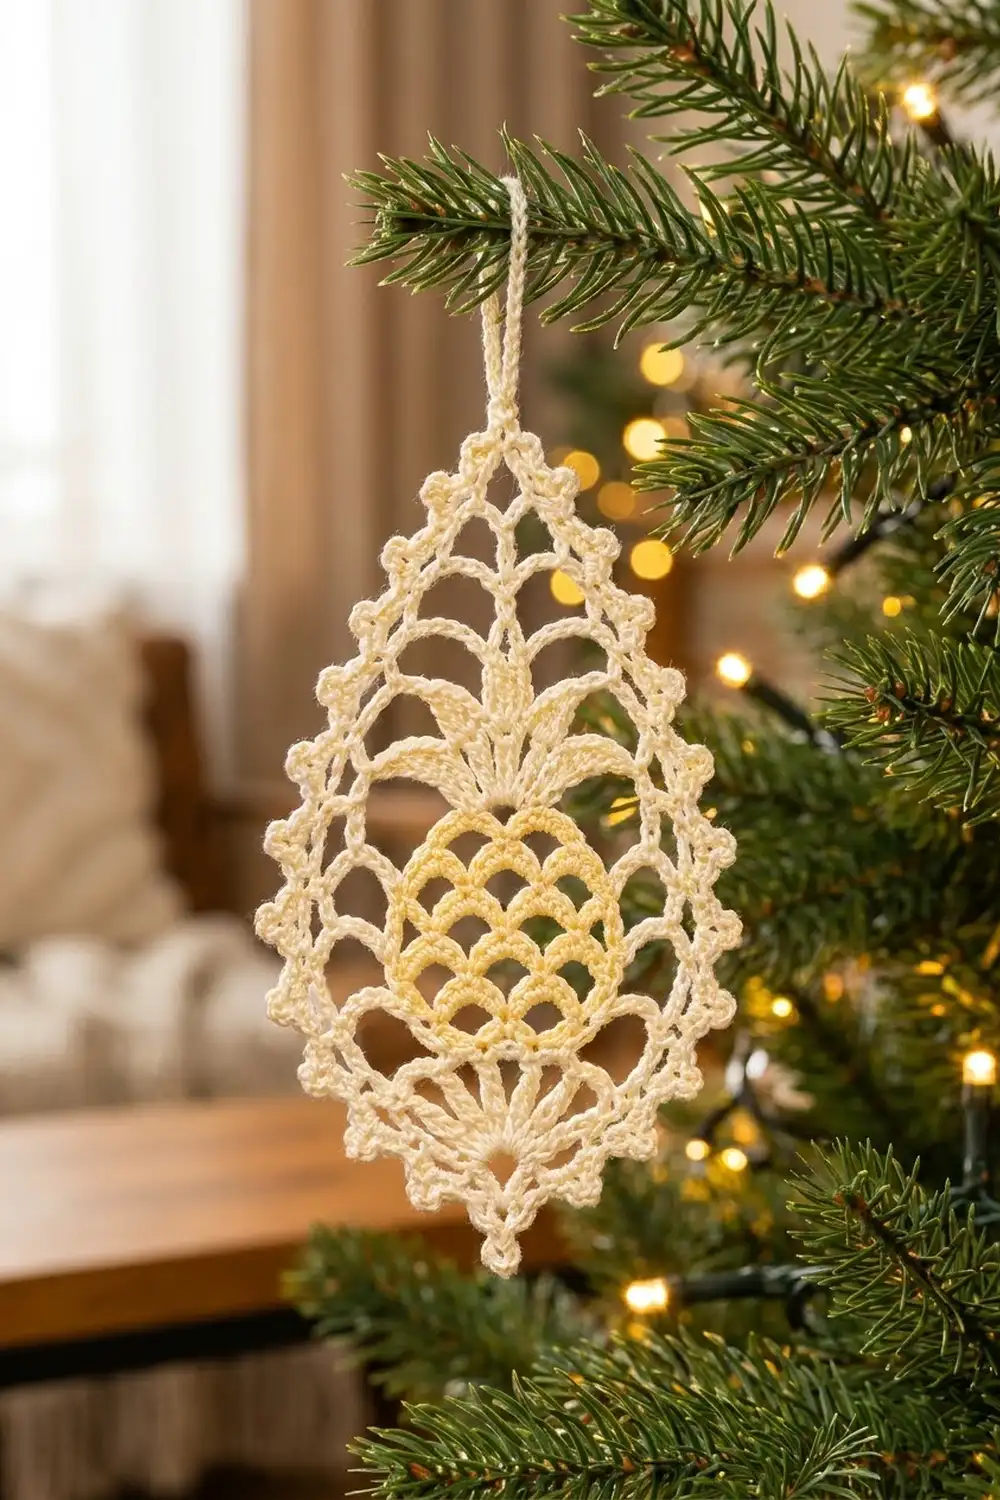
If every checkpoint matches, the ornament will block into a crisp, even teardrop ready for the tree.
Happy crocheting!