

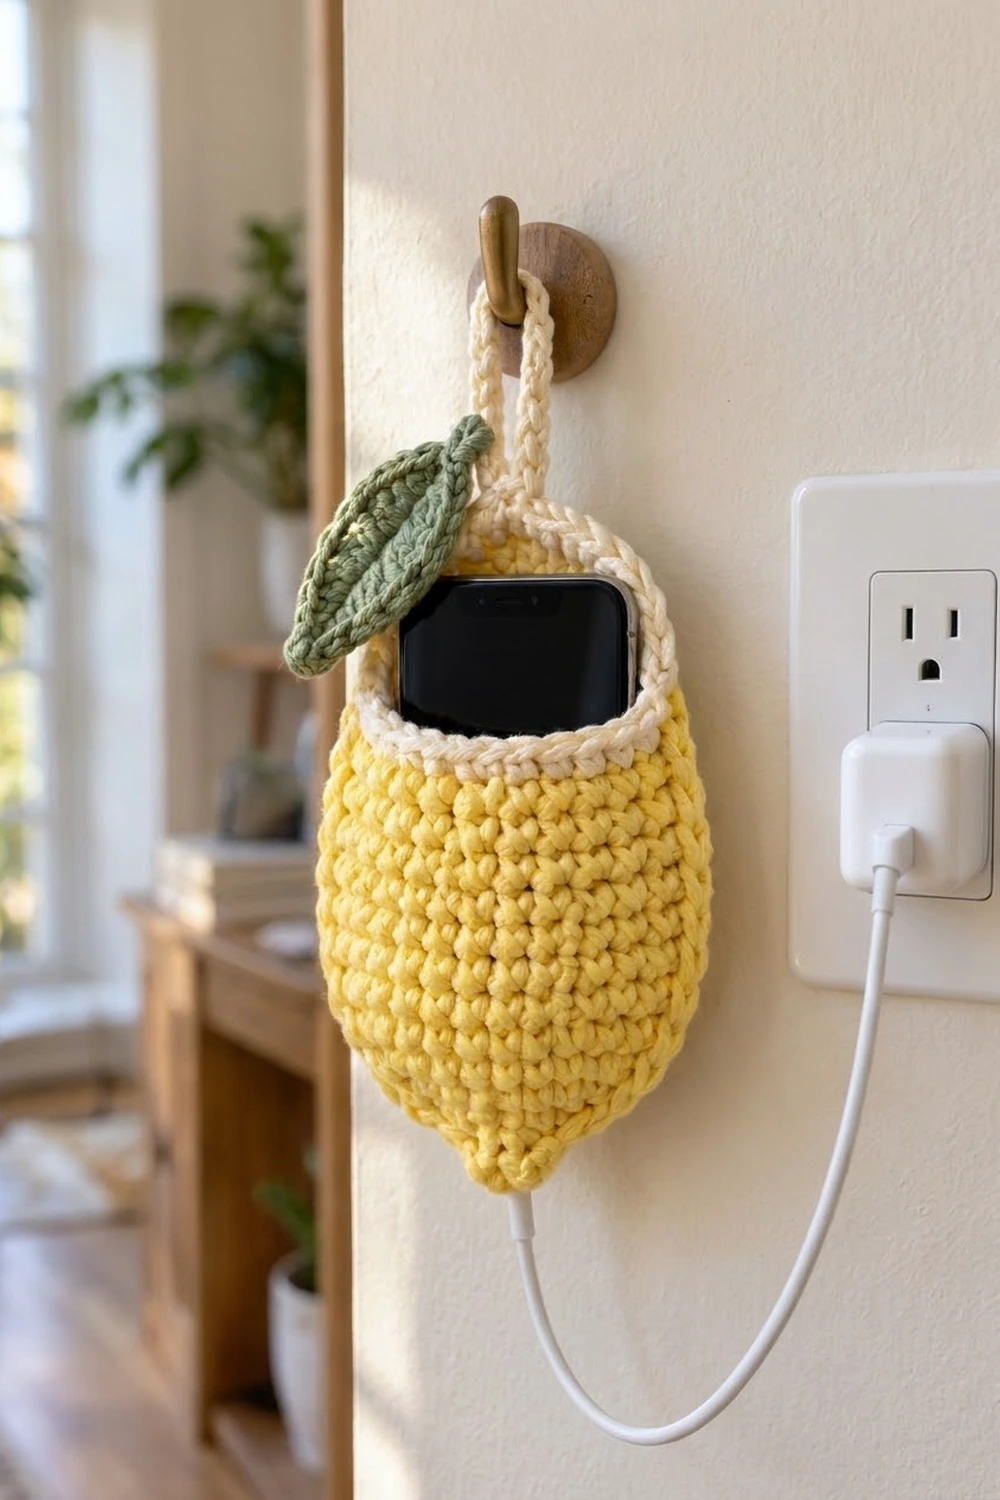
This little lemon is a wall-hanging phone pocket that keeps your phone off the floor while it charges. It hangs from a hook by a cream loop and holds the phone upright. The charging cable drops out through a small opening at the lemon’s pointed tip.
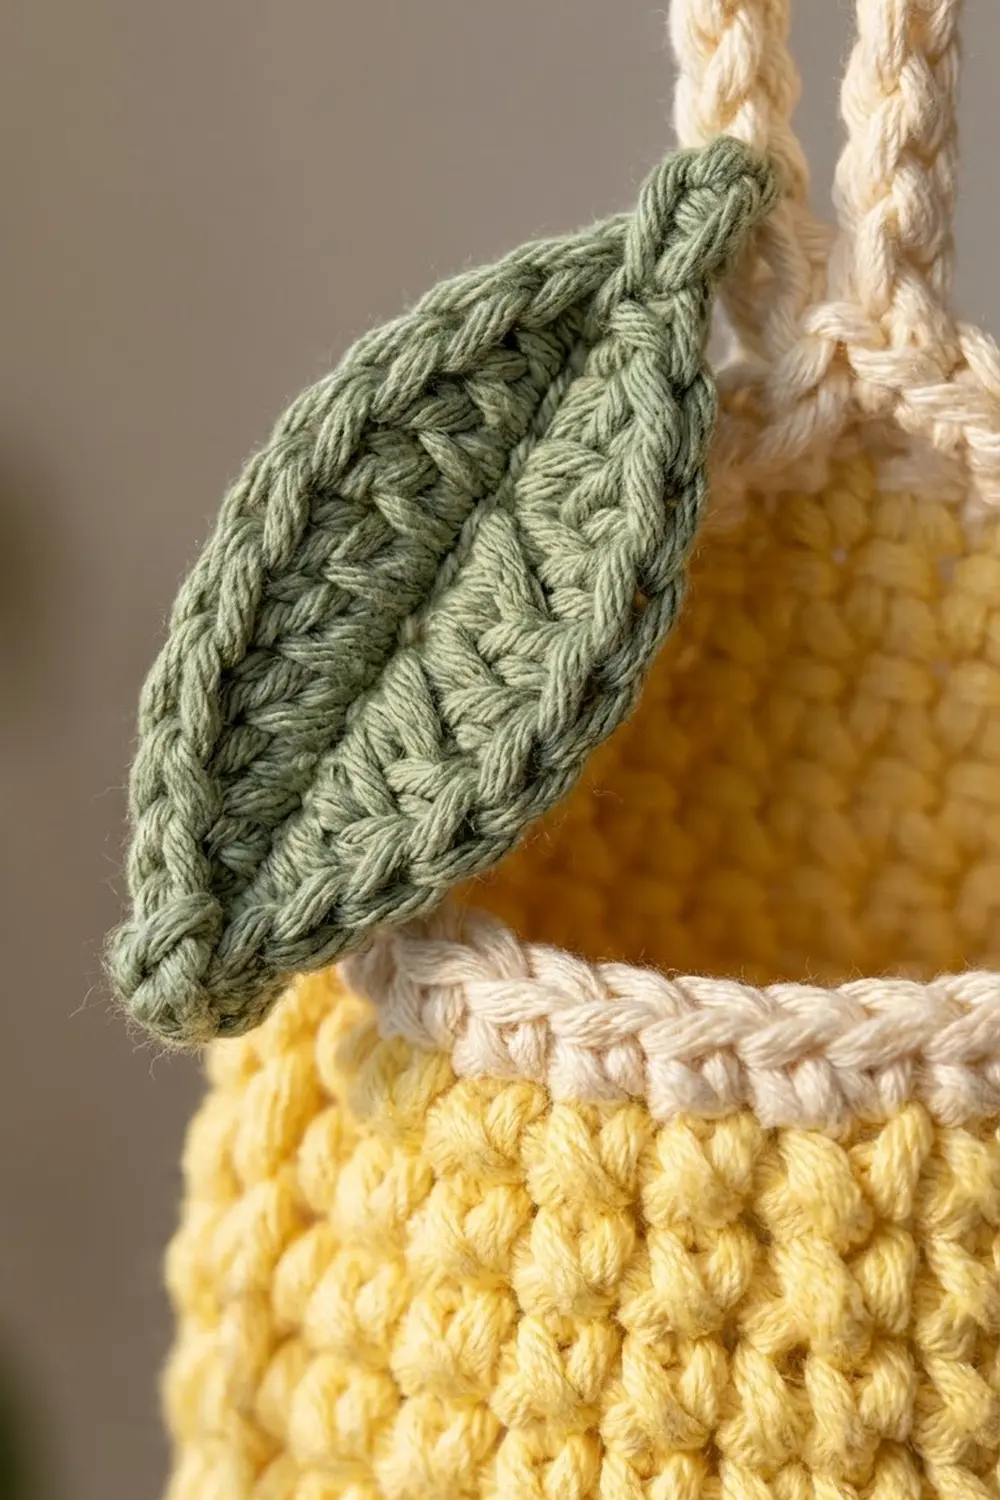
The body is a soft buttery yellow worked in dense single crochet, which gives it a pebbly texture that looks like citrus peel. A cream rim finishes the opening, and a sage green leaf with a raised center vein is sewn at the top front edge. The style is cozy and simple, cute without being fussy.
The pattern uses US crochet terms. The finished pocket measures about 5.6 in (14.2 cm) wide at its widest point when flattened and 7.75 in (19.7 cm) tall from tip to rim. The loop adds about 2 in (5.1 cm) above the rim.
Construction is simple. You work the body in the round from the bottom tip up, starting on a small open chain ring that becomes the cable port. You increase to the full lemon width, work straight, and taper slightly. Then you add the cream rim and the hanging loop directly onto the body. The leaf is a separate small piece worked around a foundation chain and sewn on.
Finished Size and Construction
- Finished size: 5.6 in (14.2 cm) wide flattened x 7.75 in (19.7 cm) tall, plus a 2 in (5.1 cm) loop; total hanging height 9.75 in (24.8 cm)
- Skill level: Easy
- Terminology: US crochet terms
- Yarn weight: Worsted (#4), 100% cotton
- Hook: 4.5 mm (US 7)
- Number of pieces: 1 item made from 2 crocheted parts: the body (with rim and loop worked on) and 1 leaf appliqué
- Layout: One pocket, with the leaf sewn at the top front edge and the loop at center back
- Opening size: 36 sts, about 4.8 in (12.2 cm) across when flattened
- Size before border: 7.25 in (18.4 cm) tall after Rnd 29
- Border (rim) depth: 0.5 in (1.3 cm): 2 rounds of sc plus a slip stitch edge
This is a single pocket, not a set of joined motifs, so there is no layout grid and no joining section.
Materials
Choose a smooth, firm cotton or cotton blend in worsted weight. Cotton holds its shape under the weight of a phone and doesn’t stretch out the way acrylic can. Avoid fuzzy or very soft yarns. You want crisp stitch definition and a dense fabric.
- Yellow (body): 60 g, about 114 m
- Cream (rim and loop): 15 g, about 29 m
- Sage green (leaf): 10 g, about 19 m
These amounts assume a cotton of roughly 1.9 m per gram. They include a comfortable margin over what the sample used.
Tools:
- 4.5 mm (US 7) crochet hook
- Locking stitch markers (at least 2)
- Tapestry needle
- Scissors
- Tape measure or ruler
- Rust-proof pins for blocking
- A small rolled towel or a phone-sized piece of card for shaping
Abbreviations (US Terms)
- ch: chain
- sl st: slip stitch
- sc: single crochet
- hdc: half double crochet
- dc: double crochet
- inc: 2 sc in the same stitch
- sc2tog: single crochet 2 together (insert hook in next st, yo, pull up a loop, insert hook in following st, yo, pull up a loop, yo, pull through all 3 loops)
- st(s): stitch(es)
- Rnd: round
- ( ): repeat the instructions inside the number of times stated
Special stitch, picot: ch 2, sl st in the 2nd ch from hook. Used once, at the leaf tip.
Gauge and Checkpoints
Gauge: 15 sc and 16 rnds = 4 in (10.2 cm) in sc worked in the round. That is 3.75 sts and 4 rnds per inch.
Work tightly. The pocket carries real weight, so the fabric should be firm enough that you can’t easily see light through it.
Test piece first: Rnds 1–12 of the body are your gauge swatch. Work them, then check:
- After Rnd 12 (42 sts): the piece is a shallow cone about 5.6 in (14.2 cm) across when flattened and 3 in (7.6 cm) tall from the tip.
- After Rnd 26: 6.5 in (16.5 cm) tall from the tip.
- After Rnd 29: 7.25 in (18.4 cm) tall from the tip.
- After the rim: 7.75 in (19.7 cm) tall from the tip.
If your piece is too big: go down to a 4 mm (US G-6) hook. A loose pocket lets the phone sag and tip forward.
If your piece is too small: go up to a 5 mm (US H-8) hook. Before you go further, check that your phone slides in its case without forcing. The opening is 4.8 in (12.2 cm) across when flattened, which fits most phones up to about 3.25 in (8.3 cm) wide in a case.
Body
Work the body in a continuous spiral with the right side facing out. Place a marker in the first st of each round and move it up as you go.
Rnd 1: With yellow, ch 4 and sl st in the first ch to form a ring. Ch 1, then work 6 sc into the ring. Don’t pull the ring closed. (6 sts)
The chain ring stays open at about 0.4 in (1.0 cm). This is the cable port. The sc worked around it reinforce the edge so it won’t stretch with use.
Rnd 2: Sc in each st around. (6 sts)
This plain round makes the small pointed nub at the bottom of the lemon.
Rnd 3: Inc in each st around. (12 sts)
Rnd 4: (Sc in next st, inc) 6 times. (18 sts)
Rnd 5: Sc in each st around. (18 sts)
Rnd 6: (Sc in next 2 sts, inc) 6 times. (24 sts)
Rnd 7: Sc in each st around. (24 sts)
Rnd 8: (Sc in next 3 sts, inc) 6 times. (30 sts)
Rnd 9: Sc in each st around. (30 sts)
Rnd 10: (Sc in next 4 sts, inc) 6 times. (36 sts)
Rnd 11: Sc in each st around. (36 sts)
Rnd 12: (Sc in next 5 sts, inc) 6 times. (42 sts)
Alternating increase rounds with plain rounds makes a gradual cone instead of a flat circle. That gives the lemon its tapered lower end instead of a round bottom.
Checkpoint: 42 sts, 5.6 in (14.2 cm) across when flattened, 3 in (7.6 cm) tall.
Rnds 13–26: Sc in each st around. (42 sts in each of these 14 rounds)
The body is now a straight tube. Flatten it now and then to make sure it isn’t twisting. A slight diagonal drift of the round start is normal in a spiral.
Checkpoint: 6.5 in (16.5 cm) from the tip.
Rnd 27: (Sc in next 5 sts, sc2tog) 6 times. (36 sts)
Each repeat uses 7 sts of the previous round, so 6 repeats use all 42 sts and leave 36. This gentle decrease gives the lemon its rounded shoulders.
Rnds 28–29: Sc in each st around. (36 sts in each round)
At the end of Rnd 29, sl st in the next st to smooth out the spiral step. Fasten off yellow.
Checkpoint: 7.25 in (18.4 cm) from the tip; opening 4.8 in (12.2 cm) across when flattened.
Leaf
Make 1 in sage green. The leaf is worked around both sides of a foundation chain.
Foundation: Ch 11.
Rnd 1: Sc in 2nd ch from hook, hdc in next ch, dc in next 5 ch, hdc in next ch, sc in next ch (9 sts along the first side). In the last ch, work (sc, picot, sc) for the tip. Rotate and work along the other side of the foundation chain: sc in next ch, hdc in next ch, dc in next 5 ch, hdc in next ch, sc in last ch (9 sts). Sl st to the first sc. (20 sts plus 1 picot)
The taller dc in the center and the shorter sc at each end make the pointed oval leaf shape.
Stem: Ch 4. Sl st in 2nd ch from hook and in the next 2 ch, then sl st into the base of the leaf. Fasten off, leaving a 12 in (30.5 cm) tail for sewing.
Center vein: With a separate strand of sage green, work surface slip stitches straight down the middle of the leaf, from the stem to just below the picot. Keep them relaxed so the leaf doesn’t curl. Weave in the vein ends on the back.
Leaf size: about 2.75 in (7.0 cm) long and 1.25 in (3.2 cm) wide, with a 0.75 in (1.9 cm) stem.
Border
On this piece, the border is the cream rim around the opening plus the hanging loop.
Border gauge: the same as the body: 15 sc = 4 in (10.2 cm), 4 rnds per inch.
Before you start, flatten the pocket so the end of Rnd 29 sits at one side fold. This splits the 36 sts into 18 sts on the front and 18 sts on the back. Mark the 9th and 10th back sts, which sit on either side of center back.
Rnd 30: Join cream with a sl st in the st at the side fold. Ch 1, sc in each st around, and join with a sl st to the first sc. (36 sts = 36 worked 1 per existing st + 0 added; 18 front, 18 back)
Rnd 31: Ch 1, sc in each st around, and sl st to the first sc. (36 sts; 18 front, 18 back)
Rnd 32: Sl st loosely in each st around. (36 sl sts; 18 front, 18 back) Don’t fasten off.
Why the math works: the opening stays at exactly 36 sts through all 3 rim rounds. With no increases, the rim can’t ruffle. With no decreases, it won’t pull in and pinch the phone. The slip stitch round adds a firm, clean edge that resists stretching each time you slide the phone in and out. Rim depth is 2 rnds of sc at 4 rnds per inch, or 0.5 in (1.3 cm).
Hanging loop: Keep working with cream. Sl st across the back to the first marked st (the 9th back st). Ch 20, then sl st into the second marked st (the 10th back st) to form a loop. Turn and work 26 sc over the ch-20 loop, covering it completely. Sl st into the 9th back st. Fasten off, then weave the tail through the base of the loop twice for strength.
Packing 26 sc over 20 ch makes a firm, slightly rounded loop that stands up instead of flopping. It rises about 2 in (5.1 cm) above the rim.
Attach the leaf: Pin the leaf on the front, near one side. The stem end should overlap the cream rim, with the tip angled up and outward. Sew around the edge with the tail, catching only the back loops of the leaf so the stitches don’t show. Secure the tail inside the pocket.
Checkpoint: 7.75 in (19.7 cm) from tip to rim; 9.75 in (24.8 cm) total hanging height.
Final Blocking
- Weave in all remaining ends on the inside of the pocket.
- Lightly mist the whole piece with water until it is damp but not soaked.
- Slide a phone-sized piece of card or a small rolled towel into the pocket. This sets the shape and opens the rim evenly.
- Smooth the body into a lemon shape and pinch the tip into a neat point around the cable port.
- Press the leaf flat with your fingers, or pin it flat on a towel if it curls.
- Stand the loop upright and let everything dry fully, at least 12 hours.
- Remove the form and compare the measurements to the checkpoints.
Final Quality-Control Checklist
- The body measures 5.6 in (14.2 cm) wide and 7.75 in (19.7 cm) tall when flattened.
- The rim has 18 sts on the front and 18 on the back, with no ripples.
- The loop is centered on the back and firmly anchored.
- The leaf is sewn on securely, with no stitches showing on the front.
- The cable port at the tip is open about 0.4 in (1.0 cm), and your connector passes through.
- Your phone slides in and stands upright without forcing.
- All ends are woven in on the inside.
Troubleshooting
The connector won’t fit through the tip. Rework Rnd 1 on a ch-5 ring instead of a ch-4 ring. The stitch counts stay the same.
The pocket is floppy. Your gauge is too loose. Go down a hook size, or work with a slightly tighter grip.
The rim flares. You probably added a st at the join. Recount Rnd 30; it must be exactly 36.
The rim pinches. You may have skipped a st or worked the slip stitch round too tightly. Rework Rnd 32 with looser tension or a hook one size larger.
The loop stretches. Weave the tail through the base of the loop again, or add a round of sl sts over the 26 sc.
The leaf curls. Loosen the vein slip stitches and block the leaf flat again.
Care
Take out the phone and charging cable before washing. Hand wash in cool water with mild soap, press the water out in a towel, and dry flat with a form inside.
Final Notes
The measurement chain is short and easy to follow. A gauge of 15 sc and 16 rnds to 4 in (10.2 cm) gives 42 sts and 5.6 in (14.2 cm) of width at Rnd 12. Height is 6.5 in (16.5 cm) at Rnd 26 and 7.25 in (18.4 cm) at Rnd 29. The 36-st rim adds 0.5 in (1.3 cm) for a finished height of 7.75 in (19.7 cm), and the loop brings the total to 9.75 in (24.8 cm). Check each stage, and the lemon will hold your phone neatly every time.
Happy crocheting!