

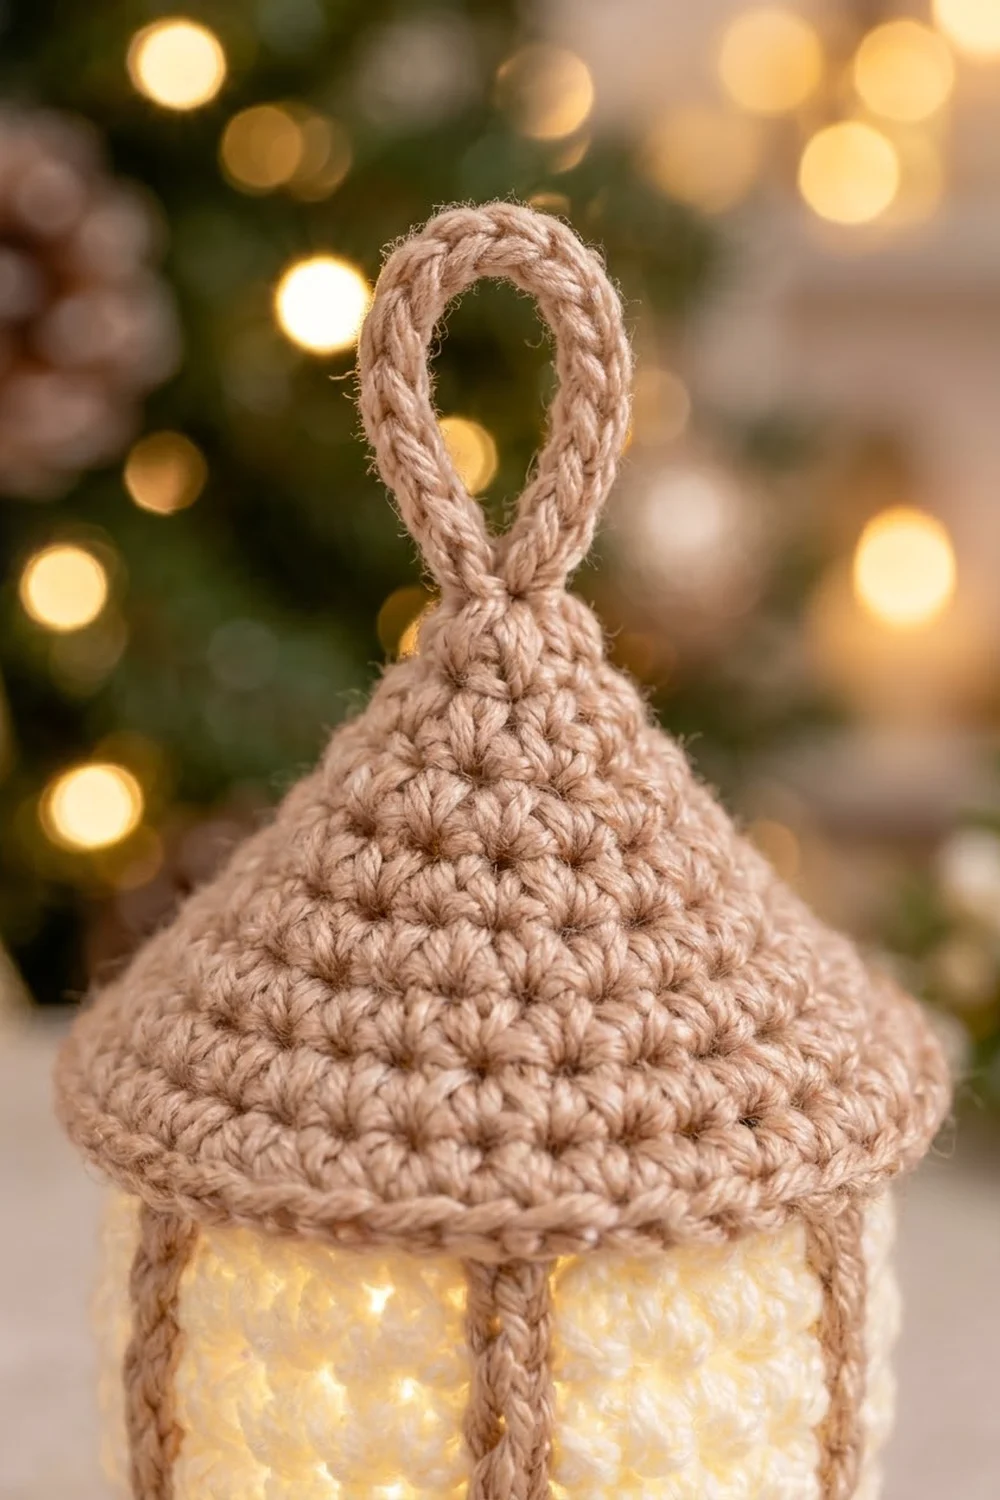
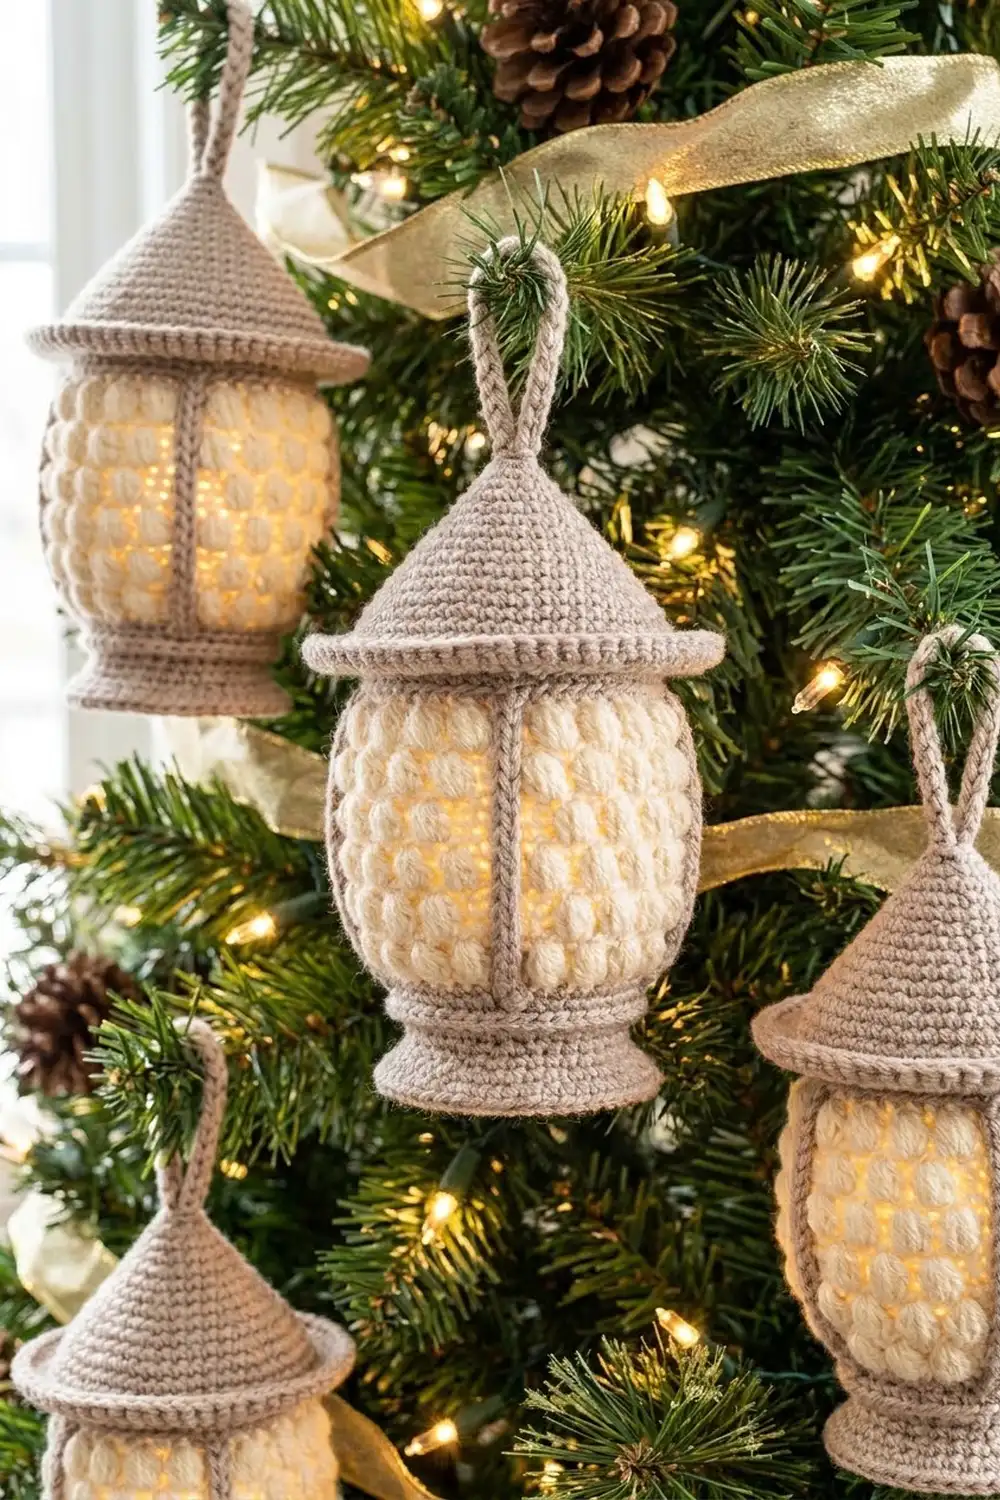
The Hearthlight Lantern is a small, chunky Christmas ornament shaped like an old-fashioned candle lantern. The cream body is covered in soft puff-stitch bumps that catch the light and look like frosted glass. Four slim taupe bars frame the panels, and a cone roof with a rolled brim finishes the top.
The palette is two warm neutrals: cream for the glass and light taupe for the frame. It fits a natural, Scandinavian or gold-and-white tree, and it works just as well tucked into a gift bag or tied onto a wreath.
This pattern uses US crochet terms. The finished lantern is about 4.25 in (10.8 cm) tall without the loop, 5.25 in (13.3 cm) with the loop, and 3 in (7.6 cm) across the brim.
You work the whole ornament from the bottom up in continuous spiral rounds. Start with a flat base, shape the foot and neck, and switch to cream for the puff-stitch body. Next, slip stitch the four bars on the surface. Work the brim into the front loops of the last body round and the cone roof into the back loops, then close the top and add the corded hanging loop.
Finished Size and Construction
- Finished size: 4.25 in (10.8 cm) tall; 5.25 in (13.3 cm) with loop
- Widest point: 3 in (7.6 cm) at the brim edge
- Body width: about 2.4 in (6.1 cm) at its widest
- Skill level: Intermediate (puff stitches, front/back loop work, surface slip stitch)
- Terminology: US
- Yarn weight: DK (light worsted, #3)
- Hook: 3.25 mm (US D/3)
- Number of pieces: 1, worked as one continuous piece
- Layout: single upright 3D ornament
- Piece size: 4.25 in (10.8 cm) tall x 3 in (7.6 cm) wide
- Brim size before edging: 2.8 in (7.1 cm) across
- Edging depth: about 0.1 in (0.3 cm) per side
Materials
Use a smooth mercerized cotton or cotton blend in DK weight. Cotton keeps the puff stitches crisp and the bars clean. Avoid fuzzy yarns, because they blur the texture.
- Color A, Cream: 12 g / about 30 m (body)
- Color B, Light Taupe: 15 g / about 38 m (base, bars, brim, roof, loop)
Both quantities include a margin of roughly 20% for gauge swatching and tails.
Tools:
– 3.25 mm (US D/3) crochet hook
– Stitch marker
– Tapestry needle
– Scissors
– Small amount of polyester fiberfill
– Optional: one mini battery LED (fairy-light bulb or 0.6 in / 1.5 cm button LED) for a glowing effect
Abbreviations (US Terms)
- MR – magic ring
- ch – chain
- sl st – slip stitch
- sc – single crochet
- inc – 2 sc in the same stitch
- dec – single crochet 2 together (invisible decrease recommended)
- BLO / FLO – back loop only / front loop only
- rev sc – reverse single crochet (crab stitch), worked left to right
- st(s) – stitch(es)
Puff stitch (puff): (Yarn over, insert hook in the stitch, yarn over and pull up a loop to the height of a sc) 3 times; there are now 7 loops on the hook. Yarn over and draw through all 7 loops. Do not chain to close. One puff counts as 1 stitch.
Surface slip stitch: Holding the yarn inside the piece, insert the hook from the outside between two stitches, catch the yarn and pull a loop through to the front. Then pull it through the loop already on the hook.
Gauge and Checkpoints
Gauge: 11 sc and 12 rounds = 2 in (5.1 cm) in sc worked in the round.
Gauge matters here because the lantern’s proportions depend on it. Work the base (Rounds 1–6) as your test piece, then check:
- After Round 6: the flat circle measures about 2.1 in (5.3 cm) across.
- After Round 12: the base sides stand 1 in (2.5 cm) tall.
- After Round 24: the piece measures 3 in (7.6 cm) from the bottom; the body is about 2.4 in (6.1 cm) wide.
- After Round 26: the brim measures 2.8 in (7.1 cm) across.
- Finished: 4.25 in (10.8 cm) tall, 3 in (7.6 cm) at the brim.
If your circle is too big: go down to a 3.0 mm hook. If it’s too small: go up to a 3.5 mm hook. Work tightly enough that stuffing won’t show between stitches.
Pattern
Work in continuous spiral rounds without joining. Mark the first stitch of each round and move the marker up as you go.
Base (Color B)
Rnd 1: MR, 6 sc in ring. (6)
Rnd 2: Inc in each st around. (12)
Rnd 3: (Sc, inc) 6 times. (18)
Rnd 4: (2 sc, inc) 6 times. (24)
Rnd 5: (3 sc, inc) 6 times. (30)
Rnd 6: (4 sc, inc) 6 times. (36)
Checkpoint: the flat circle measures 2.1 in (5.3 cm) across.
Rnd 7: Sc in BLO of each st around. (36) This turns the edge up and forms the crisp bottom rim of the foot.
Rnds 8–9: Sc in each st around. (36)
Rnd 10: (4 sc, dec) 6 times. (30) This shapes the narrow neck, about 1.7 in (4.3 cm) across.
Rnd 11: Sc in each st around. (30)
Rnd 12: (4 sc, inc) 6 times. (36) This forms the ridge ring that holds the glass.
Checkpoint: the base sides measure 1 in (2.5 cm) tall. Change to Color A on the last yarn-over of Round 12. Leave a 6 in (15.2 cm) tail of B to weave in later.
Puff-Stitch Body (Color A)
Rnd 13: Sc in BLO of each st around. (36) The unused front loops leave a small ledge where the glass meets the base.
Rnd 14: (Puff, sc) 18 times. (36: 18 puffs + 18 sc)
Rnd 15: (Sc in the puff, puff in the sc) 18 times. (36: 18 puffs + 18 sc) Each puff now sits offset from the one below.
Rnd 16: (5 sc, inc) 6 times. (42) The body starts to bulge here.
Rnd 17: (Puff, sc) 21 times. (42: 21 puffs + 21 sc)
Rnd 18: (Sc, puff) 21 times. (42)
Rnd 19: (Puff, sc) 21 times. (42)
Rnd 20: (Sc, puff) 21 times. (42)
Rnd 21: (5 sc, dec) 6 times. (36)
Rnd 22: (Puff, sc) 18 times. (36)
Rnd 23: (Sc, puff) 18 times. (36)
Rnd 24: Sc in each st around. (36)
Sl st in the next st and fasten off Color A, leaving a 6 in (15.2 cm) tail.
Checkpoint: the piece measures 3 in (7.6 cm) from the bottom, and the body is about 2.4 in (6.1 cm) across at Rounds 17–20. Puff rounds sit slightly taller than plain sc rounds, so the body section should come out at about 2 in (5.1 cm).
Push the puffs outward: If any puffs sink inward, poke them gently from the inside with a fingertip. All puffs should face out.
Frame Bars (Color B, surface slip stitch)
The top is still open, so this is the easiest time to add the bars. Count around Round 13 and mark stitches 1, 10, 19 and 28. That gives four bars with 9 stitches between each pair, which divides the body into four equal panels.
For each bar:
1. Hold Color B inside the lantern. At the first marked stitch, pull up a loop through the gap just above Round 12.
2. Work 1 surface sl st per round straight up the column, through Round 24. That makes 12 sl sts per bar.
3. In Rounds 16 and 21 the count changes, so follow the column by eye and keep the bar vertical.
4. Pull the yarn to the inside and fasten off. Knot it to its starting tail.
Keep the slip stitches loose enough that the body doesn’t pucker. Each bar should measure the same 2 in (5.1 cm) as the body.
Brim (Color B)
Join Color B with a sl st in the front loop of any st of Round 24.
Rnd 25: Working in FLO of Round 24, ch 1, (2 sc, inc) 12 times. (48: 36 sts worked 1-per-stitch + 12 added)
Rnd 26: Sc in each st around. (48)
Checkpoint: the brim flares outward and measures 2.8 in (7.1 cm) across. Continue straight into the edging below.
Roof (Color B)
Once the brim edging is done (see Border below), join Color B in any free back loop of Round 24. The roof sits inside the brim.
Rnd R1: Ch 1, sc in BLO of each st around. (36)
Rnd R2: Sc in each st around. (36)
Rnd R3: (4 sc, dec) 6 times. (30)
Rnd R4: Sc in each st around. (30)
Rnd R5: (3 sc, dec) 6 times. (24)
Rnd R6: Sc in each st around. (24)
Rnd R7: (2 sc, dec) 6 times. (18)
Stuff now. For a glowing lantern, place the mini LED in the center of the body and pack a thin, even layer of fiberfill around it. Otherwise, stuff the whole piece medium-firm. Use enough fiberfill to round out the body without stretching the puffs apart.
Rnd R8: Sc in each st around. (18)
Rnd R9: (Sc, dec) 6 times. (12)
Rnd R10: Dec 6 times. (6)
Top up the stuffing in the roof tip. Don’t fasten off.
Checkpoint: the roof is about 1.25 in (3.2 cm) tall above the brim.
Hanging Loop (Color B)
With the working loop still on the hook, ch 14. Sl st into the top of Rnd R10 to form a ring. Work 20 sc over the chain ring, covering it completely, and sl st into the top of the roof. Fasten off. Weave the tail down through the roof tip to anchor the loop, then trim.
The loop measures about 1 in (2.5 cm) tall.
Border: Brim Edging
Edging gauge: rev sc in DK cotton matches the sc gauge, 11 sts per 2 in (5.1 cm), and adds about 0.1 in (0.3 cm) of rolled cord on every side.
Work this round straight after Rnd 26, before the roof:
Rnd 27: Ch 1. Working left to right, rev sc in each st around. (48) Sl st to the first rev sc and fasten off. Weave in the tail on the underside of the brim.
This is a round piece, so think of it as four quarters of 12 stitches each. Each quarter lines up with one panel, because the frame bars sit at 9-stitch intervals on the 36-stitch Round 24, and 9 x 4/3 = 12.
Why the math works: The brim grows from 36 to 48 stitches, a ratio of 4:3, so it flares to 2.8 in (7.1 cm) and clears the 2.4 in (6.1 cm) body by about 0.2 in (0.5 cm) on each side. The rev sc edging works 1 stitch per stitch, so it adds no extra fullness and won’t ruffle. It only adds the 0.1 in (0.3 cm) roll, which brings the final width to 3 in (7.6 cm).
Final Blocking
- Weave in all tails on the inside or under the brim before blocking.
- Lightly mist the brim and roof with water. Don’t soak the piece, especially if it has an LED inside.
- Shape the brim with your fingers so it flares evenly all the way around and measures 3 in (7.6 cm) across.
- Roll the cone gently between your palms to smooth the roof.
- Straighten each frame bar so it runs vertically.
- Press the base on a flat surface so the lantern stands upright.
- Let it air-dry standing up for several hours.
Final Quality-Control Checklist
- Height is 4.25 in (10.8 cm), or 5.25 in (13.3 cm) with the loop.
- The brim measures 3 in (7.6 cm) across and flares evenly.
- The body measures about 2.4 in (6.1 cm) across at its widest.
- All four bars are vertical and evenly spaced, with 12 sl sts each.
- Every puff faces outward with no flat gaps.
- The bottom sits flat and the lantern stands upright.
- No stuffing shows through the stitches.
- The hanging loop is firmly anchored and fully covered.
- All tails are hidden.
Troubleshooting
The body looks flat, not bumpy: Your puffs may be pulled too short. Pull each loop up to full sc height before closing the puff.
The bars drift sideways: Increases and decreases in Rounds 16 and 21 shift the columns. Watch the stitch column, not the round count, and undo any slip stitches that wander.
The body puckers under the bars: Your slip stitches are too tight. Redo the bar with looser stitches or a hook one size larger.
The brim ruffles: Your edging is too loose, or you added stitches. Recount Round 25 (48 sts) and work the rev sc more firmly.
The brim curls under: Your tension is too tight. Re-block with mist and pin the brim to shape while it dries.
The lantern tips over: Remove some stuffing from the base and flatten the bottom circle.
There’s a hole at the top: Sew the last 6 stitches closed with the tail before you make the loop.
Care
Spot clean only with a damp cloth and mild soap, and remove any LED first. Store the ornament flat in a box so the brim and loop keep their shape.
Final Notes
The measurement chain is simple. The 2.1 in (5.3 cm) base circle sets the 36-stitch foundation, and the 1 in (2.5 cm) foot and neck carry it up. The puff body swells to about 2.4 in (6.1 cm) and finishes at 3 in (7.6 cm) total height. The brim flares from 36 to 48 stitches, reaching 2.8 in (7.1 cm) and then 3 in (7.6 cm) after the rolled edging. The roof brings the full height to 4.25 in (10.8 cm). Check each stage as you go, and every lantern in your set will match.
Happy crocheting!